

User Account
Business Background
Personalize your web projects with custom user account information.
Titan Solution
- Titan lets you personalize your web projects with custom user account information in a few clicks with no coding. Add custom user account information to differentiate your projects and users from others.
- A user can update their information in Salesforce as Titan is linked directly to Salesforce. All information is synced from Salesforce, and any changes are synced to Salesforce.
How to Guide
Note:
Prerequisite:
- Configure a SmartV Profile page if you want to add a Profile page to the project’s header that will give the user the option to update their profile. This is not mandatory.
- Add a header to your web project. This is mandatory.
- Click the Pages drop-down arrow to open the list.
- Click the Gear icon next to the Manage Menus option. The Site Menus screen opens.

- Under Header, ensure the toggle switch is on to include a header.

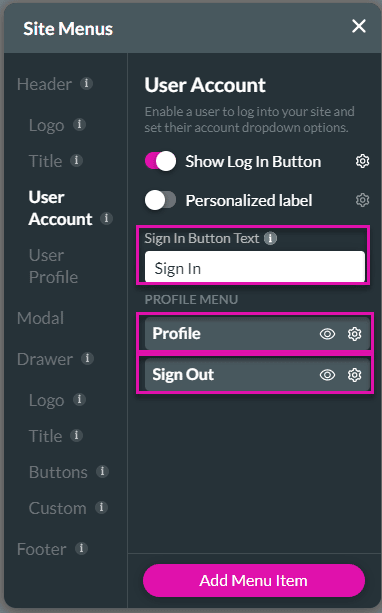
- Select the User Account option.
- Use the Show Log In Button toggle switch to show a Log In button on the header. This option is on by default.
- Click the Gear icon next to the Show Log In Button toggle switch to configure a Log In screen.
- Use the Personalized label toggle switch to add a personalized label. The Personalized Label popup opens.

- Type text in the field and use the drop-down list to select a field. The interactive field will be added to the label. This is not mandatory.
- Click the Apply button.

- Change the Sign In Button Text, if necessary. The default is “Sign In”.
- Configure a profile menu. The following options are available:
- Profile (This option is only available if you configured a Profile page.)
- Sign Out
- Configure a link. The same Edit Link screen opens whether you select Profile or Sign Out.
- Change the Link Name, if necessary. It is added by default as Profile or Sign Out, depending on which option you selected.
- Use the drop-down list to select one of the pages in your project.
- Use the drop-down list to select one of the following:
- Self: The link will open in the same page as it was clicked. This is the default option.
- Parent: The link will open in the parent page.
- Blank: The link will open in a new tab or window.
- Modal: The link will open in a modal.
- Click the Configure On Click Action button to configure an On Click Action for the link.
- If necessary, set parameters.
- Click the Save button.

Note:
You can hide an option using the View icon:

- Click the X icon in the top right of the screen to close the Site Menus screen.
- Save and Preview your project.
The personalized label is added to the header:

Select the icon to display the Profile and Sign Out options:

You can also add the following to the header:
Hidden Title
Was this information helpful?
Let us know so we can improve!
Need more help?
Book Demo