

SmartV Profile
Business Background
Verified users can create a profile on your Salesforce with the Titan project. The profile will allow them to manage their personal and contact information.
Titan Solution
Titan lets you add a profile page to show a user their profile information.
You can make fields on the profile page updateable and allow users to change their profile details in Salesforce.
How to Guide
- Configure the Login screen.
- Configure the Condition screen.
- Configure the Authentication screen.
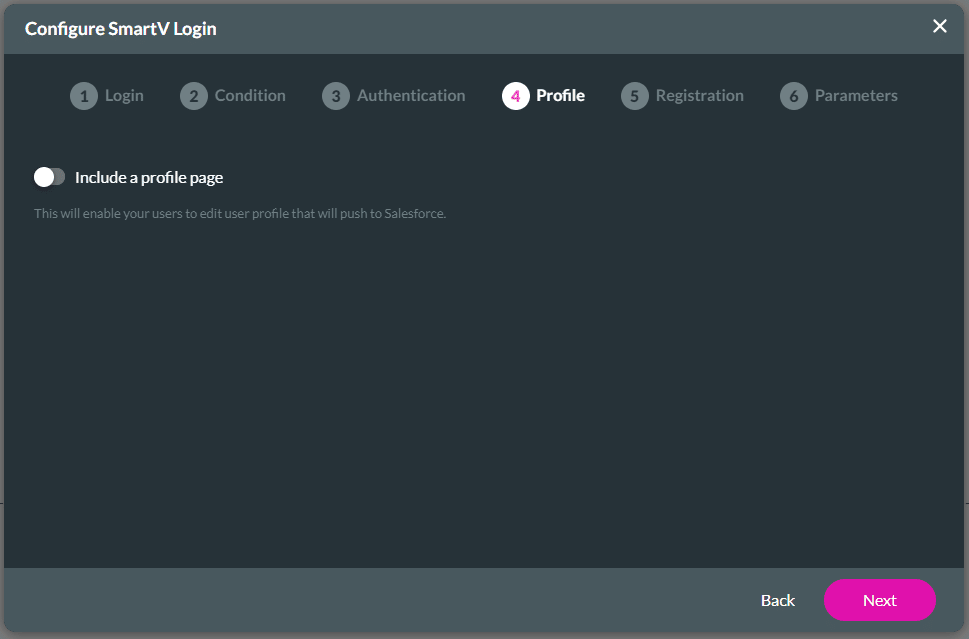
It is optional to add a profile page. You may choose to skip this screen by clicking the Next button.
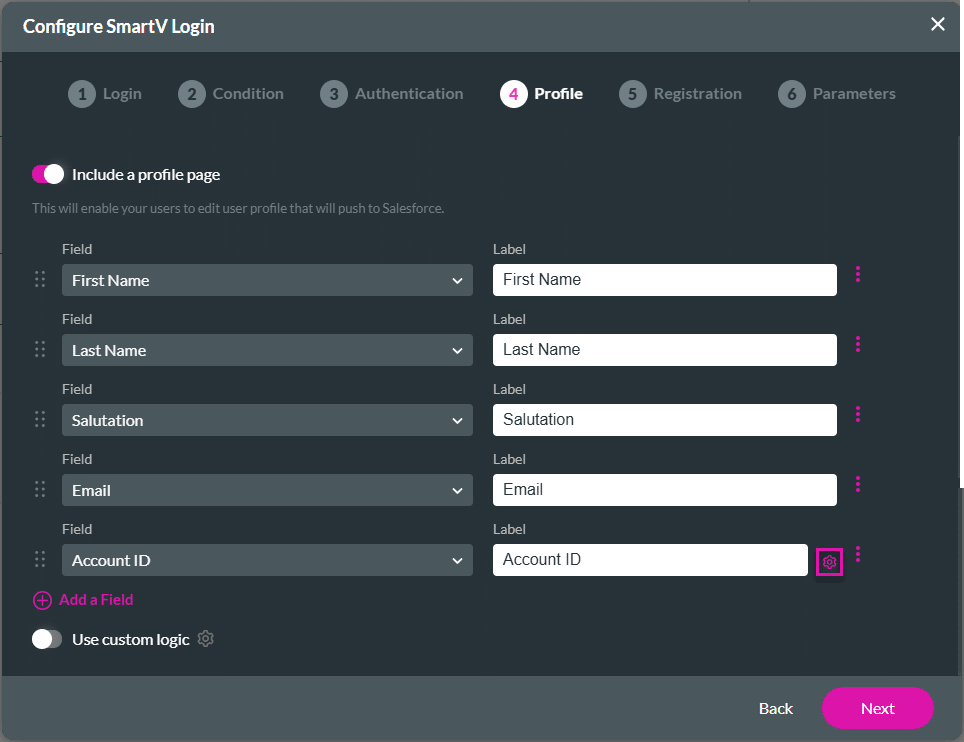
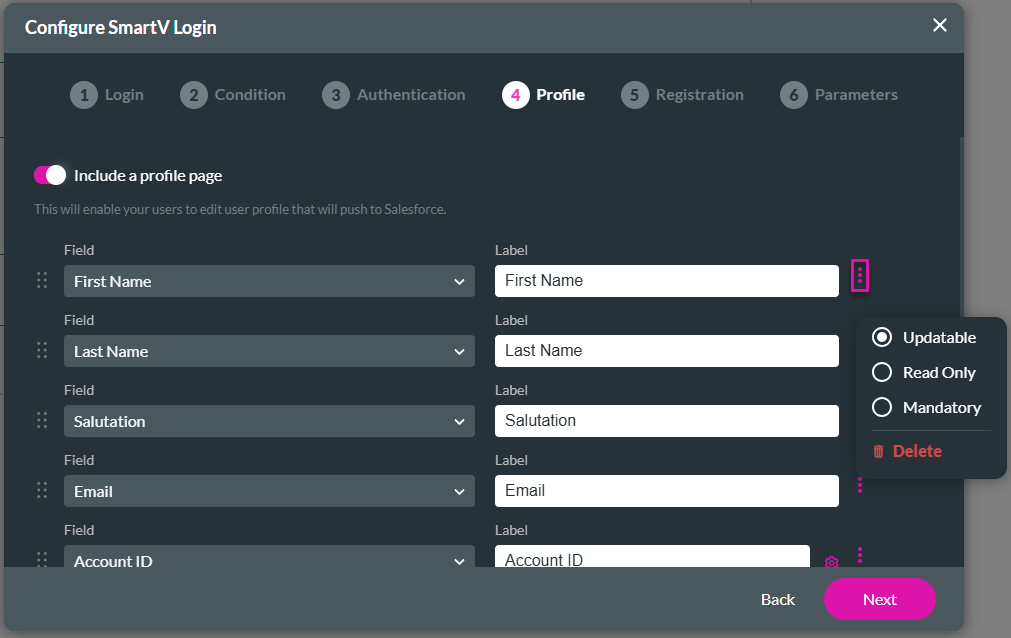
- Use the Include a profile page toggle switch to enable the option. This will create a profile page where the user can see and edit their profile data for the account.
- Click the Add a Field option.
- You can add as many fields as you need.
- You can drag a field to change its position.
- All the fields you add are fields that the user will see from their profile on Salesforce. You can map to related objects in Salesforce; for instance, if the object you selected on the Login screen is Contacts, you can map to Account.
- Use the drop-down field to select AccountID.

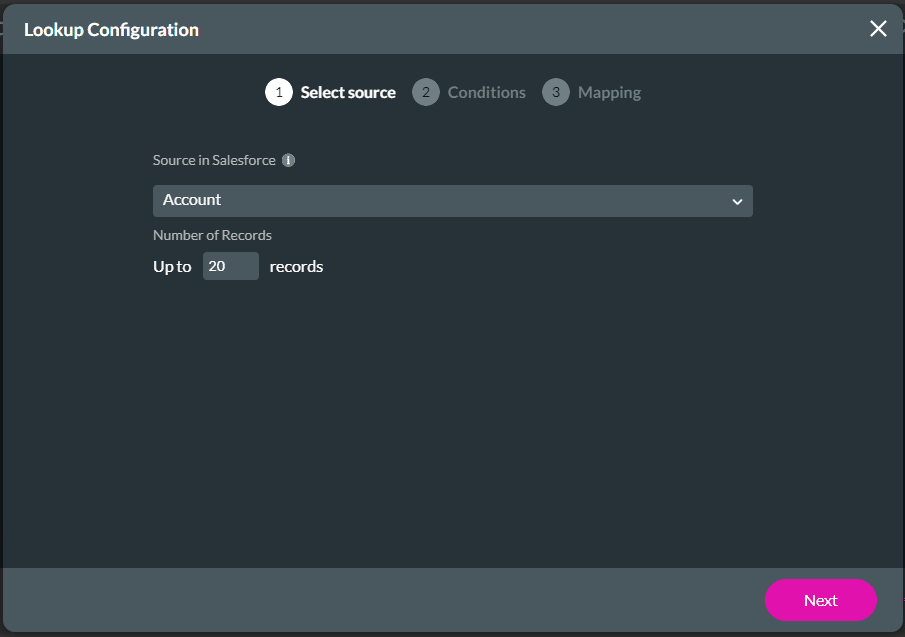
- Click the Gear icon next to the label. The Lookup Configuration screen opens. This lets you create a lookup field for the AccountID (in this example), allowing the user to select a record that they can edit.
- Use the drop-down list to select the source in Salesforce and click the Next button.
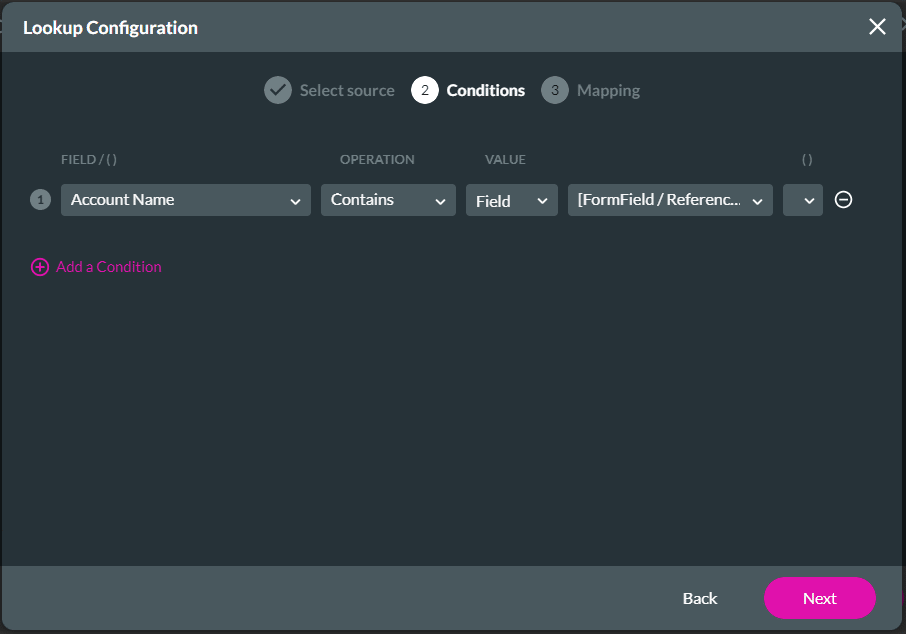
- Configure any conditions apart from the condition added by default and click the Next button.
- Click the Add a Column option to add a column if necessary.
- Use the drop-down list to select a source for the column.

- Click the Apply button. The Gear icon changes from white to pink to indicate that it has been configured.
- Click the Kebab button next to a field. A popup menu opens.
- Click the radio button to make a selection:
- Updateable: The field on the profile page can be updated.
- Read Only: The field on the profile page is read-only and cannot be edited.
- Mandatory: The field on the profile page must be completed before the user can save the page.
- Delete: Click the Delete option to delete the field.
- If needed, use the Use custom logic toggle switch to switch it on. You can add logic to update fields in Salesforce in the background that are not visible to the user. This is optional.
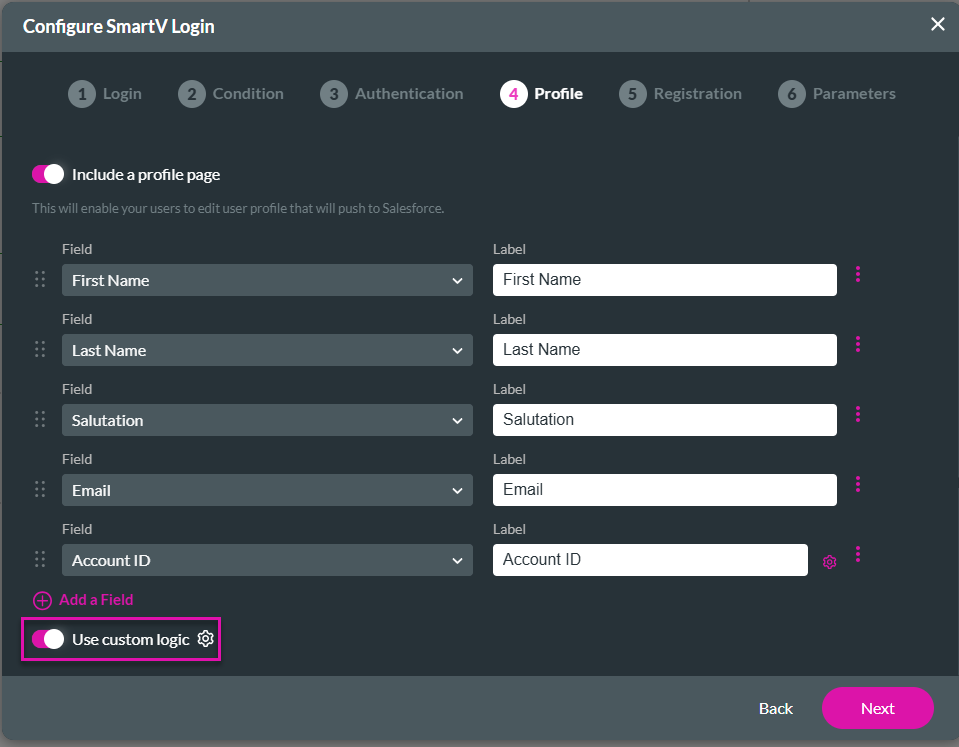
When you use custom logic, the default logic of the profile page is disabled automatically and you have to configure the logic that you need.
For instance, in this example, the Salesforce object “Contact” was selected on the Login page. If you do not add custom logic, you can only select fields linked to the Contact object on the profile page.
When you add custom logic, you can configure any logic, for instance, you can create a contact and an account and link the contact to the account.
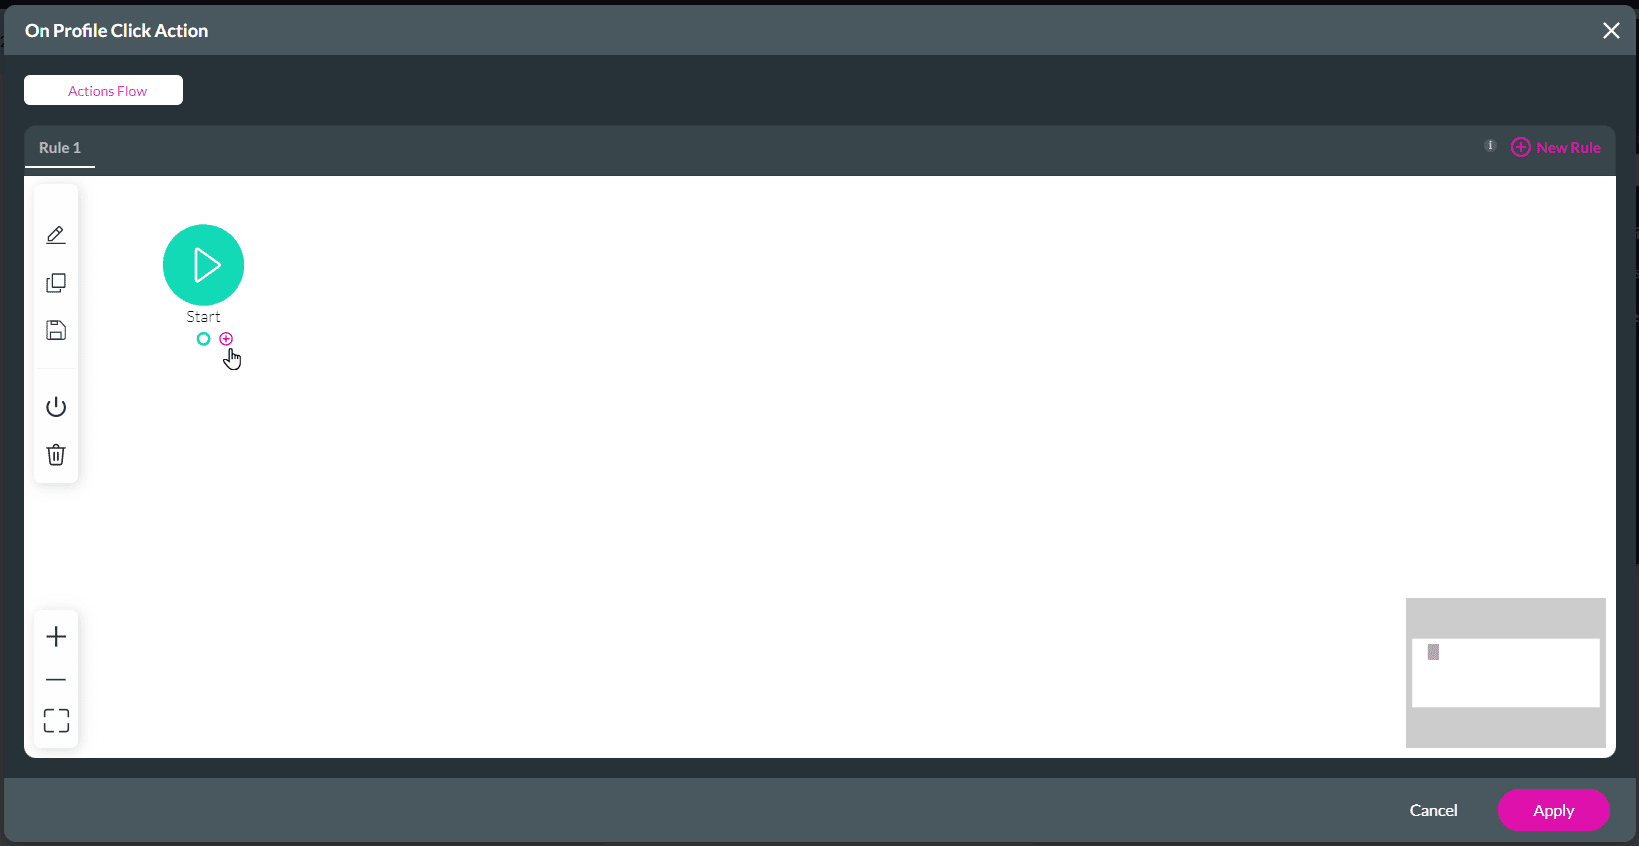
- Click the Gear icon to configure custom logic. The On Profile Click Action screen opens.
- Click the + icon to configure an on-profile click action. The Add Node screen opens.
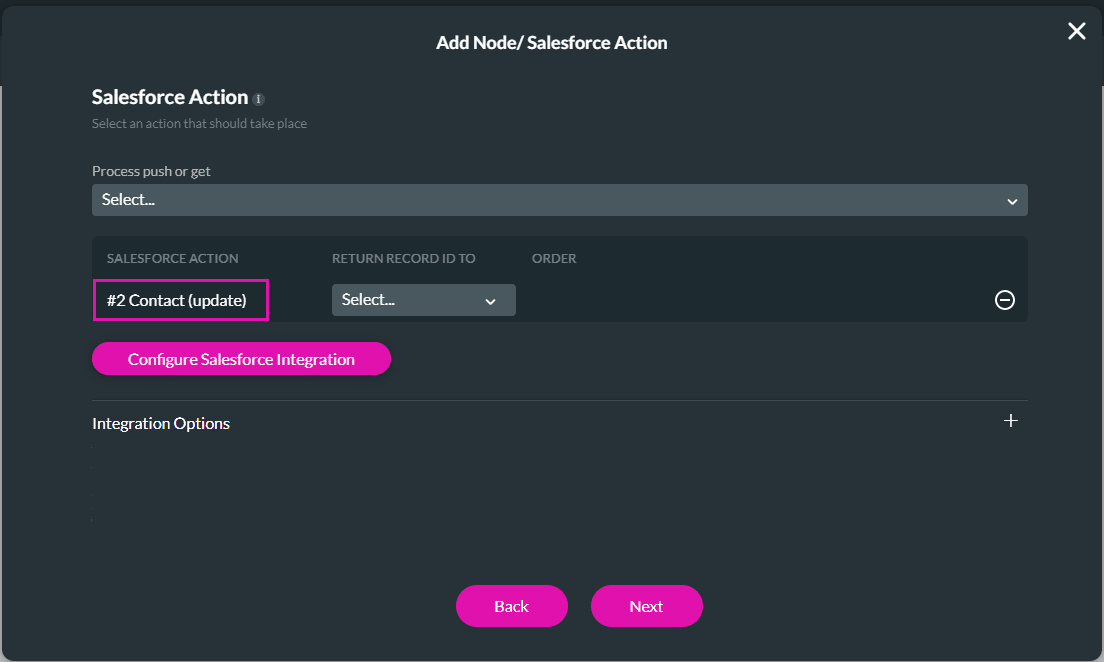
- Click a node to select it, for instance, Salesforce Action, and click the Next button. The Add Node/Salesforce Action screen opens.
- Click the Configure Salesforce Integration button.
- Under Push, click the Create New button. The Map Salesforce fields screen opens.
- Select the Object in Salesforce, for instance, Contact, and select the Action, for instance, Update.
- Under Mapping, map the SmartV element. These elements come from the attributes you added to the standard registration page.
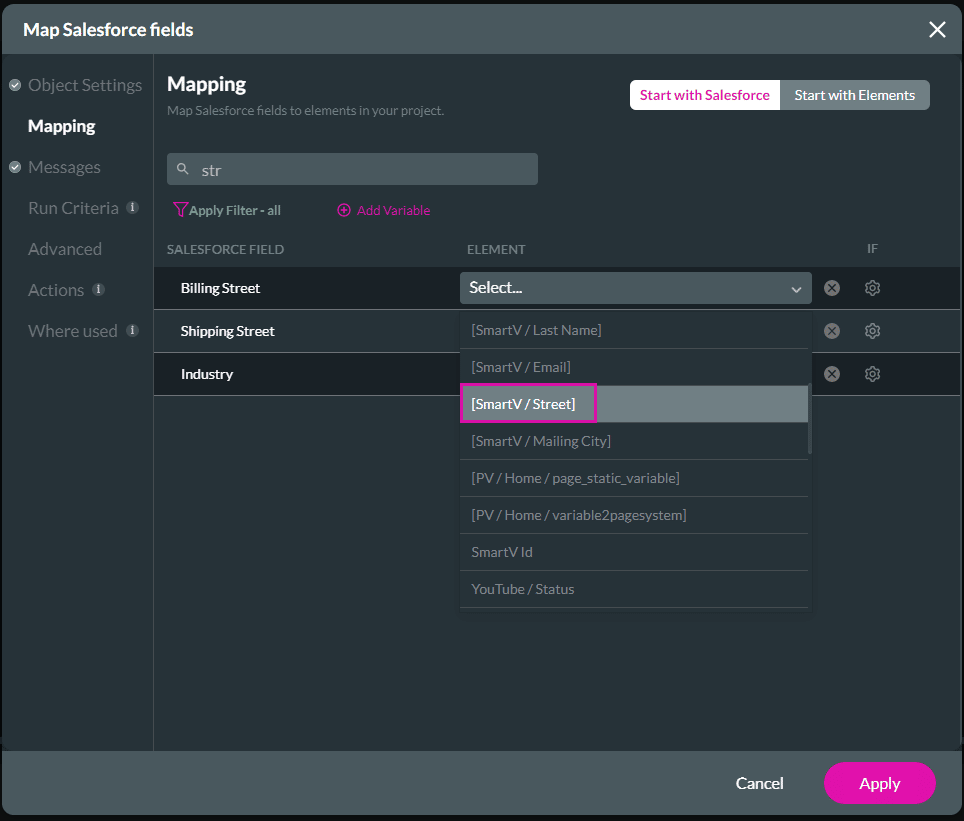
- Complete the configuration and click the Apply button.
- Click the Close button on the Salesforce Integration screen.
- Use the drop-down list to select the Salesforce push you just created and click the Next button.
- Add a tag if necessary and click the Insert button.
- Click the Apply button on the On Register Click Action screen.
- Click the Next button. The Registration screen opens.