

Generate File
Business Background
Generate files to store data that can be sent via email or exchanged using external cloud storage services.
Titan Solution
With Titan Flow, you can generate a file, such as CSV or TXT, that suits your unique business needs. For instance, you can disable the integration and account logging in Titan and then use the Generate File functionality to audit and monitor transactions together with the Titan Web Store Error Messages in Variables functionality. You can generate a JSON file for a transaction and upload it to an external cloud storage location.
How to Video
- Coming soon!
How to Guide
You can use this functionality with the Store Error Messages in Variables. The variables are used to send error messages.
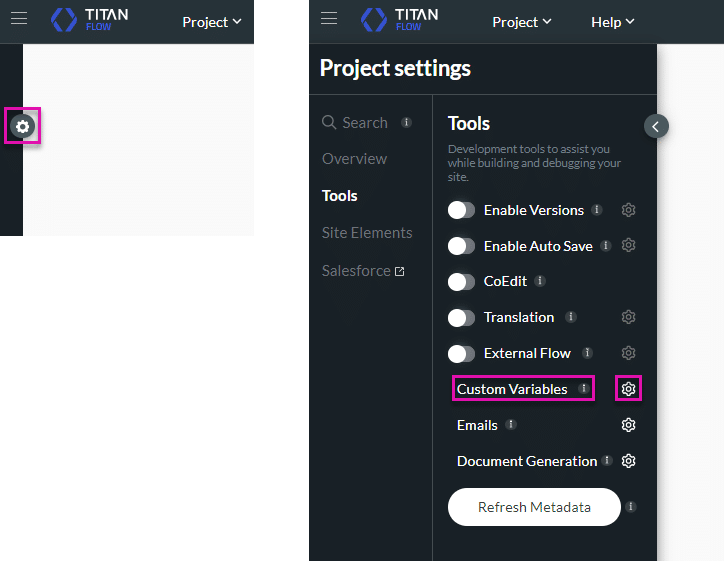
- Click the Gear icon and select the Tools option.
- Click the Custom Variables Gear icon. The Custom Variable screen opens.
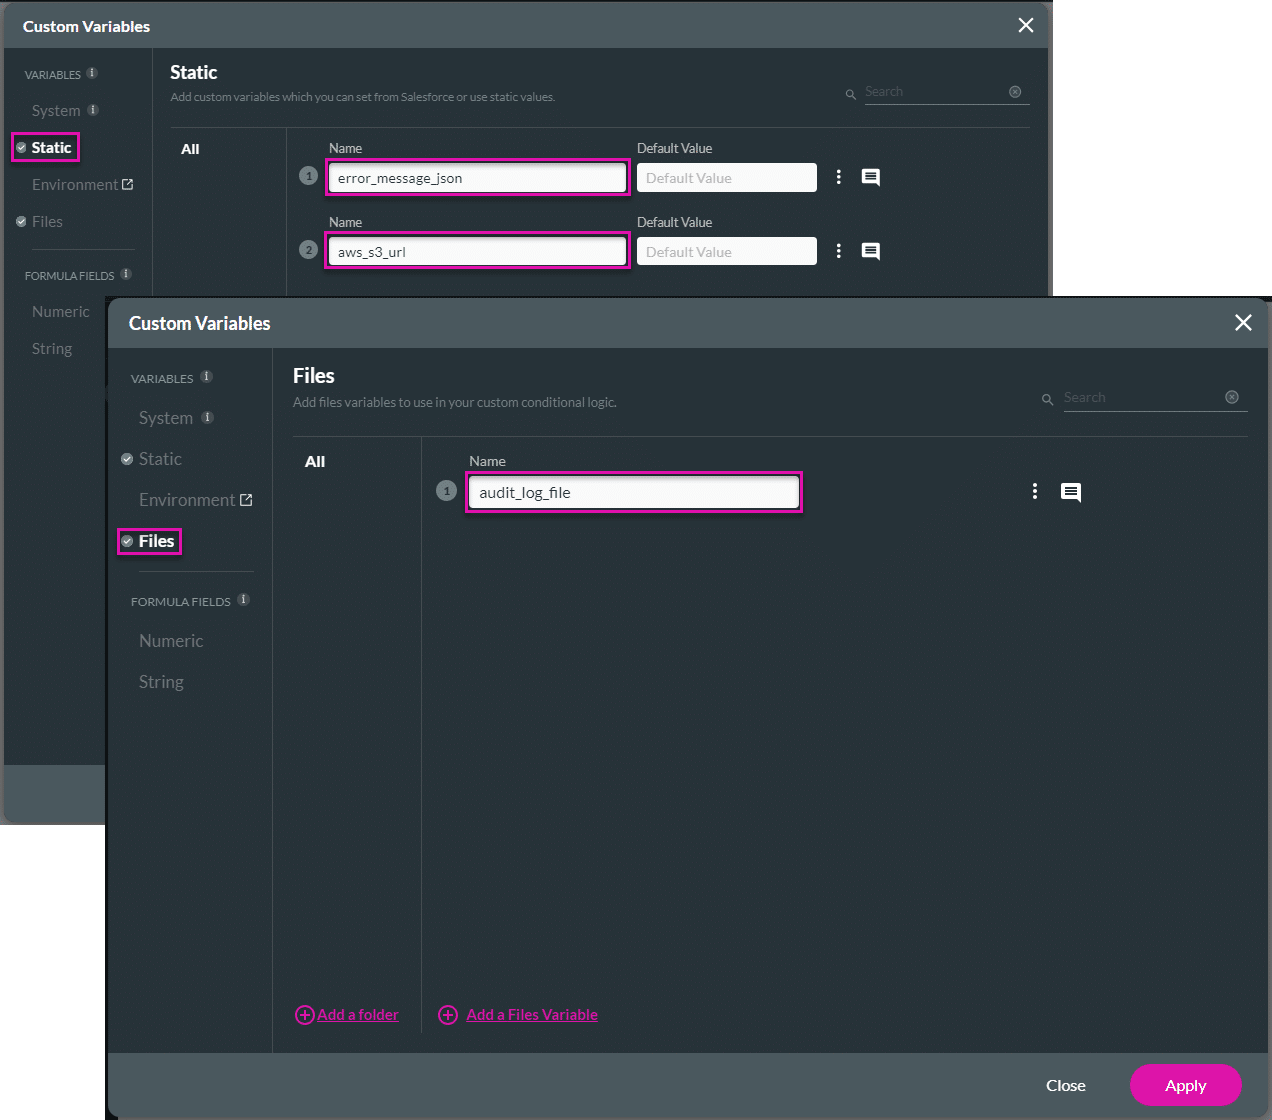
- Add the variables:
- Click the Static option. In this example, we added the variables as follows:
- error_message_JSON
- aws_s3_url
- Click the Files option. In this example, we added the variable as follows:
- audit_log_file
- Click the Static option. In this example, we added the variables as follows:
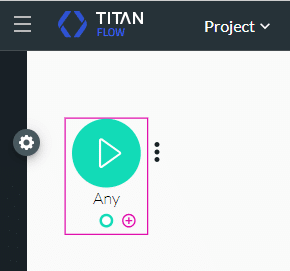
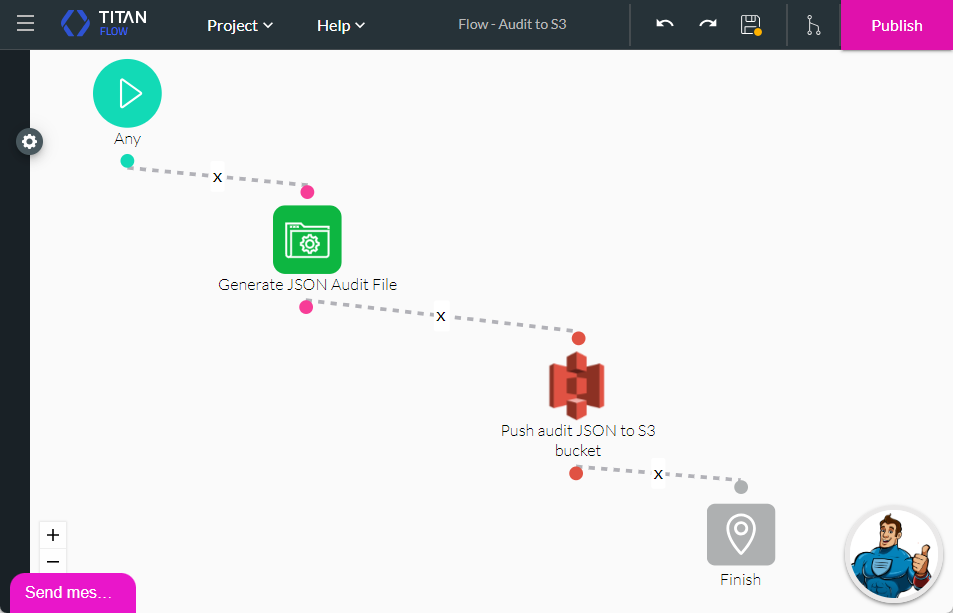
- Configure a Titan Flow to push the error messages in a Generate File node to an external cloud storage service as follows:
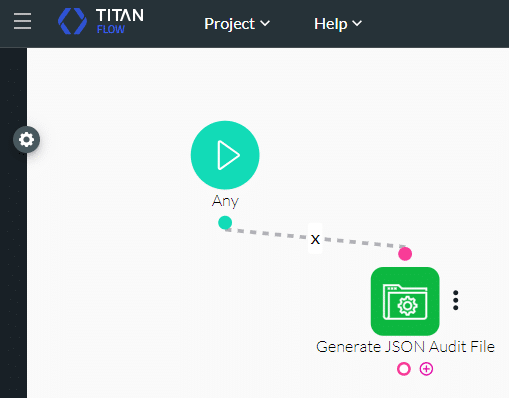
- Click the + icon next to Any. The Add Node screen opens.
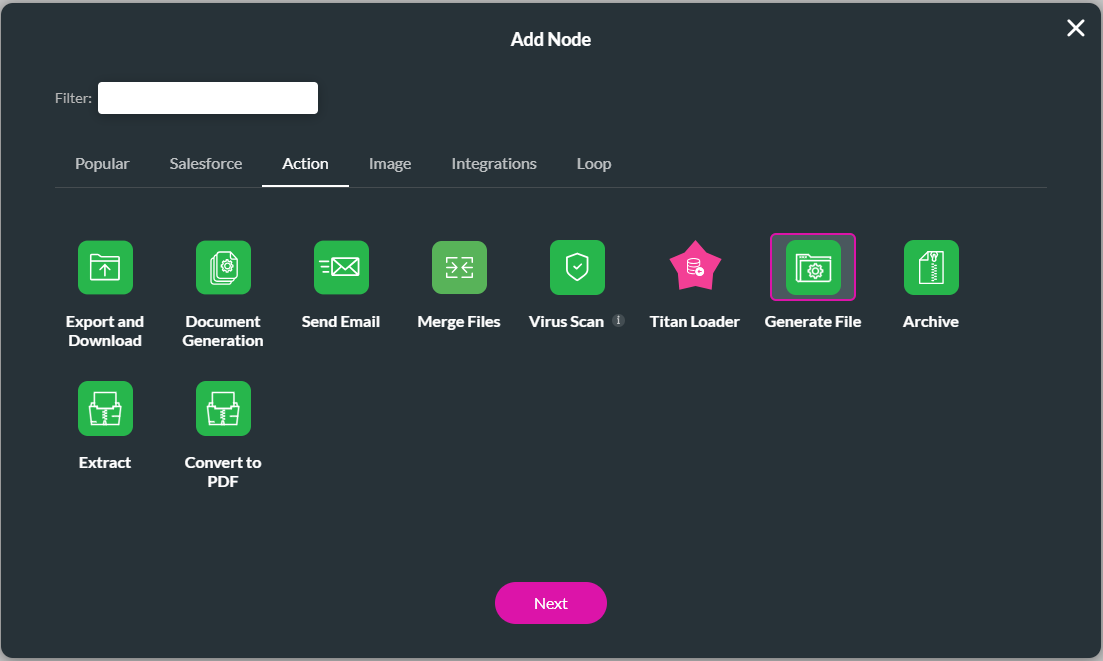
- Click the Action tab and select the Generate File option. The Add Node/Generate File screen opens.
- Click the Next button.
- Use the drop-down list to select a file name:
- Static: Type a file name in the field.
- Field: Select a variable from the list.
- Use the drop-down list to select a file type:
- Static: Type a file type in the field, for instance, .doc or .txt.
- Field: Select a variable from the list.
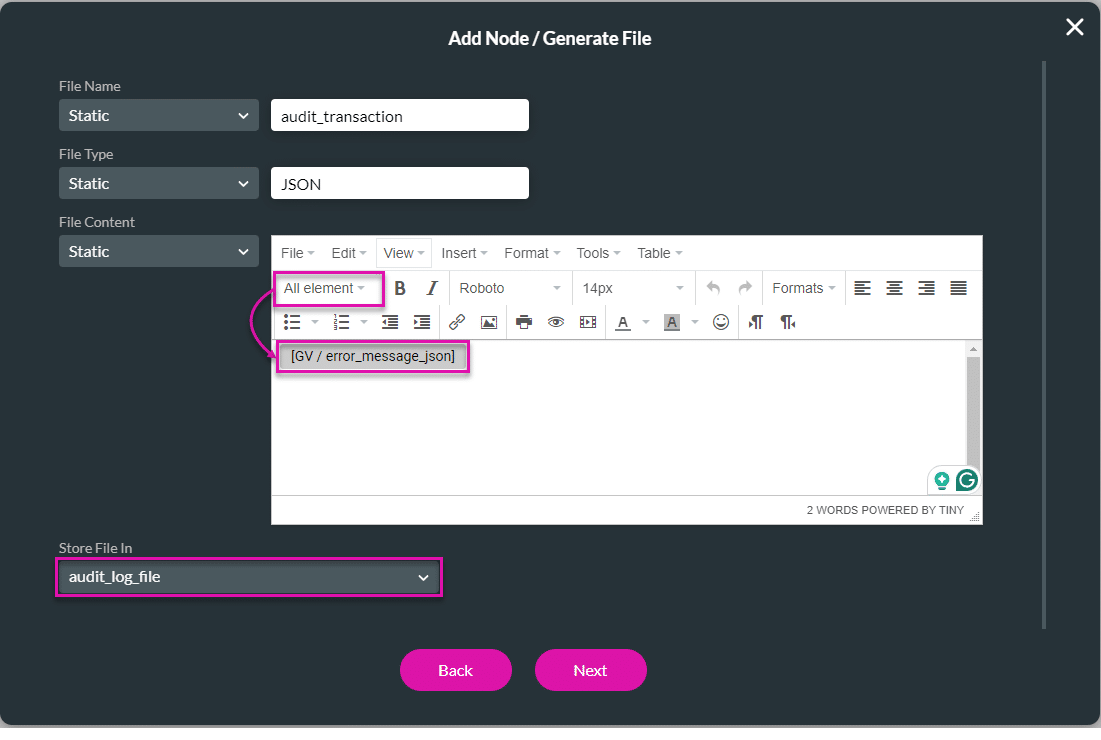
- Use the drop-down list to select file content. The options are:
- Static: Type the file content in the rich text area.
- You can use the All element drop-down list to select global variables to insert in the body of the rich text area. In this example, the following variable is used:
- error_message_JSON
- You can use the All element drop-down list to select global variables to insert in the body of the rich text area. In this example, the following variable is used:
- Field: Select a variable from the list.
- Static: Type the file content in the rich text area.
- Use the Store File In drop-down list to select an option. In this example, the variable is used as follows:
- audit_log_file
- Click the Next button.
- Add a tag and click the Insert button.
- Click the + icon next to the Generate File node. The Add Node screen opens.
- Click the Integrations tab and select an external cloud storage solution. In this example, the Amazon S3 option was selected.
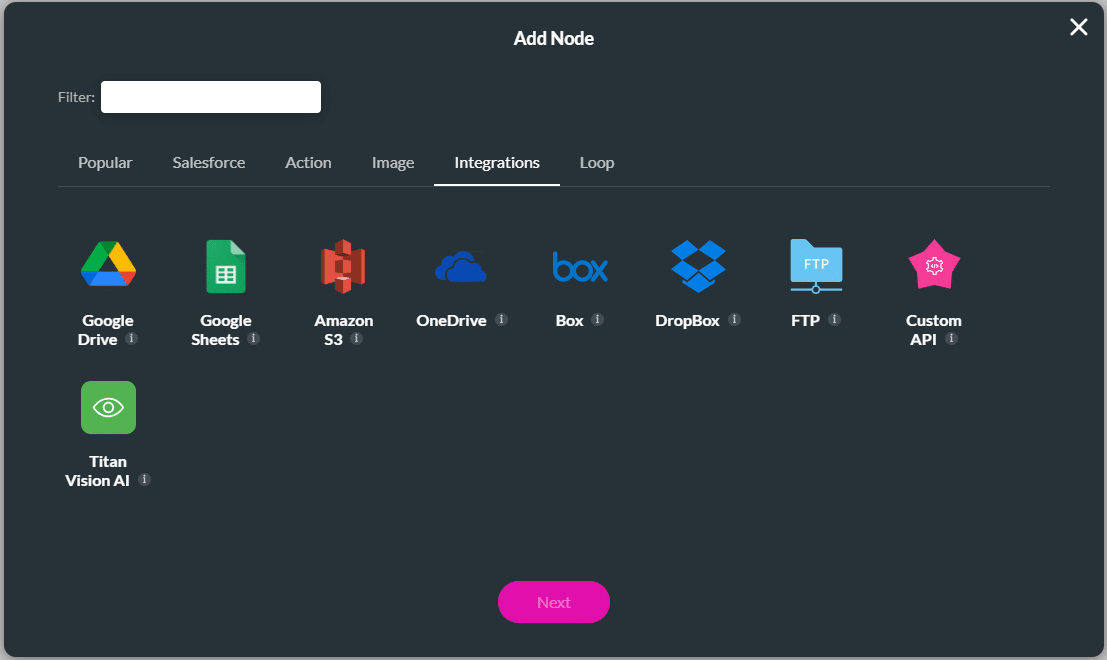
You can integrate with the following service providers:
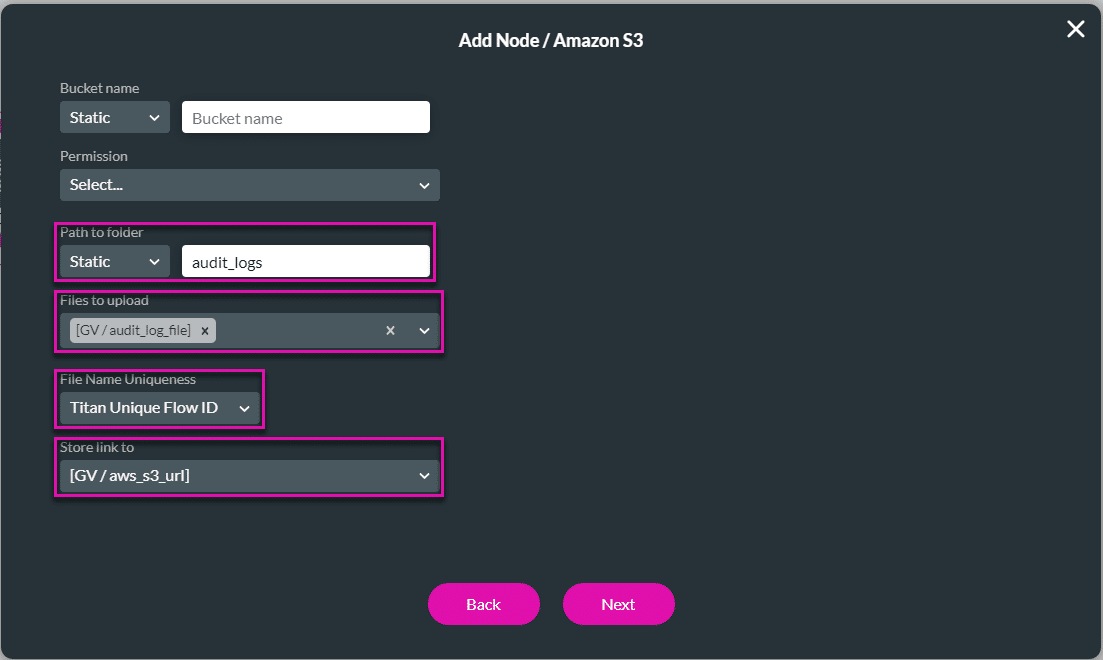
- Configure the Amazon S3 node. In this example, the following fields were mapped:
- Path to folder: audit_logs
- Files to upload: audit_log_file
- File Name Uniqueness: Titan Unique FLow ID
- Store link to: aws_s3_url
- Add a tag and click the Insert button.
- Click the + icon next to the external cloud storage node. The Add Node screen opens.
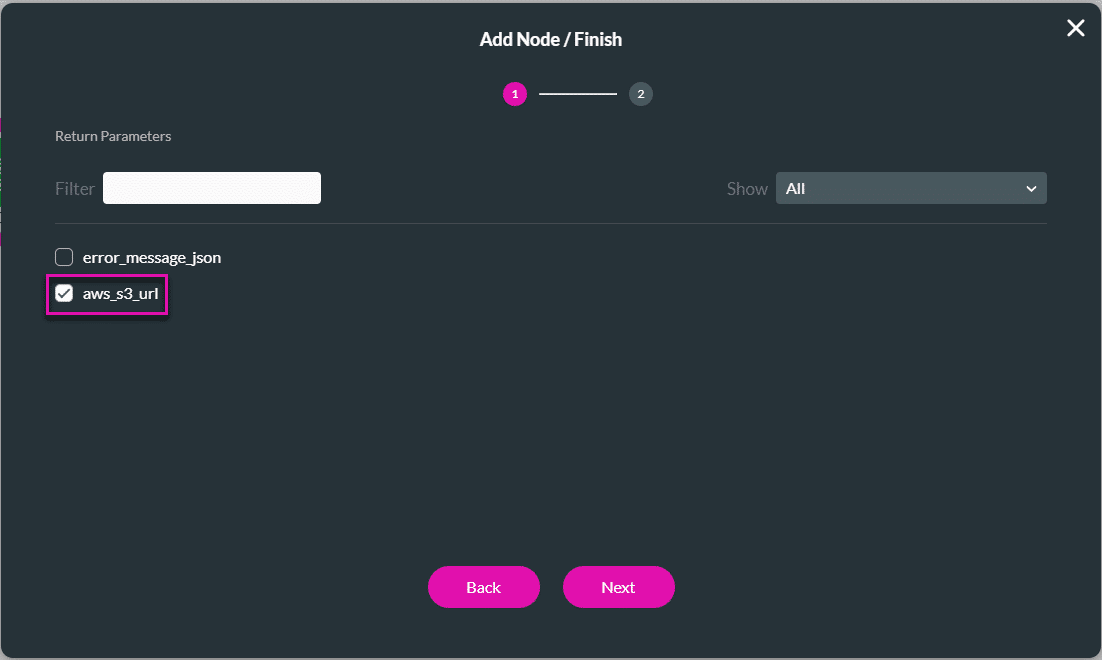
- On the Popular tab, select the Finish node. In this example, the following checkbox was selected:
- aws_s3_url
- Add a tag and click the Insert button.
- Save and Publish the project.
Call this Flow from Salesforce or use the Generate File Flow in Titan Web to send error messages.