

Discover Integration Log Settings
What Options do the Integration Log Settings offer?
You can choose how to receive logs, what logs are included in a report, and include additional email addresses for easy tracking. Customizing how logs are tracked and sent can assist with resolving errors timeously.
How to Video
Video Coming Soon!
How can you Use the Integration Log Settings?
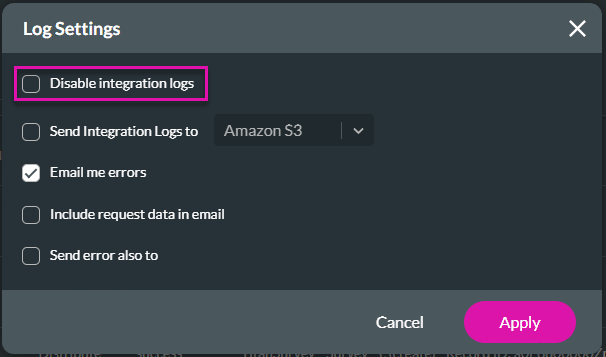
- Click the Settings tab and navigate to the Logs subtab.
- Select the Integrations option and click the Gear icon. The Log Settings screen opens.

- If necessary, click the Disable Integration Logs checkbox.
- A confirmation message is shown: “Disable Integration Logs? Are you sure? No integration logs will be stored in the system.”
- Click the Yes button to confirm.
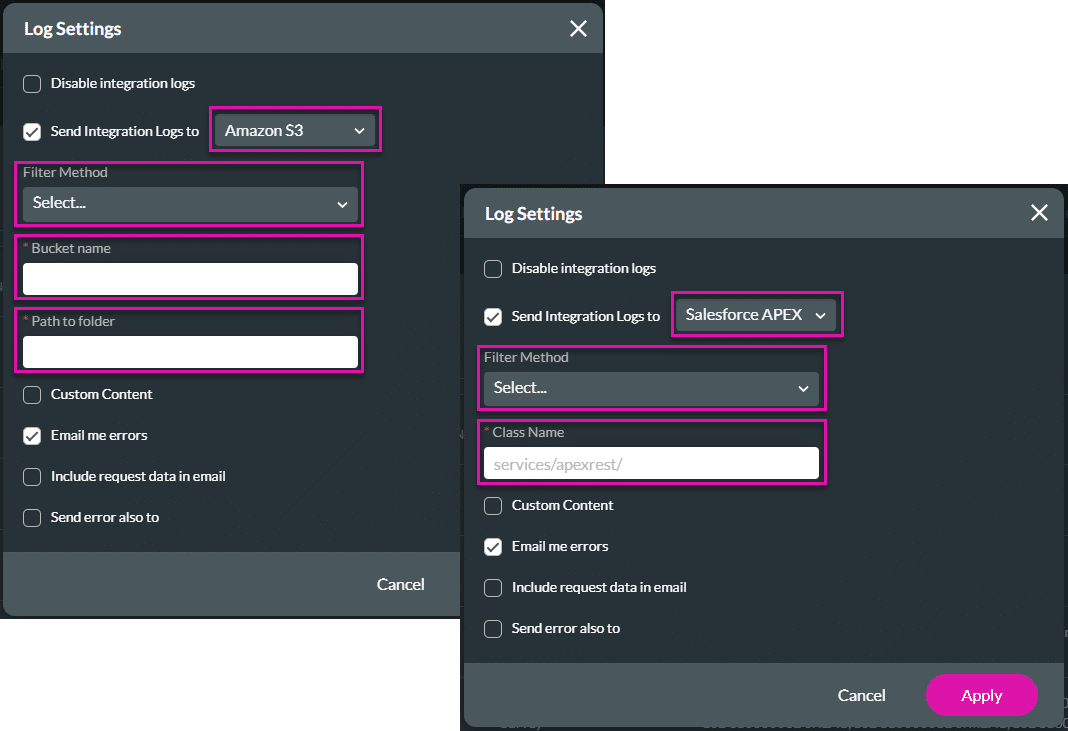
- If necessary, click the Send Account Logs checkbox to send the logs to an external location. The screen expands.
- Use the drop-down list to select the external location:
- Amazon S3
- Use the drop-down list to select a filter method. The APEX Class will receive the log details.
- Type the mandatory bucket name and path to folder in the fields.
- Salesforce APEX
- Use the drop-down list to select a filter method. The APEX Class will receive the log details.
- Type the mandatory class name in the field.
- Amazon S3
- Do any of the following as necessary:
- Deselect the Email me errors checkbox to no longer receive integration errors via email. This option is checked by default.
- Click the Include request data in the email checkbox to receive the request data in an email.
- Click the Send error also to checkbox to add an email address. That recipient will also receive the error emails.

- Click the Apply button.
Hidden Title
Was this information helpful?
Let us know so we can improve!
Need more help?
Book Demo