

Create New CLM Project
Business Background
Create a contract that multiple collaborators can edit and have multiple designated signatories.
Titan Solution
- Use Titan CLM, our contract lifecycle tool is tailor-made for Salesforce.
- Automate signing processes for your clients and streamline contract approvals in minutes with Titan CLM.
- Automatically sync data with Salesforce in real-time, using zero code.
How to Guide
One-time setup
Do the following one-time setup:
Path:
Titan Dashboard > Settings > Document Generation > CLM
- Define the CLM header using the Rich Text editor. You can add a logo or text and format it using the formatting options in the Rich Text editor.
- Define the CLM footer using the Rich Text editor. You can add a logo or text (such as copyright information) and format it using the formatting options in the Rich Text editor.
- Retain CLM header and footer configurations with the Save button.

This header and footer will be displayed on all your CLM projects.
Create a new CLM project
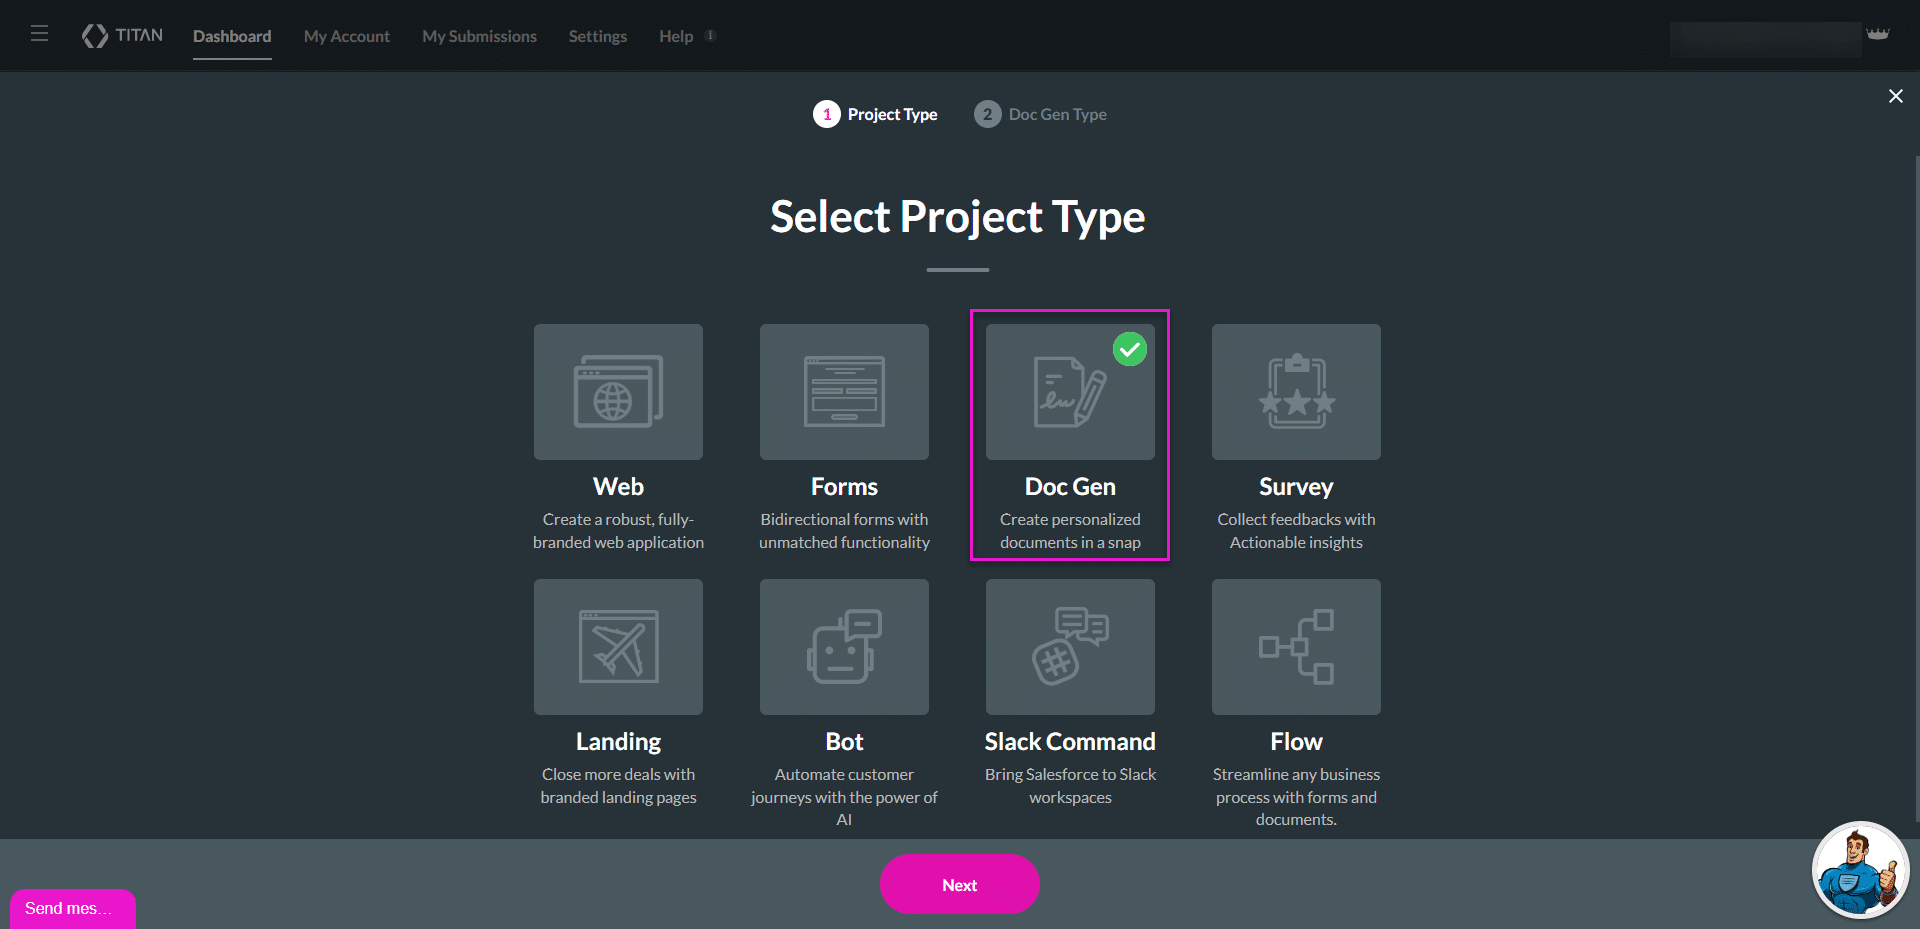
- On the Titan Dashboard, click the New Project button. The Select Project Type screen opens.

- Select the Doc Gen option and click the Next button. The Select Doc Gen option opens.
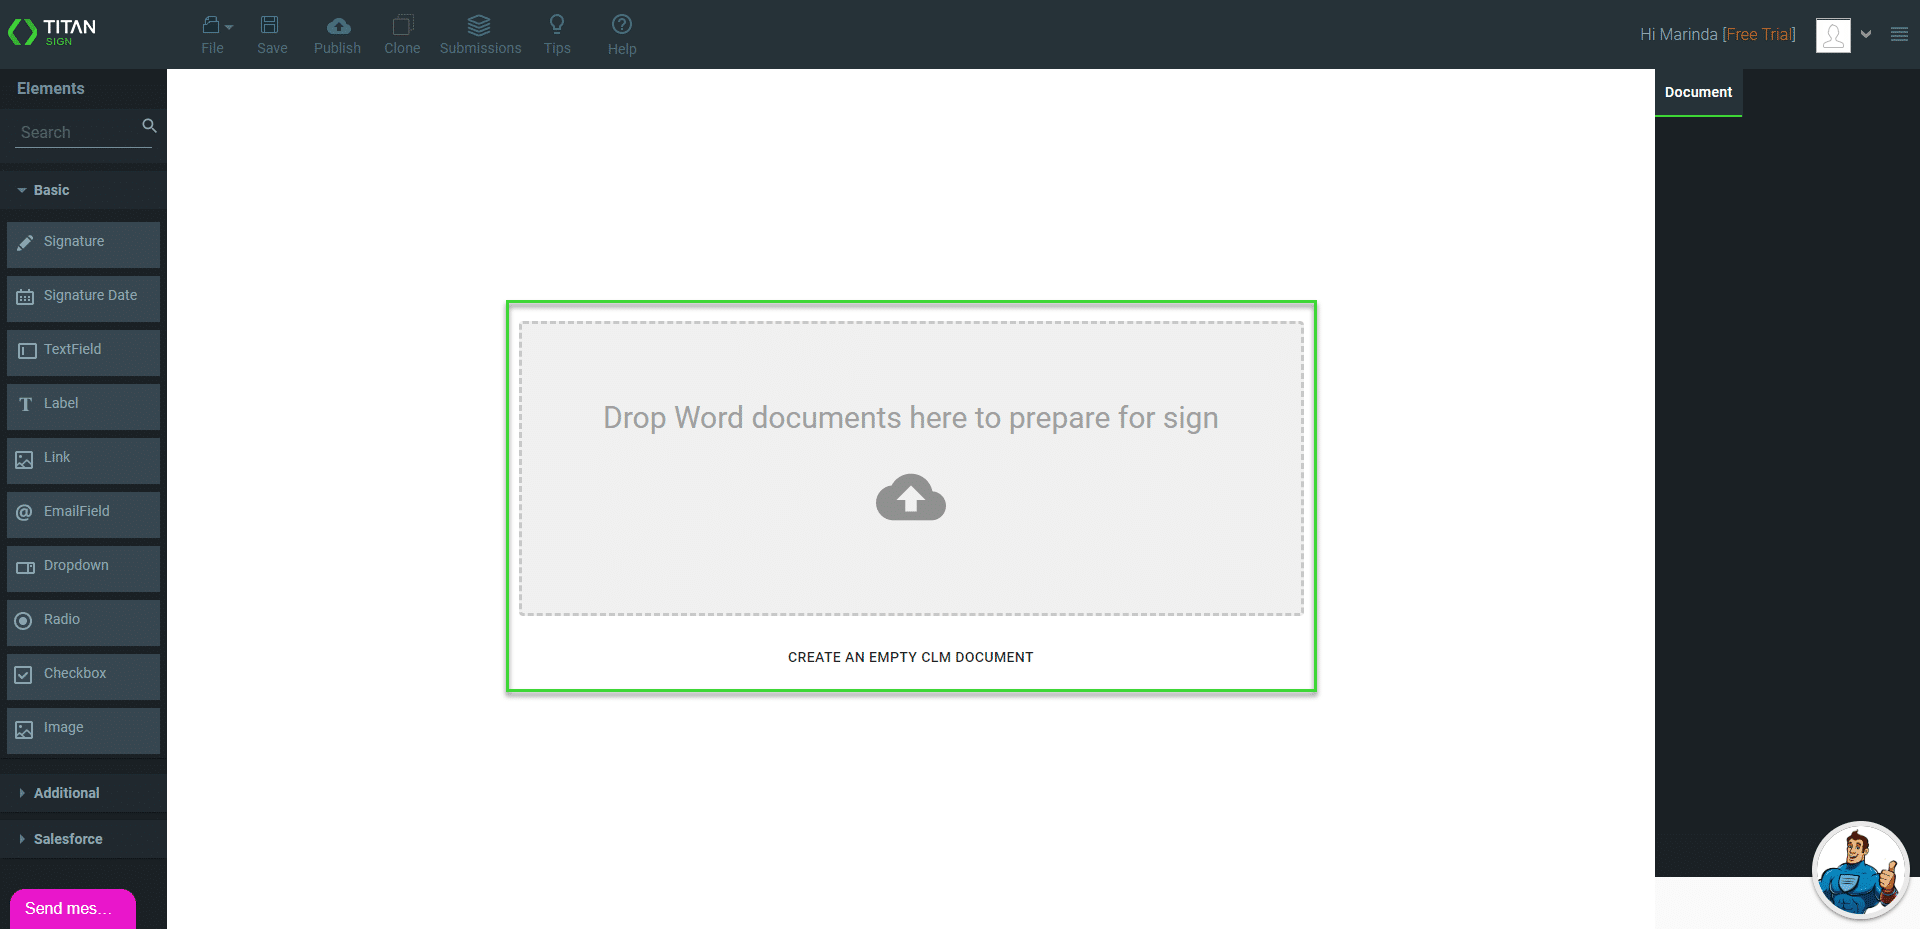
- Select the CLM option and select the Next button. A new CLM project opens.

- Drop or upload a Word template directly on the container. The document will upload to the server.
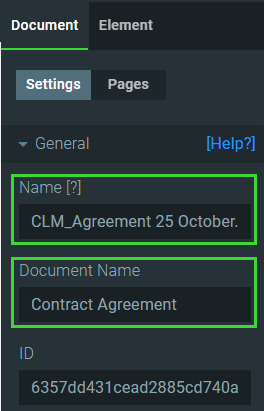
- If necessary, change the Document Name. The Name field is populated by default with the name of the uploaded document.
- Navigate to the Settings option and then open the Document access option.
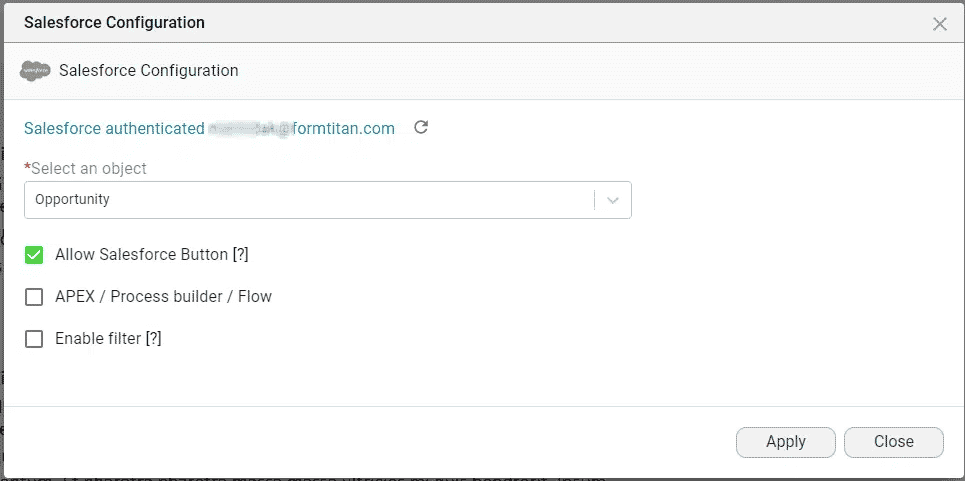
- Make sure that the Dynamic radio button is selected (default), and click the Salesforce Configuration button. The Salesforce Configuration screen opens.

- Select the Salesforce object from the drop-down list.
- Click the necessary checkboxes.
Note:
- Allow Salesforce button: When you enable this option, the project will be visible in the projects list if we initiate the process from a button or LWC.
- Button Link (for instance, Opportunity):
- /apex/Form_Builder__TitanSignWizard?recId={!Opportunity.Id}&lang=auto&wizardType=Full
- LWC name:
- CLM (for instance).
- Use the following for the button and LWC:
- WizardType:
- Full (or select one of the following: Sign, CLM, DocGen)
- Language: select one of the following: auto, en (English), he (Hebrew)
- WizardType:
- Button Link (for instance, Opportunity):
- AEPX/Process builder/Flow: Select this checkbox if you wish to initiate the project from an APEX, Process builder, or Flow.
- Enable filter: Select this checkbox if you want to add a filter. The project will be relevant to the Salesforce records corresponding to this filter.
- Click the Apply button.
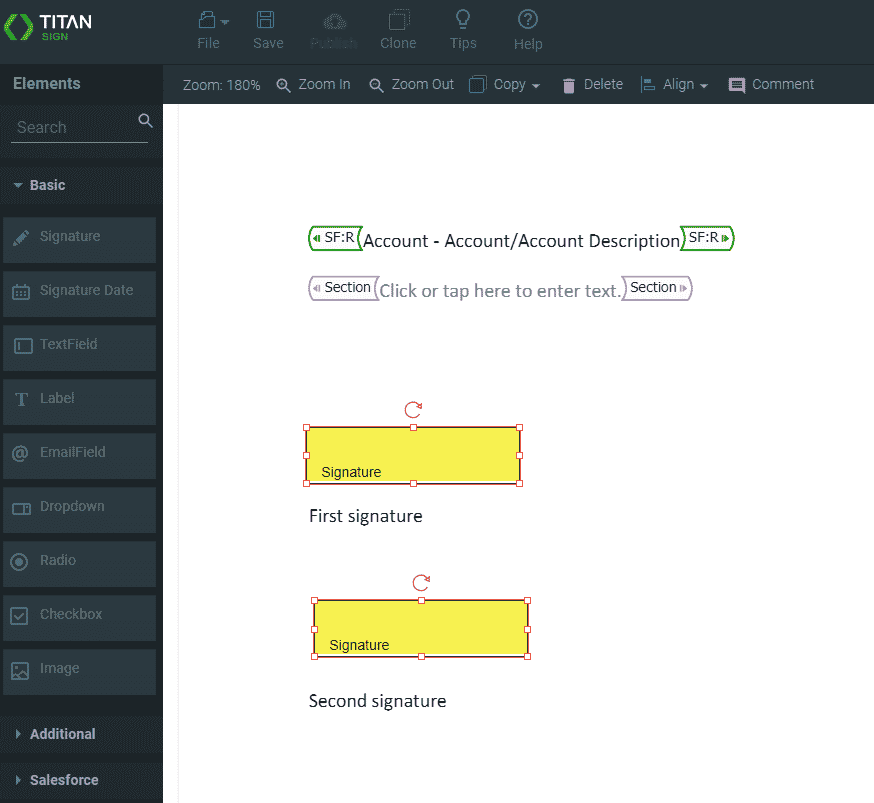
If the document template has interactive elements, for instance, signature elements, you can drag these to the correct position if they have moved during the upload process. These interactive elements were added in the Word template or using the CLM wizard in Salesforce.
Note:
You also need to set up the collaborator permissions. Read here for more information.
Hidden Title
Was this information helpful?
Let us know so we can improve!
Need more help?
Book Demo