

Document Generation – Word and Excel Templates
Business Background
Easily configure Salesforce document generation with Titan Web.
Titan Solution
- Configure document generation by adding Microsoft Word and Microsoft Excel templates to a project.
- For Word and Excel templates, you can do the following:
- Editing this uploaded template does not impact or alter the original document.
How to Guide
Note:
Prerequisite:
A Word template must contain interactive Salesforce fields or fields from a Web project added with the Titan Word add-in.
An Excel template must contain interactive Salesforce fields added with the Titan Excel add-in.
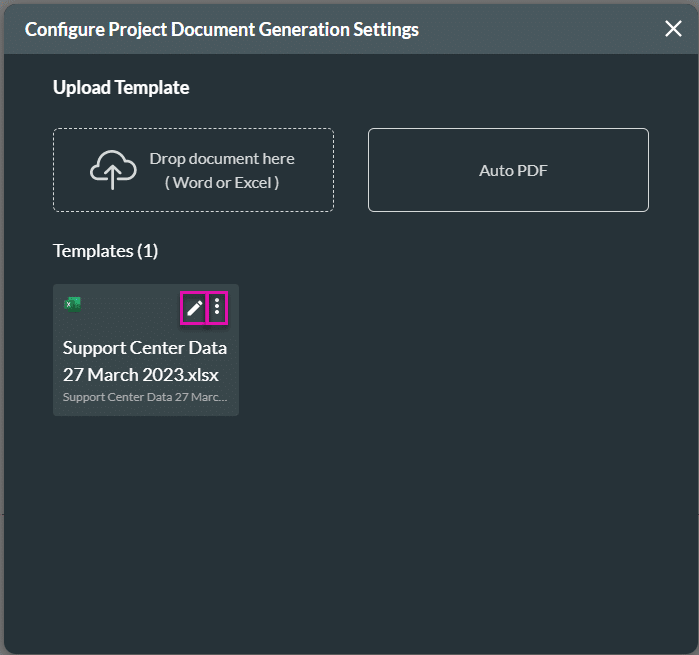
- Drop a Word or Excel document in the block from your file explorer. The file is added to the screen.
- Alternatively, click in the block to upload a document. The standard Microsoft Open screen opens.
- Browse to the file destination and click on the required file.
- Click on the Open button. The file is added to the screen.

Note:
The uploaded Excel and Word documents will be fully dynamic.
- Do the following if necessary:
- Click the X icon next to the document name to delete the document.
- Click on the Download Template option to download the template.
- Use the Drop document here block to replace the uploaded template.
- You will see a confirmation message: “Please confirm: You are about to replace the template.”
- Click the required button.
- Click on the View Versions option to view the version of the template. The View Versions screen opens.

- Click the Next button on the Configure Project Document Generation Settings screen.
- Use the checkboxes to select option/s. The document in each option will be in DOCX or PDF format:
- Preview: Preview a generated and populated document.
- Download: Download a dynamic document.
- Generate Interactive: Generate a document containing interactive fields that your end user can edit.
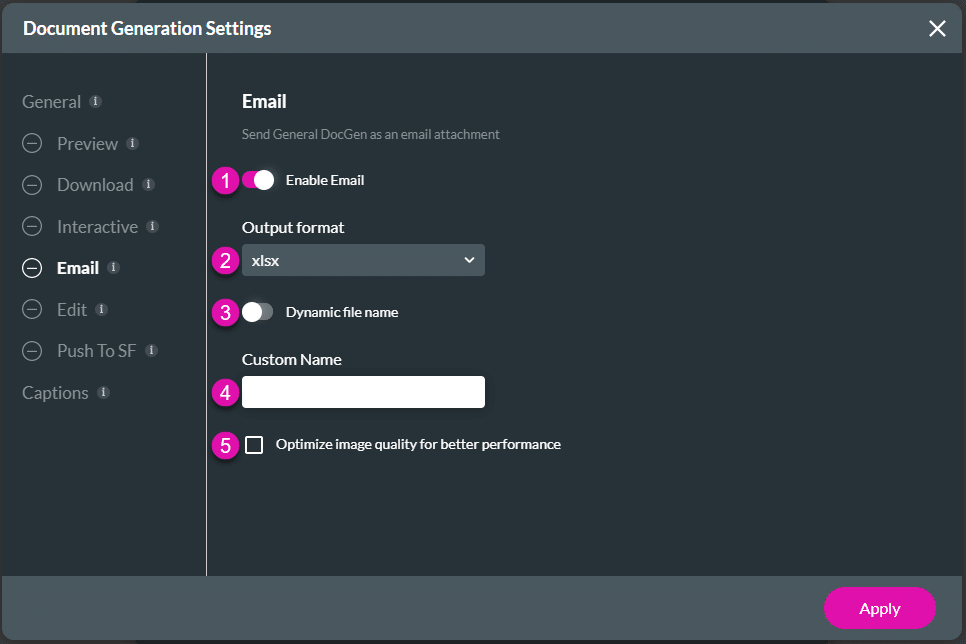
- Email: Send the template as an email attachment.
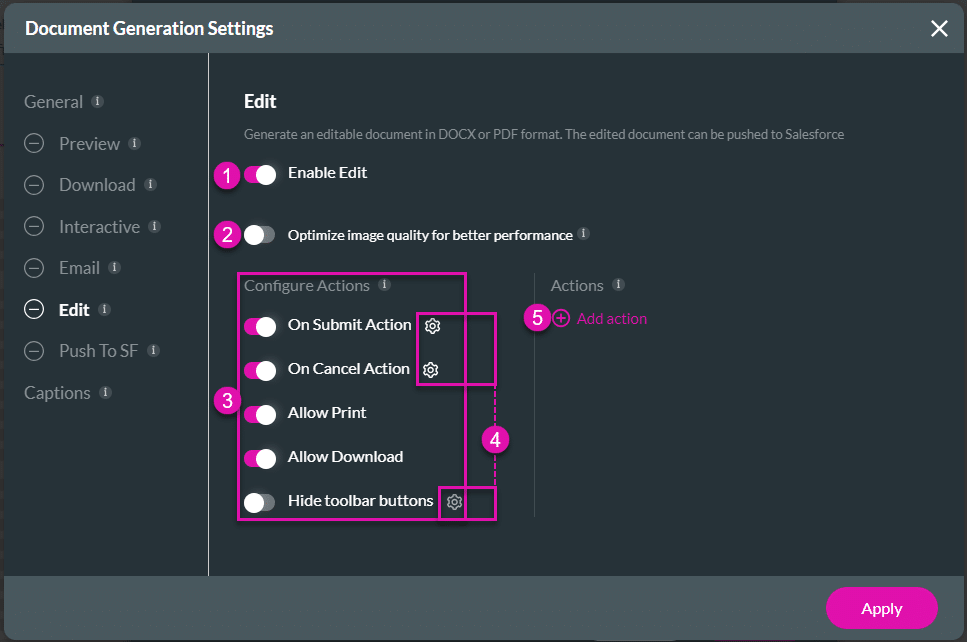
- Edit: Generate an editable document in DOCX or PDF format. The edited document can be pushed to Salesforce.
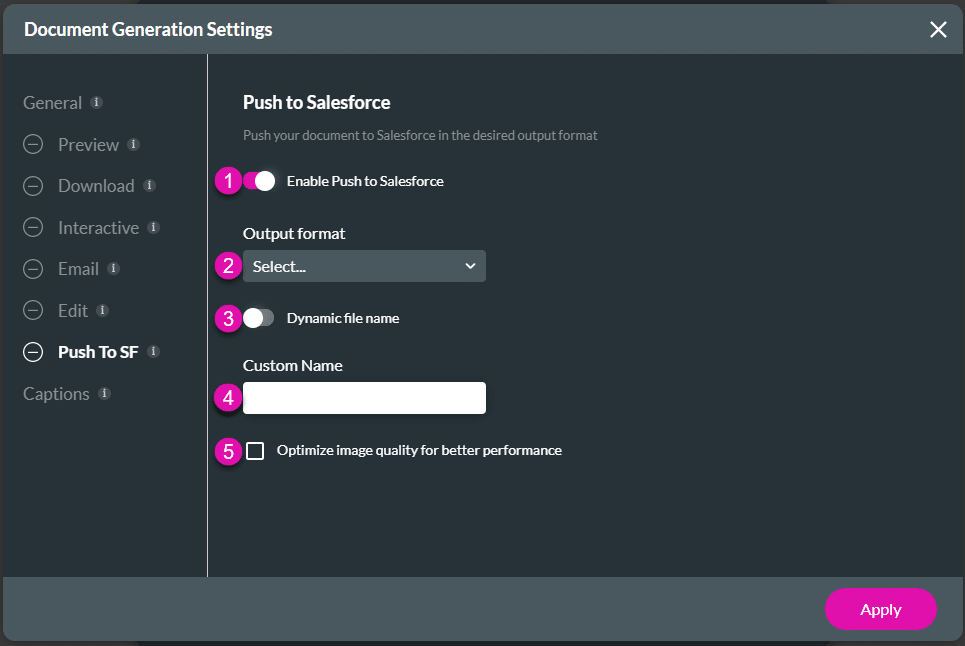
- Push to Salesforce: Push a DOCX or PDF document to Salesforce in the desired output format.
- Click the Next button.

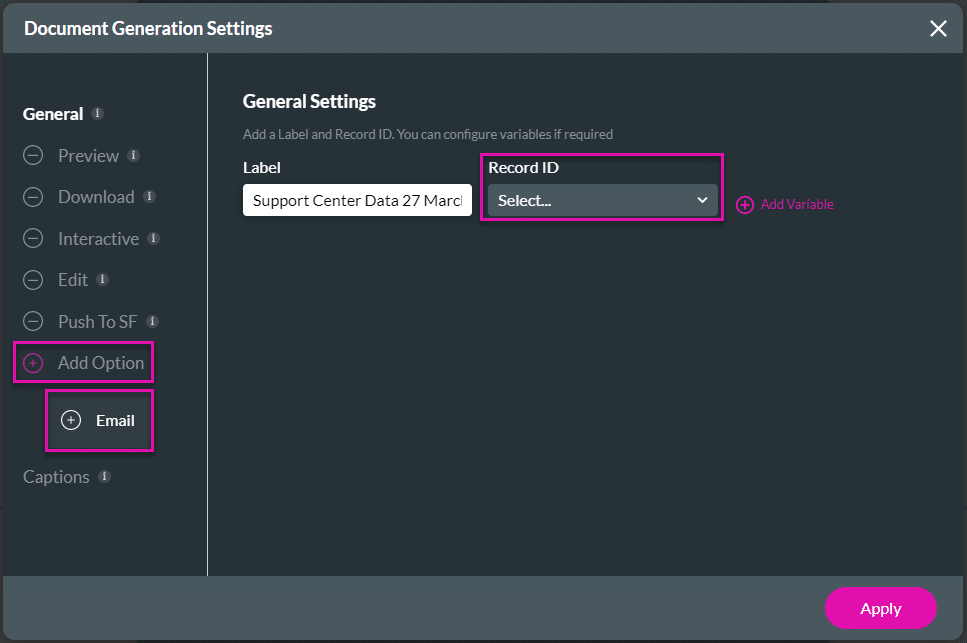
- Under General, change the label of the template if necessary. The document name is added by default.
- Use the drop-down list to add a Record ID.
- The Record ID is mandatory.
- This is either an input field or a custom variable that you added to the project.
Note:
The options on the left of the screen under General depend on the options you selected on the previous screen.
You can add options:
- Click the + icon in front of Add Option.
- Click the + icon in front of an option to add it to the list.
- Configure the options that you selected:
- Change the captions if necessary.
- View where the template was used.
Preview
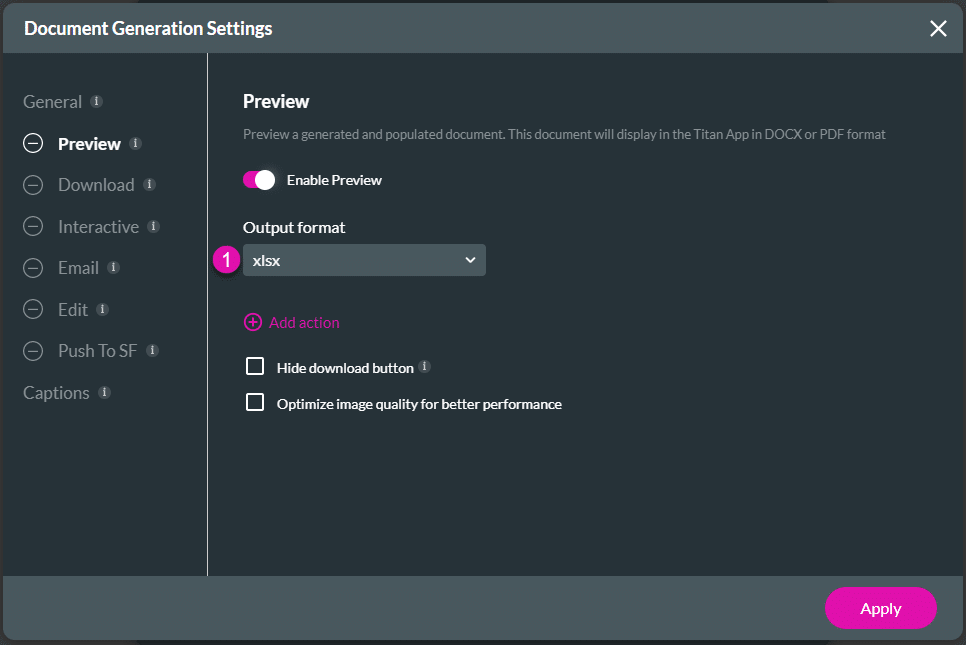
- Click the Preview option.
- Use the toggle switch to enable the Preview functionality.
- Use the drop-down list to select an output format:
- docx
- xlsx
- Use the drop-down list to select a program to view the Word (docx) document.
- Microsoft
- Titan (recommended)
- Use the Zoom drop-down list to select an option.
- Fit to device
- Select a zoom percentage.
- Use the Zoom drop-down list to select an option.

- Under the Preview option, do the following for Excel (xlsx) spreadsheets:
- Use the drop-down list and select the xlsx option.
- Under the Preview option, do the following for PDF documents.
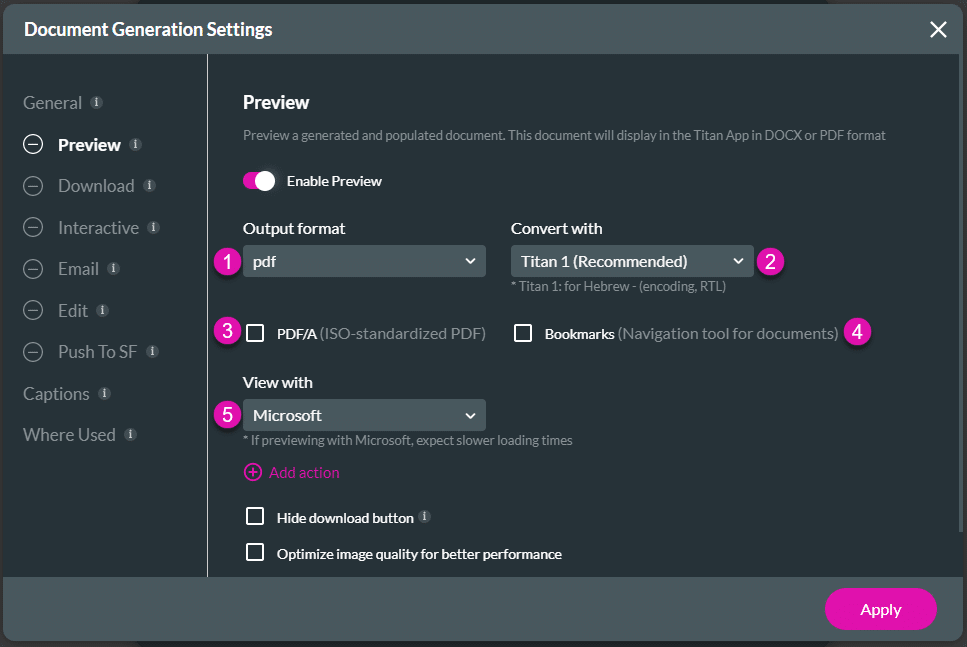
- Use the drop-down list and select the pdf option.
- Use the drop-down list to select a program to convert the pdf document.
- Libre Office
- Office 365
- Titan (recommended)
- Use the Zoom drop-down list to select an option.
- Fit to device
- Select a zoom percentage.
- Use the Zoom drop-down list to select an option.
- Titan 2
- For the Titan (recommended) option, use the checkbox to activate the PDF/A option if necessary. This is the ISO-standardized PDF.
- For the Titan (recommended) option, use the checkbox to activate the Bookmarks option if necessary. This is the navigation tool for documents.
- Use the drop-down list to select the option to view the document.
- Microsoft
- Titan 1 (Recommended)
- Use the Zoom drop-down list to select an option.
- Fit to device
- Select a zoom percentage.
- Use the Zoom drop-down list to select an option.
- Titan Mini
- Use the Zoom drop-down list to select an option.
- Fit to device
- Select a zoom percentage.
- Use the Zoom drop-down list to select an option.
- If necessary, do the following:
- Click the Add action option and add button text.
- Click the Configure Action button to configure an On Click Action.
- Click the checkbox to hide the download button.
- Click the checkbox to optimize the image quality for better performance.
- This will reduce the image quality to 80% of the original and will therefore reduce the file size.

Download
- Click the Download option.
- Use the toggle switch to enable the Download functionality.
- Use the drop-down list to select an output format:
- xlsx
- docx
- pdf
- Use the drop-down list to select a program to convert the pdf document.
- For the Titan (recommended) option, use the checkbox to activate the PDF/A option if necessary. This is the ISO-standardized PDF.
- For the Titan (recommended) option, use the checkbox to activate the Bookmarks option if necessary. This is the navigation tool for documents.
- Use the drop-down list to select a program to convert the pdf document.
- Use the toggle switch to add a dynamic file name if necessary.
- The Custom Name field changes to a drop-down list where you can select the dynamic file name.
- Type a custom name.
- Use the toggle switch to enable the actions while waiting: Freeze the screen while the template is generating.
- Click the checkbox to optimize the image quality for better performance.
- This will reduce the image quality to 80% of the original and will, therefore, reduce the file size.
- Use the toggle switch to enable the actions while waiting: Show a progress bar.

Interactive
- Click the Interactive option.
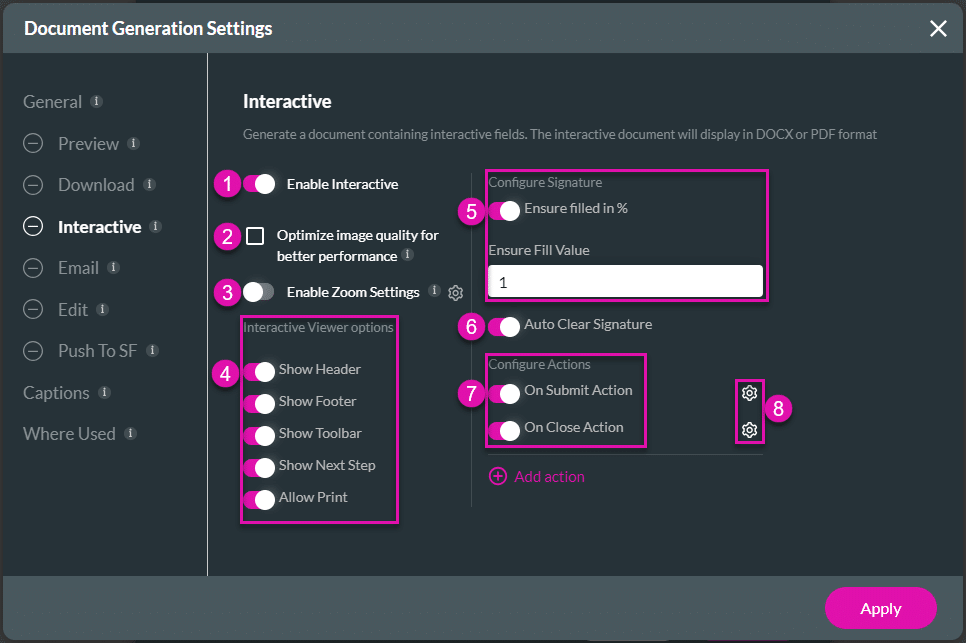
- Use the toggle switch to enable the Interactive functionality.
- Click the checkbox to optimize the image quality for better performance.
- This will reduce the image quality to 80% of the original and will therefore reduce the file size.
- Use the toggle switch to enable the Zoom Settings.
- Click the Gear icon to open the Document Generation Device Zoom screen.
- Use the drop-down list to select general zoom options. This is the default option.
- Click the Custom zoom radio button to configure the custom zoom options for desktop, laptop, tablet (L), tablet, mobile (L), and mobile (S).
- Click the Gear icon to open the Document Generation Device Zoom screen.
- Use the toggle switches to enable the Interactive Viewer options:
- Show Header
- Show Footer
- Show Toolbar
- Show Next Step
- Allow Print
- Use the toggle switches to enable the Ensure filled % option.
- When this option is enabled, the signer will be required to make a signature larger than the percentage specified in the “Ensure Fill Value” field in the signature box.
- This will prevent the signer from simply making a dot in the mandatory signature field.
- Add a positive integer number in the Ensure Filled Value field. One or two percent is sufficient.
- Use the toggle switches to enable the Auto Clear Signature option.
- The signature field will be cleared after the document was submitted.
- Use the toggle switches to enable the Configure Actions options:
- On Submit Action
- On Close Action
- Use the Gear icons to configure the actions:
- Click the Email option.
- Use the toggle switch to enable the Email functionality.
- Use the drop-down list to select an output format:
- xlsx
- docx
- pdf
- Use the drop-down list to select the program to convert the document.
- Use the toggle switch to add a dynamic file name if necessary.
- The Custom Name field changes to a drop-down list where you can select the dynamic file name.
- Type a custom name.
- Click the checkbox to optimize the image quality for better performance.
- This will reduce the image quality to 80% of the original and will therefore reduce the file size.
Edit
- Click the Edit option.
- Use the toggle switch to enable the Edit functionality.
- Click the checkbox to optimize the image quality for better performance.
- This will reduce the image quality to 80% of the original and will therefore reduce the file size.
- Use the toggle switches to enable the Configure Actions options:
- On Submit Action
- On Close Action
- Allow Print
- Allow Download
- Hide toolbar options
- Use the Gear icons to configure the actions:
- On Submit Action
- On Close Action
- Hide toolbar options: Use the modal to hide the accessibility settings.
- If necessary, click the Add action option to configure another action you may need.
Push to Salesforce
- Click the Push to Salesforce option.
- Use the toggle switch to enable the Push to Salesforce functionality.
- Use the drop-down list to select an output format:
- xlsx
- docx
- pdf
- Use the drop-down list to select the program to convert the document.
- Use the toggle switch to add a dynamic file name if necessary.
- The Custom Name field changes to a drop-down list where you can select the dynamic file name.
- Type a custom name.
- Click the checkbox to optimize the image quality for better performance.
- This will reduce the image quality to 80% of the original and will, therefore, reduce the file size.
- Make sure that you configure the Salesforce Push.
Captions
- Click on the captions option to change any of the captions.

Where Used
- Click the Where Used option to view where the document generation is triggered.

- Click the Apply button. The Word or Excel template is added.
- Use the Edit icon to edit the template.
- Use the Kebab icon to do one of the following:
- Turn Off
- Delete
Add the Document Generation to an action flow
- Configure an On Click Action on an element.
- Click the + icon to add a node.
- Under User Interaction, select the Document Generation option and click the Next button.

- Use the drop-down lists to select the following:
- Template
- Action
- Click the Next button.
- Add a tag if necessary and click the Insert button.

If you are interested, check out our Salesforce document generation article for a comparison of the 10 best tools in the market.
Hidden Title
Was this information helpful?
Let us know so we can improve!
Need more help?
Book Demo