

Salesforce Integration: Payments
Business Background
Configure the Salesforce integrations for your payment methods.
Titan Solution
Titan Web lets configure the Salesforce integrations for your payment methods in your Web project.
How to Guide
Prerequisites:
- Configure Payment.
- Select Payment Type.
- Set Payment Method.
- Set Processor Configuration.
- Set Post Payment.
- Set Layout.
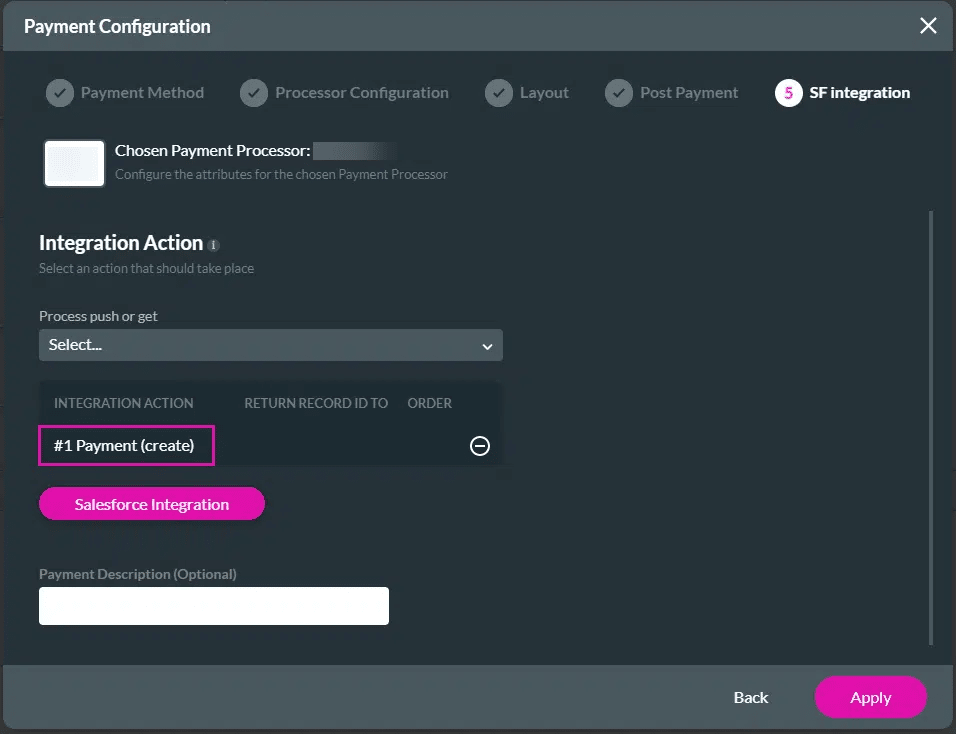
- Use the Process Push or Get drop-down list to select an option.
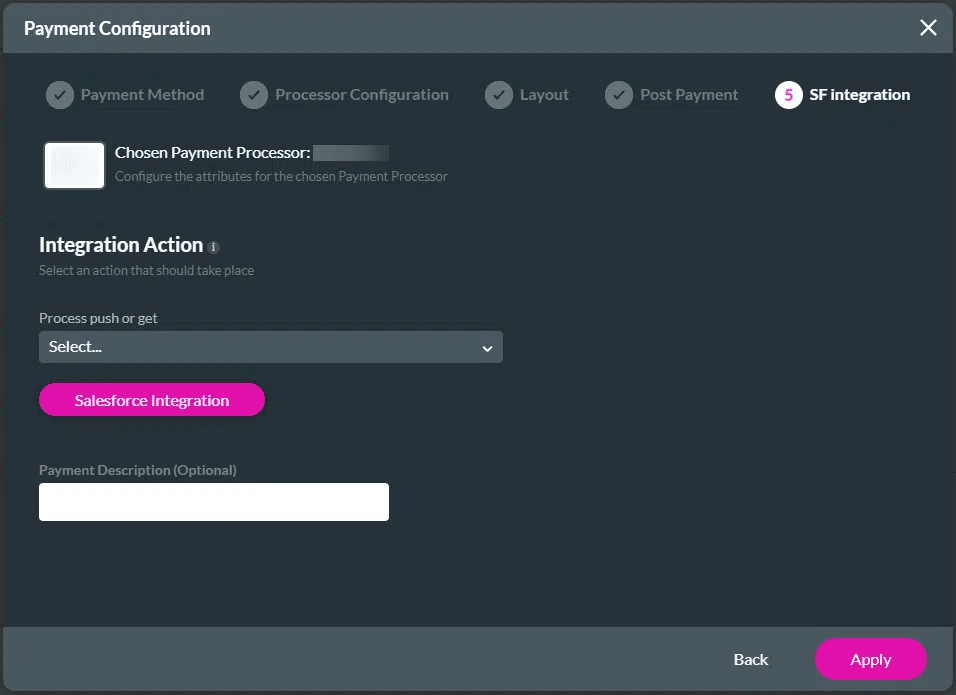
If you do not see your predefined Salesforce Push, browse to Salesforce integrations:
- Project Settings > Salesforce > Salesforce Integrations > Push > Advanced
The Upon payment checkbox must be checked:
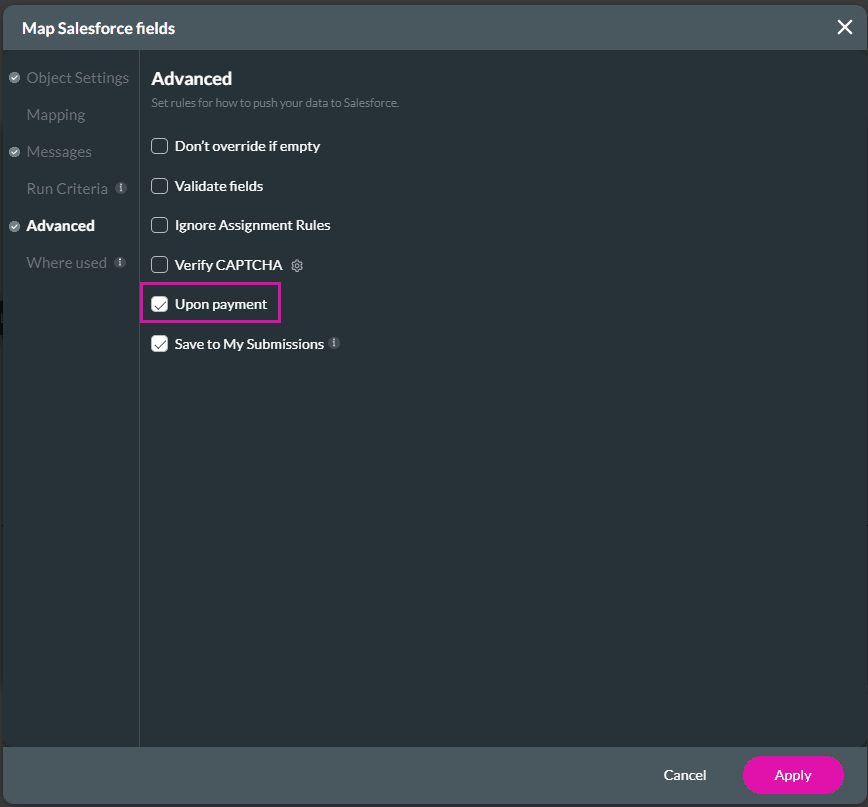
If this option is not checked, the Salesforce Push cannot be added to the payment configuration. It notifies the system that this is a payment push.
Save to My Submissions is automatically checked when Upon payment is checked and cannot be unchecked. This will hold the parameters (in the Titan package in Salesforce that must have been installed via AppExchange) that are coming back from the payment company after a successful payment .
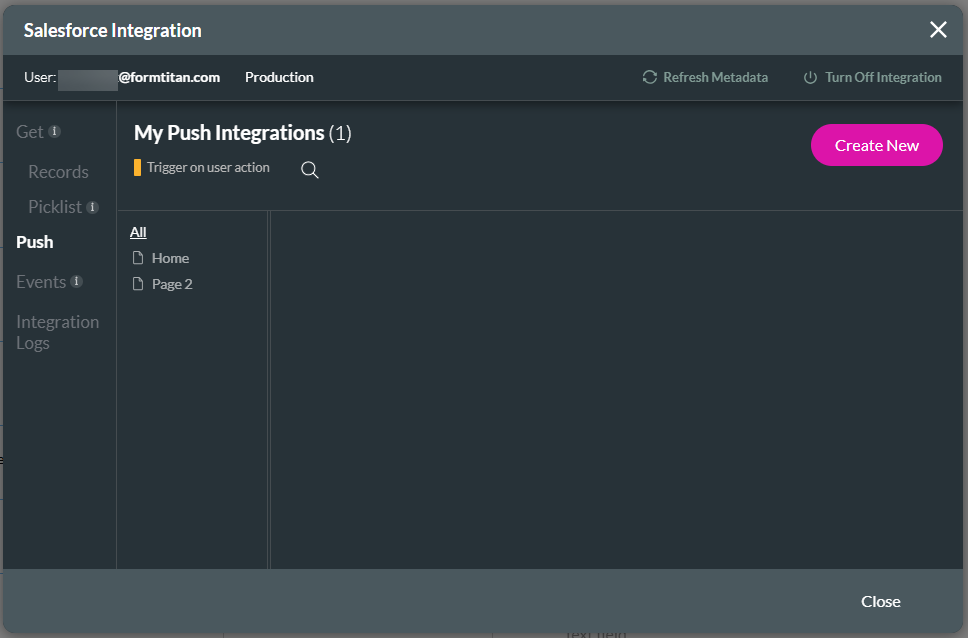
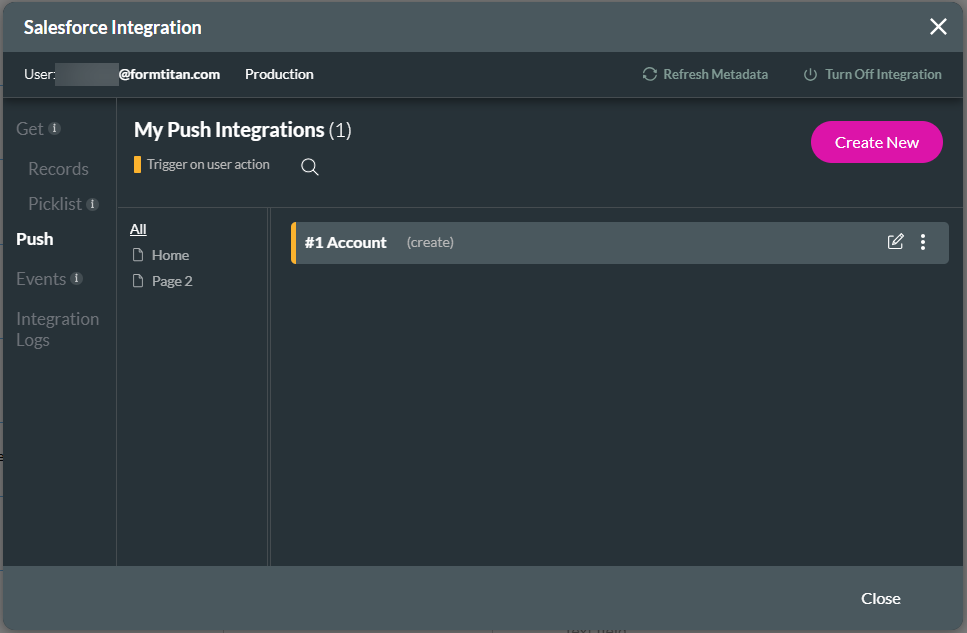
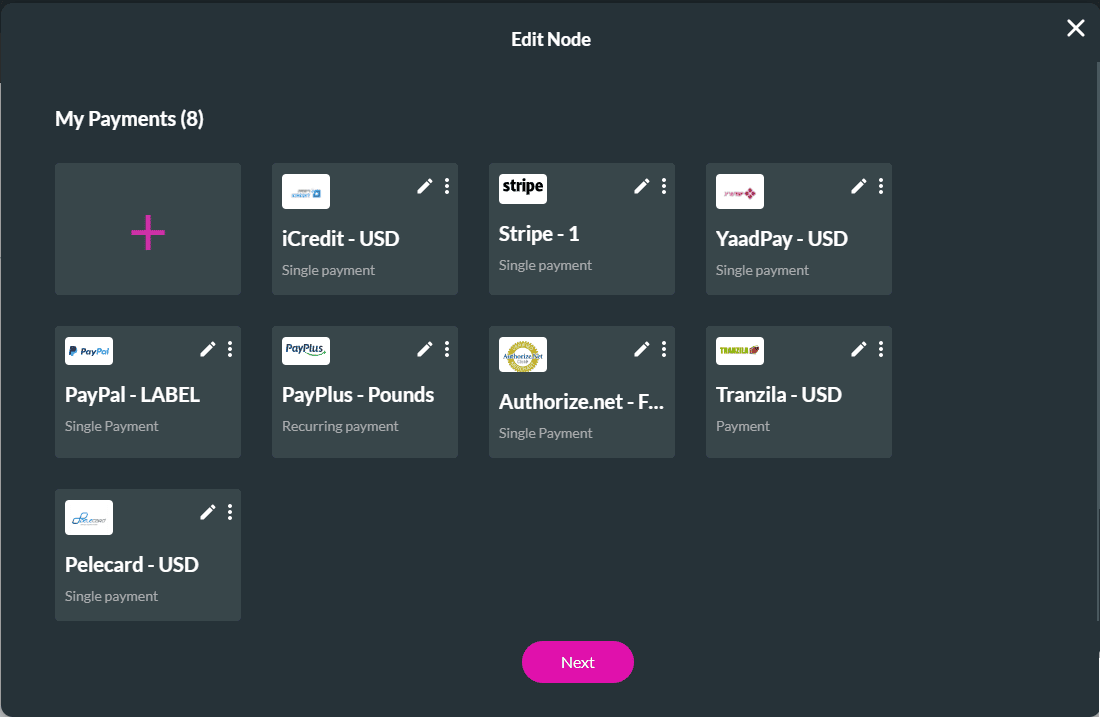
- Alternatively, create a Salesforce Push by clicking the Configure Salesforce Integration button. The Salesforce Integration screen opens.
- Under Push, click the Create New button. The Map Salesforce fields screen opens.
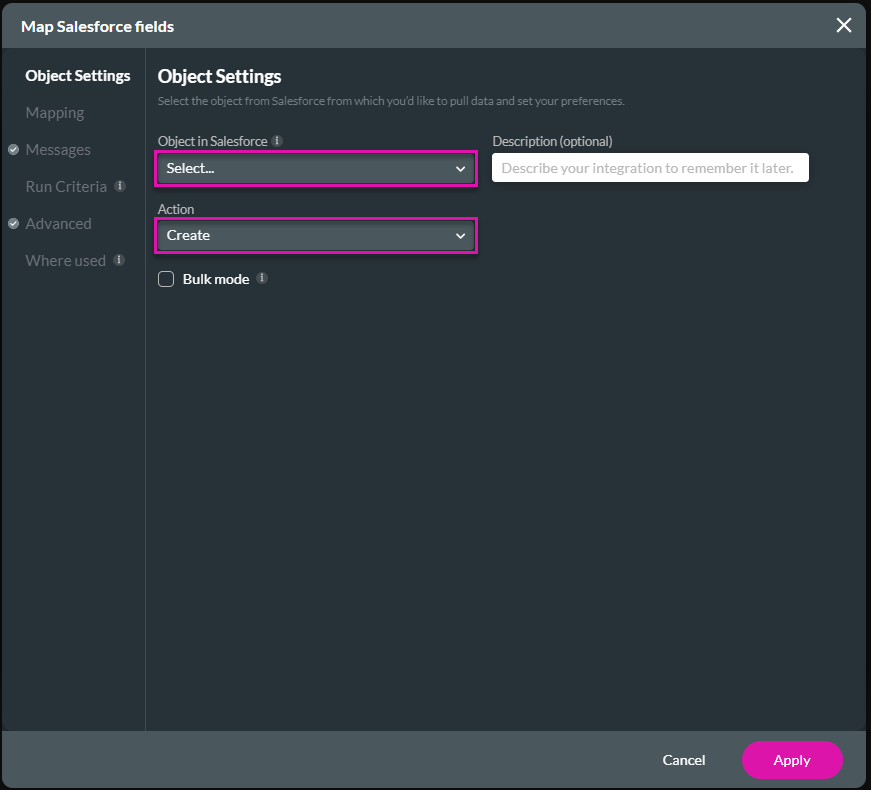
- Use the drop-down list to select an object in Salesforce, for instance, Payment. This lets you track every payment.
- Use the drop-down list to specify the action, such as creating or updating an object. In this article, the Create option was selected.
- Add a description in the field. This is used for internal needs: it describes the integration of the data from and to Salesforce internally.
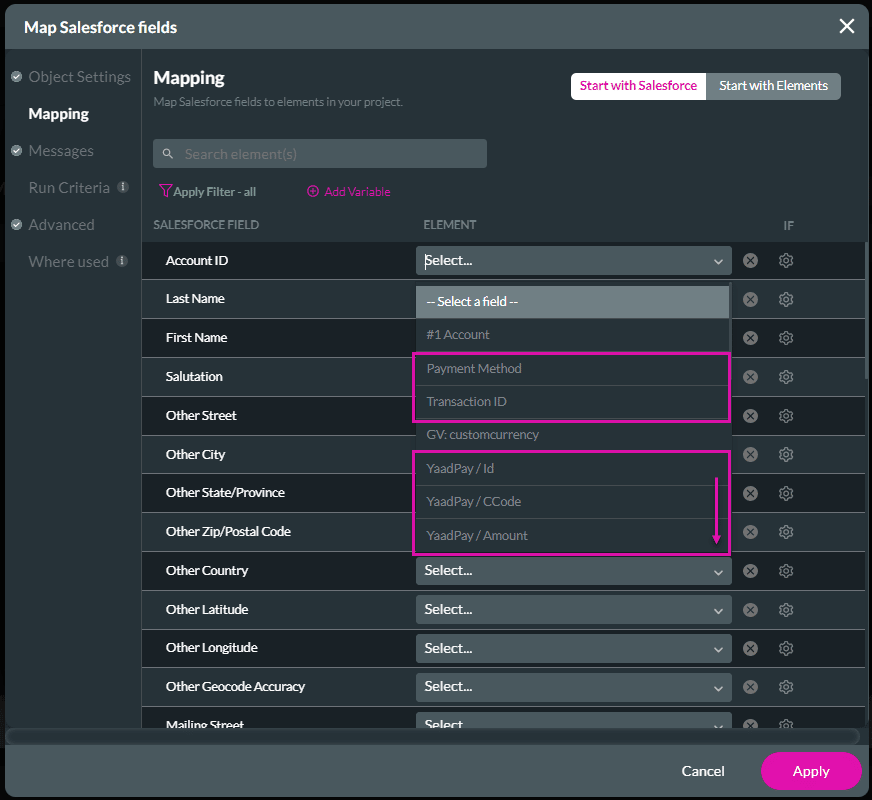
- Under Mapping, use the drop-down list and scroll down to select the attributes relevant to your configured payment type. Each payment integration has unique attributes you can push to Salesforce.
These are the returned parameters for the payment integration process.
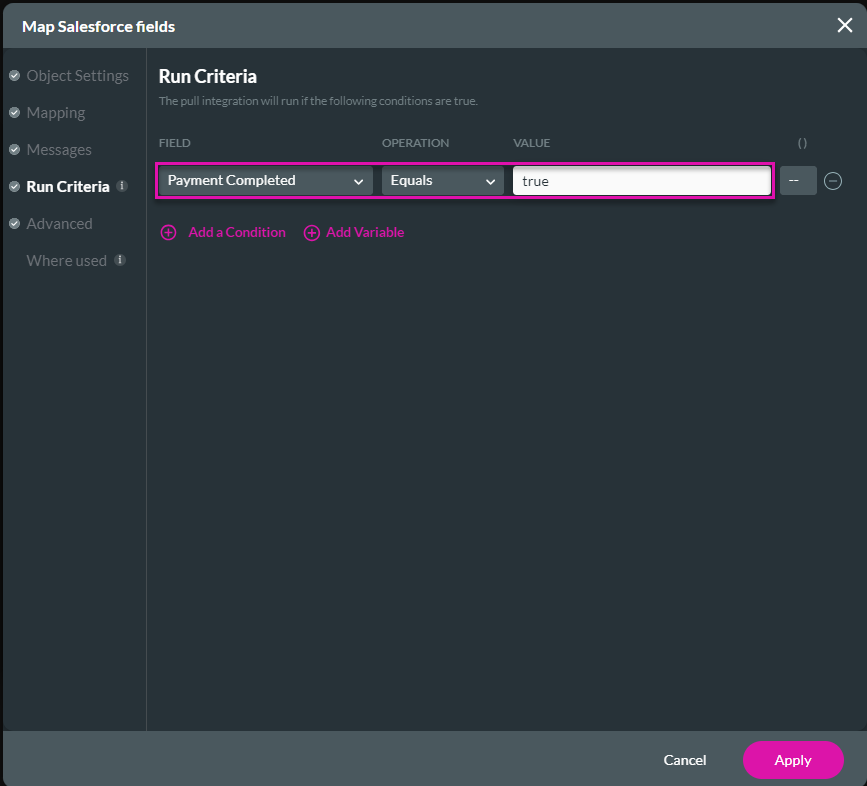
- Under Run Criteria, configure the run criteria. The Push will only run when the condition in the run criteria is met.
- This example shows the run criteria when the payment is completed.
- Configure the run criteria that suit your business needs.
- Under Advanced, configure the following optional options:
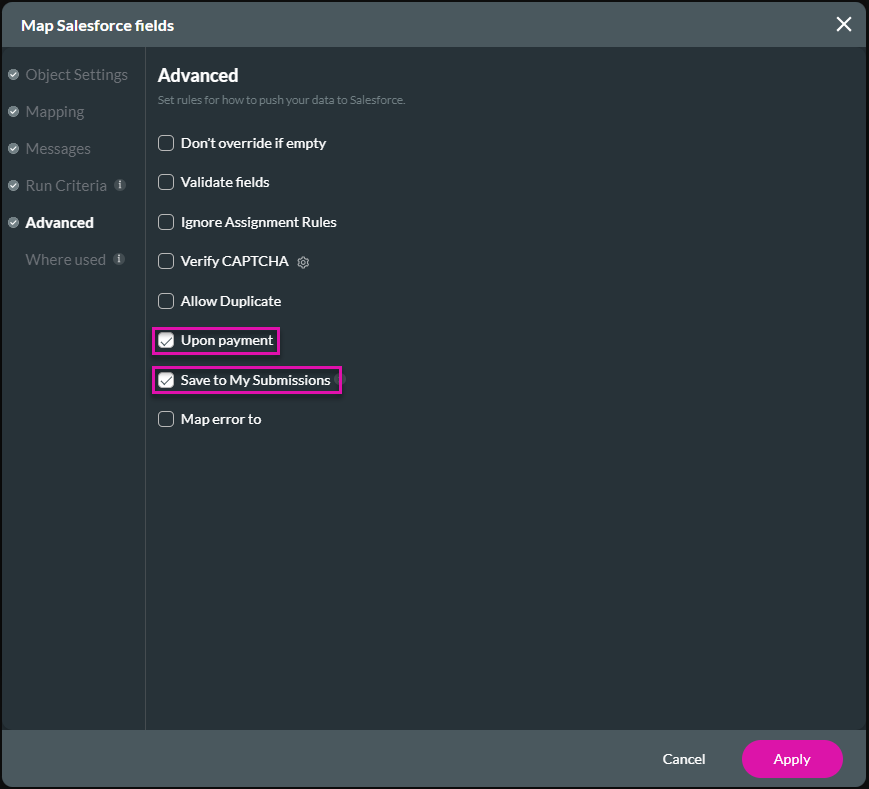
The Upon payment checkbox must be checked. If this option is not checked, the Salesforce Push cannot be added to the payment configuration. It notifies the system that this is a payment Push.
Save to My Submissions is automatically checked when Upon payment is checked and cannot be unchecked. The payment action will be saved in the Titan package in Salesforce that must have been installed via AppExchange.
- Click the Apply button. The Push integration is added to the Salesforce Integrations screen.
- Click the Close button. The option is added to the Payment Configuration screen.
- Select the Integration Action you configured from the drop-down list.
- Add a Payment Description if necessary.
- Click the Apply button.
- Click the Apply button.
- If needed, add a tag and click the Insert button. The payment method is added with a label next to the company name.
- Click the Next button. The payment type is added to the element.
