

Local Storage
Business Background
Store information as a draft on the user’s local browser or review the contents before saving it to Salesforce.
Local storage and session storage are part of the web storage API. It allows web applications to store data in the user’s browser with no expiration date – unless specified differently. This means the data persists even after the browser window is closed or the user navigates away from the site.
Using local storage provides a convenient way to enhance user experience by maintaining state across visits and sessions without relying on server-side storage solutions.
Titan Solution
Titan lets users temporarily save information as a draft on their local browser. They can review the content before saving it to Salesforce.
Titan suggest that you rather use the Submissions functionality as it is more robust and has better security features.
How to Guide
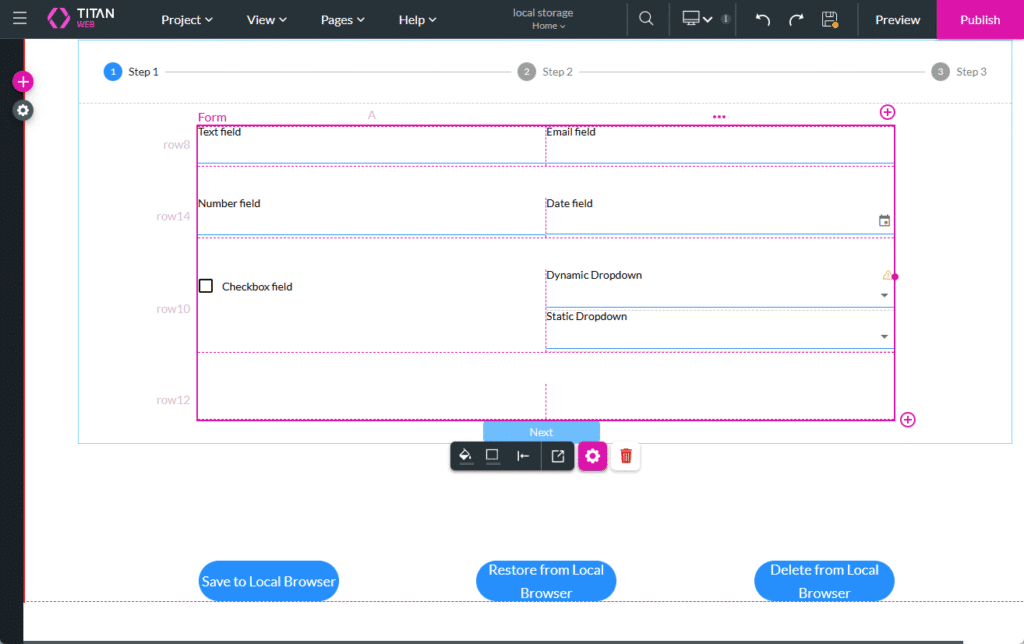
In this example, we have a form element in a stepper container where a customer can complete information fields, and three buttons with on-click actions, with the following actions:
- Save to Local Browser button that saves the completed fields to the local browser storage.
- Restore from Local Browser button that recalls these completed fields from the local storage into the form.
- Delete from Local Browser button to delete the information from the local browser.
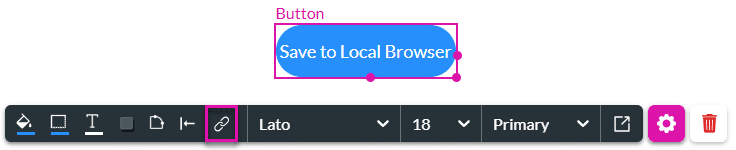
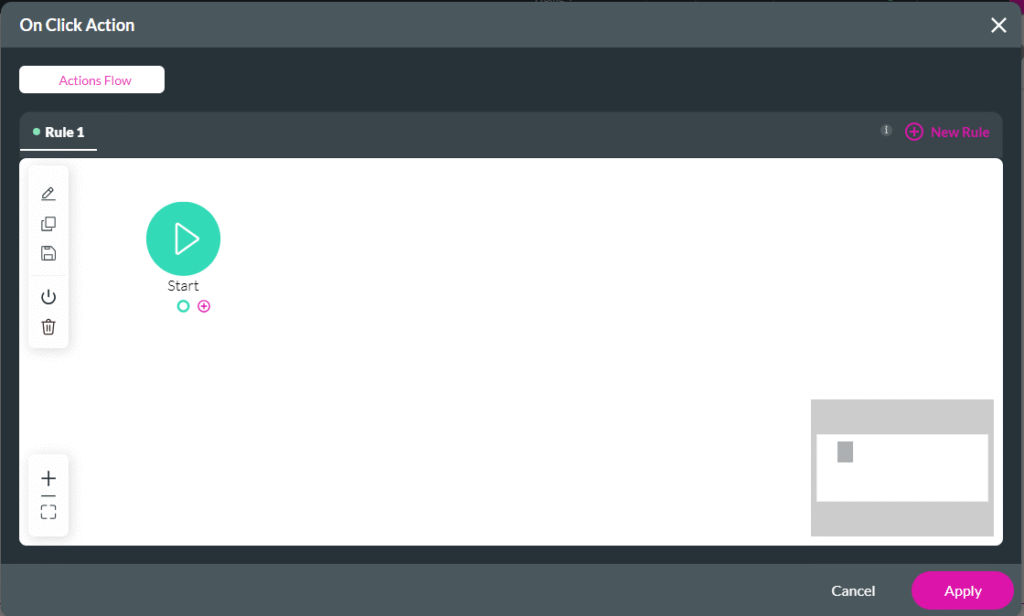
- Select the Save to Local Browser button and click the On Click Action icon.
- Click the + icon next to the Start node.
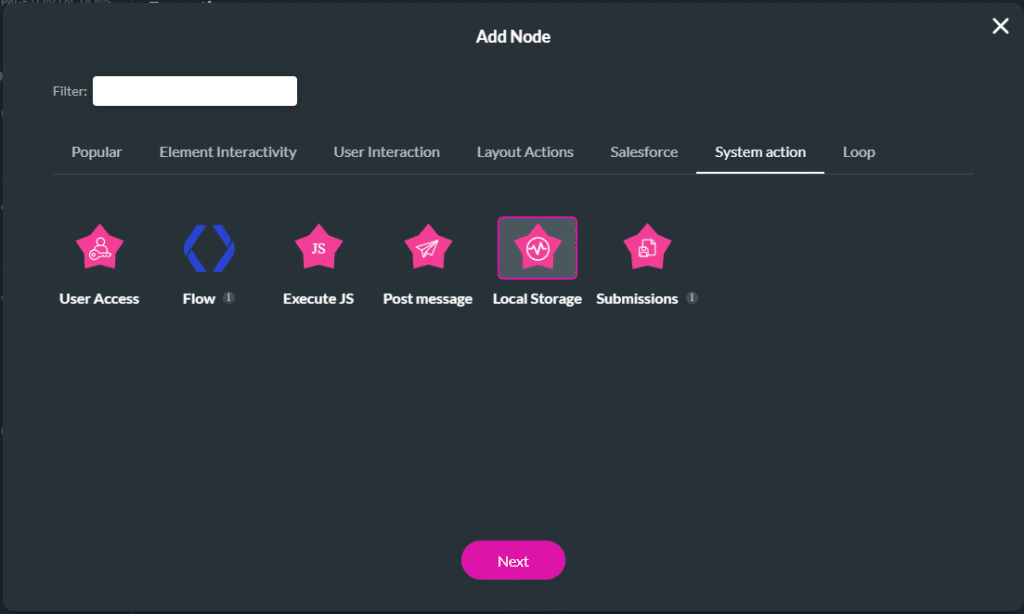
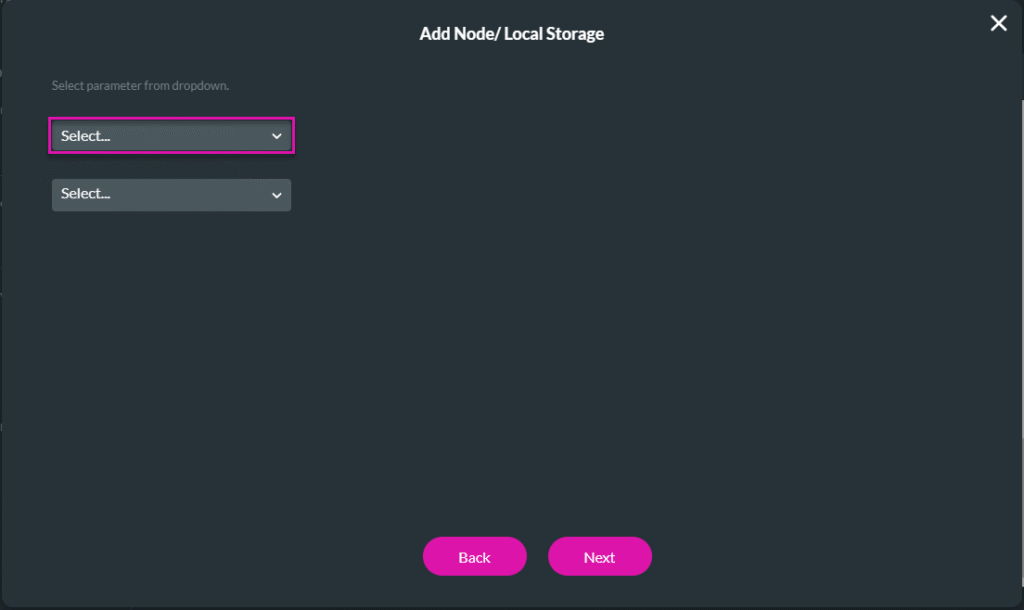
- Under System action, click the Local Storage option and click the Next button.
- Use the drop-down lists to select one of the following. The screen layout changes depending on the option selected.
- Store: The information is stored in the local browser.
- Restore: The stored information is recalled from the local browser, and the form is populated.
- Invalidate: The stored information is deleted from the local browser.
Store to the Local Storage
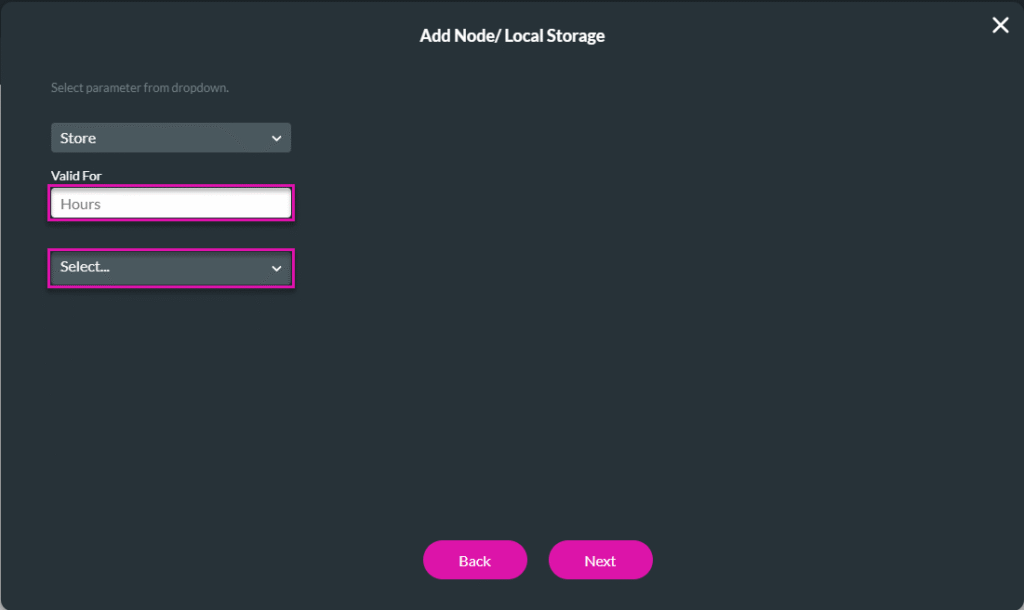
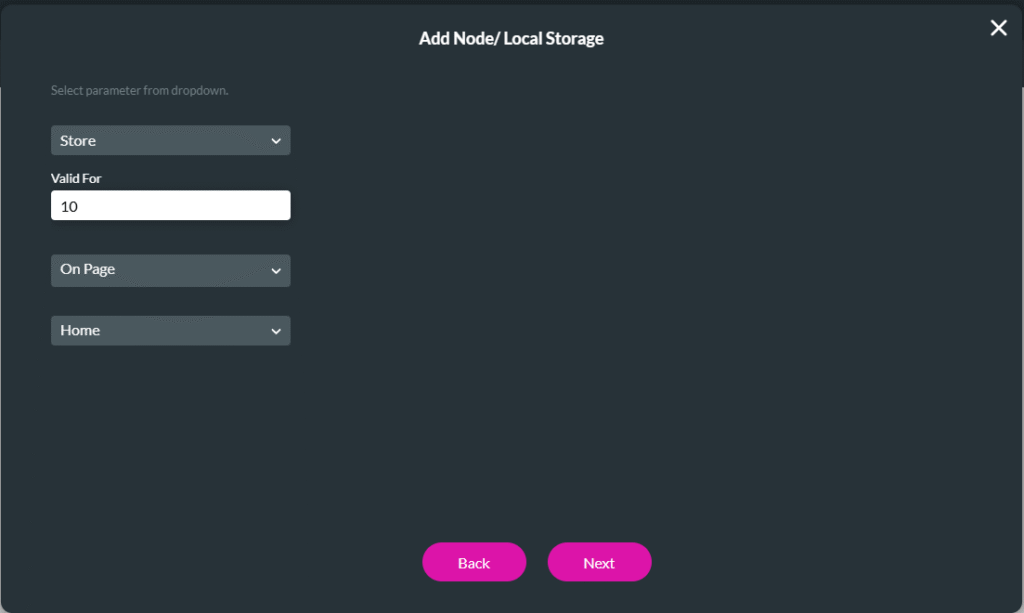
- Select the Store option.
- Type the number of hours in the Valid For field. This is how long the information will be stored in the local browser.
- Use the drop-down list to select an option:
- On Page: Use the added drop-down list to select a project page. All the elements on the page will be stored.
- Field: Use the added drop-down list to select a field. Only one element on the page can be selected.
- Field Group: Use the added drop-down list to select a field group. You can select multiple options.
- Project: Only the first page will be stored.
- Click the Next button.
- Add a tag if necessary.
- Click the Insert button. The Local Storage Node is added to the On Click Action screen.
- Click the Apply button.
- Save the project.
Restore from the Local Storage
- Select the Restore from Local Browser button and click the On Click Action icon.

- Click the + icon next to the Start node.
- Under System action, click the Local Storage option and click the Next button.
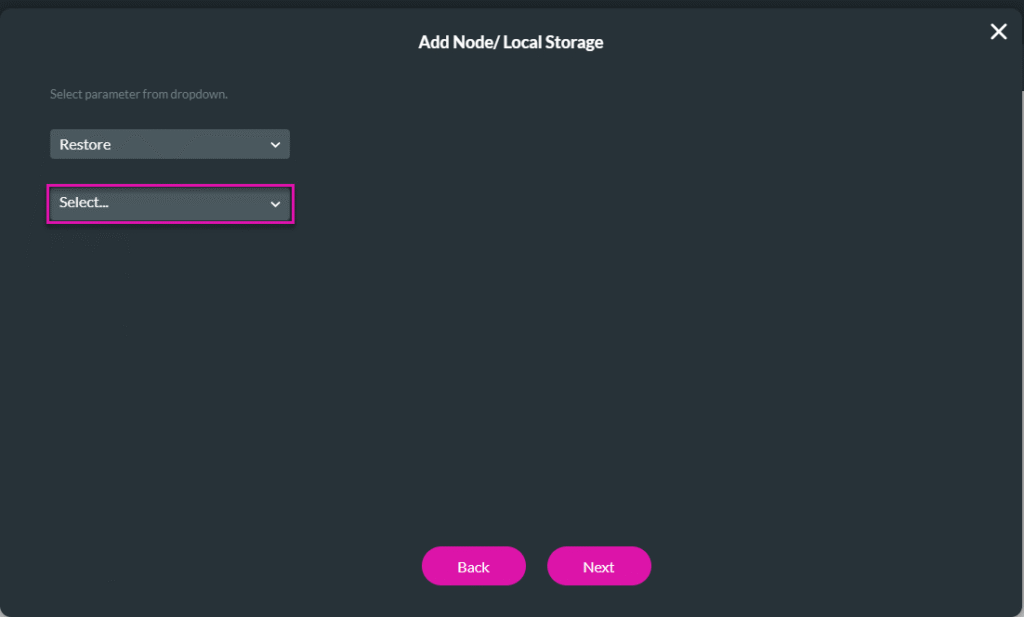
- Select the Restore option.
- Use the drop-down list to select an option:
- On Page: Use the added drop-down list to select a project page. All the elements on the page will be restored.
- Field: Use the added drop-down list to select a field. Only one element on the page can be selected.
- Field Group: Use the added drop-down list to select a field group. You can select multiple options.
- Project: Only the first page will be restored.
- Click the Next button.

- Add a tag if necessary.
- Click the Insert button. The Local Storage node is added to the On Click Action screen.
- Click the Apply button.
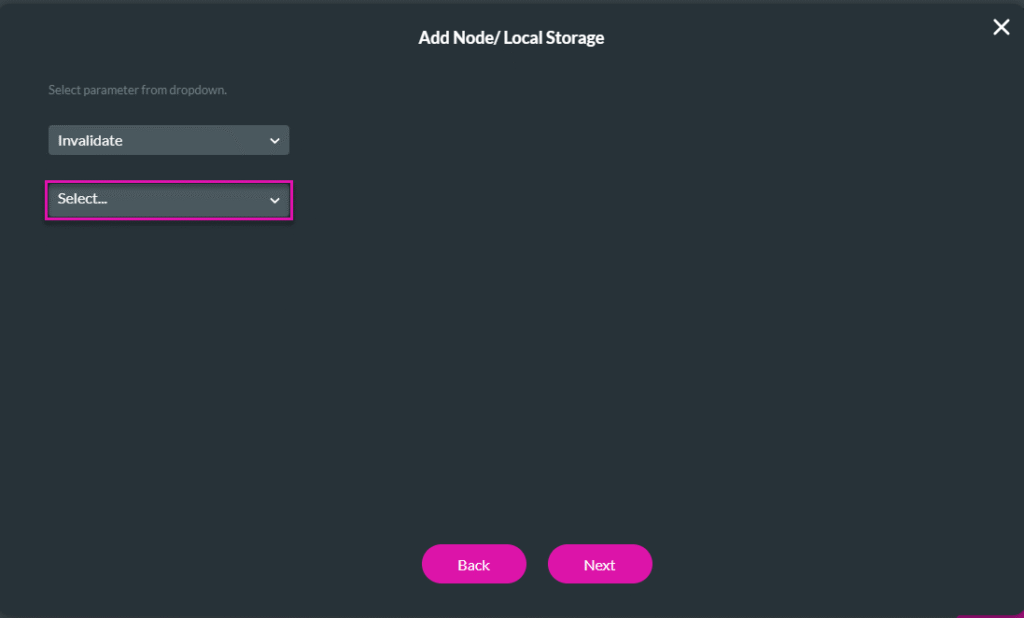
Invalidate from the Local Storage
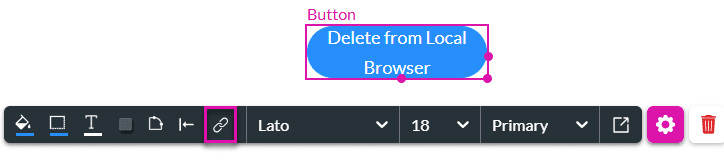
- Select the Delete from Local Browser button and click the On Click Action icon.
- Click the + icon next to the Start node.
- Under System action, click the Local Storage option and click the Next button.
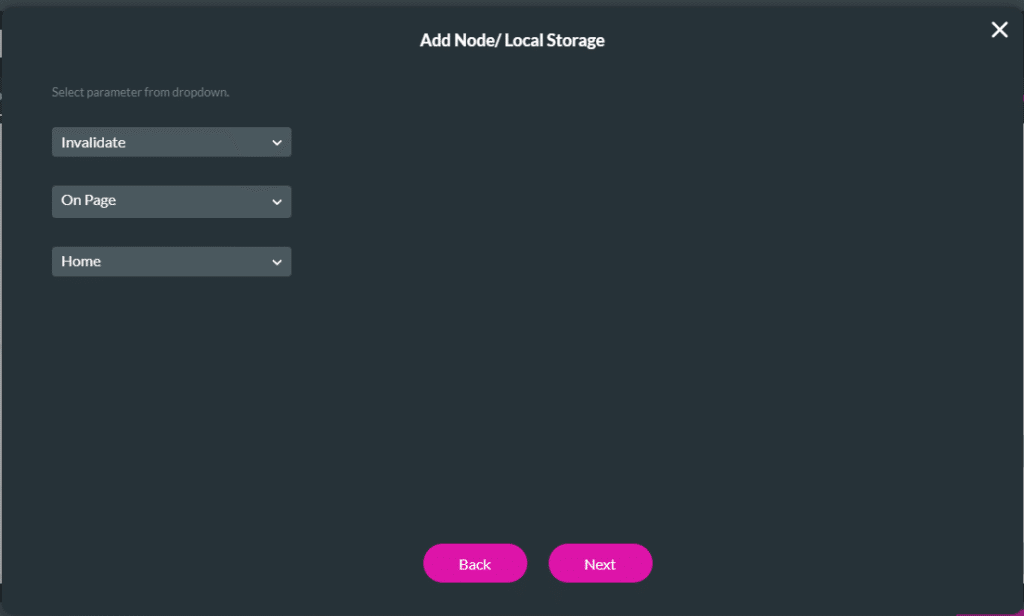
- Select the Invalidate option.
- Use the drop-down list to select an option:
- On Page: Use the added drop-down list to select a project page. All the elements on the page will be deleted.
- Field: Use the added drop-down list to select a field. Only one element on the page can be selected.
- Field Group: Use the added drop-down list to select a field group. You can select multiple options.
- Project: Only the first page is deleted.
- Click the Next button.
- Add a tag if necessary.
- Click the Insert button. The Local Storage node is added to the On Click Action screen.
- Click the Apply button.