Genie Form Assist
Business Background
Even with Titan’s intuitive drag-and-drop interface, configuring a form may still consume a considerable amount of time.
Titan Solution
Save time and avoid human error by embracing Titan’s Genie. You will see the form materialize as you configure it in a few steps, complete with Salesforce integration.
How to Guide
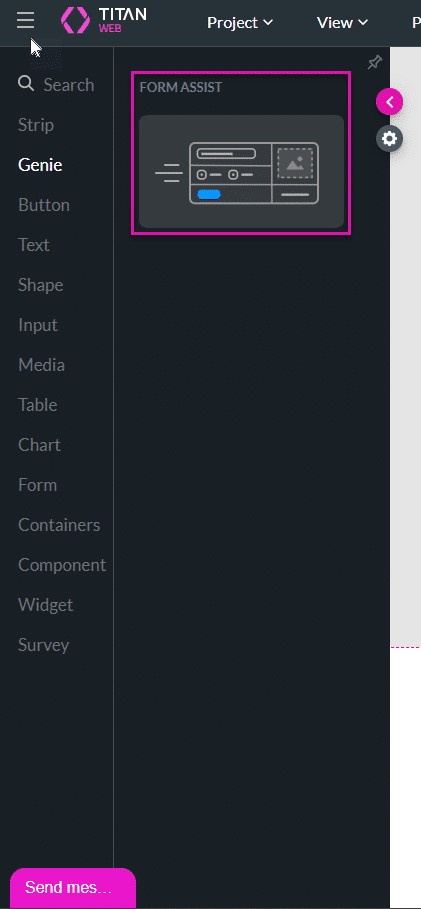
- Click the + icon to open the element list.
- Select the Genie option and drag-and-drop the Form Assist element to the canvas. The Genie – Form Assist screen opens.
You can watch an introduction video on how to use the Genie Form Assist by clicking the YouTube link on this screen.
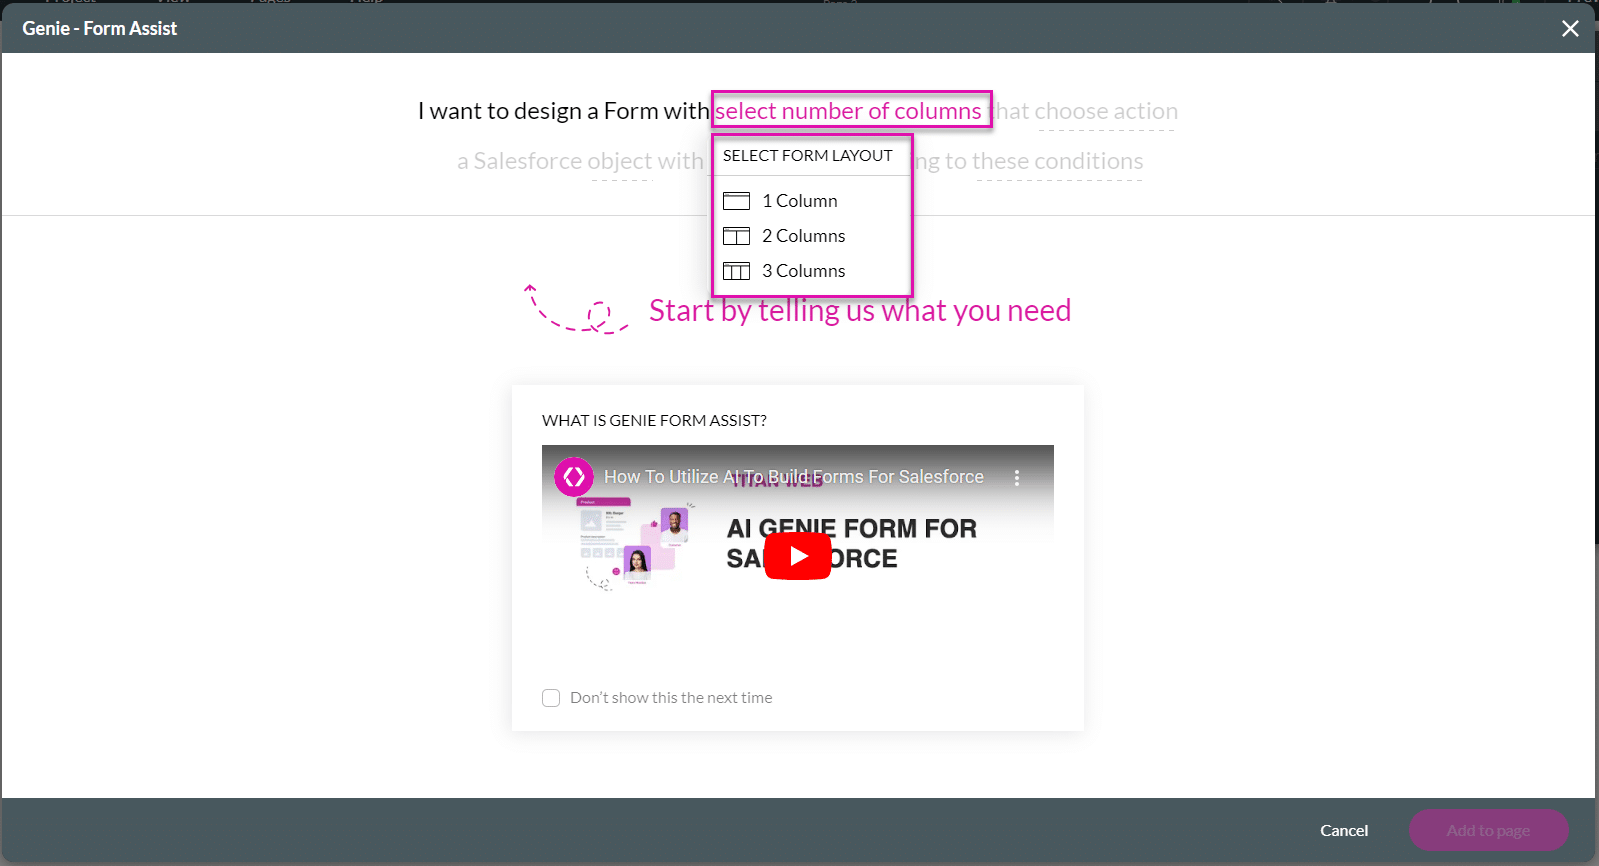
- Click the select number of columns option. A drop-down list opens.
- Select an option:
- One column
- Two columns
- Three columns
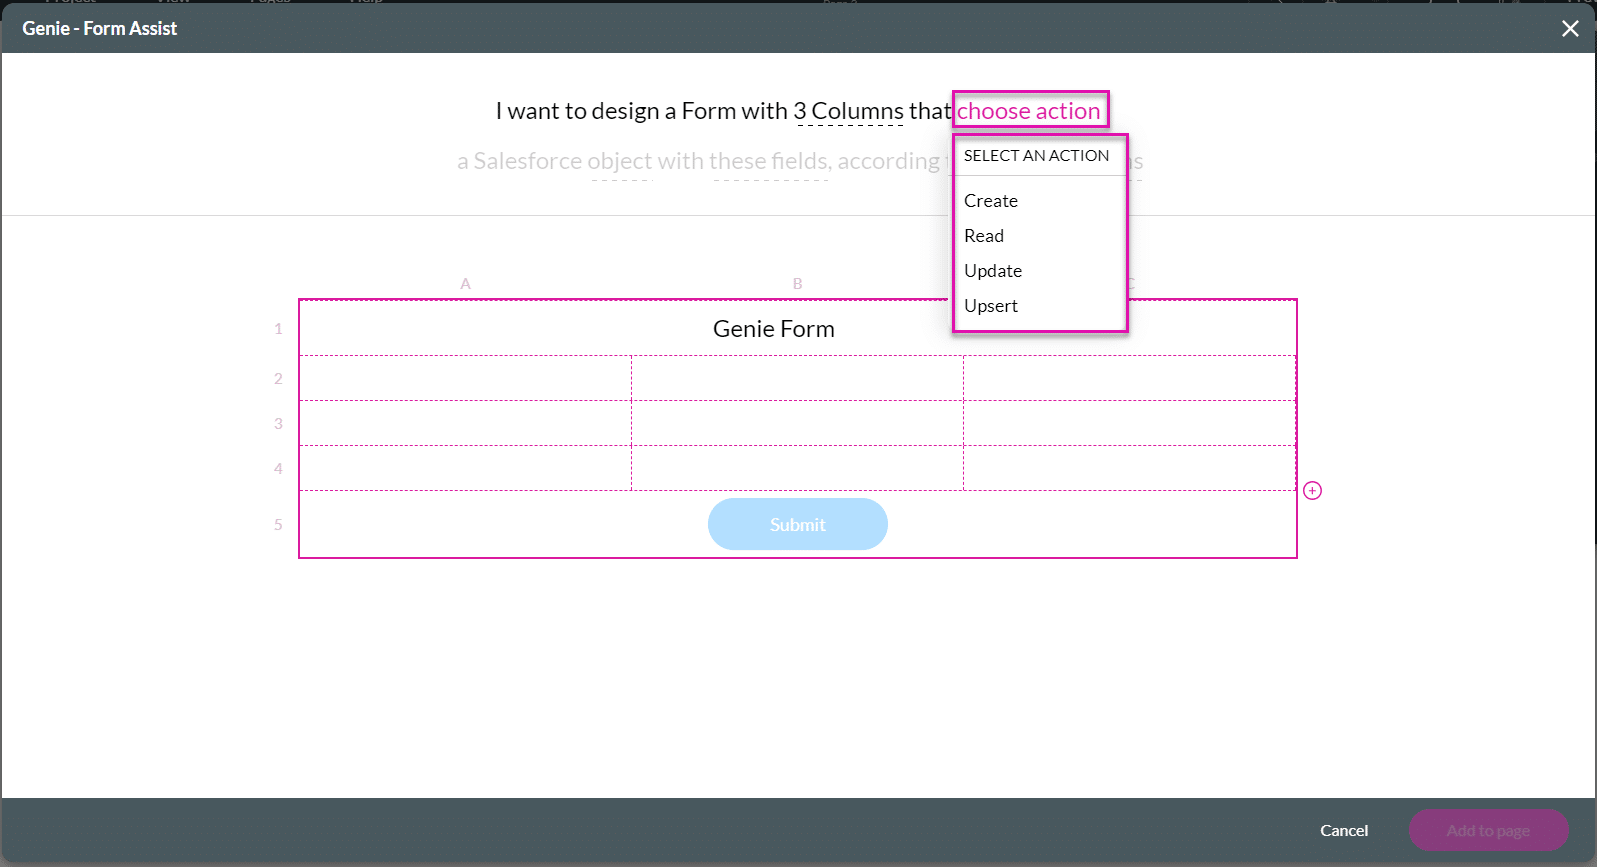
A form with five rows is added with a merged header row and, depending on the action selected, a button in the final row. You can add rows at any time.
- Click the choose action option. A drop-down list opens.
- Select an option:
- Create: The header row changes to Create.
- The label of the button element is Create.
- Read: The header row changes to Read.
- The last row of the form (with the button element) is removed.
- You can configure conditions.
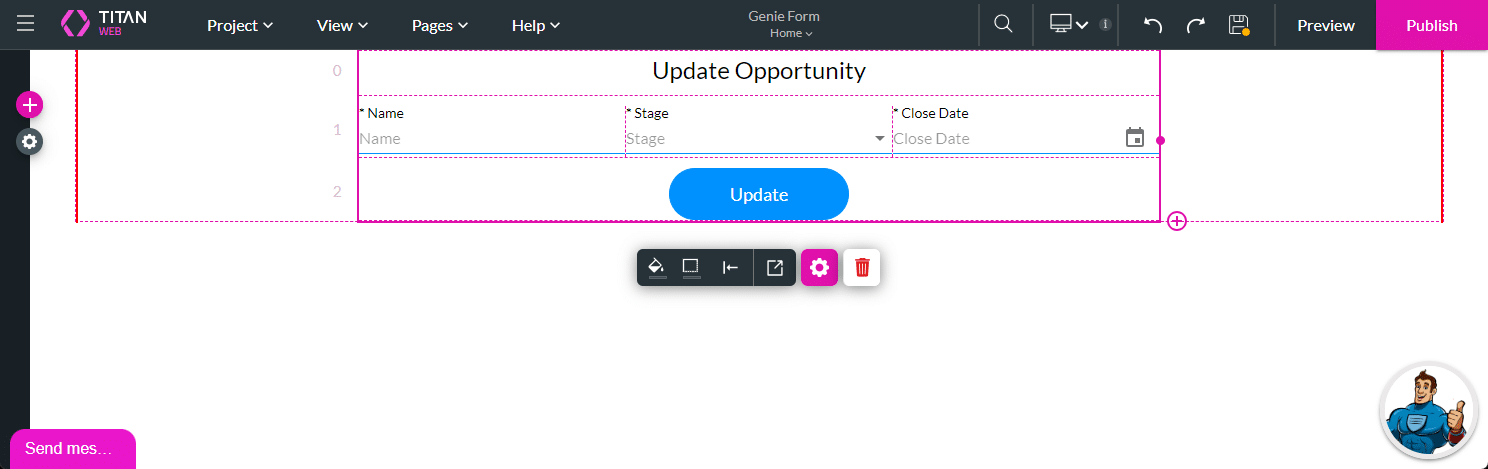
- Update: The header row changes to Update.
- The label of the button element is Update.
- You can configure conditions.
- Upsert: The header row changes to Upsert. If a record already exists in Salesforce, it will be updated. If it doesn’t exist, it will be inserted.
- The label of the button element is Upsert.
- You can configure conditions.
- Create: The header row changes to Create.
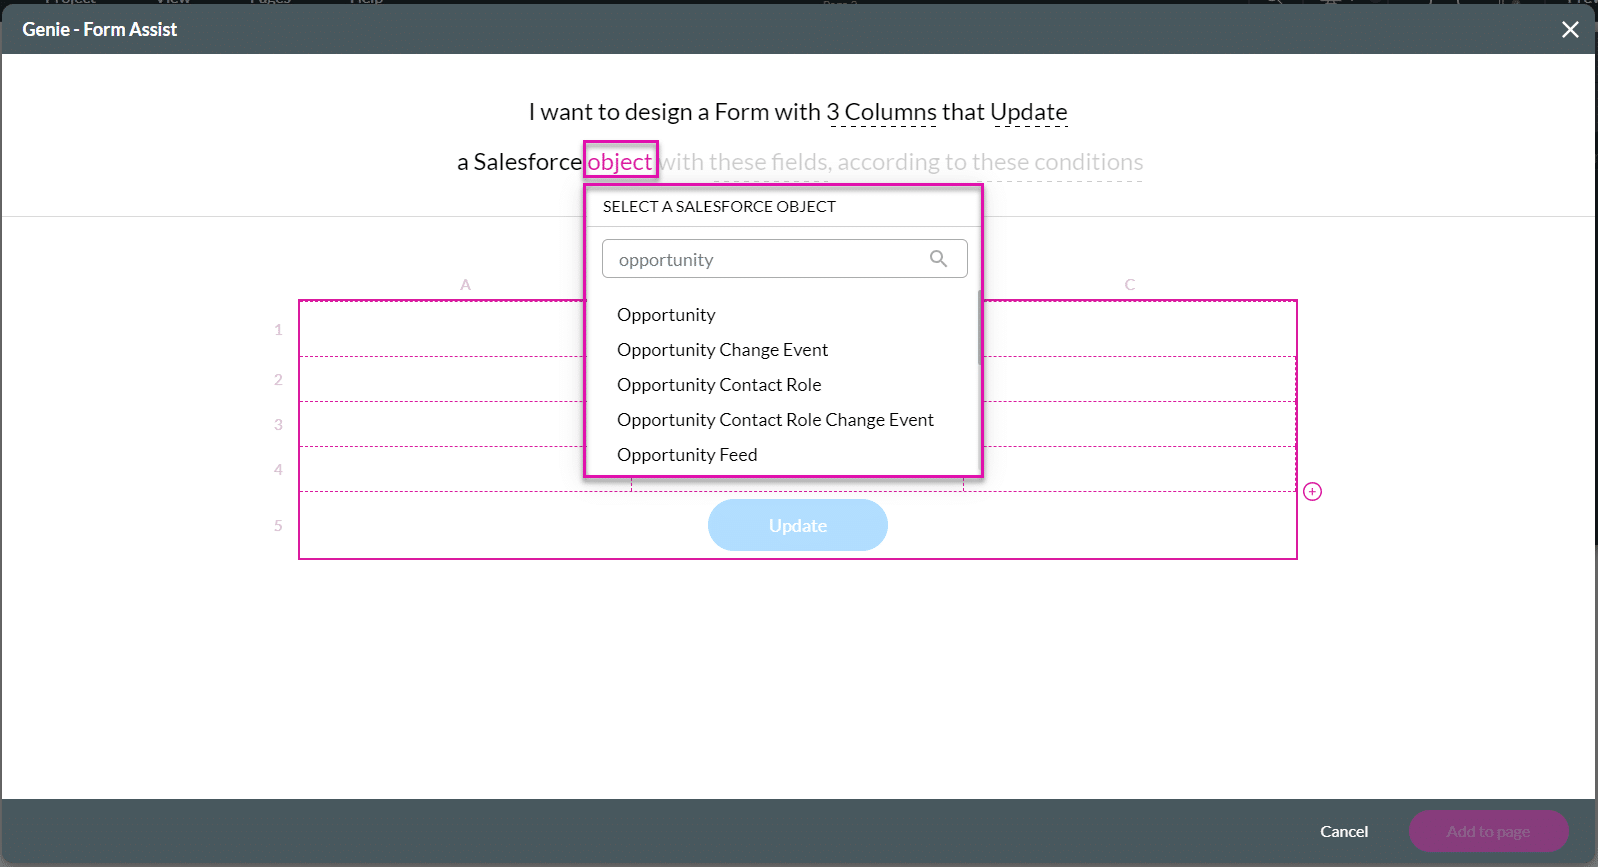
- Click the object option to select a Salesforce object. A drop-down list opens.
- Use the Search field to find an object. The header row changes accordingly, adding some of the object’s mandatory fields to the form. For instance:
- One field is added for Account.
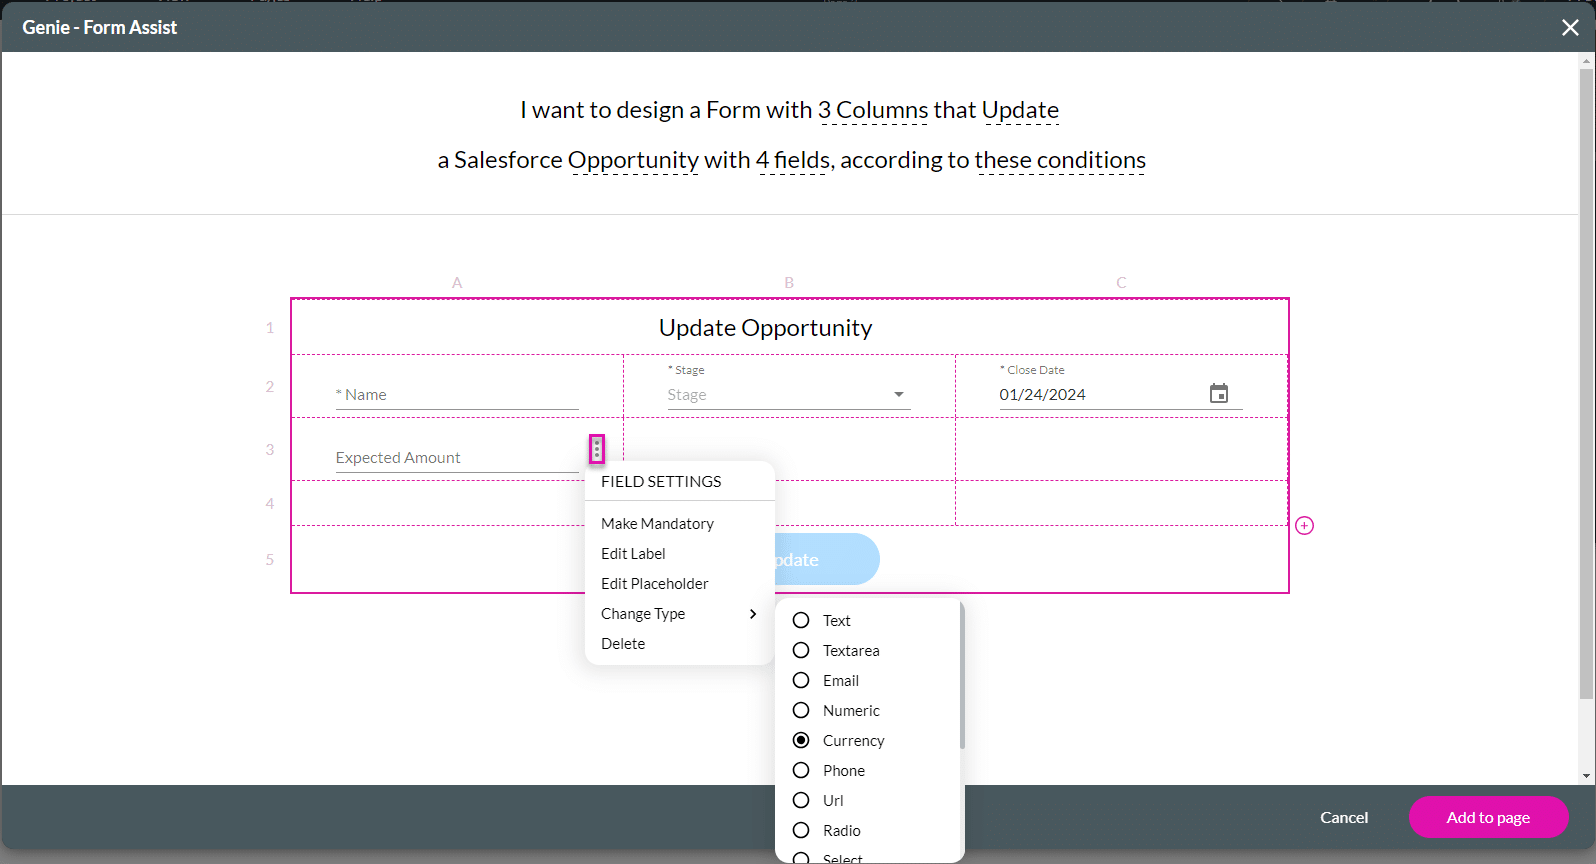
- Three fields are added for Opportunity.
- Use the Search field to find an object. The header row changes accordingly, adding some of the object’s mandatory fields to the form. For instance:
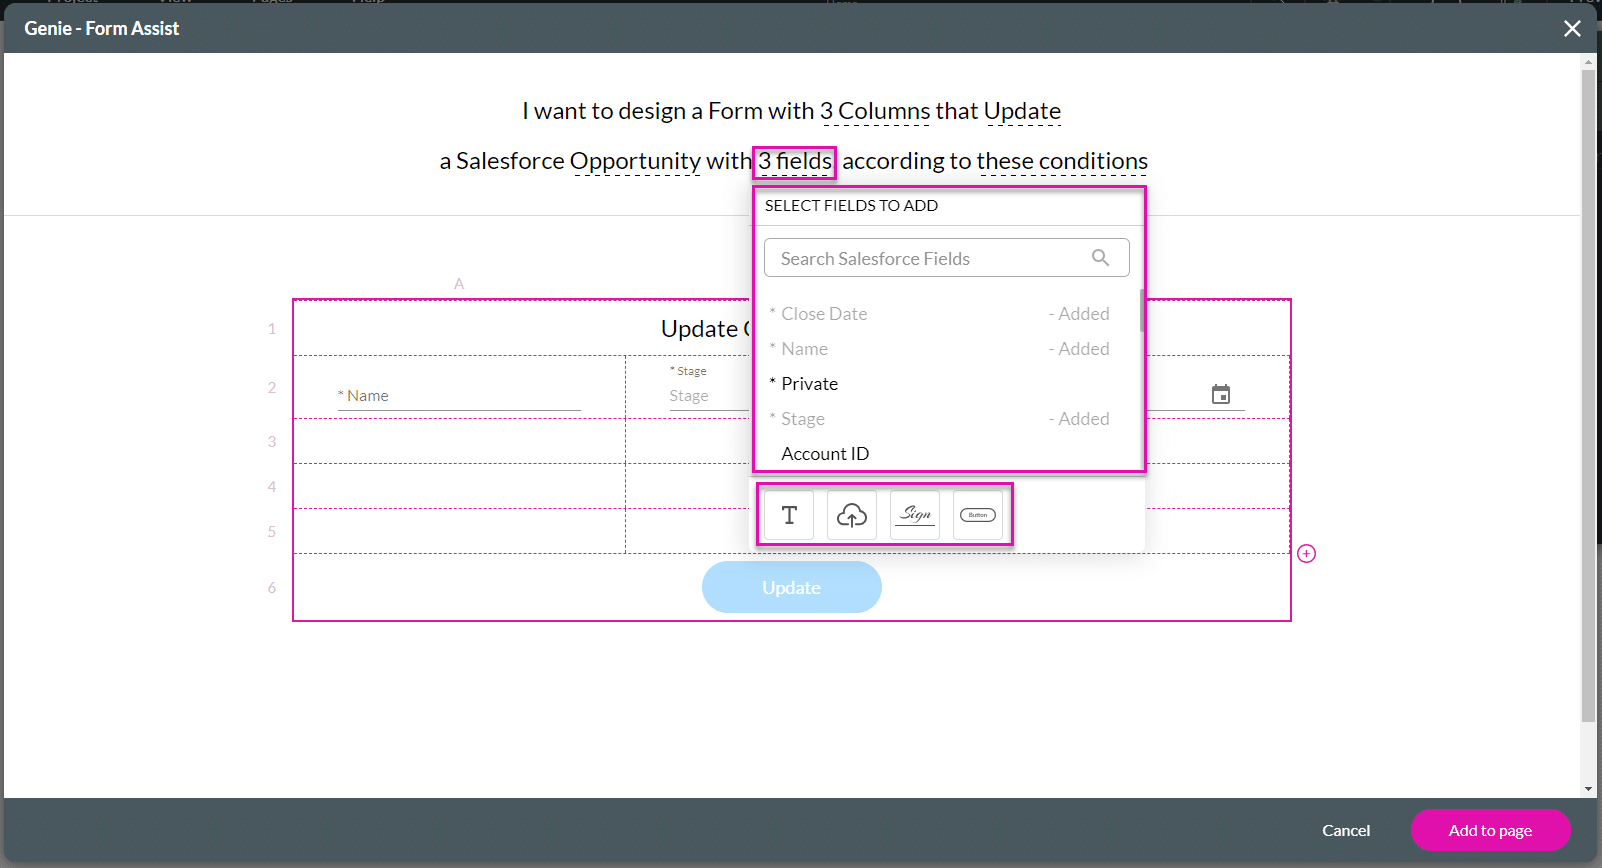
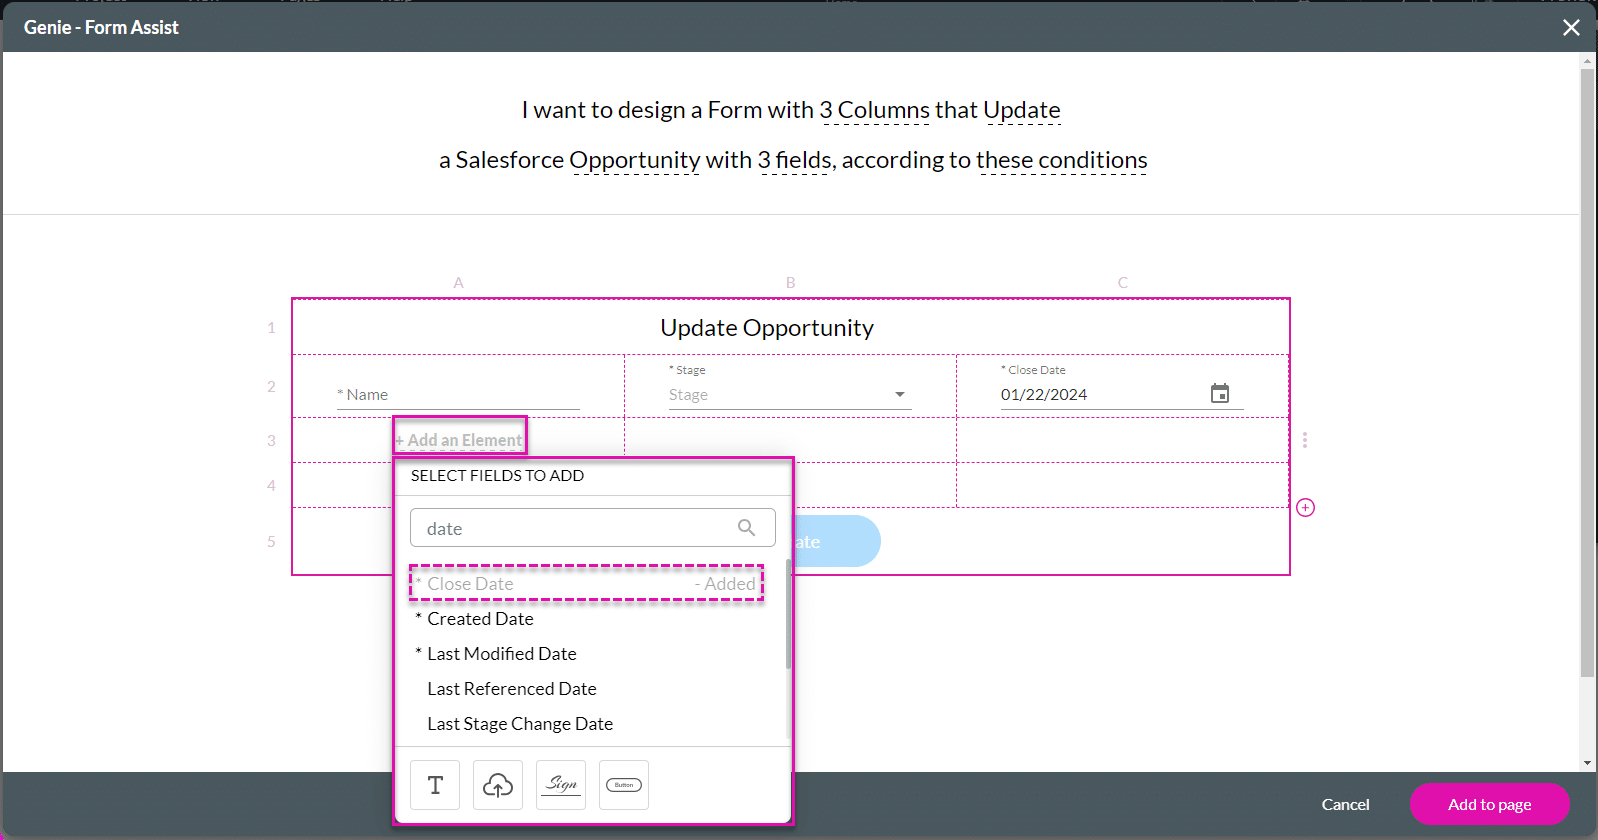
- Click the fields option to add more fields to the form. A drop-down list opens.
- Use the Search field to find more fields.
- Click an option to add it to the form.
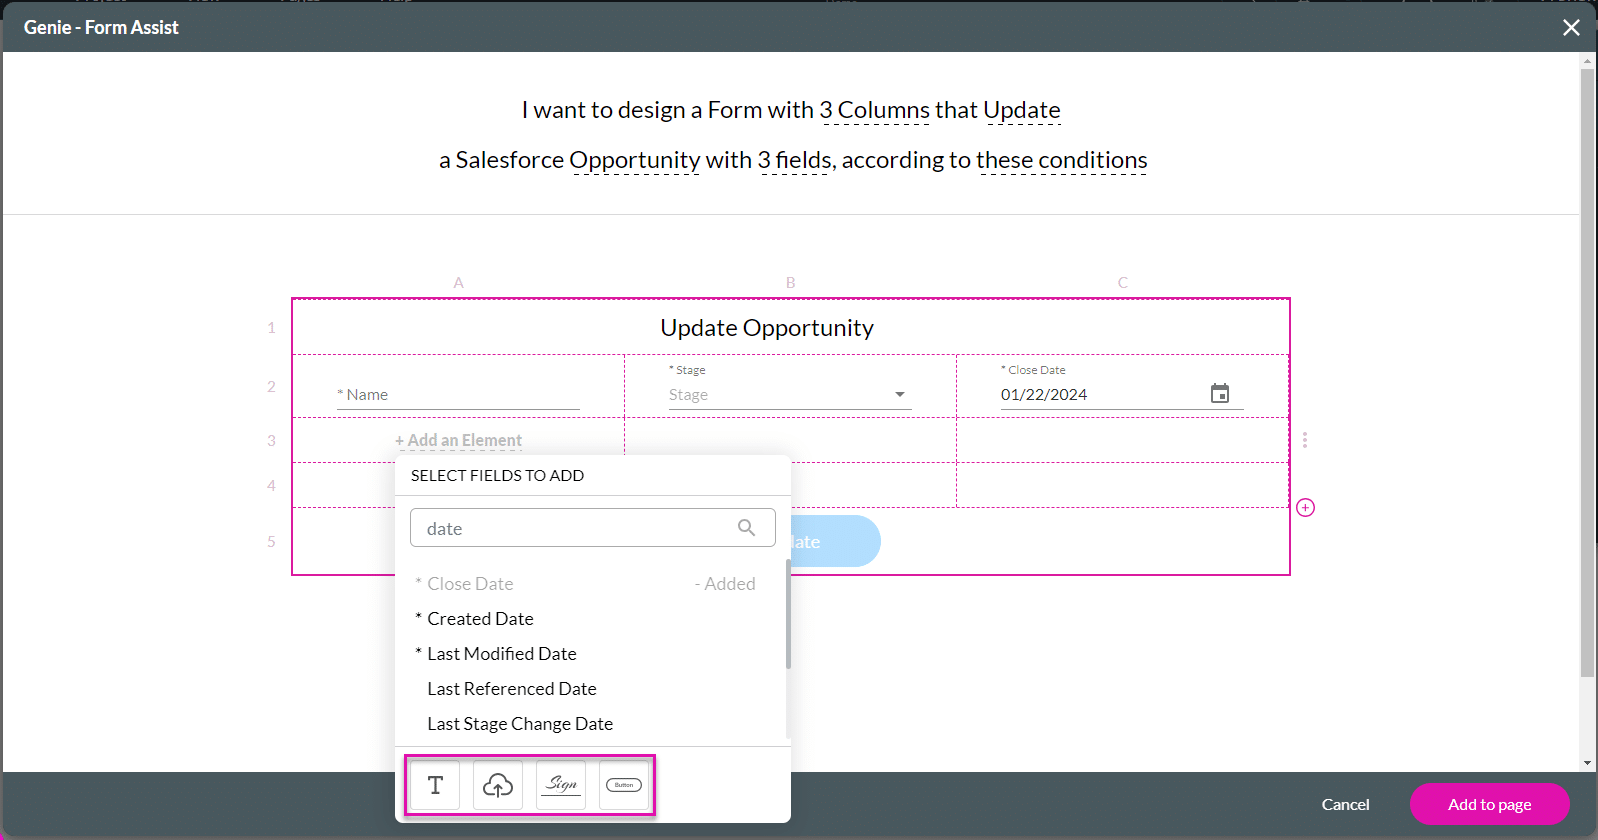
- Double-click the icons at the bottom of the drop-down list to add the following elements:
- Text
- File upload
- Signature
- Button
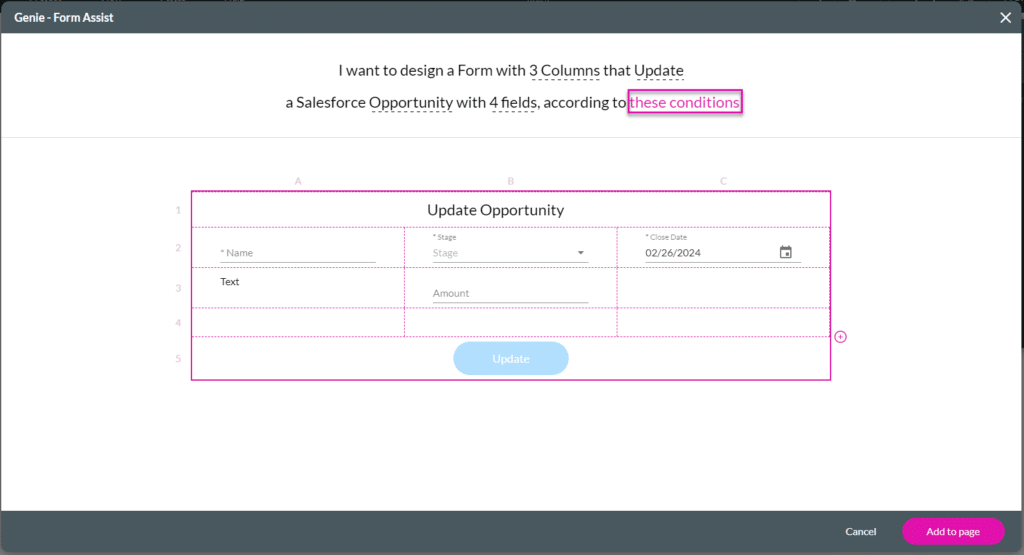
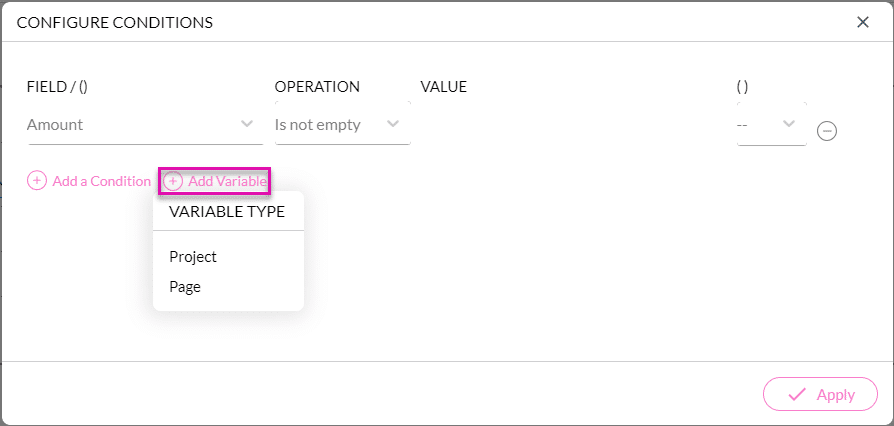
- If necessary, click the these conditions option to open the Configure Conditions screen.
- You can set conditions for Read, Update and Upsert actions.
- Refer to the Titan article on conditions.
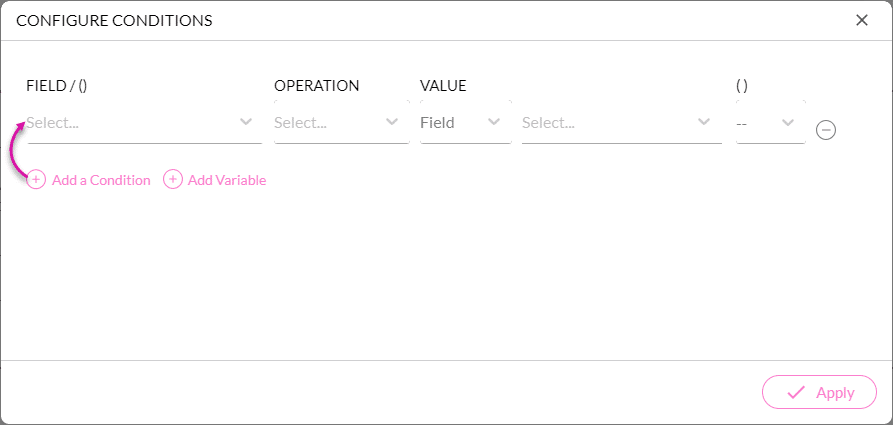
- Click the Add Variable option to add the following custom variables, if necessary.
- Click the Apply button.
- If necessary, click in a cell to add an element.
- Use the Search field to find Salesforce fields.
- There is an indication when an element has been added.
- All the mandatory fields are marked with an *.
- Use the Search field to find Salesforce fields.
- If necessary, click an icon to add an element to a cell:
- Text
- File Upload
- Signature
- Button
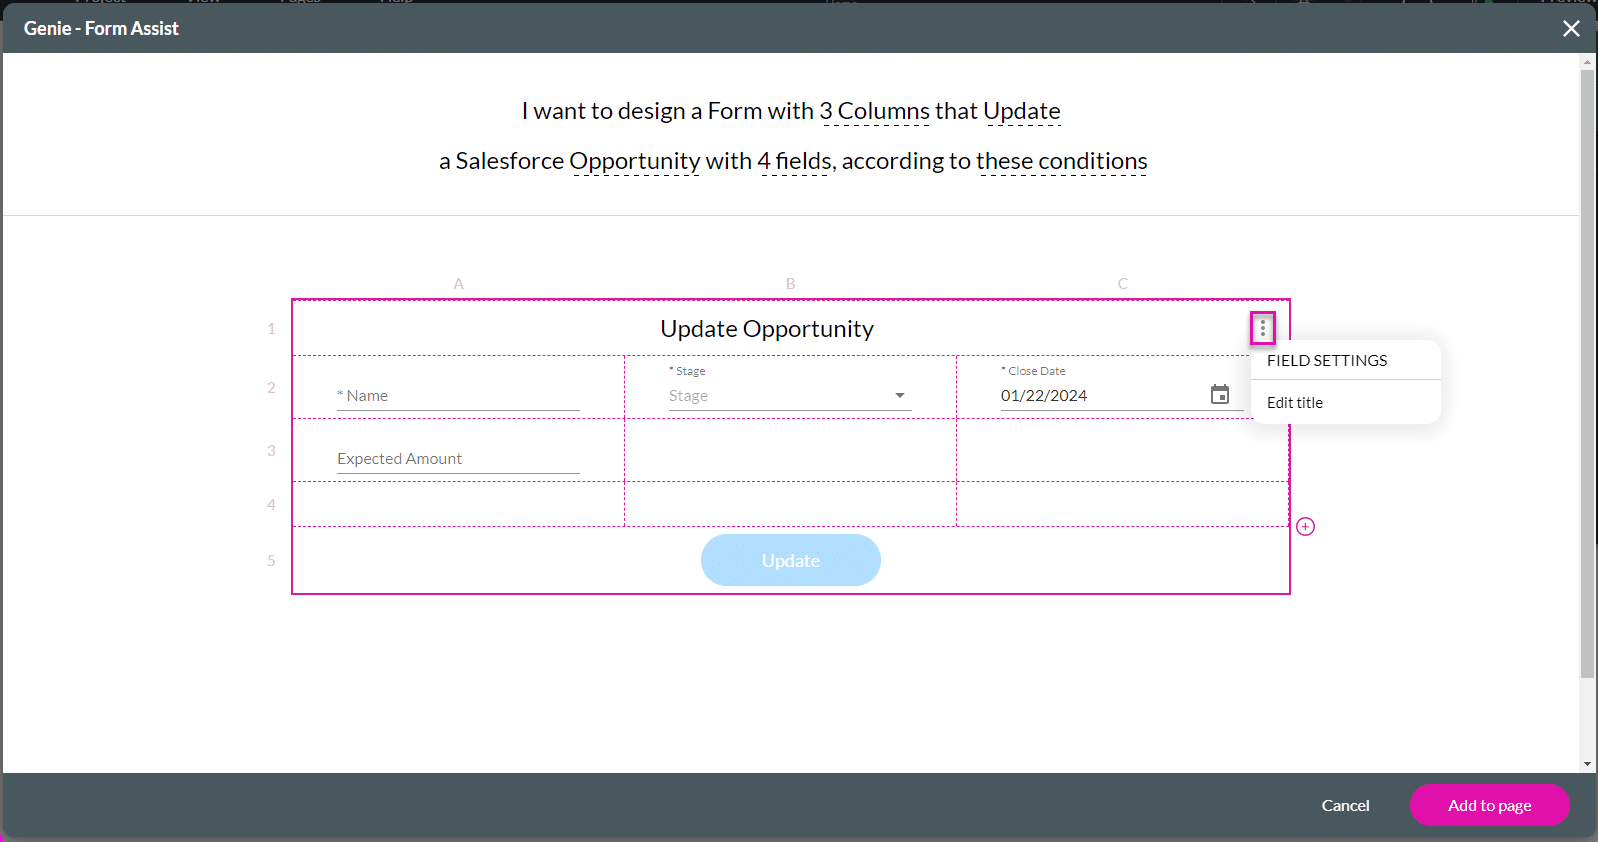
- Click the Kebab icon next to the title to do the following:
- Edit title:
- The Edit Title modal opens.
- Type a new title and click the Save icon.
- Edit title:
- Click the Kebab icon next to an element in a cell to do the following:
- Make Mandatory (for optional elements) or Make Optional (for mandatory elements)
- Edit Label
- The Edit Label modal opens.
- Type a new label and click the Save icon.
- Edit Placeholder
- The Edit Placeholder modal opens.
- Type a new placeholder name and click the Save icon.
- Change Type
- A secondary drop-down list opens.
- Click an option to select it.
- Delete. This will delete the element from the form.
- Click the Add to page button. The form is added to the canvas.
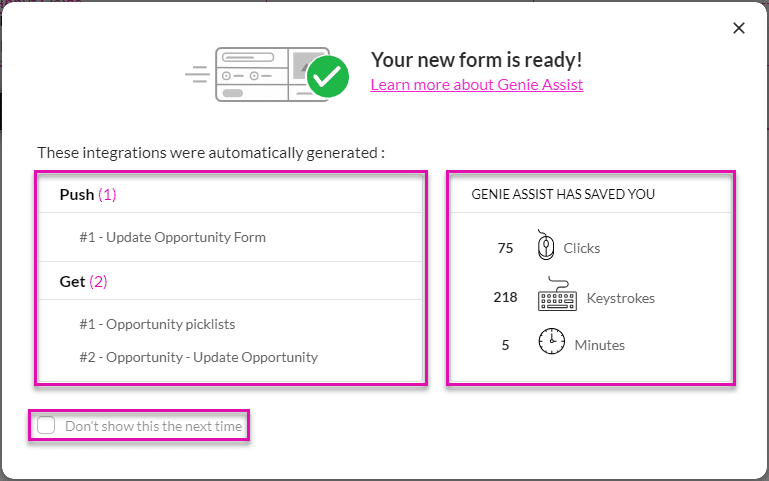
You are shown a summary toast message of the automatically generated Salesforce integrations, as well as the saved clicks, keystrokes, and time. You can also click the Don’t show this next time checkbox, and the toast message will not be shown again in the future.
- Click the x icon to close the toast.