

Enable Versions
Business Background
Versioning allows you to create and store multiple snapshots or iterations of your website. This allows you to revert to previous versions if needed and keep a record of changes for reference or collaboration purposes.
Track and manage changes made to the website over time.
Titan Solution
The Enable Versions option lets you save and manage your project versions in Titan. You can compare the versions to follow the project’s progress or revisit older versions. If necessary, you can revert to previous versions and export data about the version to a CSV file.
With Titan, you can also integrate and save versions directly in GitHub.
How to Guide
You can save versions before the project is published (when it is still a draft) and after it is published.
The following is discussed:
- Enable versions
- Manage project versions
- Alternatively, you can use GitHub to do version control.
- You can also view the version of a project from the Dashboard.
Enable versions
If you turn on the Enable Versions feature and click the Save icon on the project banner, a version will automatically be saved.
You also have the option to create committed versions where you can provide more details about the specific version. For committed versions, you must provide a detailed name and description. This allows for better version management.
Regularly saved versions are saved when the user clicks the Save icon, while committed versions require you to click the Commit Versions icon and supply the version with a name and description.
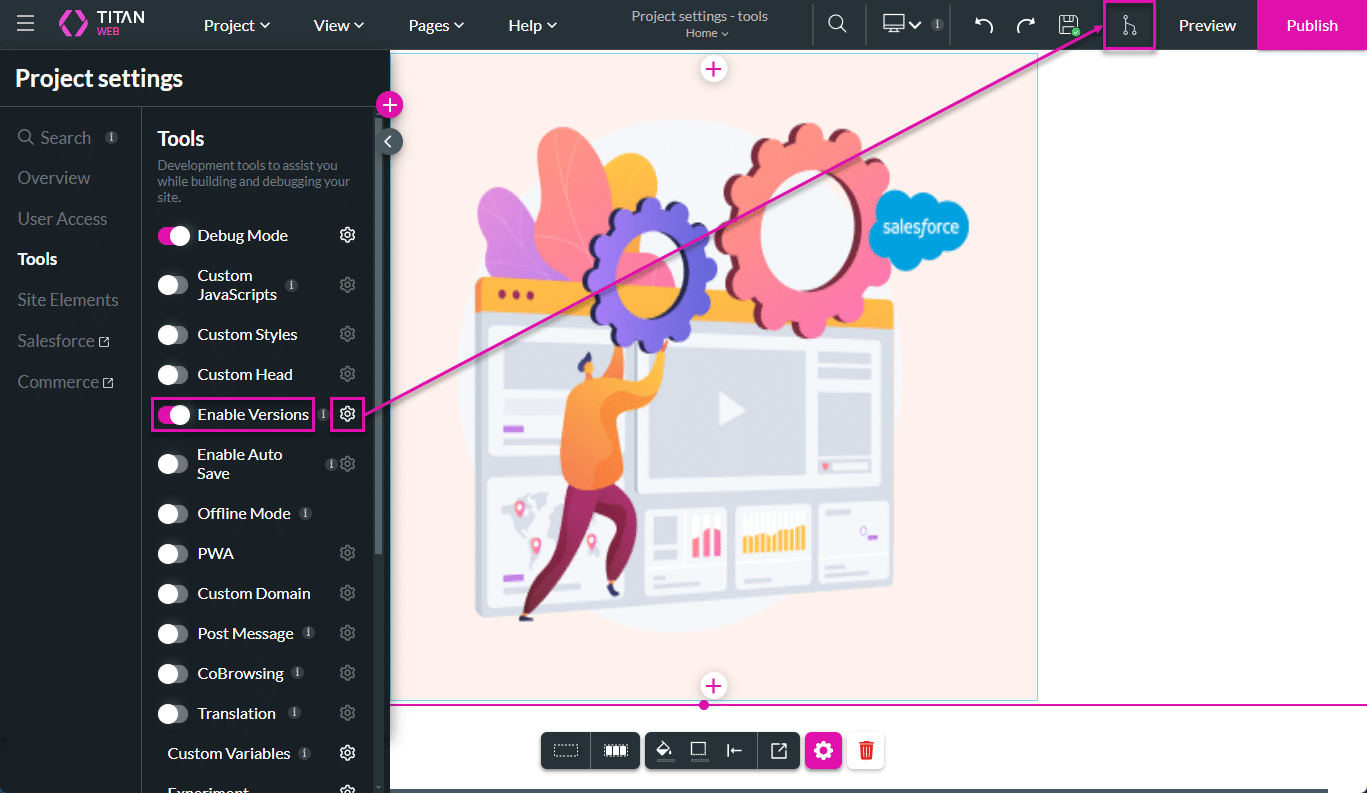
- Click the Gear icon on the Web project to open the Project Settings.
- Click the Tools option. The Enable Versions toggle switch is on by default.
- The Commit Version icon is shown on the Web banner.
Regularly saved versions
- A version will automatically be saved each time the Save icon on the project banner is clicked.
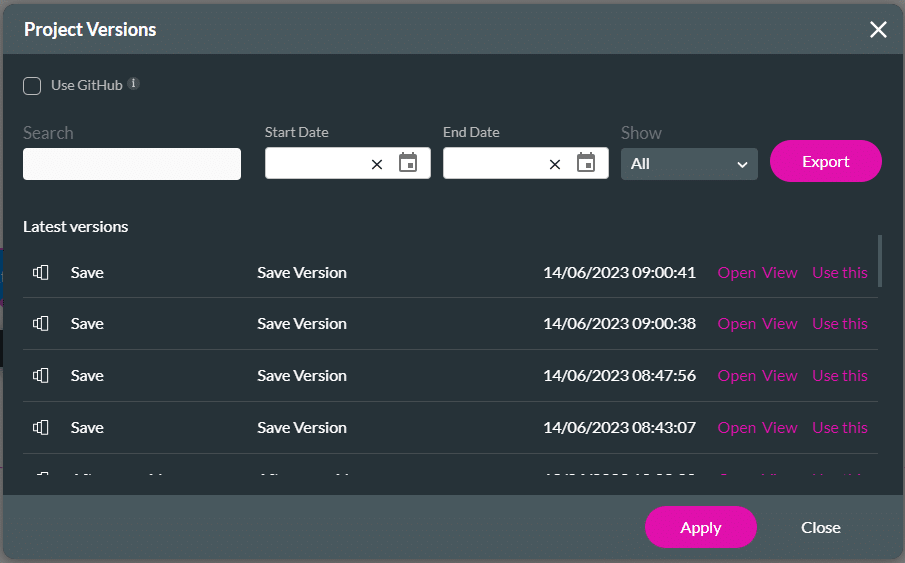
- You can view the saved versions by opening the Project Settings > Tools > Enable Versions Gear icon. The Project Versions screen opens.
Commit versions
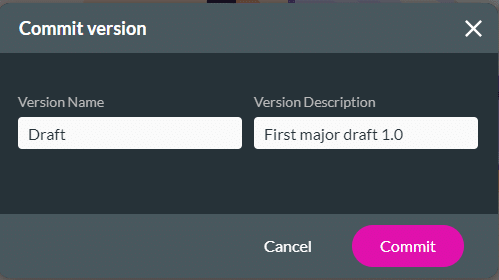
This option lets you provide a name and description for better version management.
- Click the Commit Version icon on the project banner. The Commit Version screen opens.

- Type a version name and version description.
- Click the Commit button.
Manage project versions
- Click the Gear icon on the Web project to open the Project Settings.
- Click the Tools option.
- Click the Enable Version Gear icon. The Project Versions screen opens.
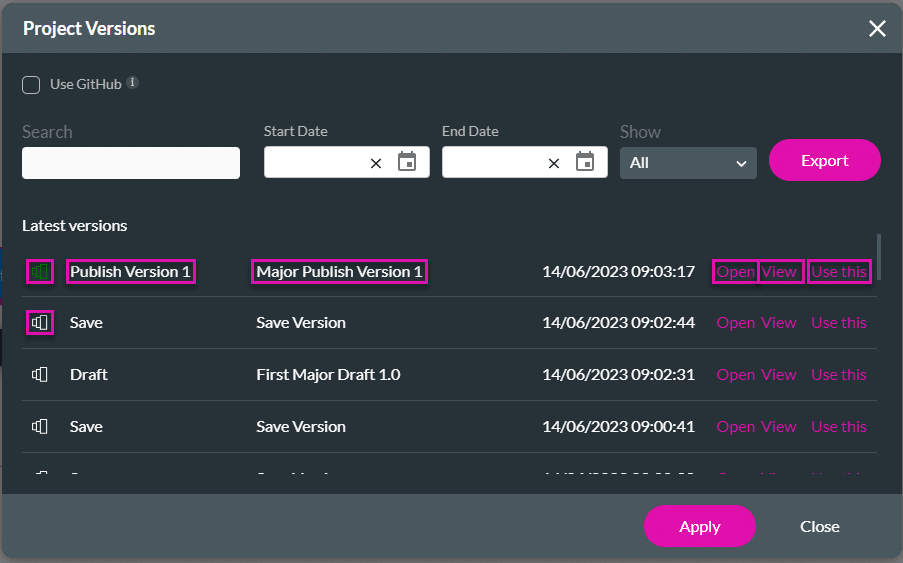
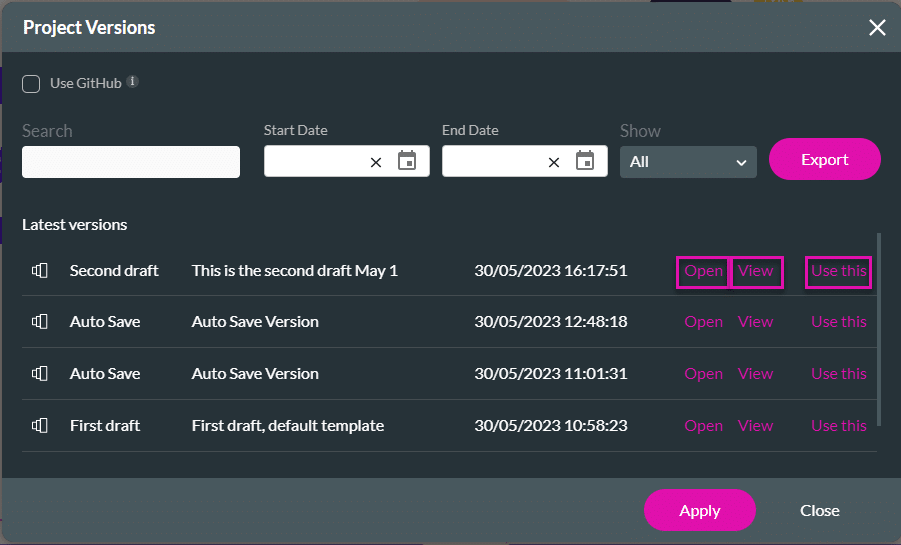
- Under Latest versions, the committed version name and description are listed with the exact time that the version was saved.
- When a project is saved by clicking the Save icon on the Web banner, the version doesn’t have a custom name and description.
- The latest published version has a green icon (compared to the white icon of other versions).
| Option | Description |
|---|---|
| Open | Click the Open option next to a version. That version opens in a new tab. – This project can only be viewed and compared to the currently open project. – This version of the project cannot be Saved, Previewed or Published. 
|
| View | Click the View option to open the View Version screen. The following information is shown: – Name – Description – Date in the formatDD/MM/YYYY, hh:mm AM or PM – Runtime version (the Titan software version) – Published at (only when the project has been published) – Email address of the user who published (only when the project has been published) – Email address of the user who committed the version 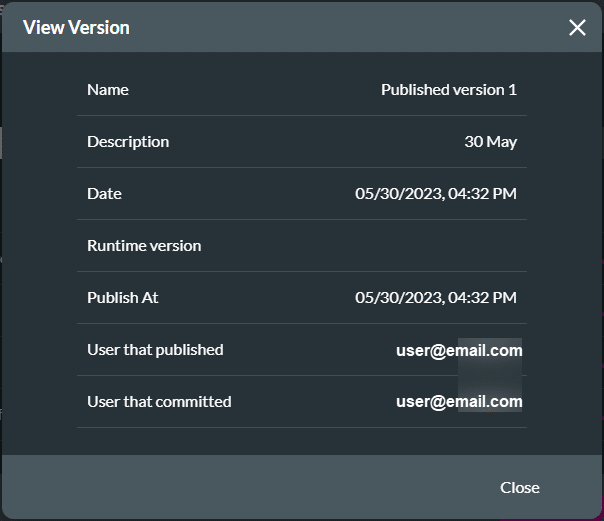
|
| Use this | Click the Use this option to revert to the selected version. |
- Take note of the following on the Project Versions screen:
- Use the Search field to search for specific versions.
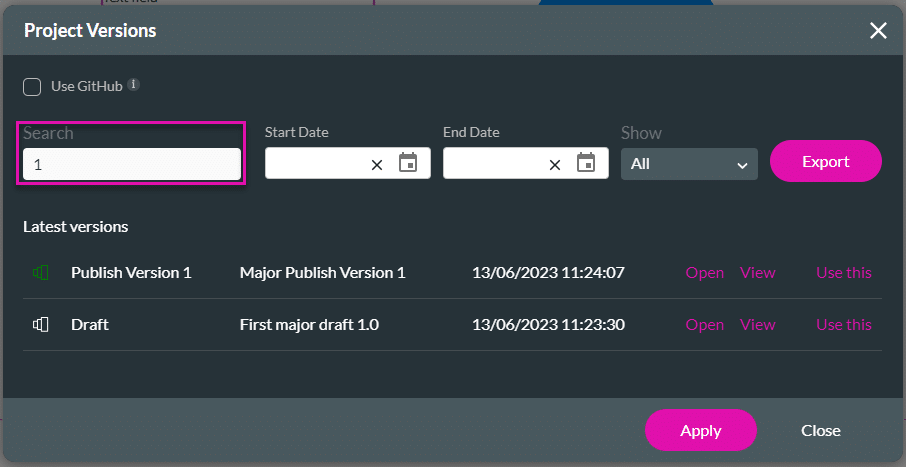
- Use the Start Date and/or End Date fields to search by date.
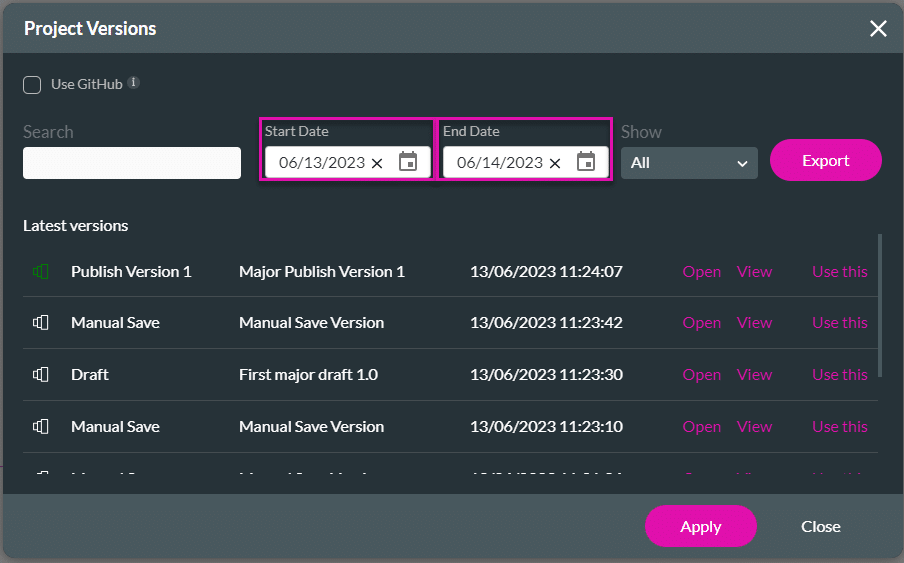
- Use the Show drop-down list to show the following:
- All
- Commit
- Save
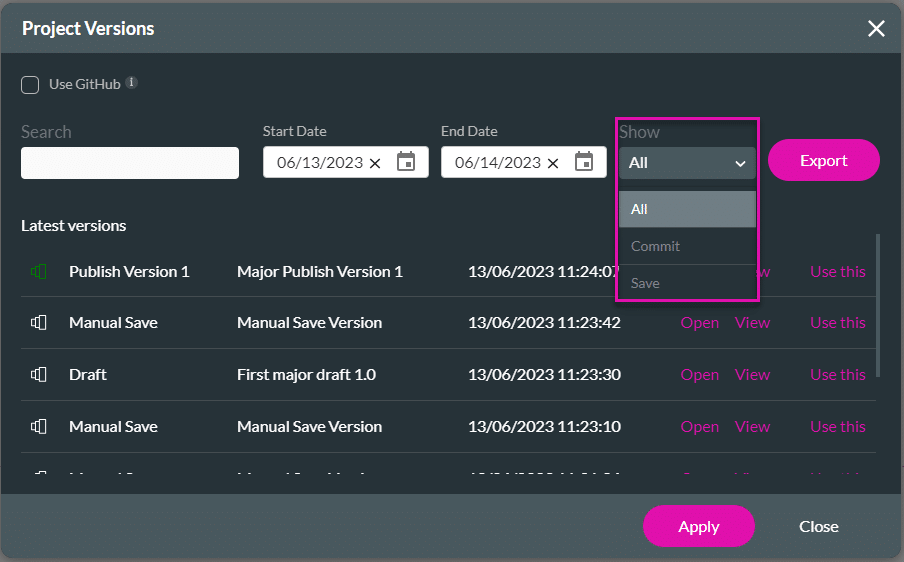
- Click the Export button to export the data to a CSV file with the following information: ID, Time, Name, Description, Action, Session User, Published User, App Version, and Published At.
Use GitHub for version control
Prerequisite:
Browse to the Titan Dashboard > Settings > GitHub > Authenticate button.
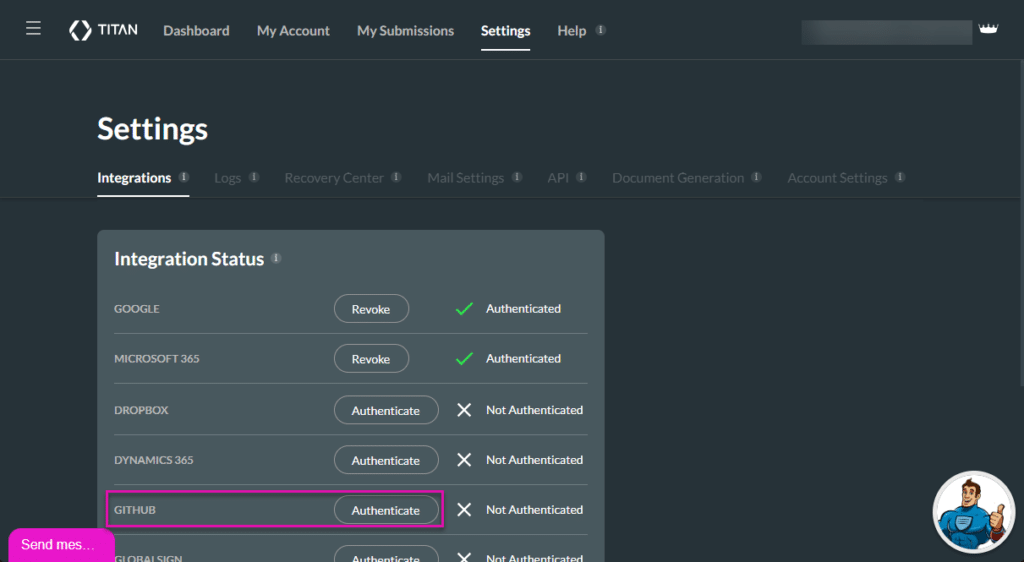
Ensure that you have enabled and authenticated GitHub to track your versions using GitHub.
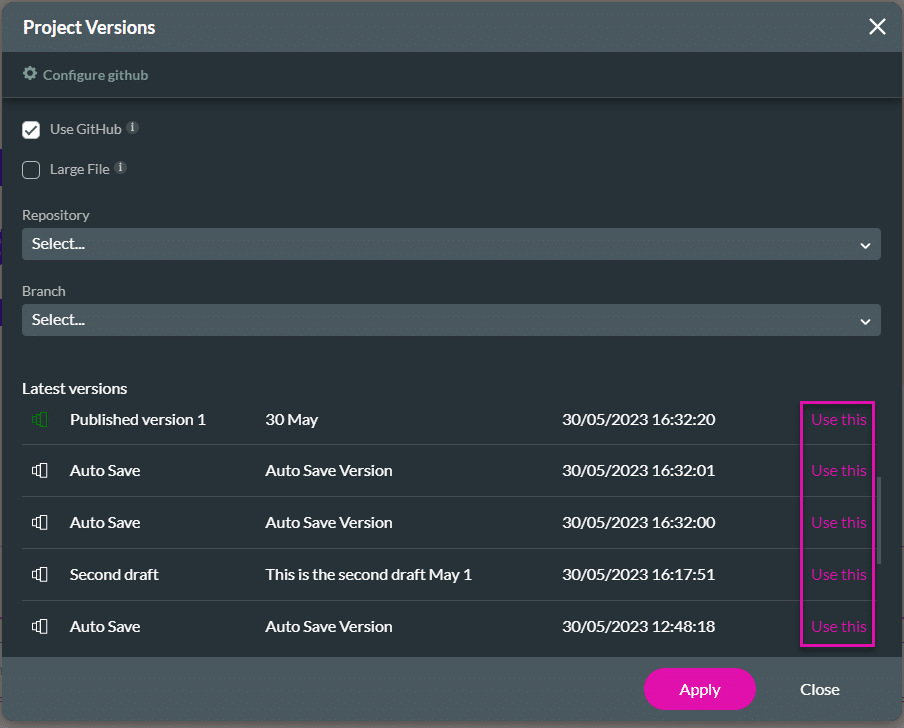
- Click the Use GitHub checkbox to track your versions.
- Click the Large File checkbox.
- Select the Repository where you want to save your versions from the drop-down list.
- Select the Branch from the drop-down list and click the Apply button.
When you use GitHub, the screen changes and you can only use a version.
The Open and View options are only available when you use the Titan option for version control.
View the version from the Dashboard
- On The Dashboard, click the project’s Kebab icon and click the View versions option. The Project Versions screen opens.
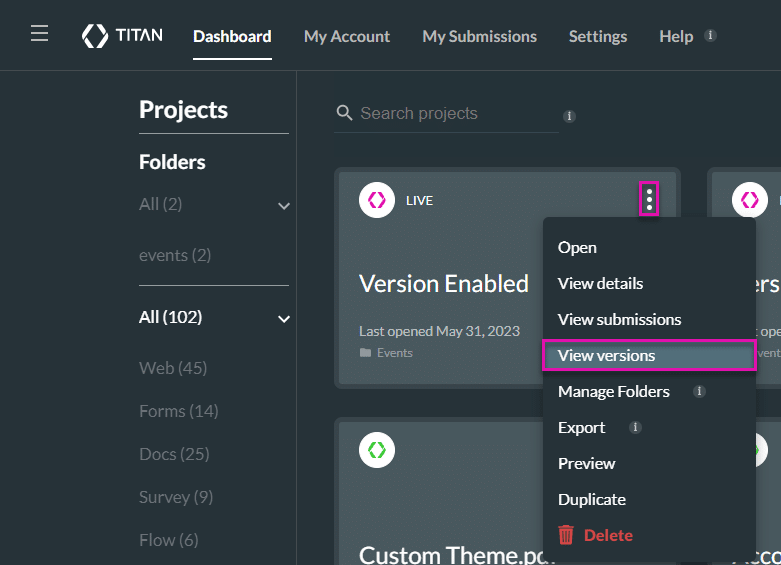
- Use the Open option to view the project in a new tab.
- Click the View option to view details about the version.
- Click the Use this option to revert to the selected version.
Learn more about Titan’s native integration with the Salesforce Experience Cloud.
Easily design, deploy, and measure custom web applications directly from Salesforce using Titan’s drag-and-drop web page builder.