

Create and Store Submissions
Business Background
Store information as a draft or review the contents before saving it to Salesforce.
Titan Solution
Titan lets you temporarily save information as a draft. You can review the content before saving it to Salesforce. The submission will be saved in your Salesforce under the Titan-managed package submission object and will not require any customization from the organization’s side. All these are pre-built in the product and the application.
Use the Store Submission JSON option to save the file to a custom object in Salesforce, or an external location, for instance, Google Drive.
How to Guide
Storing a submission allows the administrator to choose what will be saved and when. The submission will be saved in your Salesforce under the Titan-managed package submission object. It will not affect other Salesforce data.
Prerequisites:
Gear icon > Project Settings > Tools > Custom Variables
- Create a custom static variable for this option that will be used in the Submission ID field, for instance, called “submissionid.”
- Create a custom static variable for the JSON file that will be sent to Salesforce if you want to use that functionality.
- Create a custom system variable. Select the option called “Project ID.” The project ID is used for added security.
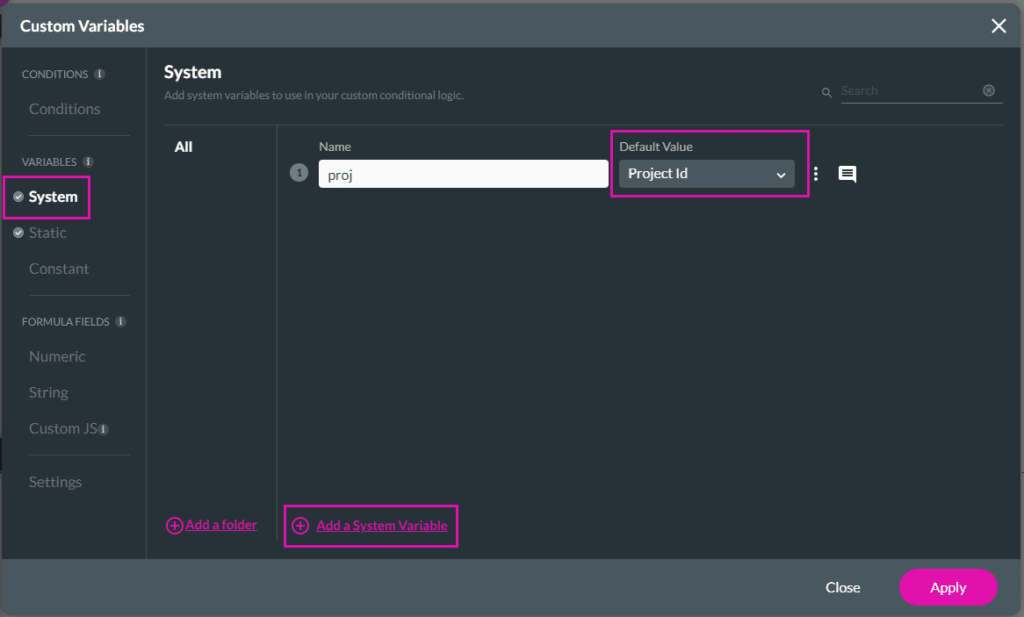
The Submission ID and Project ID parameters will be used when loading a submission.
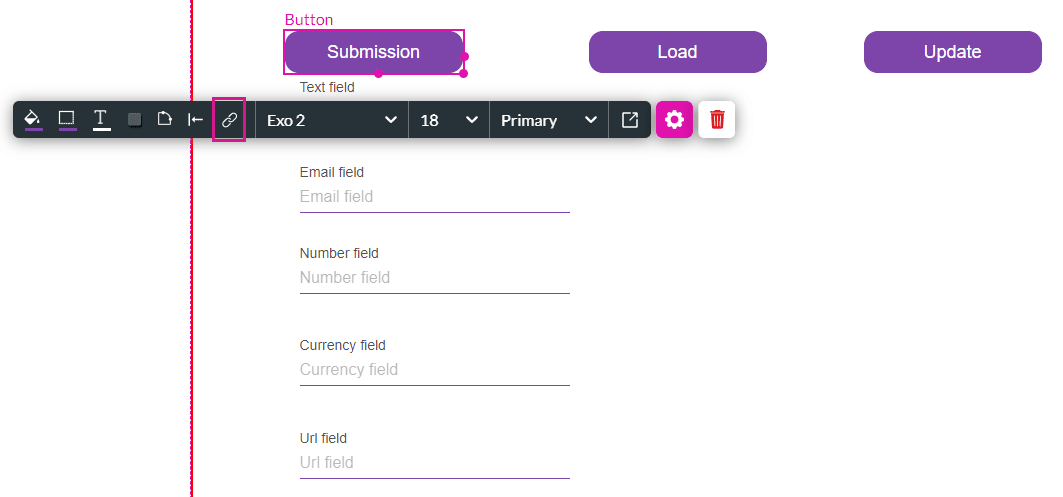
In this example, we have a form that a customer can complete, and a Submission button that will save the form to a draft.
- Configure the On Click Action on the button. The On Click Action screen opens.
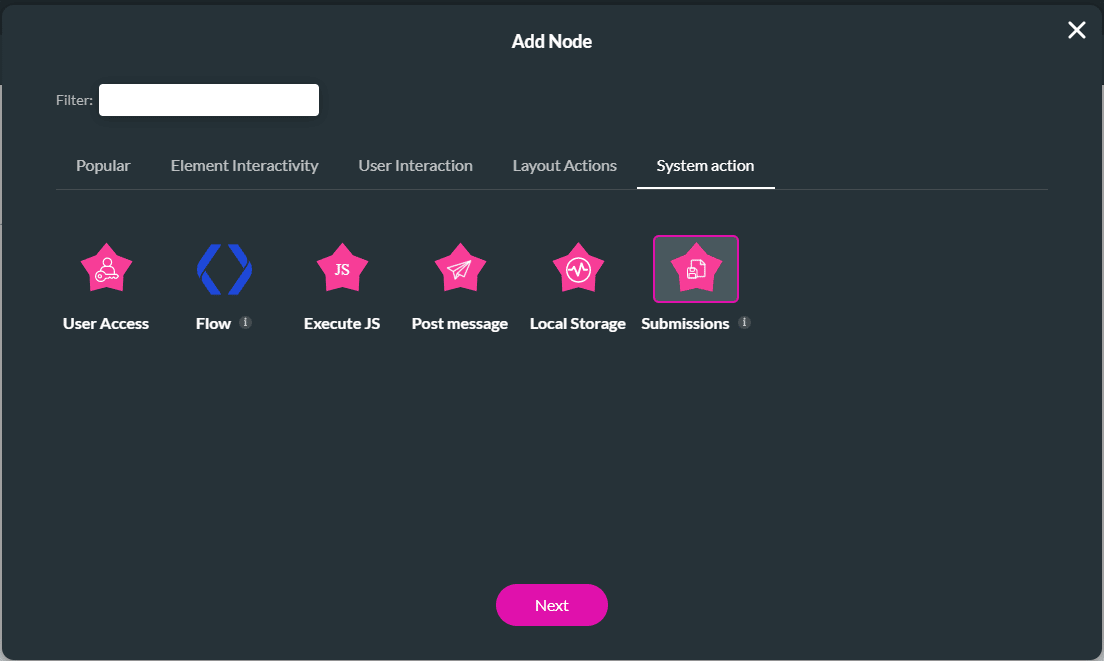
- Click the + icon to add a node. The Add Node screen opens.

- Select the Submissions option and click the Next button. The Add Node/Submissions screen opens.
- Select the Store radio button.
- Select the Create radio button.
- Use the What would you like to store? drop-down arrow to open the list. The options are as follows:
- On Page
- From Strip
- Field
- Field Group
- Click an option to select it. The screen changes as follows:

| Option | Screen |
|---|---|
| On Page | 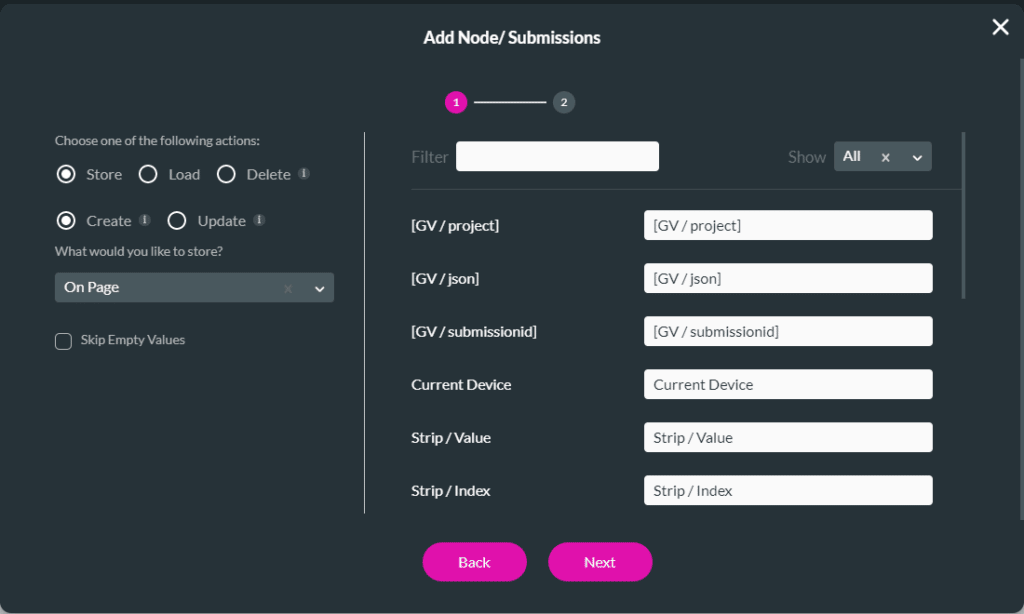
|
| From Strip | 
|
| Field | Use the Fields to Store drop-down to select a field. You can only select one field.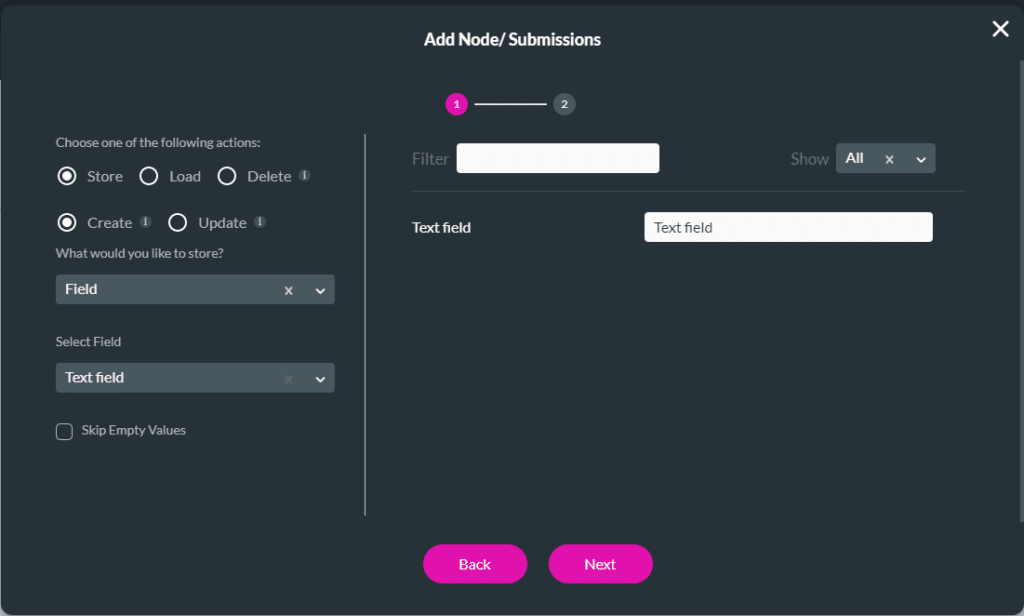
|
| Field Group | Use the Fields to Store drop-down to select fields. You can select multiple fields.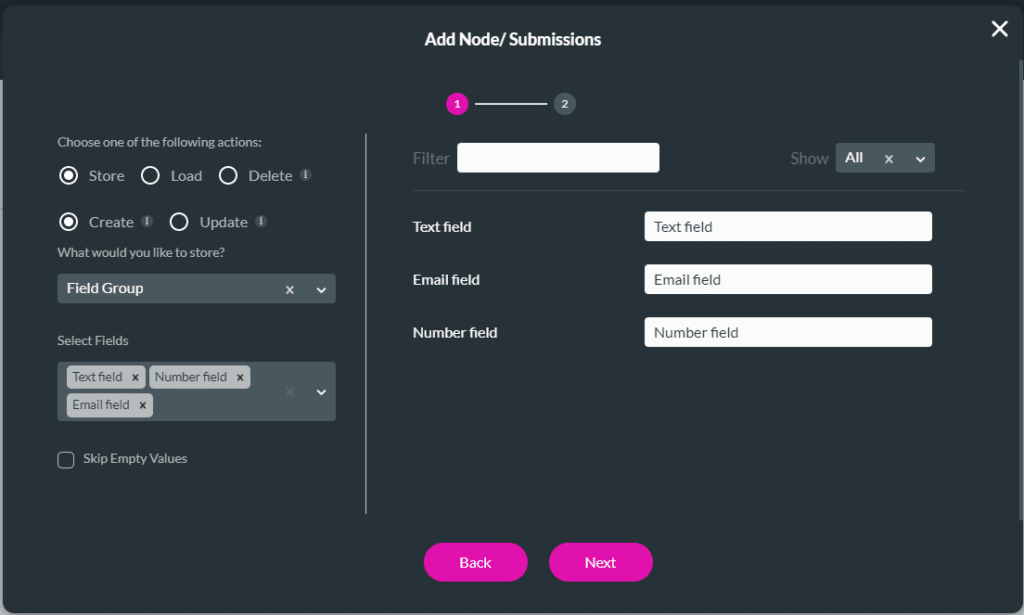
|
In this example, On Page will be used:
- Select the On Page option. The parameters for On Page are shown on the right side of the screen.
- Enter a parameter name in the text field. This is the name under which the information will be saved in the submission. When loading the fields, you must state which parameters to load and reference this name.
- If necessary, click the Skip Empty Values checkbox. Empty values will not be added to the submission.
- Click the Next button.

- Use the drop-down list to select the location to store the submission ID. The submission ID is the variable needed when you load the submission. It will not be able to load if this variable is not correct.
- Additionally, use the drop-down list to select the location to store the submission JSON.
- The data from the submission is saved to a JSON file that can be saved to Salesforce.
- It is saved to a variable and can be pushed to any file, for instance, Accounts.
- Use this if you don’t want to save the file to the Titan object in Salesforce but rather to a custom object.
- You can save it externally, for instance, to Google Drive.
- Add the Salesforce action after the Submissions action on the On Click Action screen to push the file to Salesforce or the external file location.

If you do not enter a unique name, the field ID of the element will be used.
- Add a tag if necessary.
- Click the Insert button. The Submissions Node is added to the On Click Action screen.
- Click the Apply button.
View the created submission
You can see whether the submission was successful:
- Browse to the Project Settings and select the Salesforce option.
- Select the Integration Logs option and then click the ContentVersion (create) – Record ID link.

The JSON file opens via Salesforce, for instance:
