

Columns
Description
The Columns option is available for the tables, power tables, and list views. This option allows you to change the structure and format of the displayed information.
How to Guide
Note:
Prerequisite:
Configure a power table to the Web project.
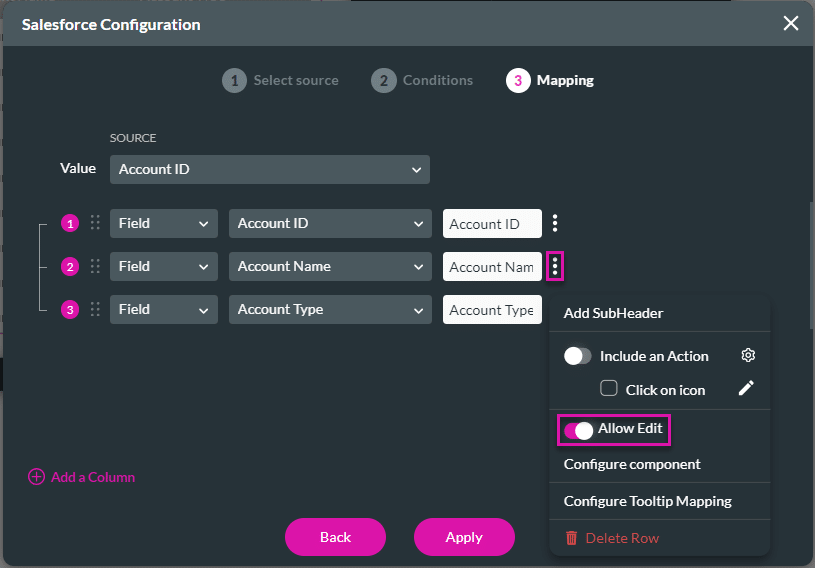
- Before clicking the Apply button, click the Kebab icon next to the column you would like to edit.
- In this example, the toggle switch to enable the Allow Edit option is on for the Account Name column.
- This will give more options for the Column configuration:
- Mandatory
- Enable Clear Icon
- Click the Apply button.
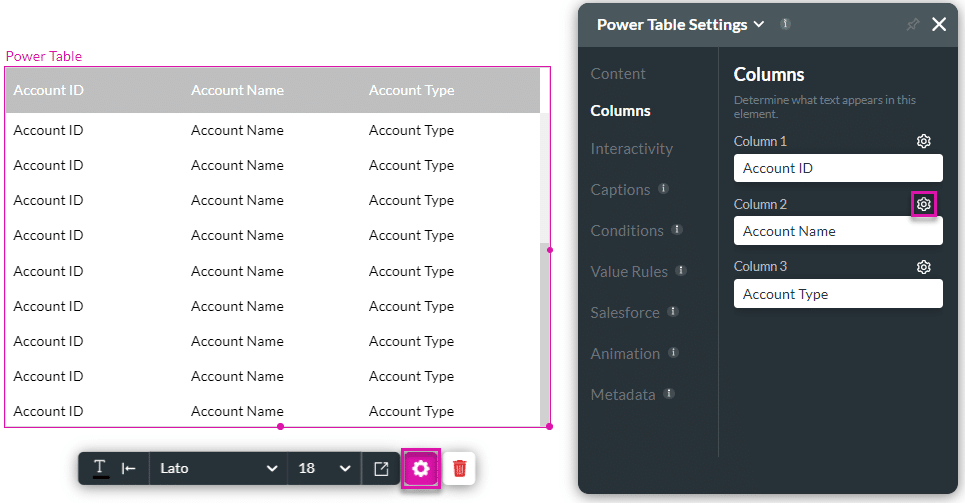
- Click the power table settings Gear icon. The Power Table Settings screen opens.
- Click the Columns option and click the column Gear icon. The Column Settings screen opens.
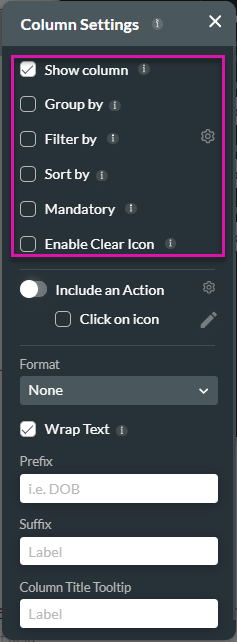
- Click the Show Column checkbox to show the column.
- Click the Group by checkbox to group items according to category.
- Click the Filter by checkbox to filter items using a search function.
- Click the Sort by to arrange items according to type.
- Click the Mandatory checkbox to mark a column as required.
- This option is only available if the column can be edited.
- Click the Enable Clear icon to add an X icon in the editable field.
- This will clear the contents.
Warning:
Use the Enable Clear Icon option with caution, as the information will be permanently deleted in Salesforce.
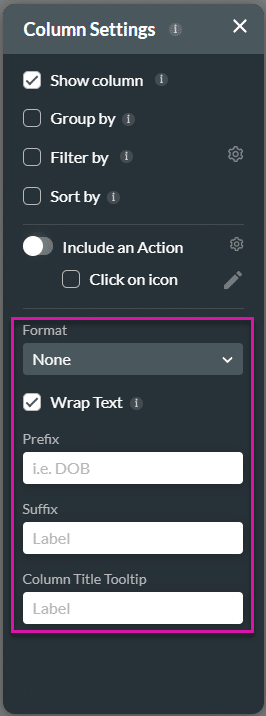
- Enable the Include an Action option to configure on-click actions by selecting the Gear icon.
- Select the Click on icon checkbox and click the Edit icon to change or add an icon.
- Type the Aria Label in the field. This is the text that will be read by screen readers and assistive technology.

- Use the Format drop-down list to select an option, if necessary.
- Select the Wrap Text checkbox to fit text in a column.
- Type the Prefix and Postfix in the relevant fields.
- Type the title in the Column Title Tooltip field.
Hidden Title
Was this information helpful?
Let us know so we can improve!
Need more help?
Book Demo