

Titan Sign SmartV
Business Background
Website security is more important than ever.
- Authentication and verification of users allow you to limit access to webpages that may contain protected information to intended users only.
- It is important that your users can verify themselves quickly and easily, providing greater security and improving the user experience. This will save costs and protect your business effectively.
- Protect your content from data breaches and ensure your customers’ data is safe.
Titan Solution
- You can add smart validation to your Sign projects. Smart validation adds a double verification to your documents. You can add a one-time password or two-factor authentication (2FA). This is safer than using just an email and password method of verification.
- With SmartV, you can add additional protection to your Sign project. Users will have to authenticate themselves before accessing the document.
- The verification is sent to Salesforce, from where is can be sent via email or SMS, for instance.
How to Guide
Follow the steps:
Add SmartV to your Sign project
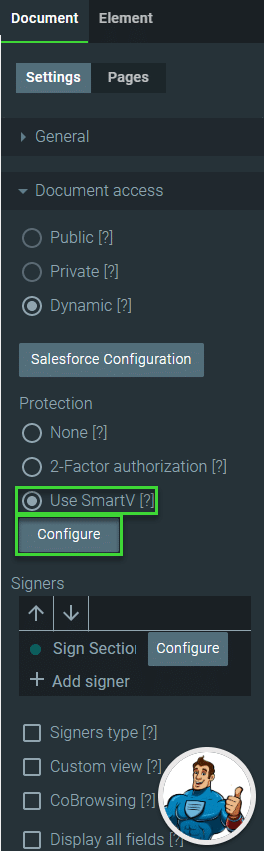
- On the panel on the right of the screen, select Settings.
- Select the Document Access option to expand the options.
- Select the SmartV radio button and click the Configure button. The Configure SmartV screen opens.
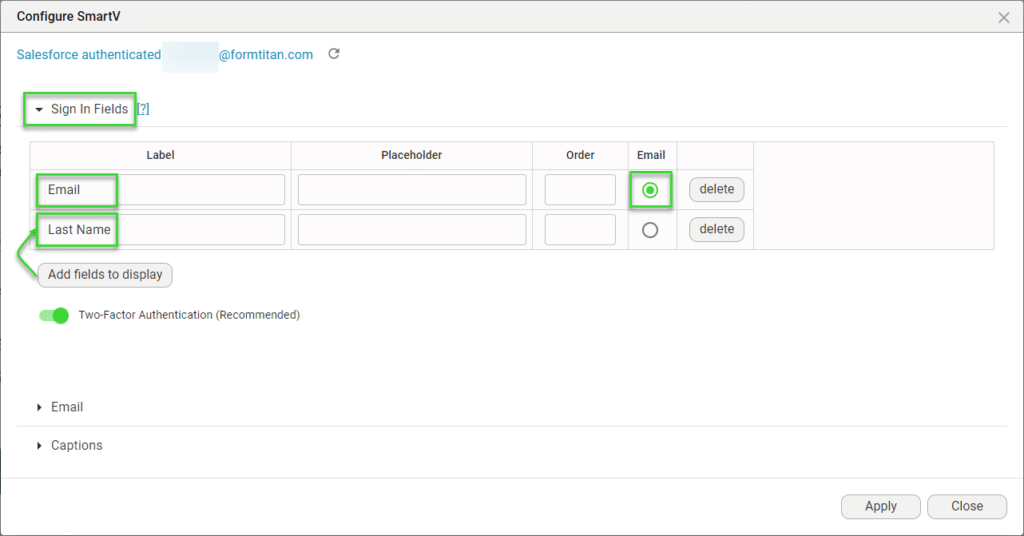
- Add the labels for the SmartV option on the Sign In Field screen. These are the fields that the user will have to complete to access the document.
- Click the Add fields to display button to add more fields.
- In this example, email and last name are used.
- Use the Email radio button to mark a field as an email.
- Use the Two-Factor Authentication toggle switch to set the 2FA on. This is recommended.
- Click the Add fields to display button to add more fields.
You must create a six digit field in Salesforce to store the two-factor authentication. You will map this field here.
- Click on the Email option to open the email options.
- Default: This is the default email that the user will receive.
- Use the HTML toggle switch to activate the rich text editor if necessary.
- The email will be sent from Titan.
- Create OTP without Email: You can trigger the one-time password via Salesforce automation.
- Titan will not send an email.
- The one-time password is saved in Salesforce and must be sent to the signer, for instance, using SMS.
- Send Email via SF: Send the email using Salesforce.
- Click the Configure button. The Send via Salesforce screen opens.
- Use the drop-down list to select the email.
- Select the required options, if necessary:
- Use From Titan mail server as fallback
- Create Email Message in Salesforce
- Default: This is the default email that the user will receive.

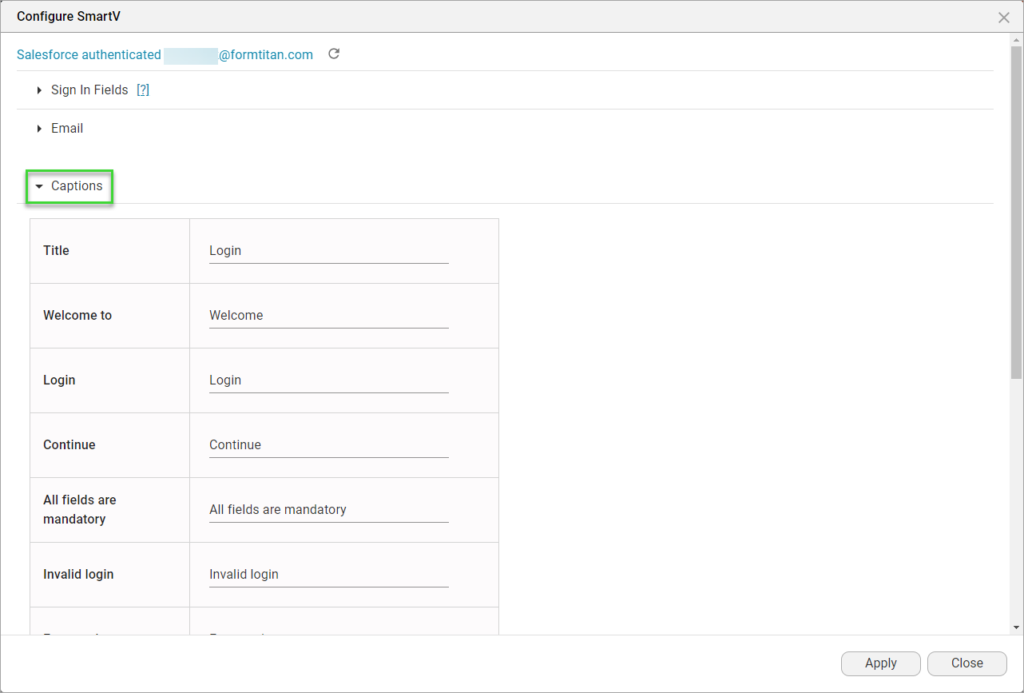
- If necessary, change the captions.
- Click the Apply button.
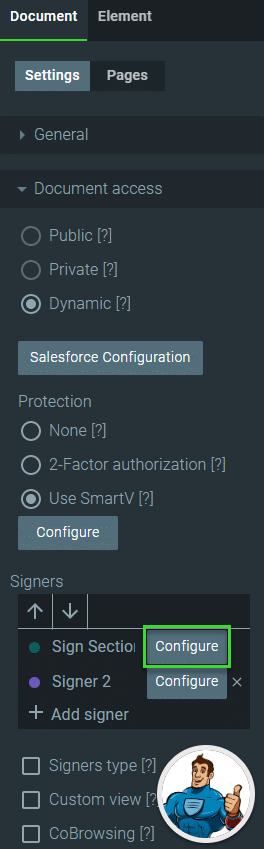
Add the SmartV to the signers
- Click on the Configure button to configure the signer/s. The Get From Salesforce screen opens.
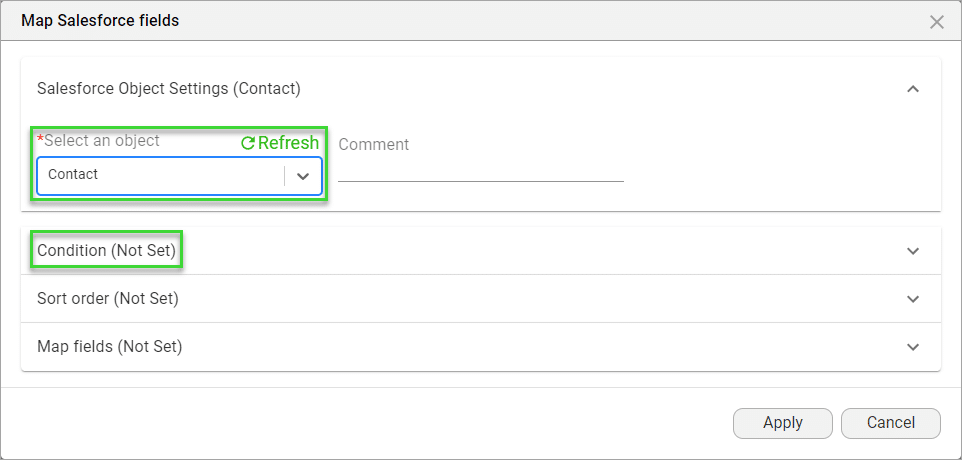
- Click on the Add object button. The Map Salesforce fields screen opens.

- Select the object from the drop-down list. This is the object that contains the signer’s contact details. The Conditions drop-down list is added to the screen.
- Click the Conditions drop-down list. The list expands.
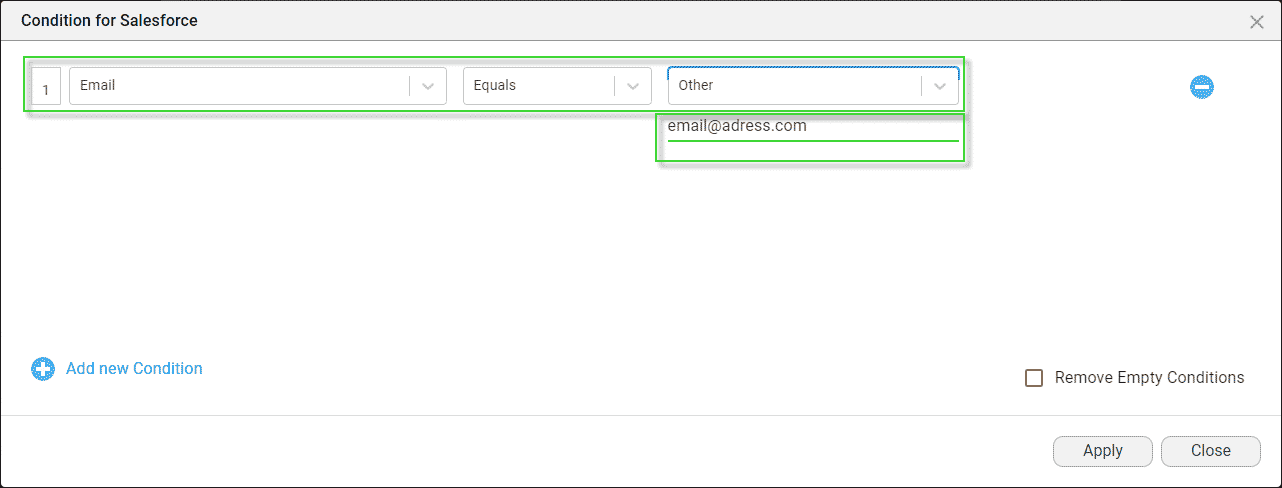
- Click the Set Conditions button. The Conditions for Salesforce screen opens.
- Select the condition that will filter your signer.
- Click on the Apply button. The Conditions for Salesforce screen closes. The status of the Conditions has changed to Is Set.
- Click on the Map fields drop-down list. The list expands.
- Click on the Set Mapping button. The Salesforce mapping screen opens.

- Select the First Name, Last Name, and Email from the Salesforce field drop-down lists.
- Select the SmartV code, Email, and Last Name from the Salesforce field drop-down lists.
- The SmartV Verification Code is saved to the dedicated field you added in your Salesforce.
- Click on the Apply and Finish button. The Salesforce mapping and Map Salesforce fields screen close.
- Repeat the steps until you have added all the signers you need.
The fields used to configure the SmartV must be unique. If there are multiple records with the same last name and email fields, there will be multiple matched records and the users will not be able to log in.

The signers will receive an email with a link to the document. When they click on the link, a web page will open where they will have to enter the parameters that were configured (for instance, email address and last name). If the correct email and last name are given, the screen will change and the signer will have to enter the verification code that was sent via email.
Interested in our Titan/ Salesforce Integration? Read about Titan’s Salesforce Forms.