

Auto Reminder
Business Background
Remembering to send reminder emails can be tedious; therefore, automated reminder emails save time and effort.
Titan Solution
You can configure automated email reminders in a few clicks.
How to Guide
- Under Document, select the Settings option.
- Click the Limit/Reminder option to expand the list.
- Click the Signer Auto Reminder checkbox.
- Click the Configure button. The Auto Reminder screen opens.

- Type a number in the Remind after field.
- If necessary, click the drop-down list to configure a repetition for the reminder. The default option is No Repeat.

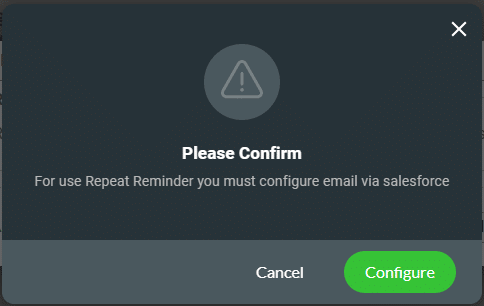
- Click the Repeat option. The Confirmation modal opens.

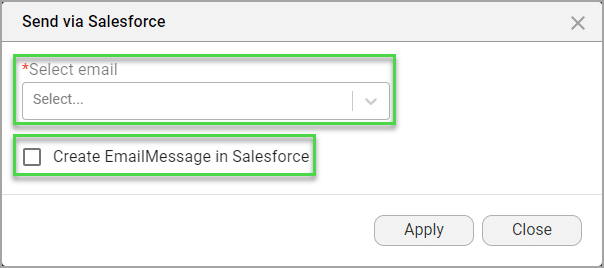
- Click the Configure button. The Send via Salesforce screen opens.
- Select the email from the drop-down list.
- If necessary, click the Create Email Message in Salesforce checkbox.
- You must then configure the email message in Salesforce.
- Alternatively, configure the reminder email in Titan Sign.
- Click the Apply button.
- Type a number in the field to set the number of repeats.
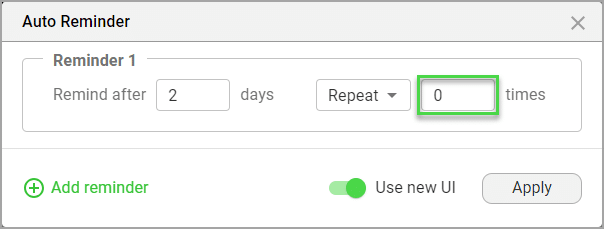
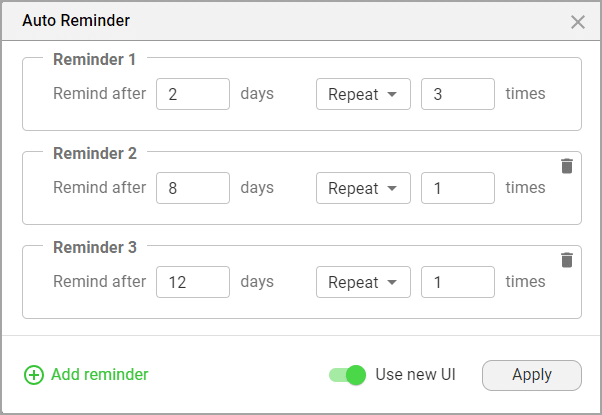
- Click the Add reminder option to add more reminders, if necessary.
Note:
In the above example, the reminder email will be sent after 2 days, until it has been sent for a total of 3 times.
After 8 days a reminder will be sent and after 12 days another.
As soon as the signer signs the document, the reminder emails will no longer be sent.
- Click the Apply button.
Note:
You can quickly set one or two reminders by disabling the Use New UI toggle switch. The old UI is shown.
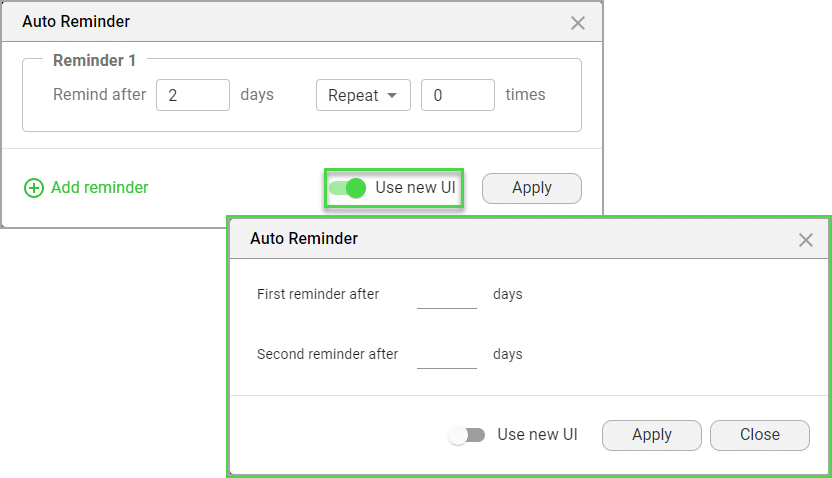
- Type a number in the field/s.
- Click the Apply button.
Remember to configure the Reminder email.
Hidden Title
Was this information helpful?
Let us know so we can improve!
Need more help?
Book Demo