

How to Upload Files to SharePoint from Titan Flow
Business Background
The SharePoint integration in Titan Flow enables you to upload files directly from Salesforce, a web portal, or after signing a contract to your SharePoint document libraries. This integration helps organizations reduce Salesforce file storage costs and share documents with users who do not have access to Salesforce.
You can easily connect your Microsoft account and automate file uploads to SharePoint, ensuring a secure and reliable document management process across both platforms.
Titan Solution
The SharePoint integration in Titan Flow provides a direct, no-code connection between Salesforce and SharePoint. It allows users to automatically upload and store files as part of any Flow process, whether triggered by Salesforce records, web portals, or e-signature actions. By removing the need for third-party middleware or manual uploads, Titan delivers a secure and efficient document management experience across both systems.
When to Use this Integration
Use the SharePoint integration if you want to:
- Store Salesforce files in SharePoint to save Salesforce storage space.
- Make files accessible to users outside Salesforce.
- Automate document uploads as part of Flow processes.
Before You Begin
Ensure you have:
- A valid Microsoft 365 account with access to SharePoint Online.
- Access permissions to the desired site, library, and folder in SharePoint.
- A Titan license that includes Titan Flow.
How to Guide
Learn how to connect Titan Flow to SharePoint and upload your files automatically.
Authentication Setup
You can authenticate your SharePoint account from either the Titan Dashboard or directly within your Flow project.
Option 1: Authenticate from Titan Dashboard
- Go to Titan Dashboard > Settings > Integrations.
- Find SharePoint in the list.
- Click Authenticate.
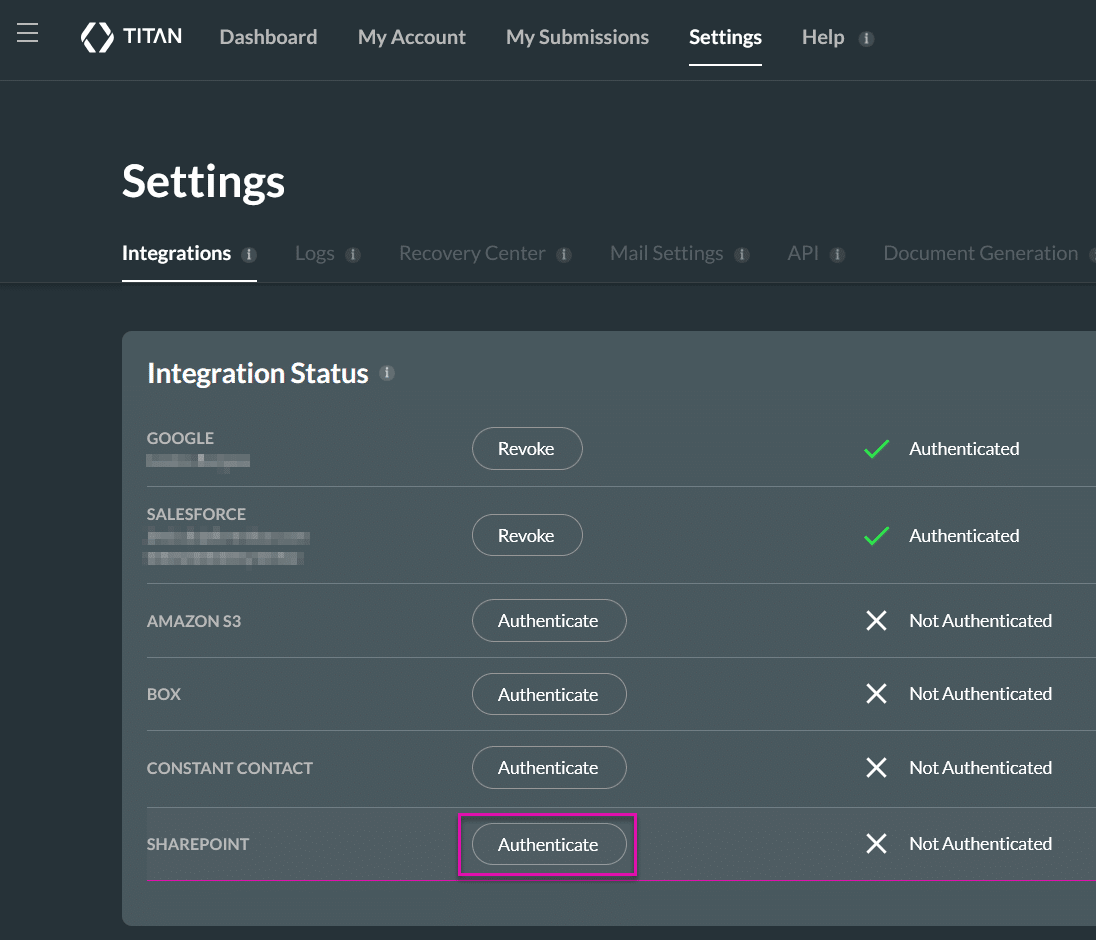
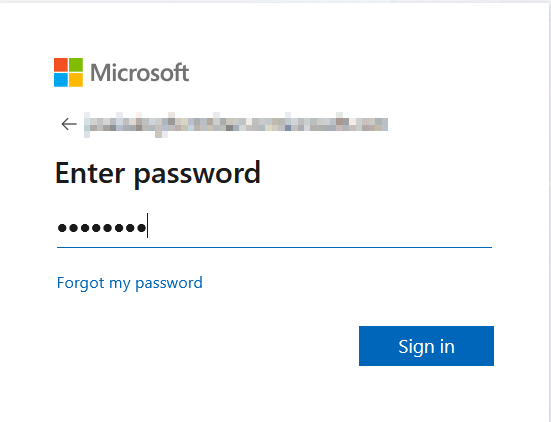
- Sign in with your Microsoft account when prompted.
After successful authentication, the integration status will display Authenticated.

You can revoke access at any time using the Revoke button.

Option 2: Authenticate from the SharePoint Action node
- In your Flow project, add a SharePoint action node.
- On the SharePoint API Call screen, click Authenticate.
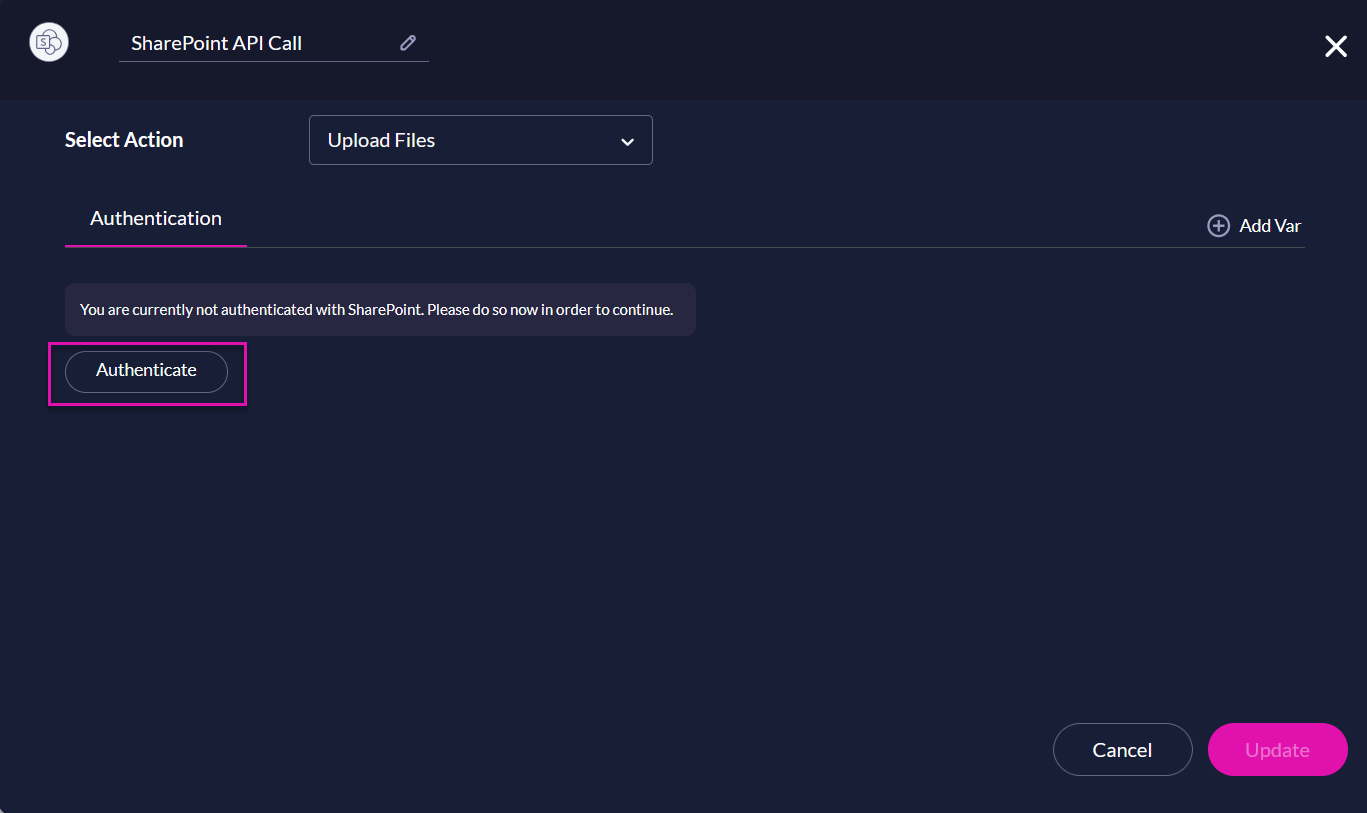
- Sign in with your Microsoft account to complete the setup.
Note: You can authenticate from either location, but revoking access is only available from the Titan Dashboard under Settings > Integrations.
Add the SharePoint Action Node in Flow
Configure the SharePoint Node in your Flow to set up File Uploads.
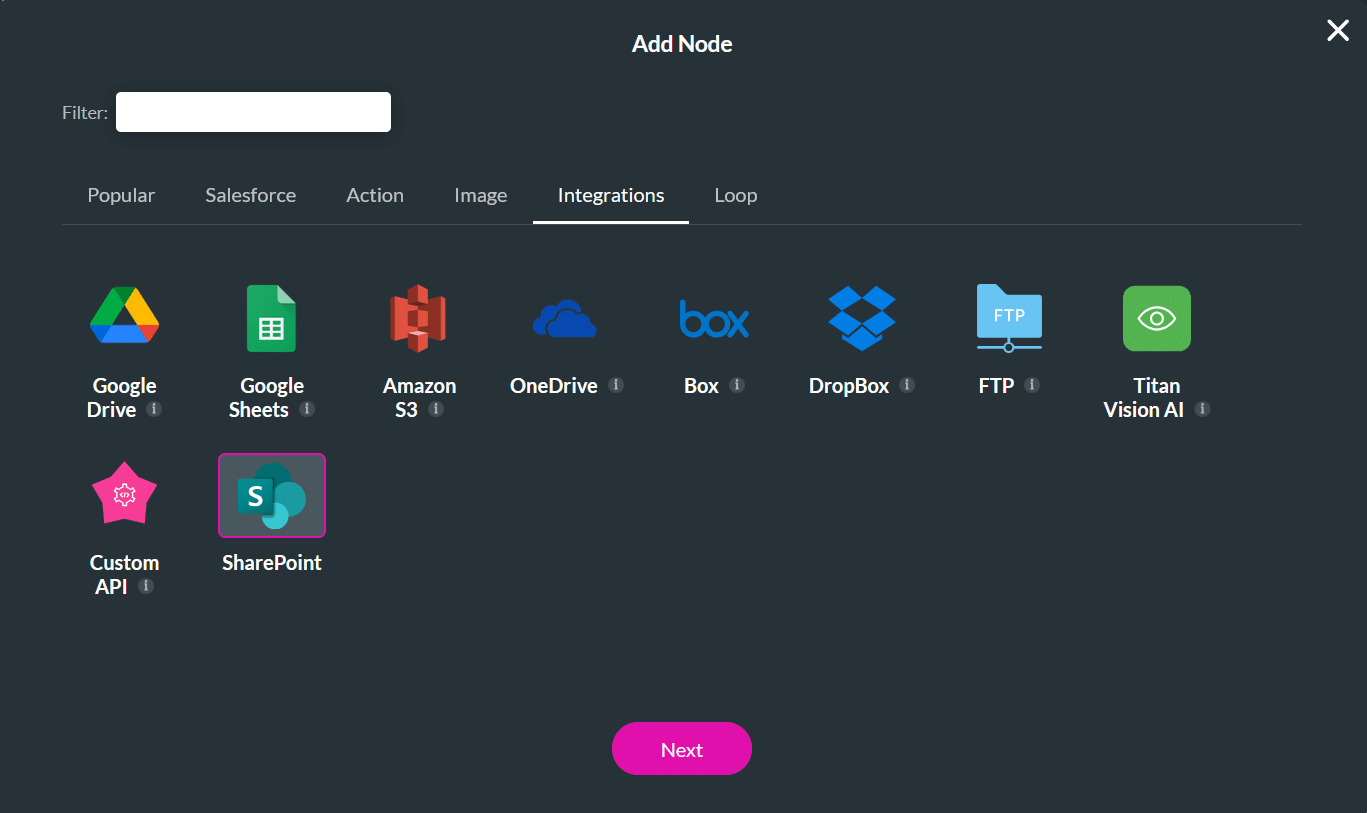
- Open your Flow project in Titan Builder.
- Click +, choose SharePoint, and select Next.
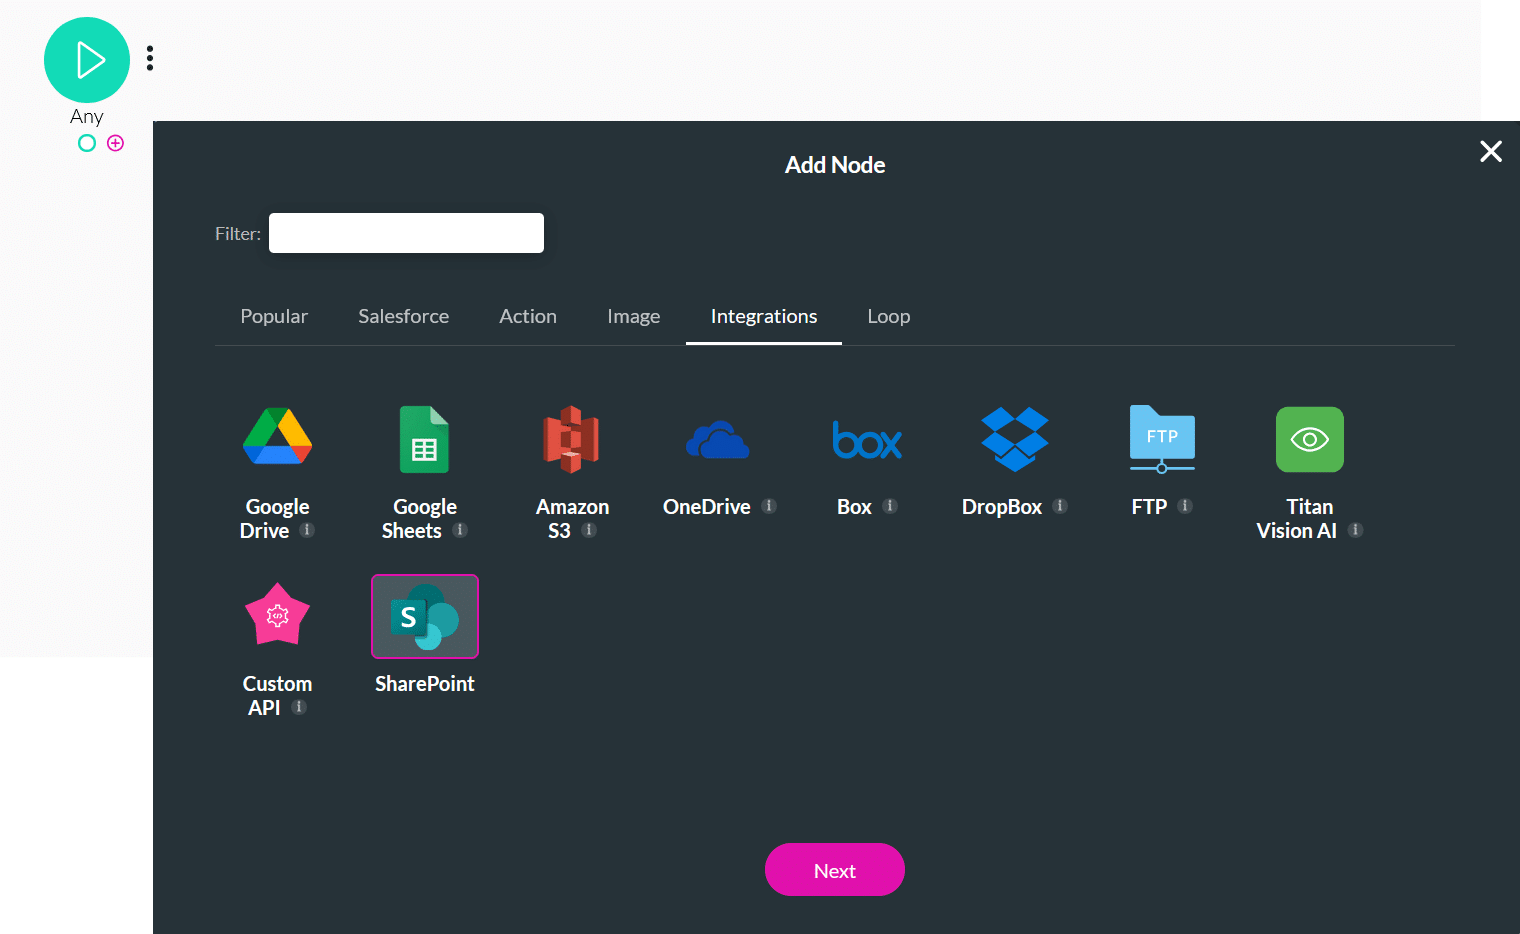
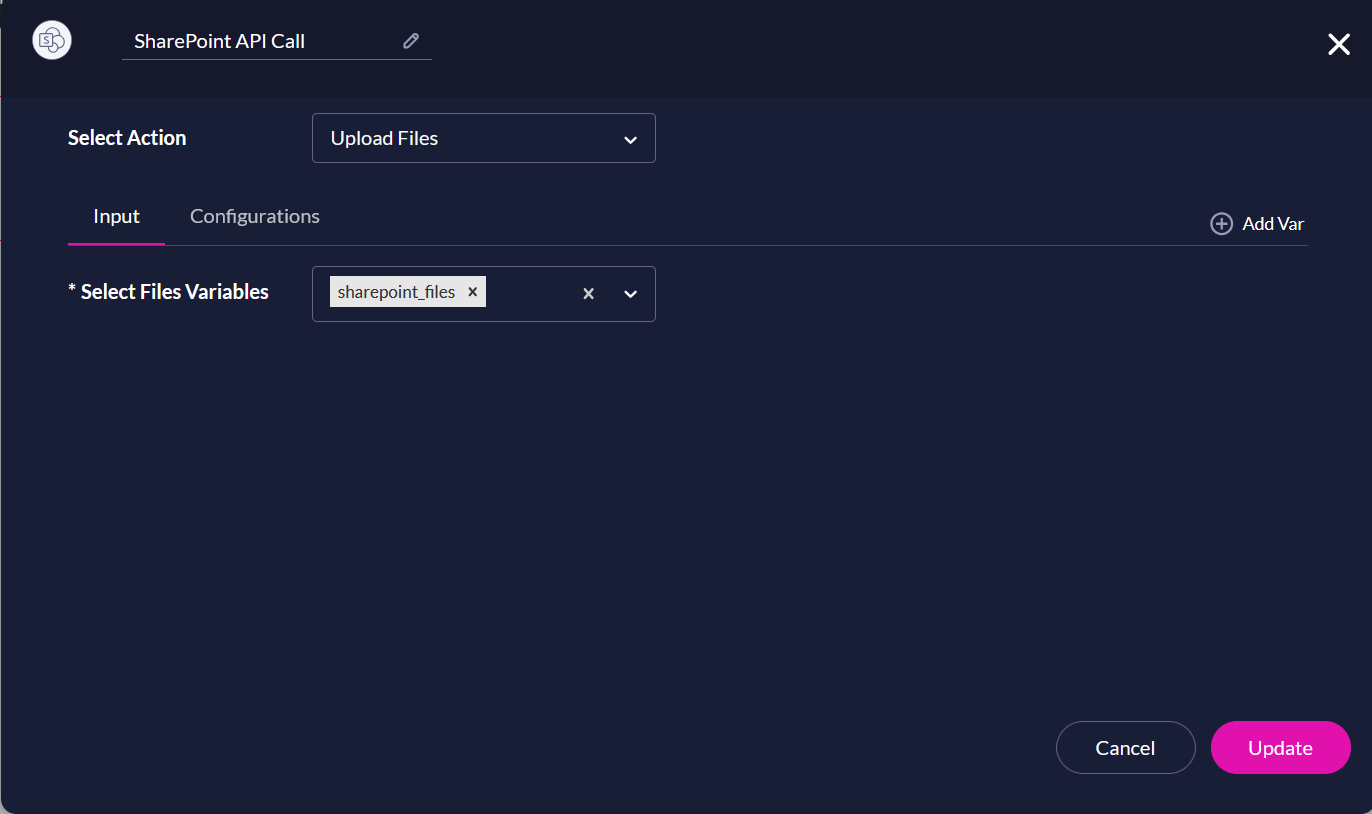
- In the Select Action dropdown, choose Upload Files.
- Under Select Files Variables, use the dropdown to select the files variables that contain the files you want to upload.
- Click Add Var to create a new Files Variables in the Files section of the Custom Variables modal. This step is optional.
- You can also rename the node at the top of the window to make it easier to identify in your Fow.
This step is optional; the default node name is SharePoint API Call.
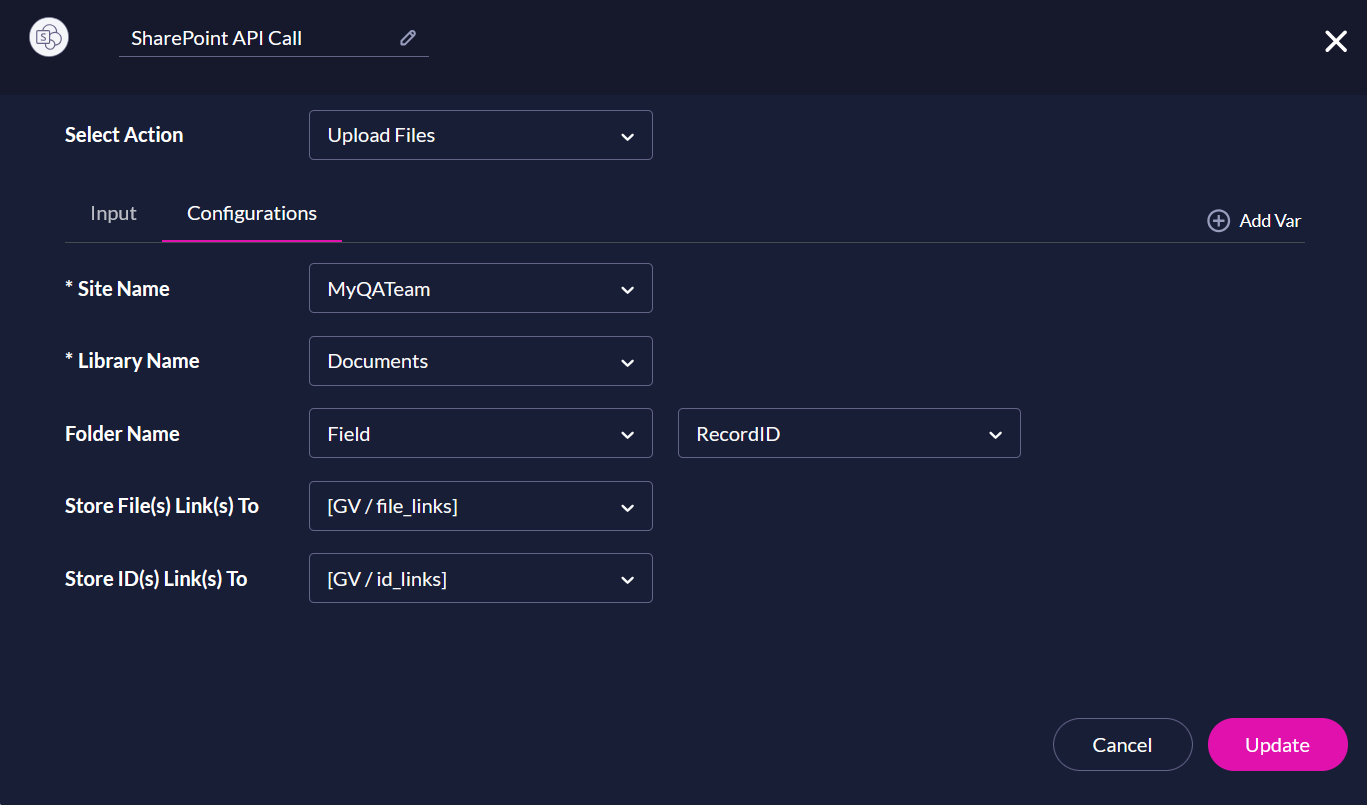
- Click the Configurations tab in the SharePoint action node.
- Under Site Name, use the dropdown to select the SharePoint site connected to your authenticated Microsoft account.
- Under Library Name, choose the document library where the file should be uploaded. The list displays all available libraries within the selected site.
- In the Folder Name, choose where to store your uploaded file.
- Root – Uploads the file to the root directory of the selected library.
- Field – Uses a variable value (for example, from Salesforce or a Titan form) to dynamically determine the folder name.
- Static – Lets you type the folder name directly.
You can also create a path to a subfolder by typing the full path. For example, entering “UploadToSharePoint/2025” will store the file within the “2025” folder located in the “UploadToSharePoint” directory.
Tip: Folder names are case-sensitive. Make sure the path matches the folder structure in SharePoint exactly.
- Under Store File(s) Link(s) To, choose a static variable to store the returned file links. This step is optional.
- Under Store ID(s) Link(s) To, choose a static variable to store the returned file IDs. This step is optional.
- The returned File Link and File ID can be stored in variables for later use (for example, to update Salesforce records).
- Click Update to save your configuration.
Error Handling
The SharePoint node automatically triggers the On Cancel exit if an upload fails. Common reasons for failure include:
- Invalid or expired authentication token.
- Insufficient permissions for the selected site, library, or folder.
- File type or size restrictions.
- Missing or deleted folder path after project deployment.
Integration Logs
View your integration logs under Titan Dashboard > Settings > Integrations Logs.
The SharePoint integration logs capture:
- Successful and failed uploads.
- Deleted or inaccessible sites, libraries, or folders.
- Authentication and revocation activity.
Example
SharePoint File Upload – Success
File: invoice_2025.pdf
Site: Marketing
Library: Documents
Link: https://sharepoint.com/sites/Marketing/Shared%20Documents/invoice_2025.pdf
Testing and Validation
When testing, confirm that:
- All SharePoint sites, libraries, and folders load correctly in dropdowns.
- Uploads succeed for multiple File Variables.
- Authentication persists between Flow and Dashboard sessions.
- The system behaves correctly when a site, library, or folder is deleted.
- Links and IDs return correctly for different file sizes and types, including those with Hebrew folder names.
Known Limitations
- Manual path entry is supported but not recommended.
- Some libraries or folders with special characters in names may not display correctly.
- If a SharePoint site or folder is deleted, uploads fail until the configuration is updated.
Troubleshooting
| Issue | Possible Cause | Solution |
|---|---|---|
| “Authentication Failed” message | Integration logs are not updating | Re-authenticate under Dashboard > Settings > Integrations |
| File not uploaded | Missing permission or deleted folder | Confirm SharePoint access and folder path |
| “File type not supported” | Unsupported extension | See File Type Limits section |
| Integration logs not updating | Connection timeout | Refresh integration logs or check API call usage |
Part of this workflow: