

Invoke Salesforce Flow from Titan
Business Background
Salesforce flow actions provide the benefit of automating data in business workflows with easy maintenance.
Titan Solution
Titan Flow extends your business digital experience by allowing admins to configure Salesforce parameters and mapping for bi-directional data syncing with Titan.
How to Guide
- Click the + sign on the Action Flow icon. The Add Node screen opens.
- Click the Salesforce option.
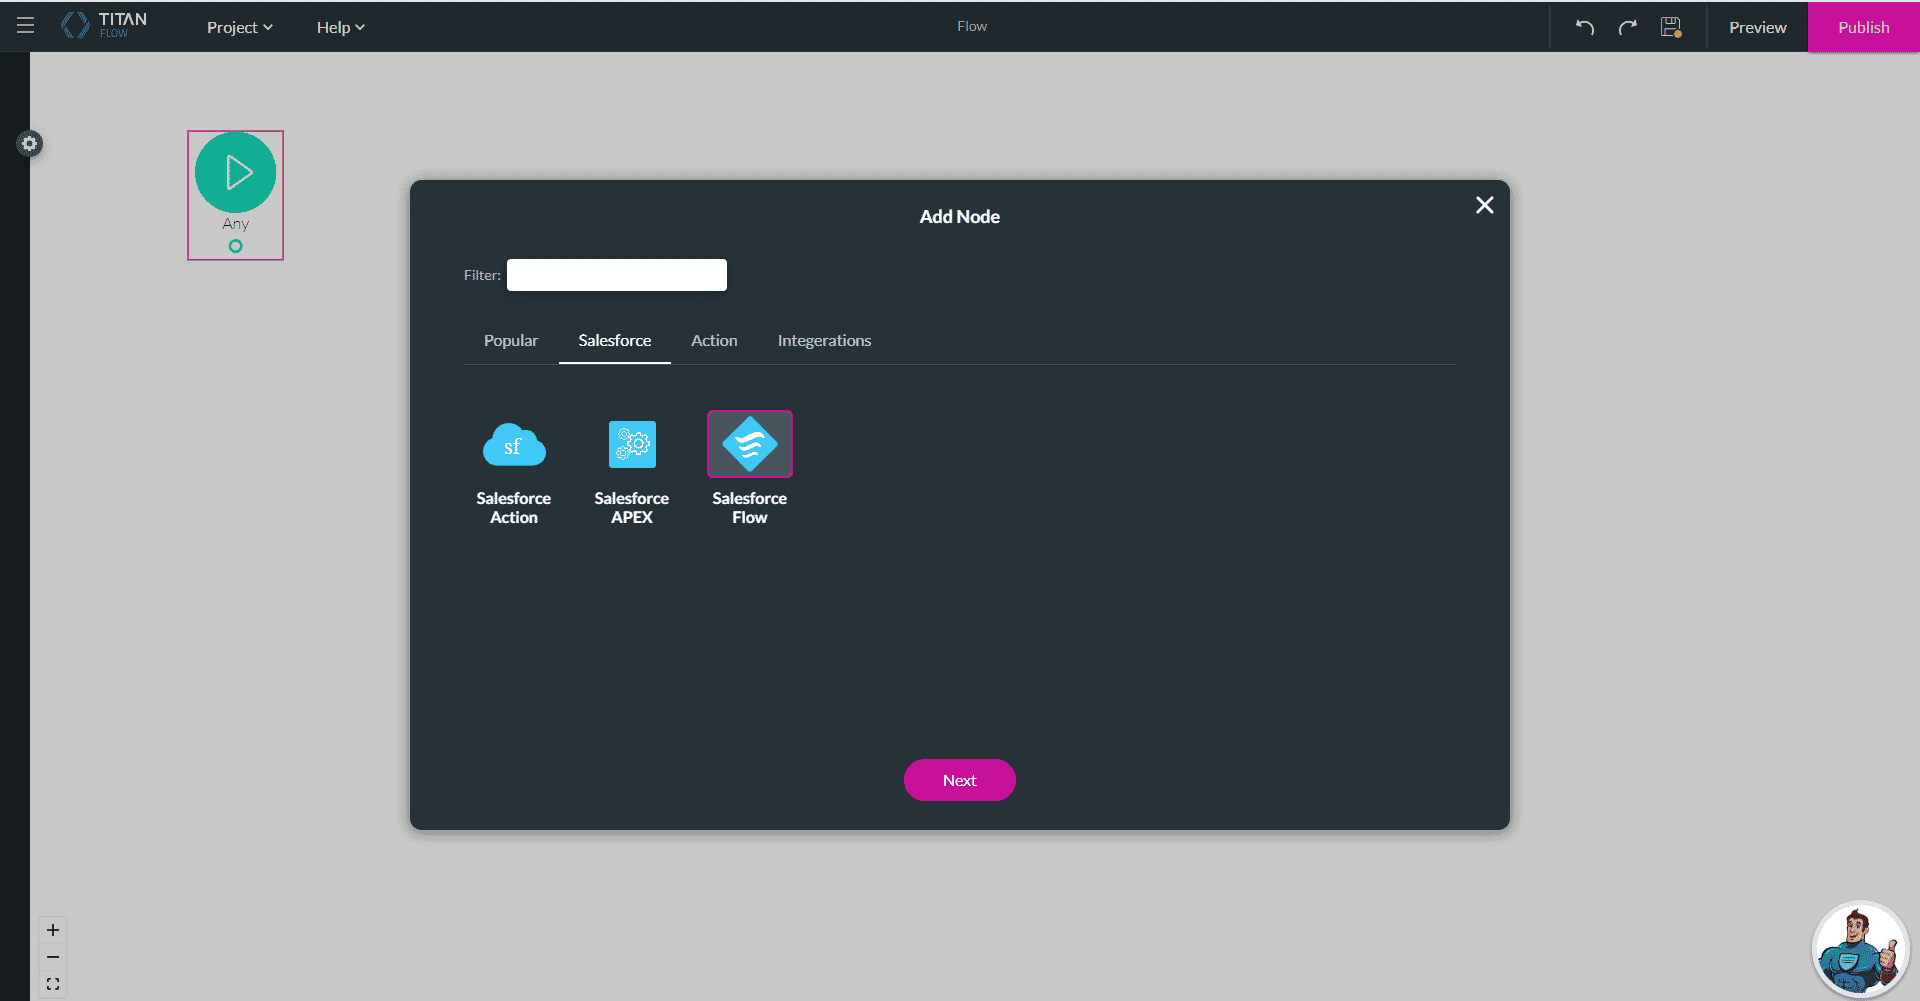
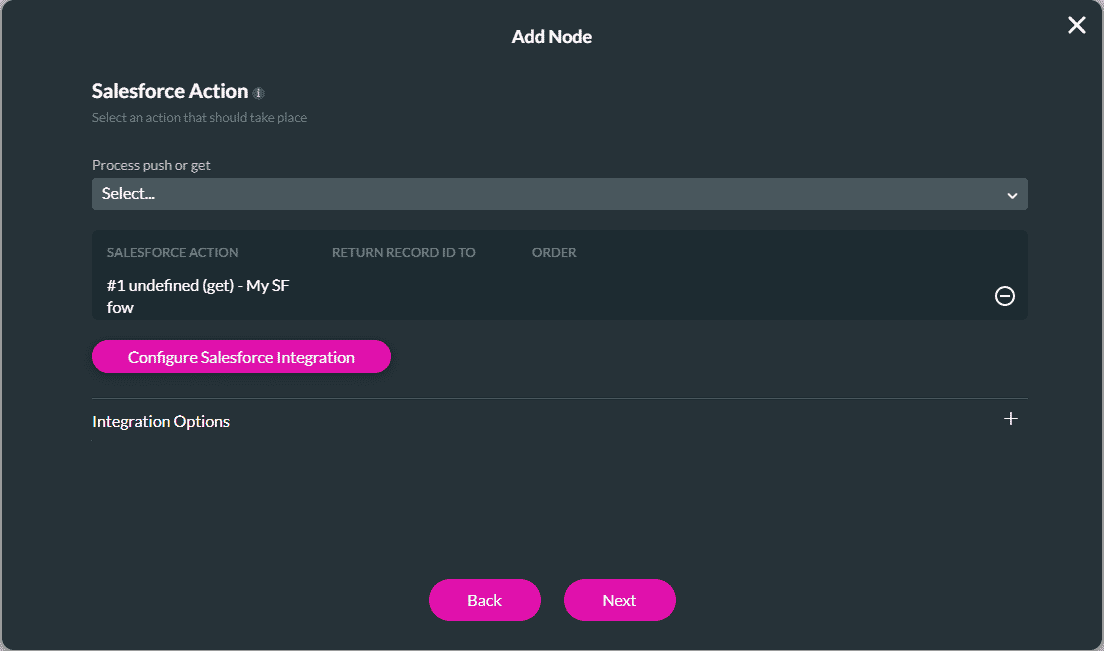
- Click the SF Flow option. The Add Node screen opens.
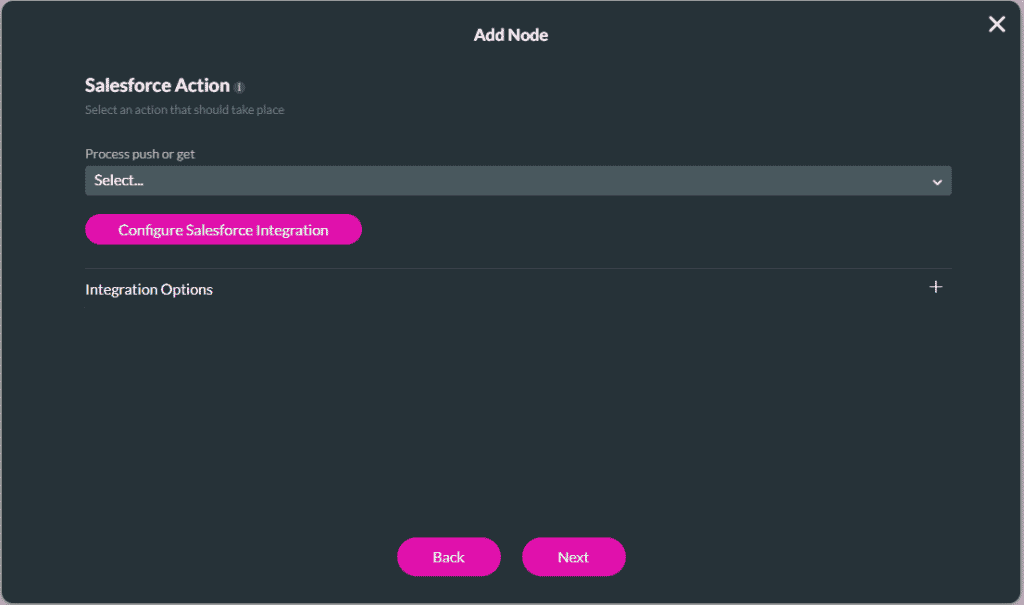
- Click the Configure Salesforce Integration button. The Salesforce Integration screen opens.
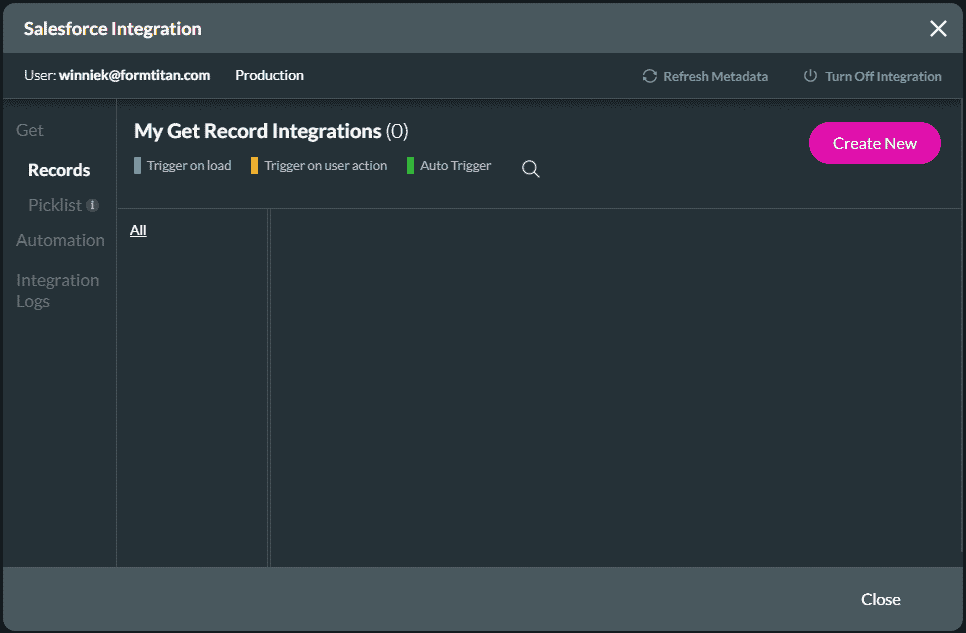
- Click the Create New button. The Map Salesforce fields screen opens.
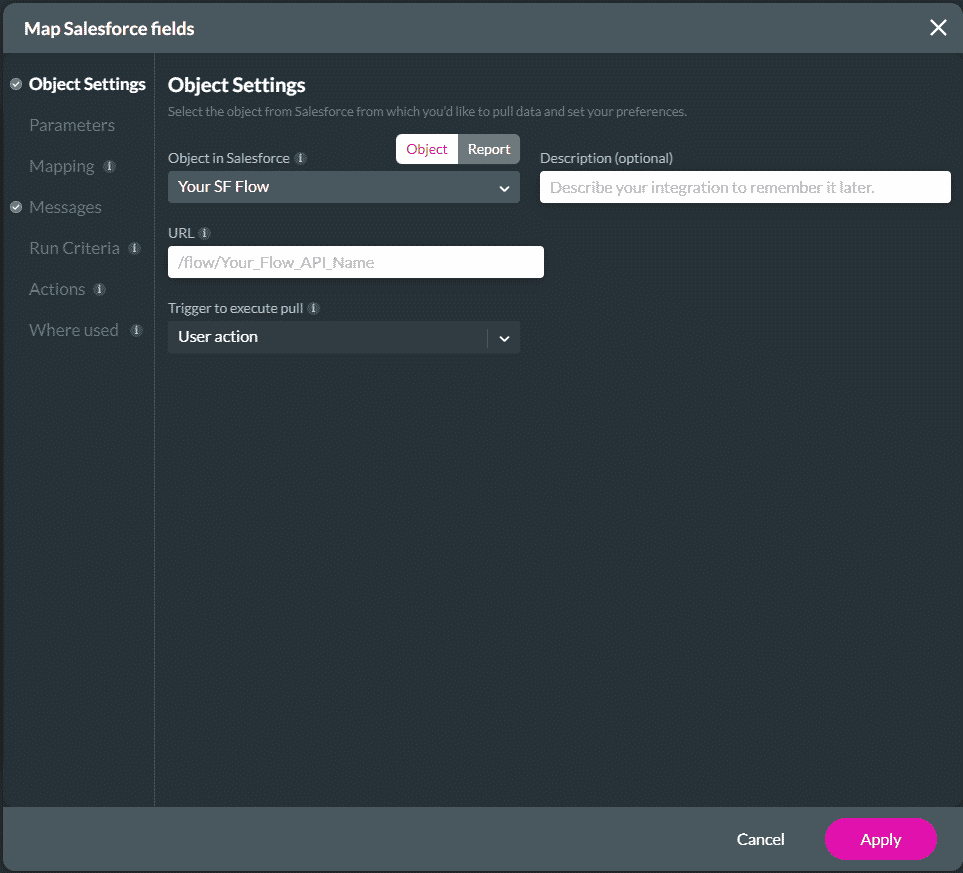
- Select Your SF Flow from the Objects in Salesforce drop-down list.
- Paste the URL in the URL field.
- If necessary, type the description in the Description field.
Note:
When you add a description it is displayed under My Get Record Integration.
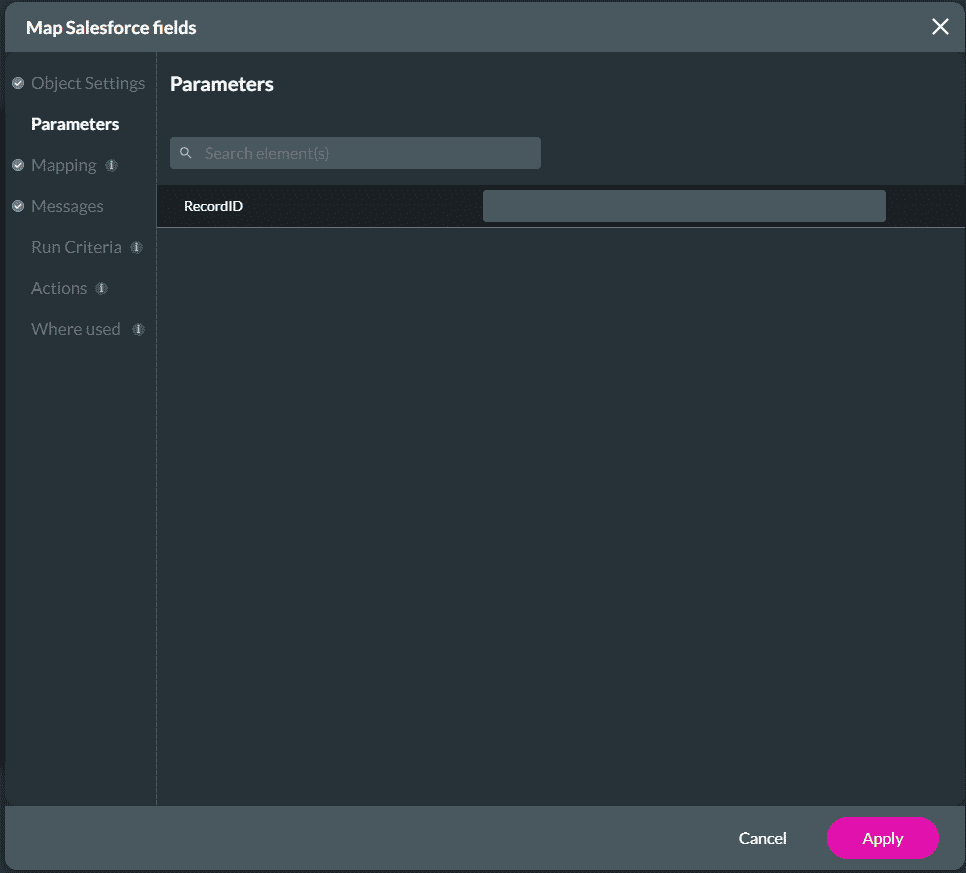
- Click on the Parameters option to send parameters to the Flow.
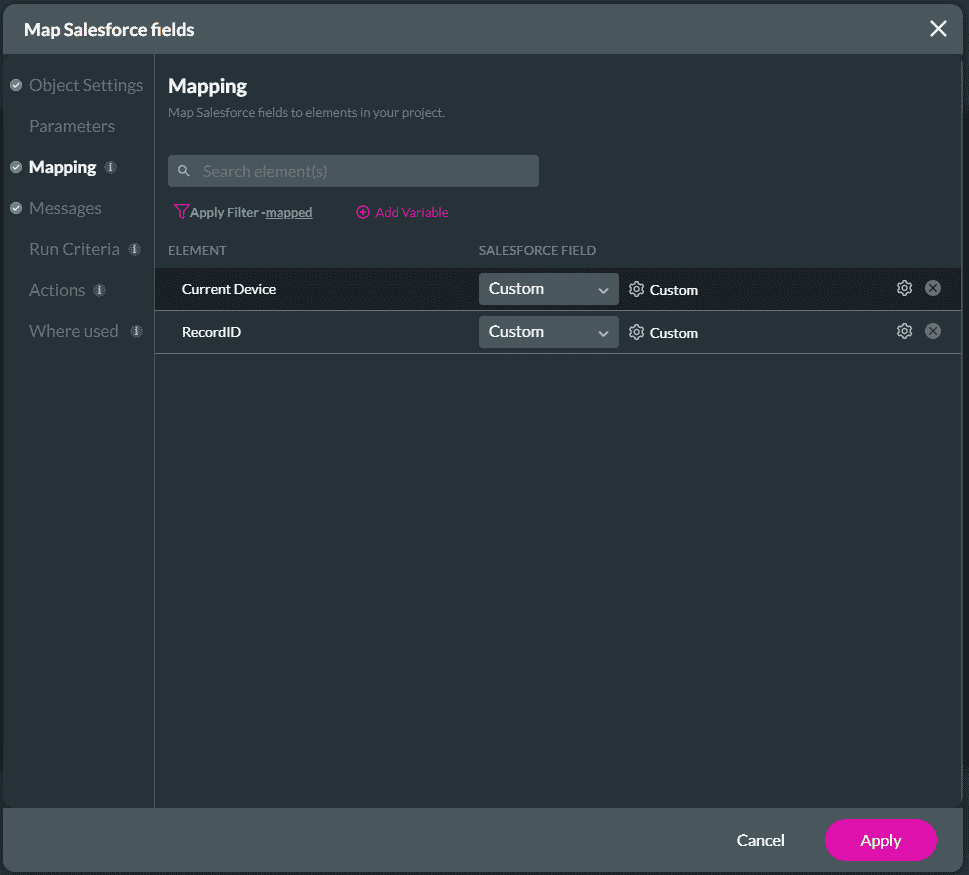
- Click the Mapping option to add the results from Salesforce Flow.
- Select the Element from the Current Device and Record ID drop-down list.
- Click the Apply button and click the Close button from the Salesforce Integration screen.
- Select the Get option from the Process push or get drop-down list and click on the Next button.
- Add a Tag name in the Tag field and click o the Insert button.
The added Salesforce Flow shows on the screen.

Interested in Titan and Salesforce. Read up on our no-code forms.
Hidden Title
Was this information helpful?
Let us know so we can improve!
Need more help?
Book Demo