Review & Send in CLM
Business Background
You can automate signing processes and speed up contract approvals in minutes. Sync all data with Salesforce in real time using zero code.
Titan Solution
- Use Titan CLM, our contract lifecycle tool tailor-made for Salesforce, to automate signing processes and speed up contract approvals.
- The CLM wizard lets you easily review the template and send it to the collaborators and/or signers.
How to Video
Coming Soon.
How to Guide
Prerequisites:
- Make sure you have completed the Sign Project setup process before proceeding.
- Add a source document.
- Edit or add collaborators.
- Edit or add signers.
- Preview the document.
- Configure the document settings.
The settings made in the CLM Wizard override the settings made in the Titan CLM project.
The Titan CLM project is not affected by the CLM Wizard changes.
- Click on the drop-down lists to select the object and then the record to which the process documentation will be stored in Salesforce.
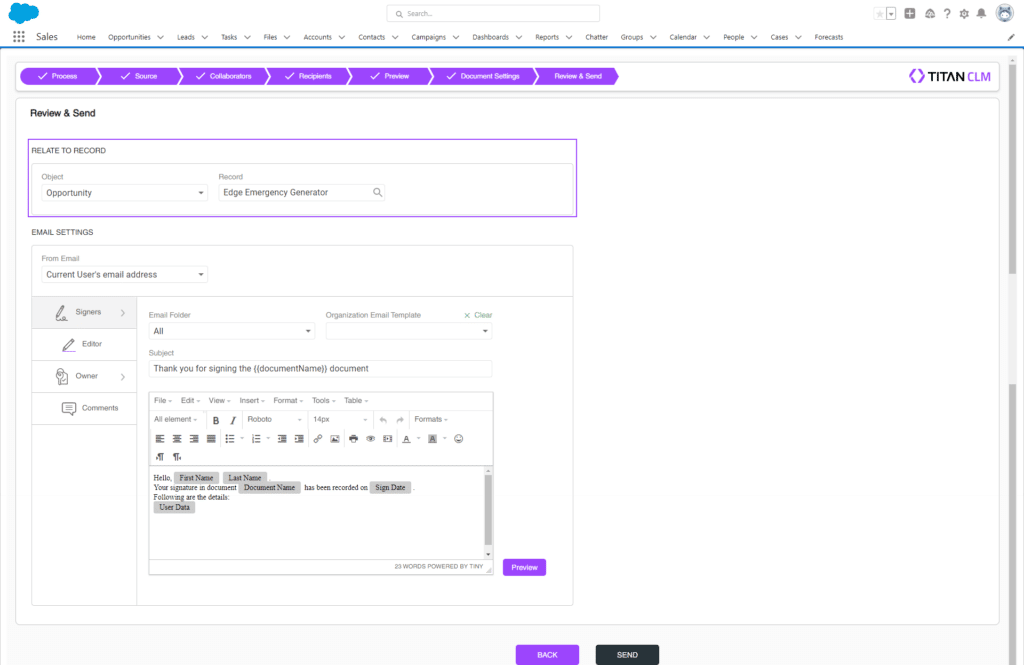
As default, we will use the object and record from which you initiate the CLM process.
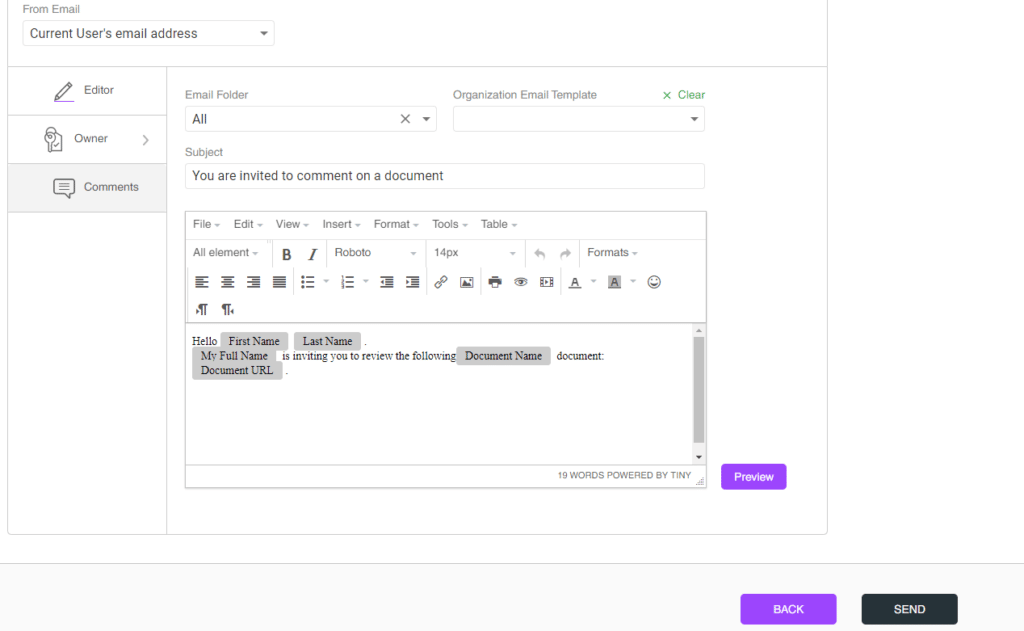
- Click on the drop-down list to select the From Email address. The options in the drop-down list are linked to the object you selected.
- Click on the drop-down list to select the email folder.
- Click on the drop-down list to select the organizational email template, or use the template below to preview or change the contents of the email.
If you select an organizational template, it will override the custom emails you configured. Click on the Clear button to revert to the custom emails you configured.
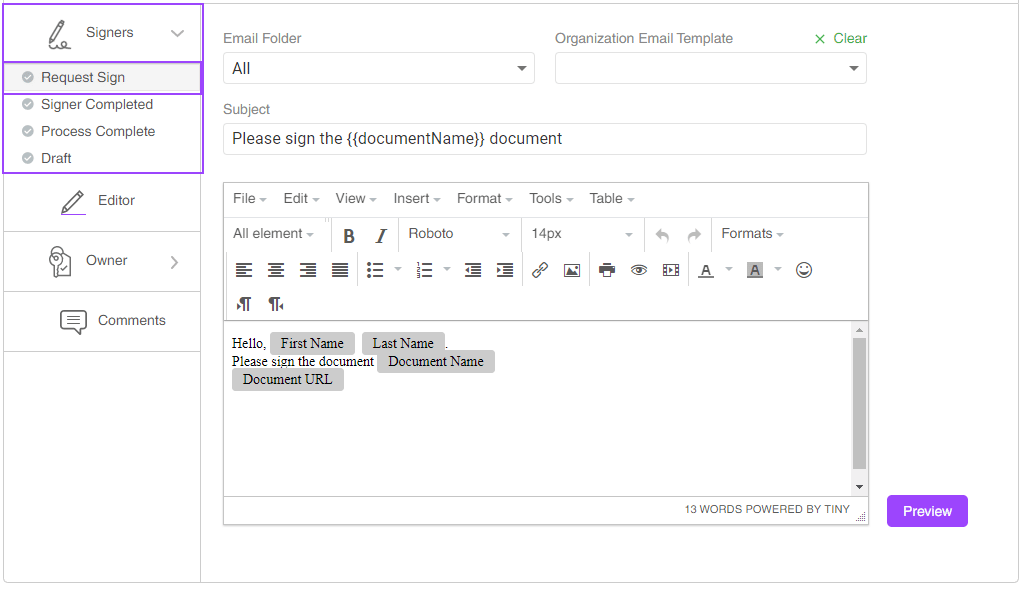
1. You can customize the template as follows:
- Signer – this option is available if at least one signer was configured and the Start Sign Process was selected on the Document Settings screen.
- Request Sign
- Signer Completed
- Process Complete
- Draft
- Reminder
- Editor
- Reminder
- Owner
- Request Collaboration
- Sign Notify
- Rejected
- Comments – this option is available if at least one collaborator with Comment type was configured on the Collaborators screen.
2. Make sure that each email has a Document URL. This is mandatory.
- Click on the Signer/Owner button to open the list.
- Click on the suboption, for instance, Request Sign.
- Review the subject line and make changes if necessary.
- Review the body and make changes if necessary.
- Use the All element drop-down list to add interactive elements.
- Click on the suboption, for instance, Request Sign.
- Alternatively, click on the Editor/Comments button.
- Review the subject line and make changes if necessary.
- Review the body and make changes if necessary.
- Use the All element drop-down list to add interactive elements.
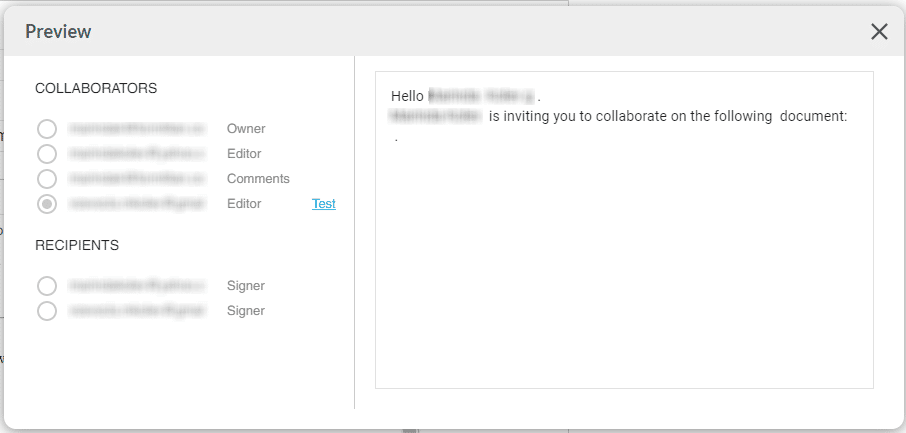
- Click on the Preview button. The Preview screen opens and shows a list of the collaborators and signers.
- Click a radio button to select a recipient and preview the email that they will receive.
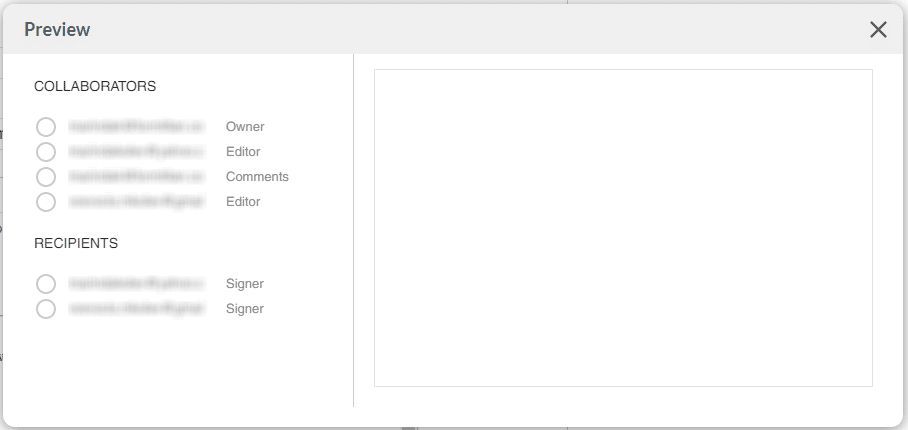
- Click the Close button at the top right to close the screen.
- If you are satisfied with all the settings, click on the Send button.
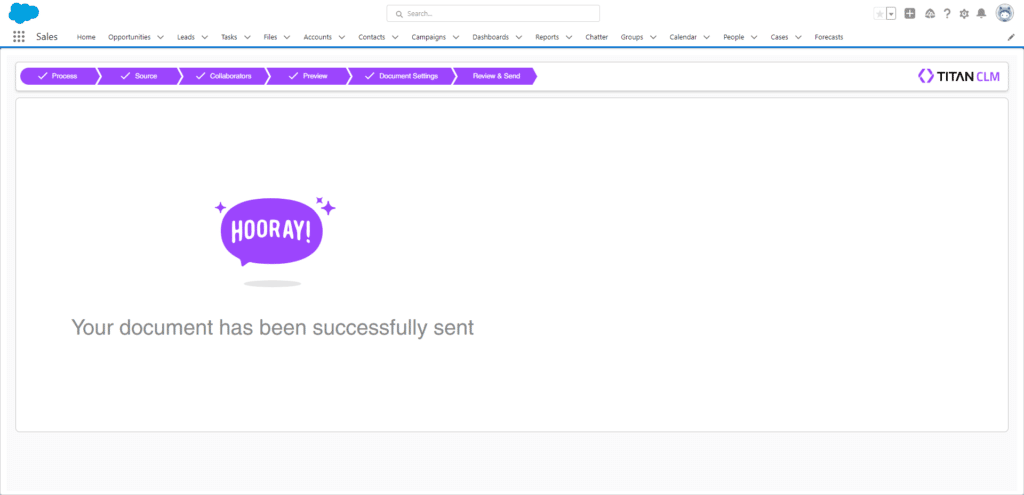
The following message is shown: “Preparing your document, please wait.”
When the process is completed, you will see the following screen: