

Translate Countries and States
Business Background
Your clients may speak various languages, and your products should suit these business needs.
Titan Solution
Add translations to elements on your Web projects.
How to Guide
Refer to Set up Translations for more information.
- Add two drop-down elements to the canvas. In this example, one is for the Country picklist and the other is for the State picklist.

- Click the Gear icon to open the Project Settings.
- Select the Salesforce option. The Salesforce Integration screen opens.

- Under Picklist, create a new Get Picklist integration or select the Edit icon to edit an existing Get Picklist integration. The Map Salesforce Fields screen opens.

- Select Country from the drop-down list.

- Under Mapping, select Country for the element “Country/Label.”

- Under Advanced, use the toggle switch to translate content to another language.
- Select the language from the drop-down list and select the Apply button.
- Repeat from step 4 for the State drop-down element.
- Click the Apply button.

- Click the Close button.

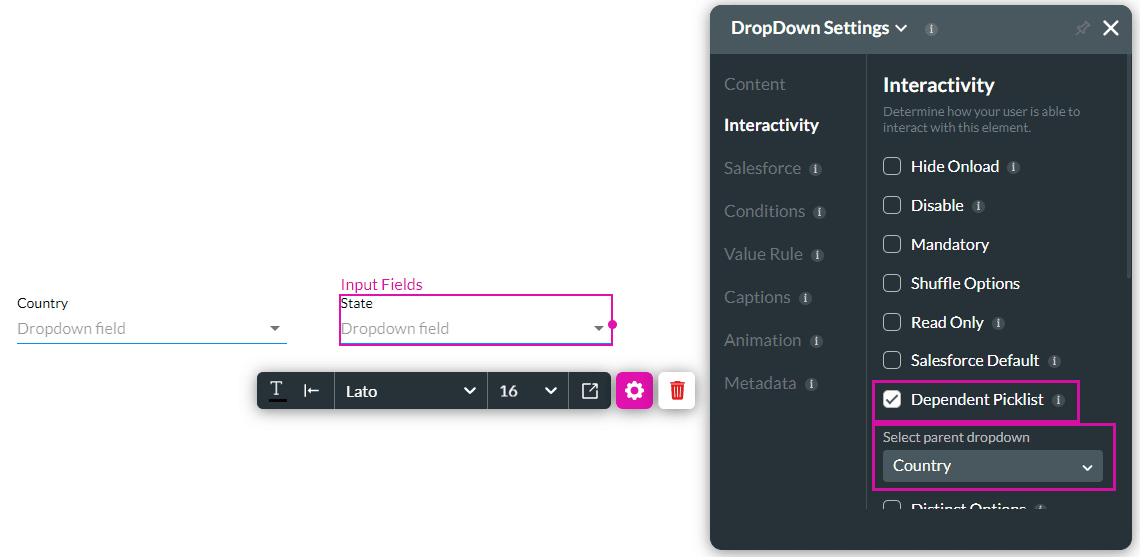
- Click the Gear icon for the State element. The DropDown Settings screen opens.
- Under Interactivity, select the Dependent Picklist checkbox.
- Select Country from the parent drop-down list.
- Save and Preview the project.
The translation of the country will be available for selection in the Country drop-down list. The corresponding translated states will be available in the State drop-down list.
Hidden Title
Was this information helpful?
Let us know so we can improve!
Need more help?
Book Demo