

Text Comparison Widget
Business Background
Compare the values in similar fields in a Salesforce object, or the same fields in different records.
Titan Solution
You can use the Text Comparison widget to compare the differences in similar fields; for instance, if you have multiple answer versions of the same questionnaire and you want to see where changes occurred.
How to Guide
- Click the + icon to open the list of elements.
- Under the Widget option, scroll down and drag-and-drop the Text Comparison widget to the canvas.

- Drag the Text Comparison bigger. You will see the example text.
Note:
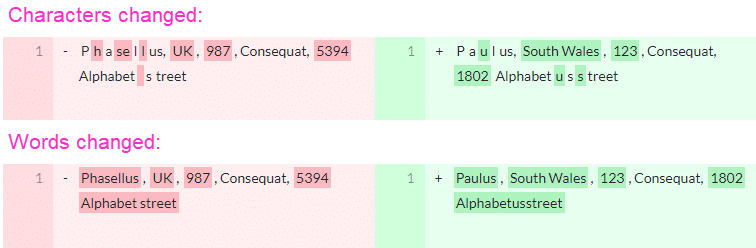
Any deletions are marked with pink on the left and additions are marked with green on the right.
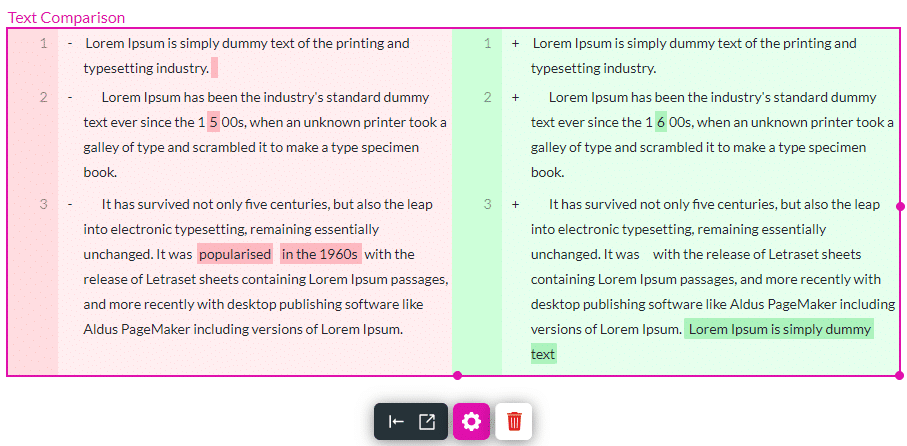
If there are no changes, the text on both sides will be shown without any colors when you preview the project.

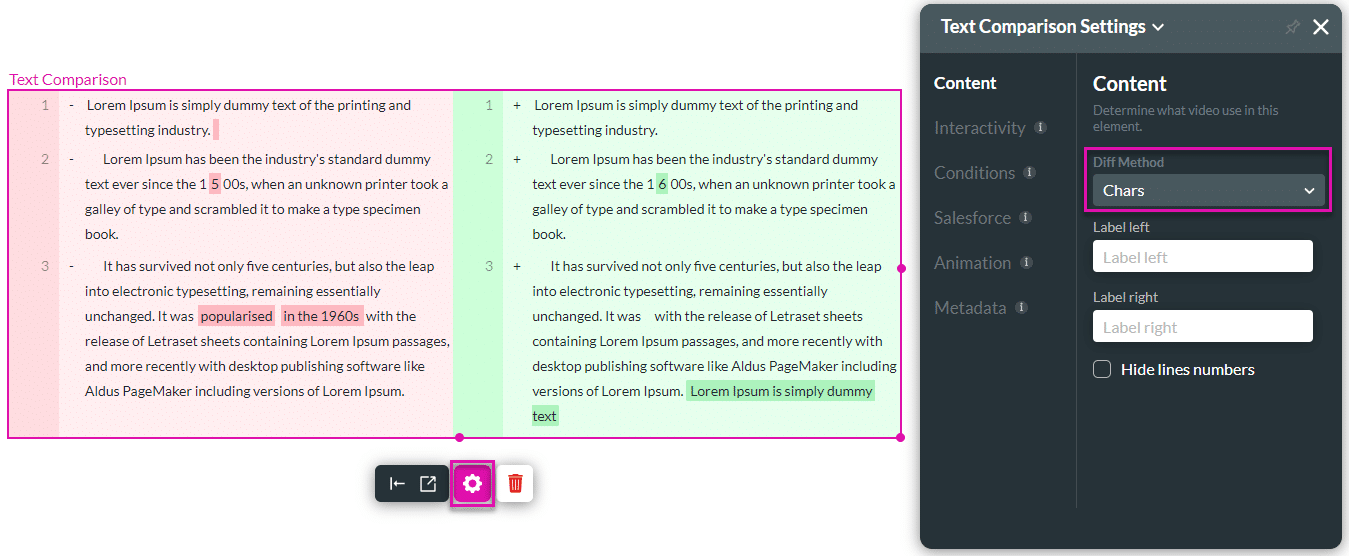
- Click the Gear icon to open the Settings screen.
- Use the drop-down list to select a method:
- Chars: any characters that change will be shown.
- Words: the changed words will be marked.
- Words with spaces: the changed words and spaces will be shown.
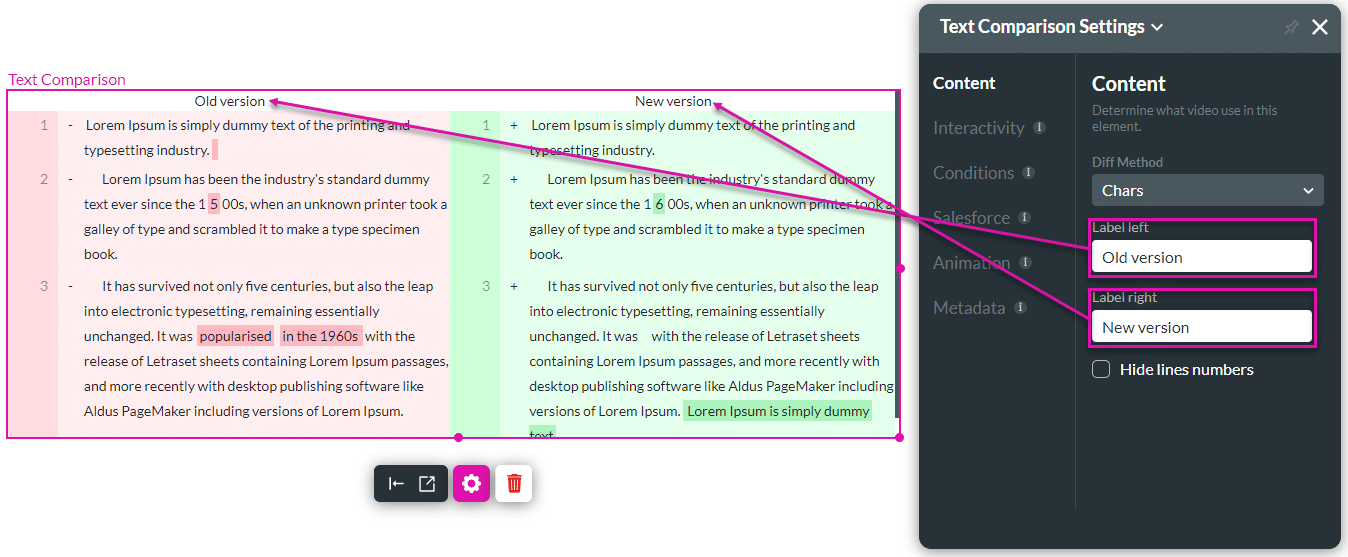
- If necessary, label the sides of the widget.
- If necessary, click the checkbox to hide the line numbers on the left of the widget.
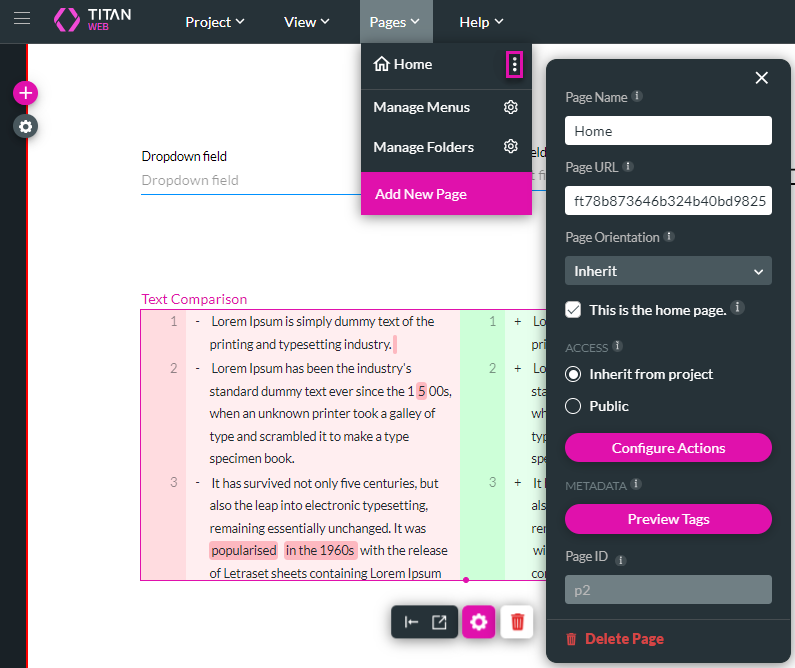
- Open the Pages drop-down list and click the Kebab icon next to the page on which the Text Comparison widget was placed.
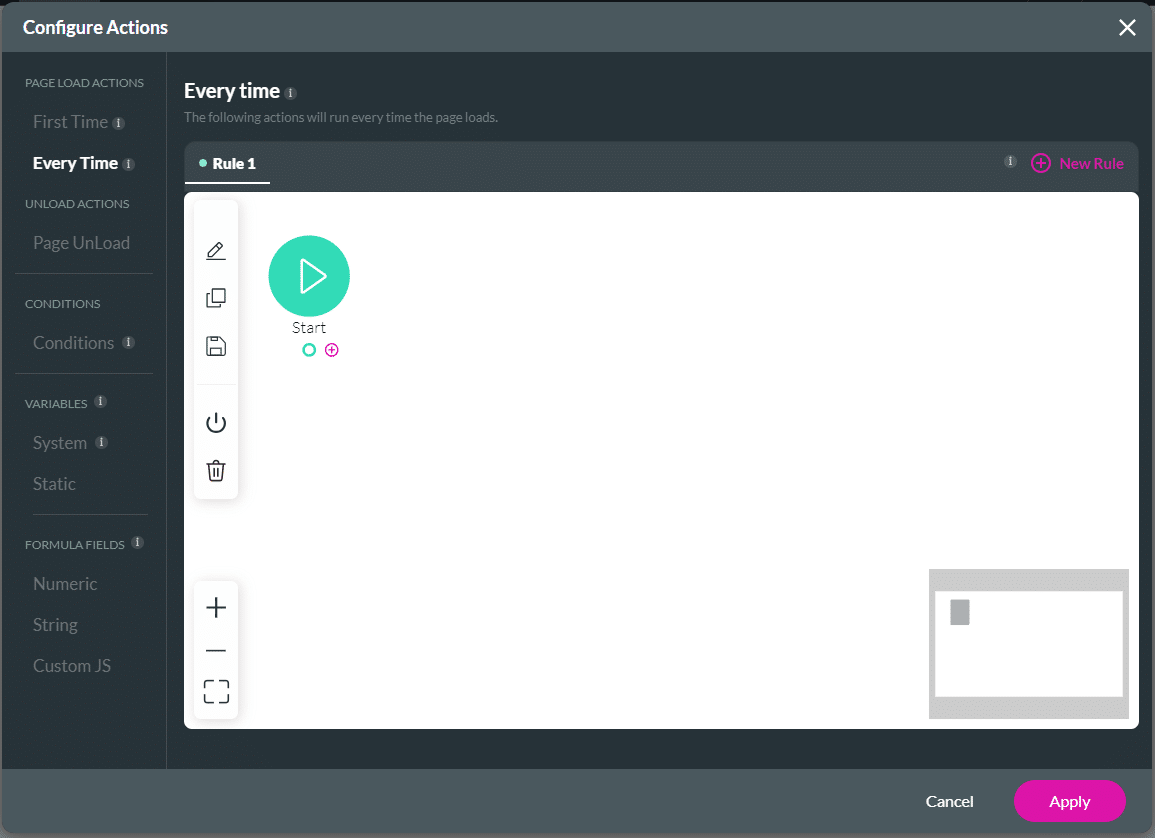
- Click the Configure Actions button. The Configure Action screen opens.
- Select the Every Time option and click the + icon next to the Start node.
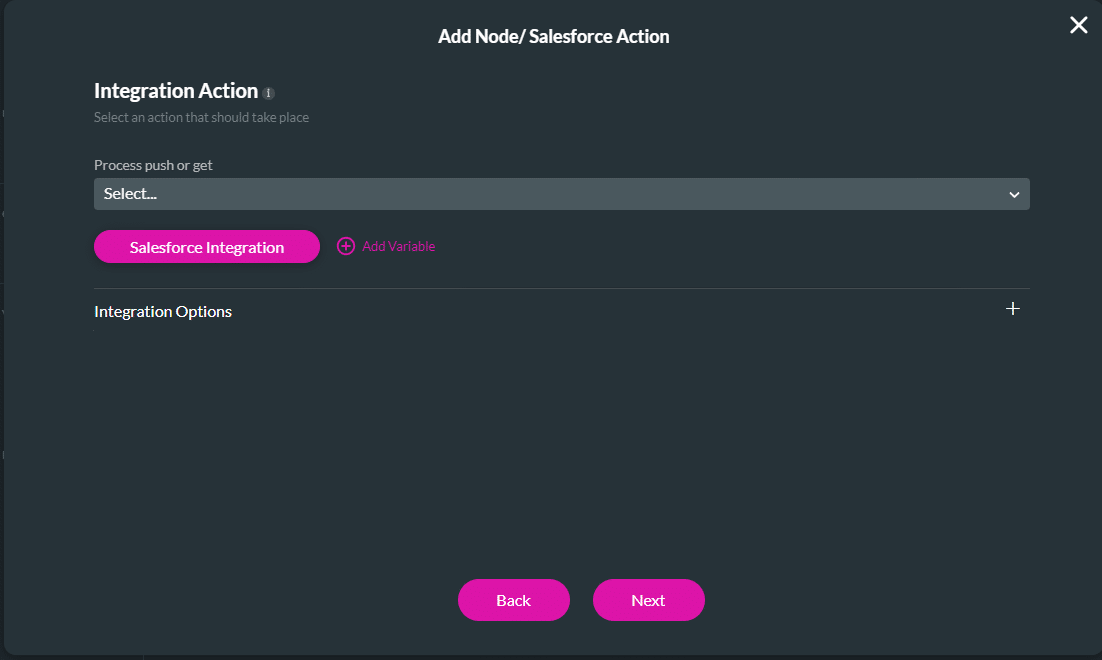
- Click the Salesforce option and click the Next button.

- Click the Salesforce Integration button.
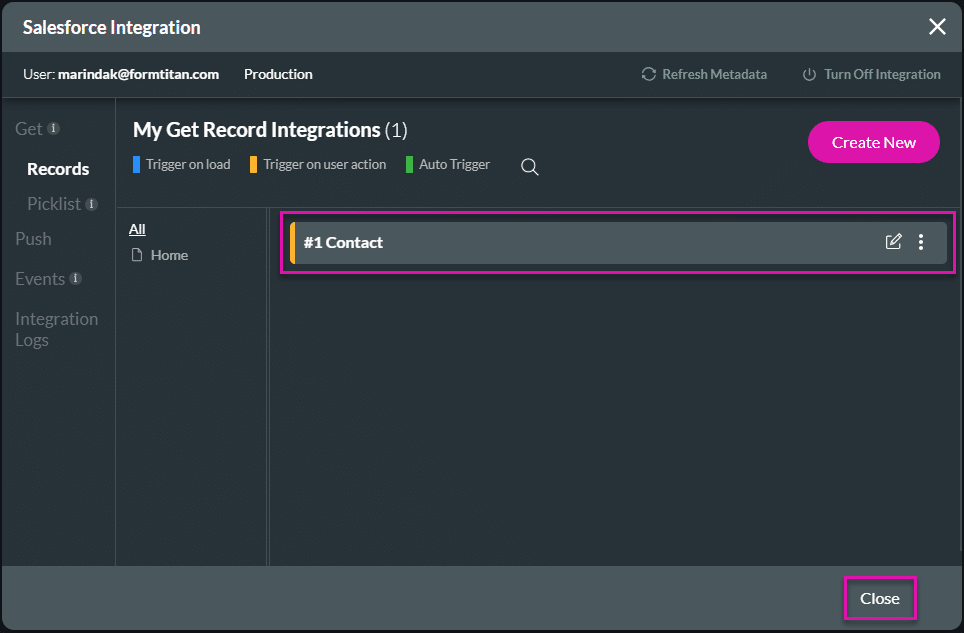
- Click the Create New button.
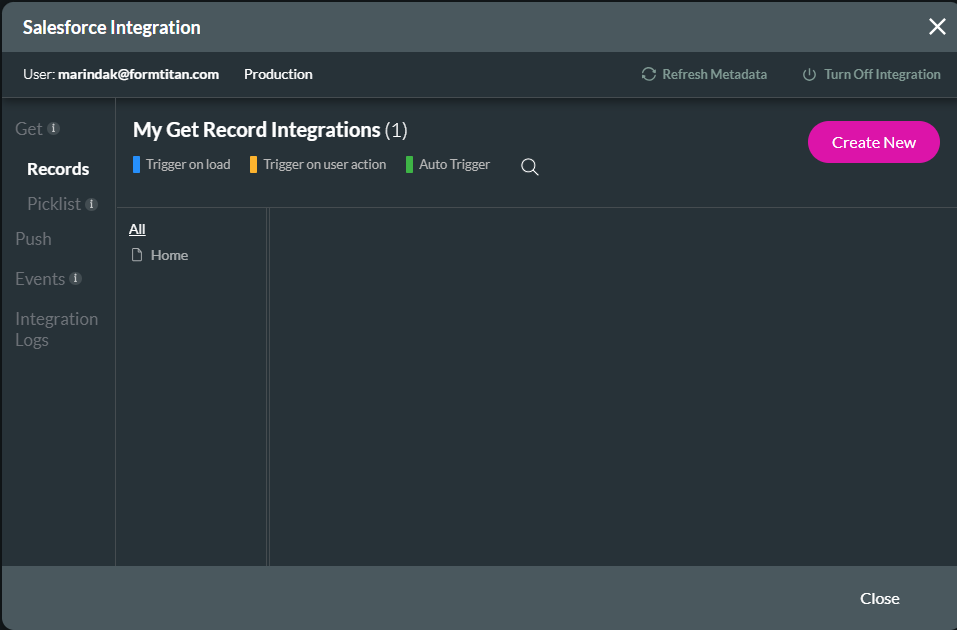
- Use the drop-down list to select the object in Salesforce. In this example, Contacts was selected.
- Use the drop-down list to select the action. In this example, User action was selected.

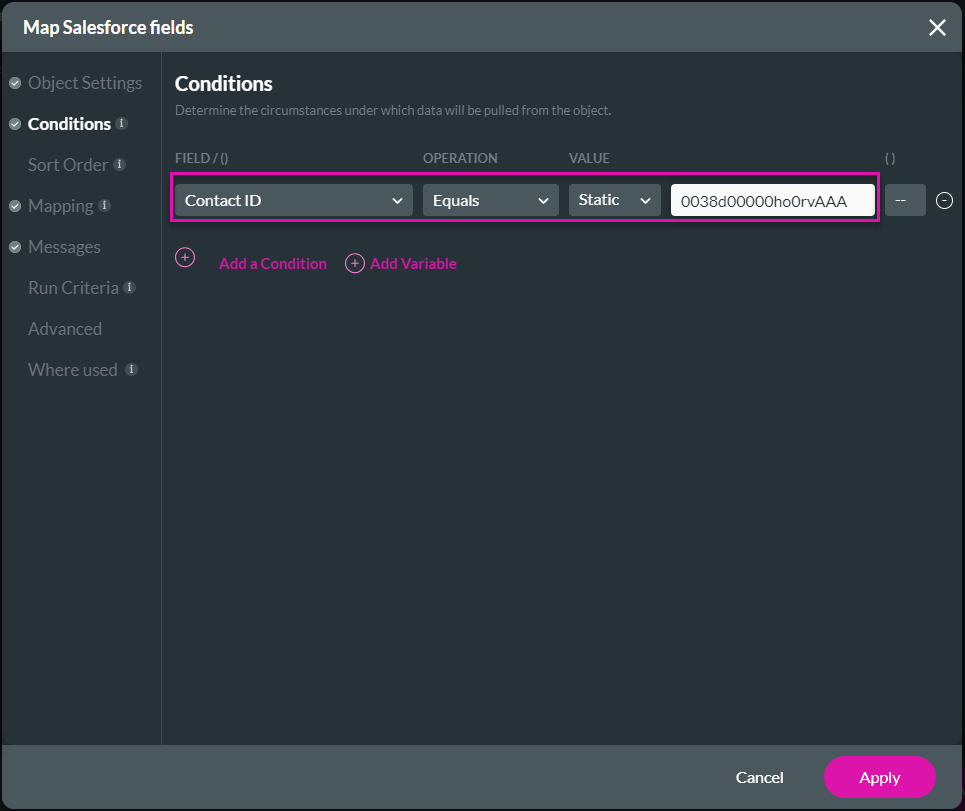
- Click the Conditions option and configure the necessary condition. In this example, the Contact ID is equal to a static value.
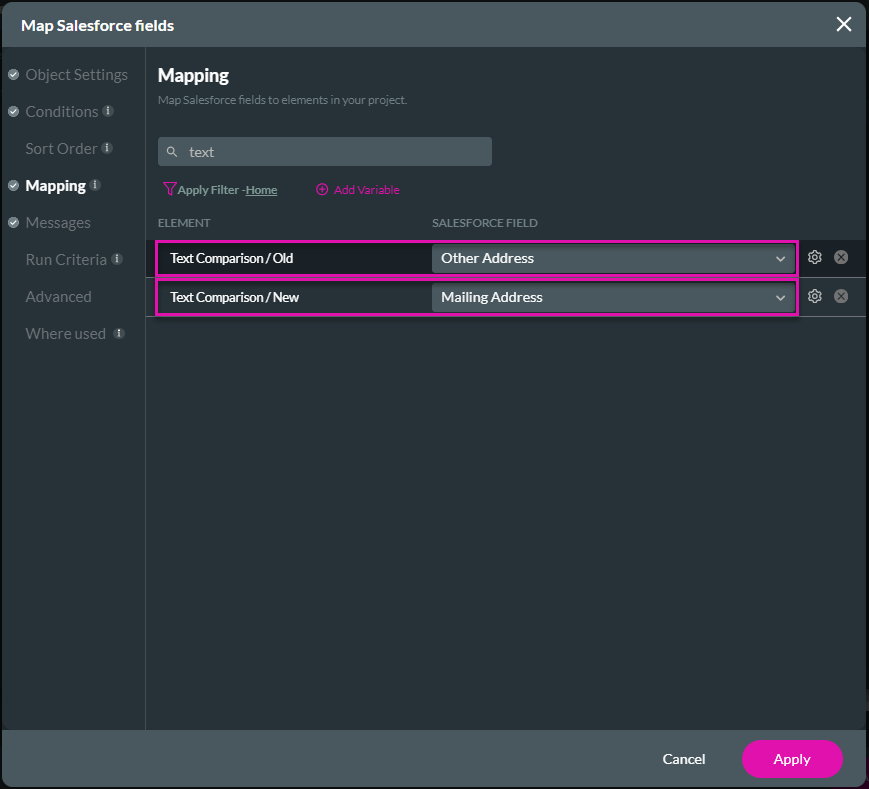
- Click the Mapping and configure the mapping for the Text Comparison/Old and Text Comparison/New fields. These are the two fields that will be compared.
- Click the Apply button.
- Click the Close button.
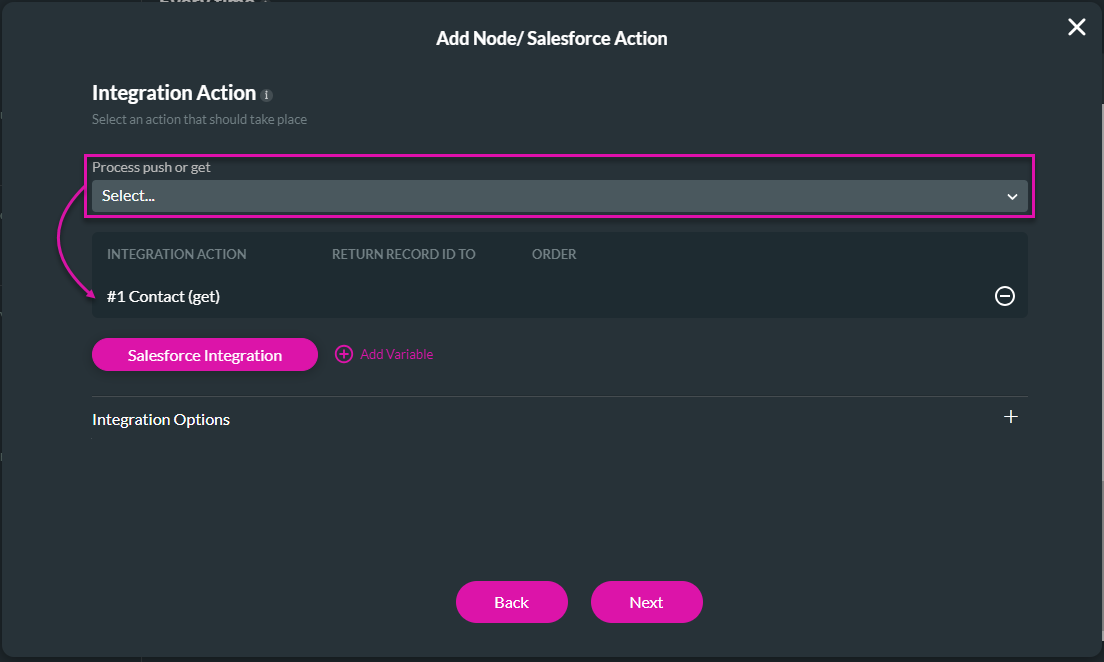
- Use the drop-down list to select the Process push or get.
- Click the Next button.
- Add a tag if necessary and click the Insert button. The Salesforce Node is added.
- Click the Apply button.

- Save and Preview the project. You will see the changes:
Hidden Title
Was this information helpful?
Let us know so we can improve!
Need more help?
Book Demo