Configure the Scheduler Widget
Business Background
Allow users to view, create, edit, and delete schedules, appointments, or events within a calendar-like interface.
Titan Solution
With Titan Web, you can add a scheduler widget to schedule meetings with Salesforce-linked contacts or static users. You can configure meeting types, availability, and events.
How to Guide
The first step in configuring the Scheduler widget is adding users or assets. You can add static data or bring objects from Salesforce. Afterward, you can configure meeting types, events, and availability as required.
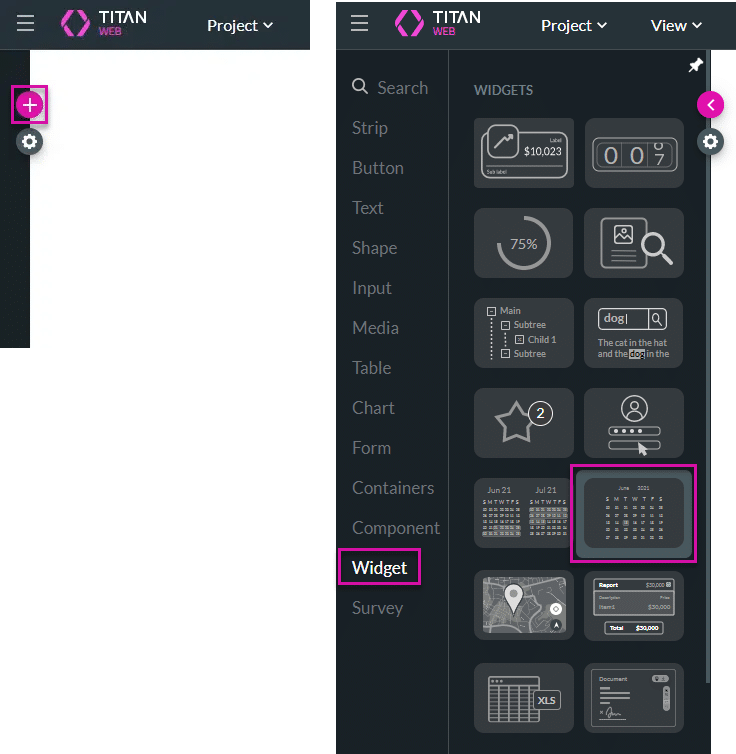
- Click the + icon to open the list of elements.
- Select the Widget option from the list.
- Click-and-drag the Scheduler widget to the canvas. The Scheduler Configuration screen opens.
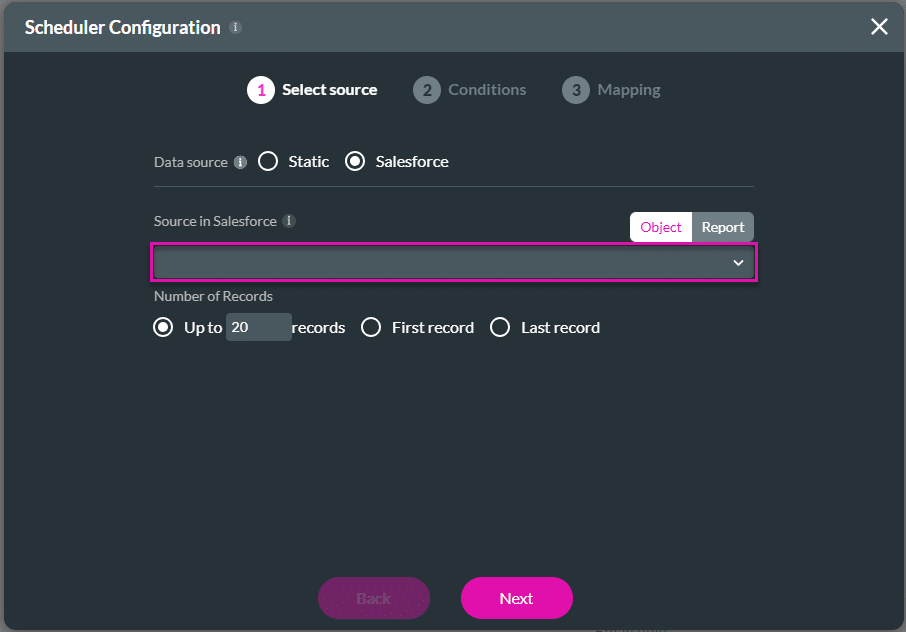
- Select the Source in Salesforce from the drop-down list. This is the default option. It will bring dynamic data from the Salesforce source that you select.
- This can be people, for instance, contacts, opportunities, or leads.
- It can also be resources, such as meeting rooms or venues.
- Click the Next button and, if necessary, configure conditions for the Salesforce object, for instance, a specific type of person or resource.
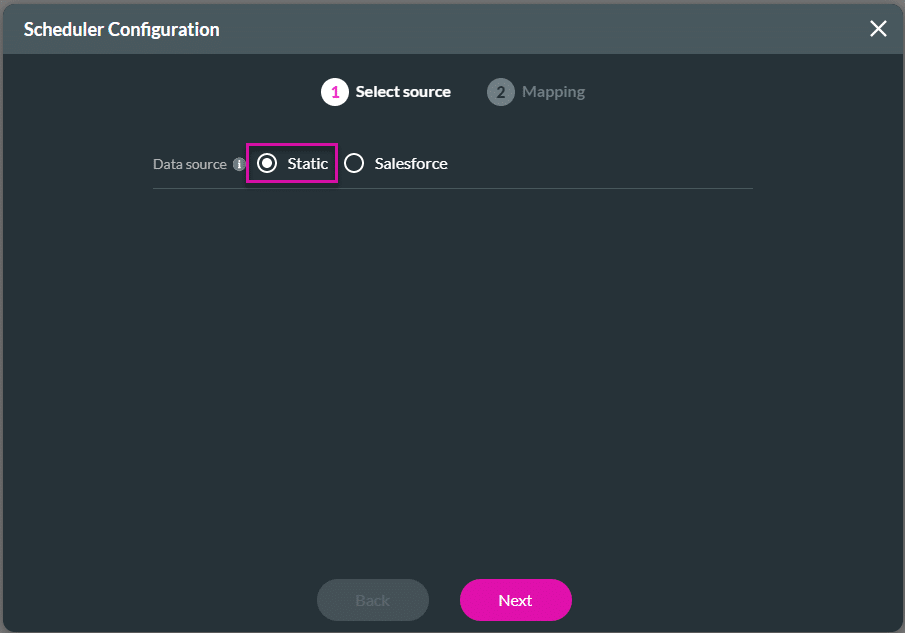
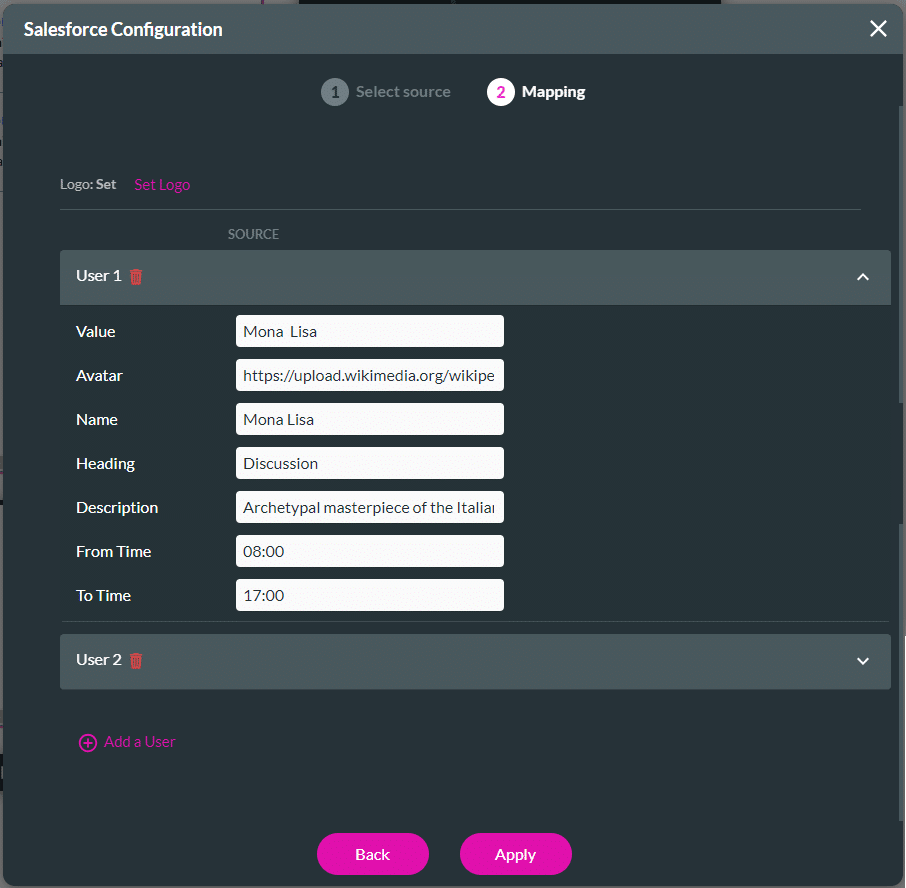
- Alternatively, click the Static radio button to configure a static data source. This is the method used in this example.
- Click the Next button.
- Configure the mapping by adding data, such as the following:
- Value: This is the unique identifier for each user. It can be a name or a numeric value. You will see this value when you use the debug functionality or when you configure a condition.
- Avatar: You can add an avatar with an image URL, either a JPEG or a PNG.
- Name: This is the name of the person or venue that will be displayed on the scheduler.
- Heading: This can be a description of the person or venue you are adding, for instance, CEO or Boardroom.
- Description: You can give further information here, for instance, product specialist or first floor.
- From Time and To Time: These are the specific times that the person or venue is available. This is optional. You can configure availability and absences later.
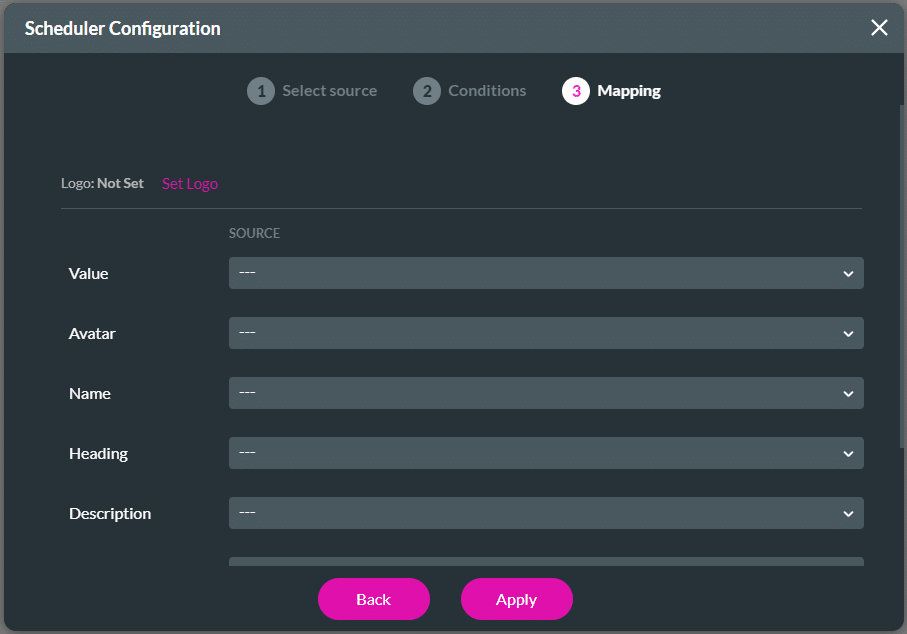
The mapping options are the same for the Salesforce data source. Use the drop-down lists to select the options.
- Click the Apply button. The scheduler is added to the canvas.
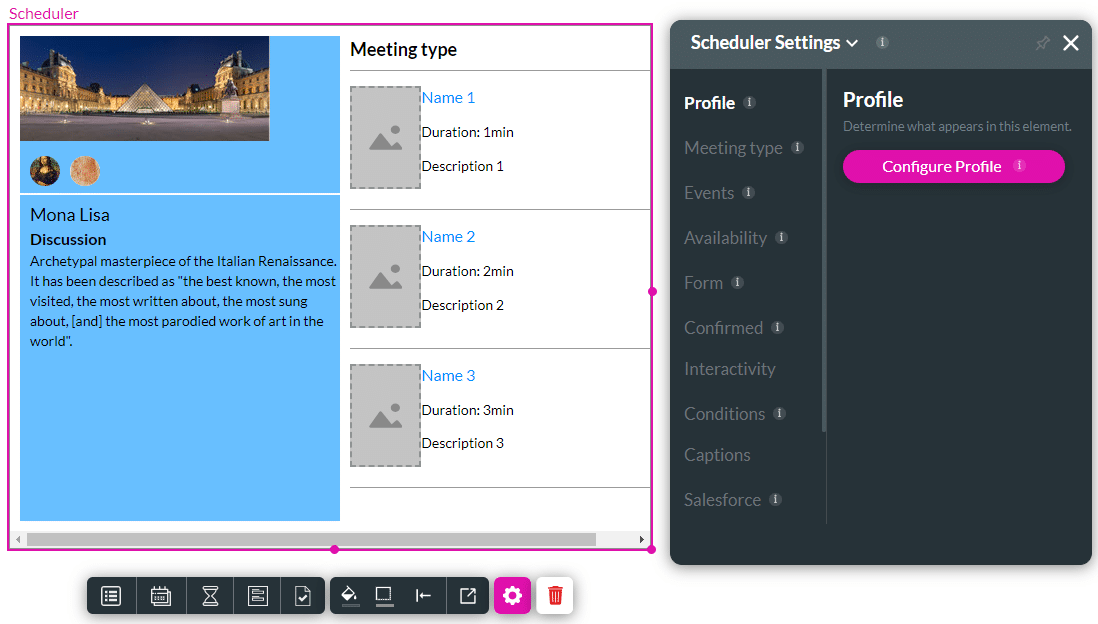
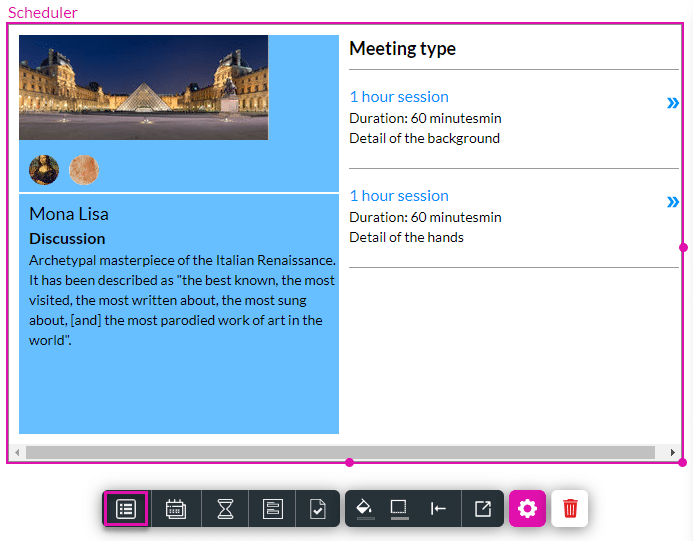
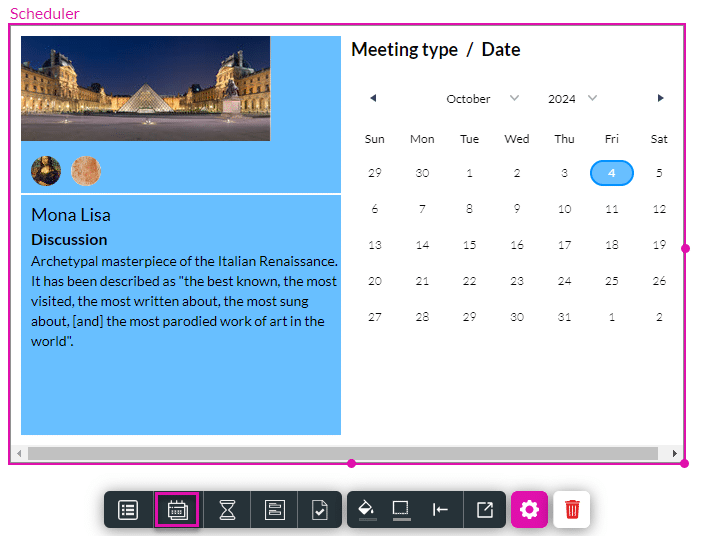
- Use the toolbar to select the different screens of the scheduler widget. The default is the Meeting type screen.
To see the Meeting type/Date screen, click the Date icon.
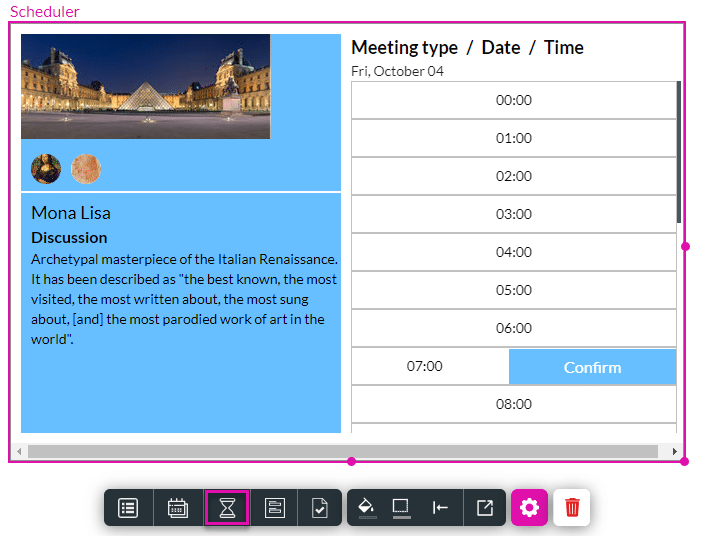
Click the Time icon for the Meeting type/Date/Time screen.
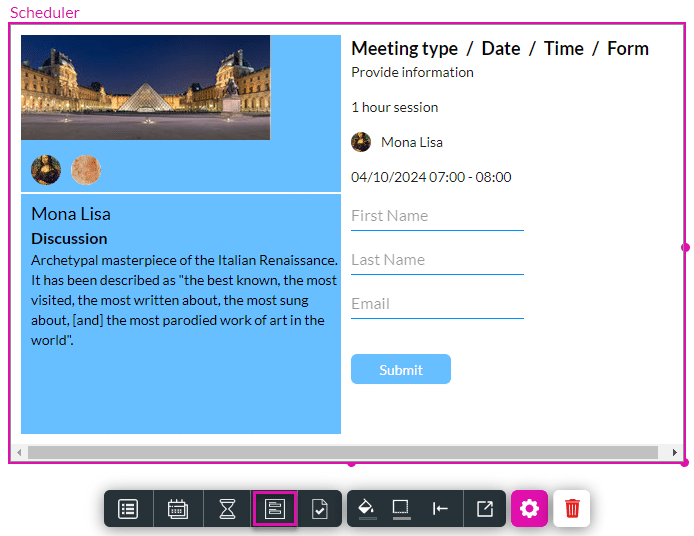
To see the Meeting type/Date/Time/Form screen, click the Form icon.
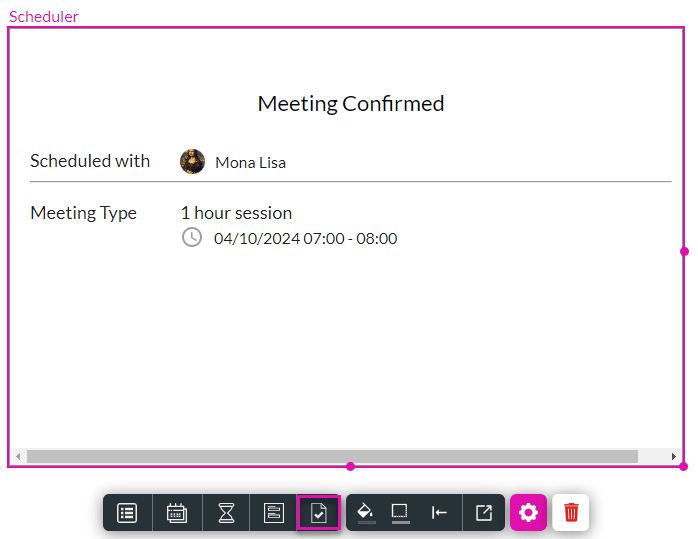
Click the Confirmation icon for the Meeting Confirmation screen.