

Multiple Finish Slides
Business Background
Use Titan Survey to create web or email surveys for Salesforce easily. Configure Salesforce integrated surveys swiftly with Titan’s no-code platform.
Titan Solution
Titan Survey can help you customize a Finish Slide based on customer responses from your web or email survey.
- Add a unique message to the Finish Slide of a survey depending on a customer’s previous response.
- Rating questions are popular question types and work well with customized notifications on Finish Slides for your surveys.
- Gauge customer sentiment from their survey responses and impress them with our intelligent customer interaction options.
- Set up conditional logic for your survey question flows.
- Incorporating these customized Finish Slides into a survey is fast, with a few clicks that can save you time and increase the professionalism of your business.
How To Video
Video Coming Soon!
How to Guide
- In Titan, create a new Web Survey Project.
- Add question and/or information slides.
Note:
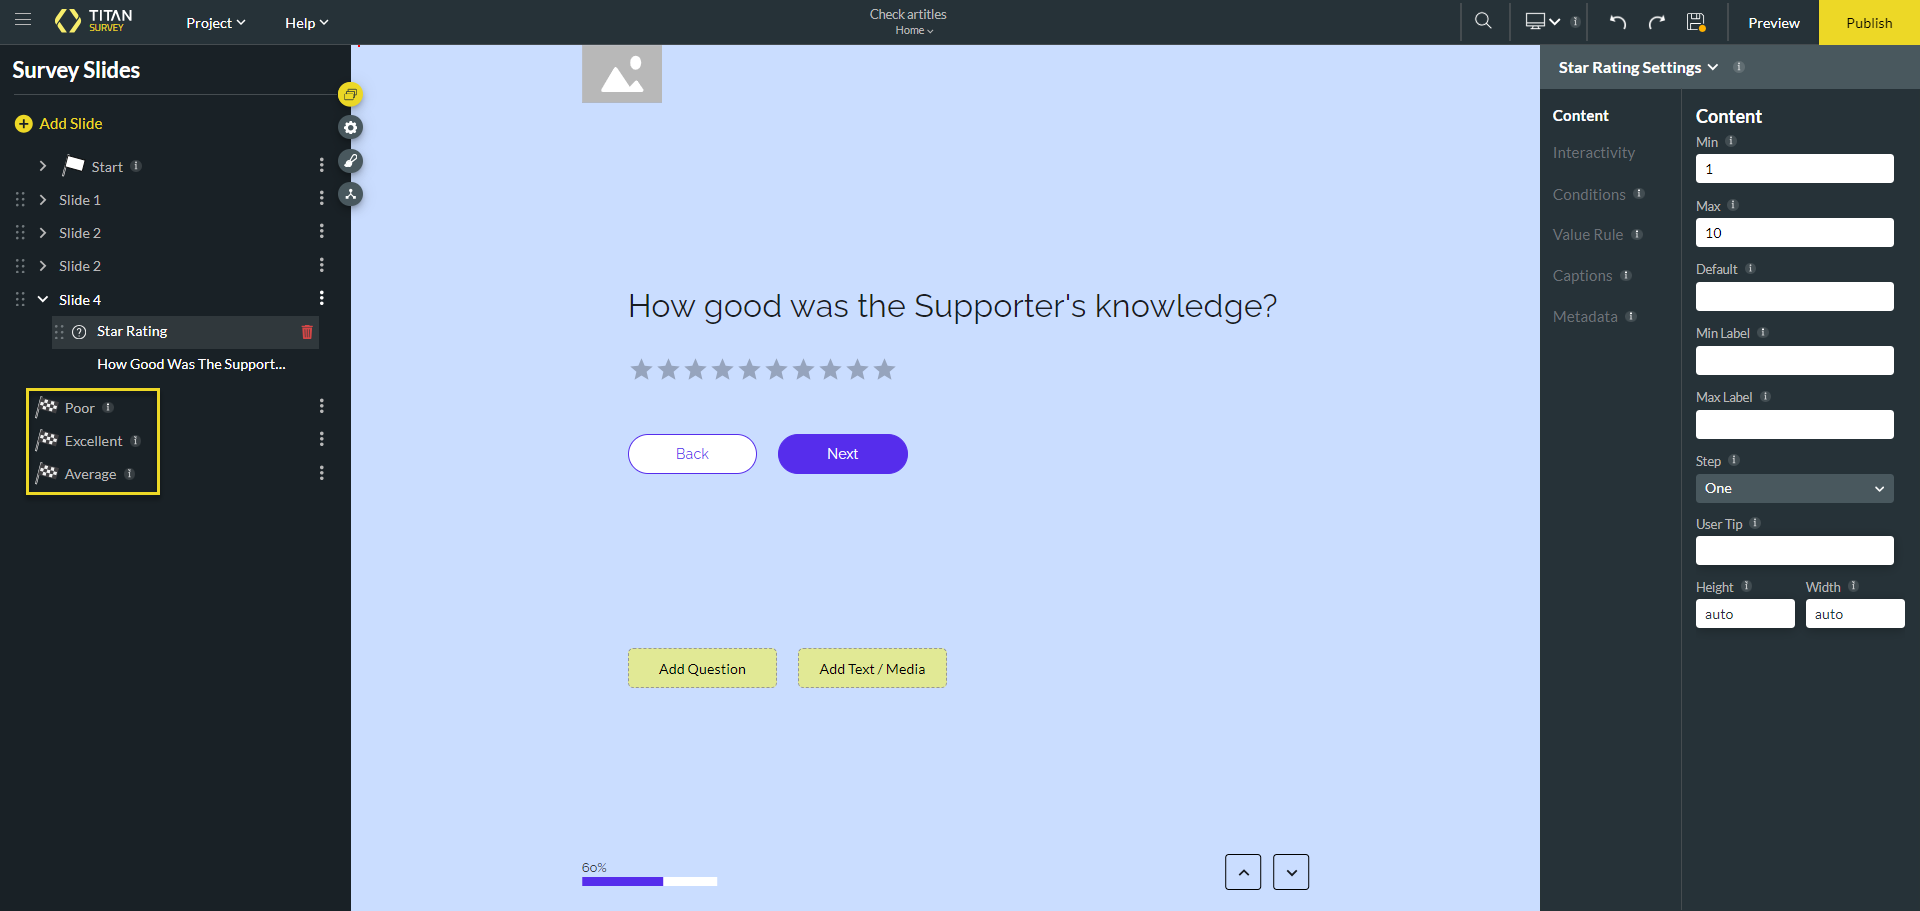
Prerequisites: Make sure you have a survey slide where the user can select options. In this example, a star rating is used.

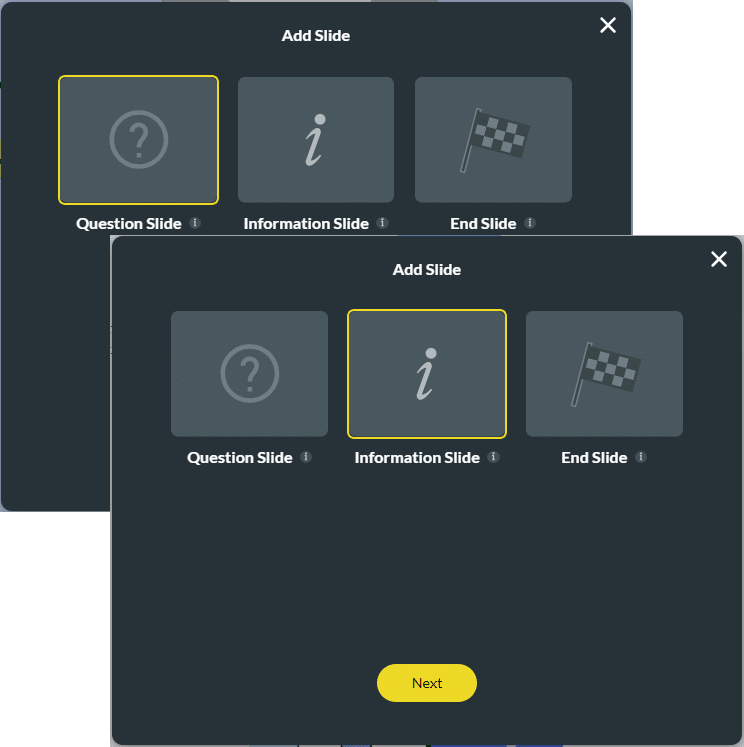
- Click the Add Slide button. The Add Slide screen opens. The default option is a Question slide.
- Click the End Slide option. The Add Slide screen with layout options opens.
- Click the layout option. You can edit this later.
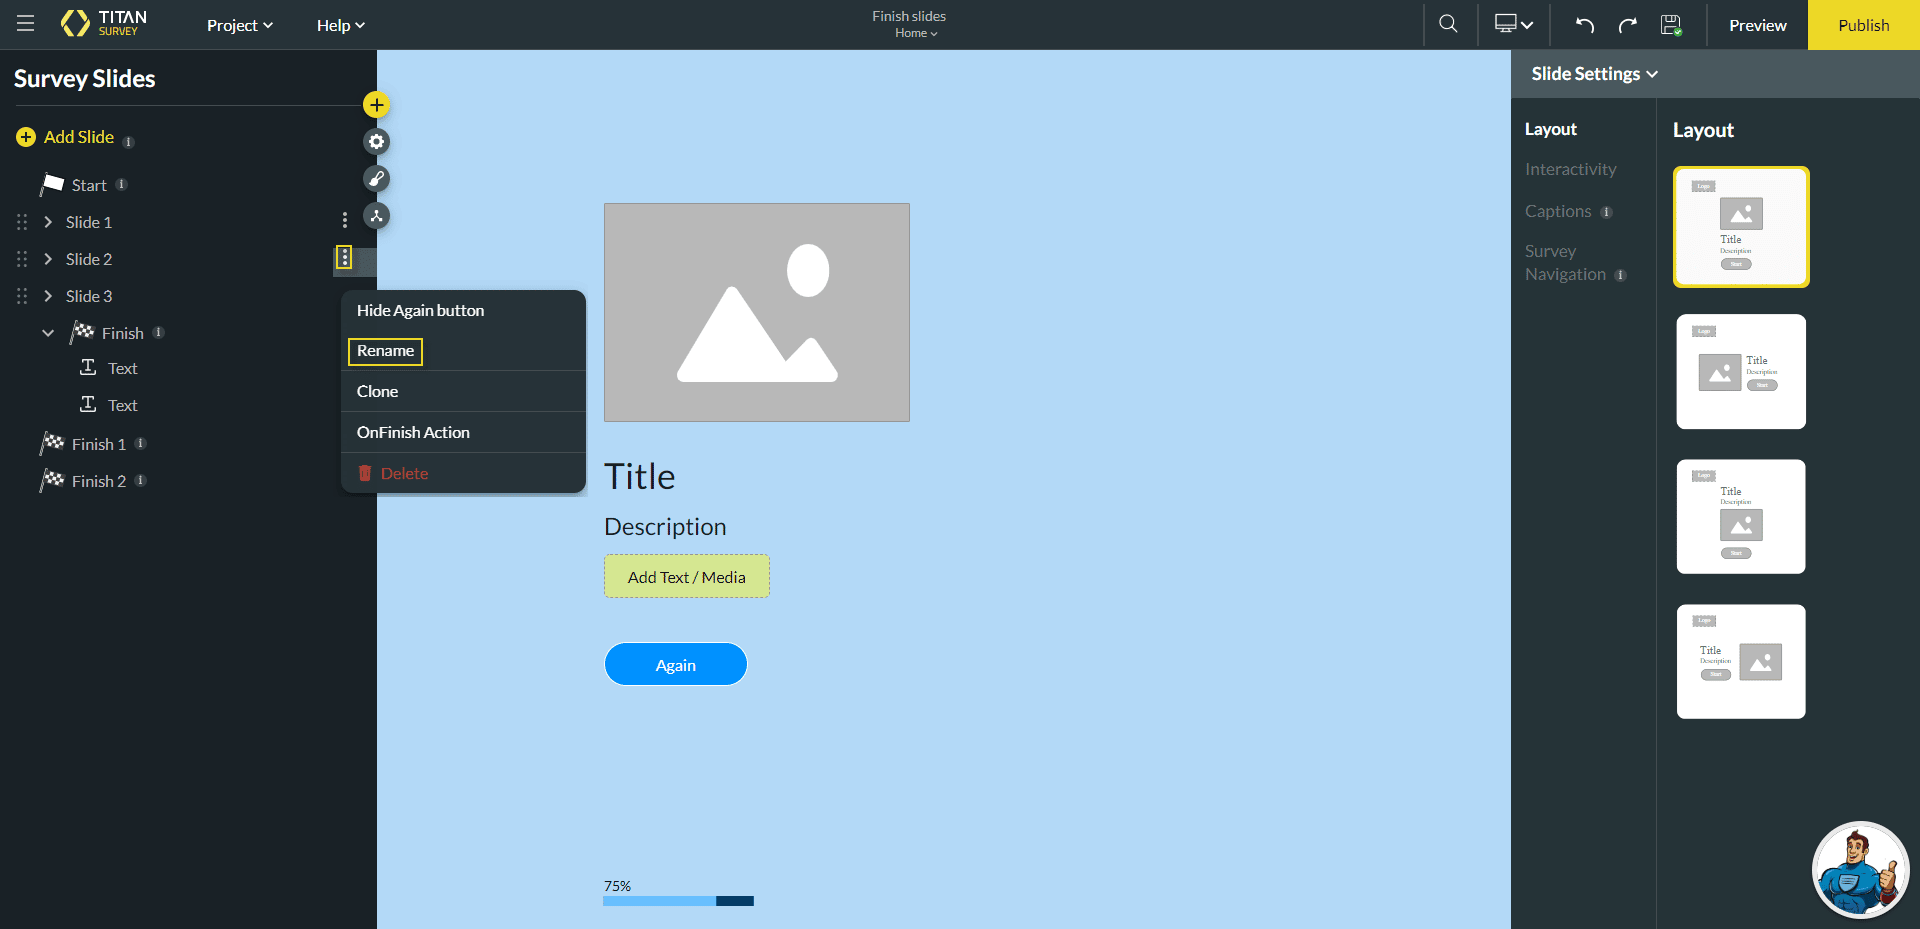
- Repeat these steps until you have the number of Finish slides you need. For this example, we will use three finish slides: the default and two extra.

- Rename each Finish Slide:
- Click the Kebab button.
- Click the Rename option. The Slide Name popup opens.
- Type a recognizable name in the field.
- Click the check mark to save the name.
- Click the first Finish Slide.
- Click the Rename option and change the title.
- Click the second Finish Slide.
- Click the Rename option and change the title.
- Click the third Finish Slide.
- Click the Rename option and change the title.
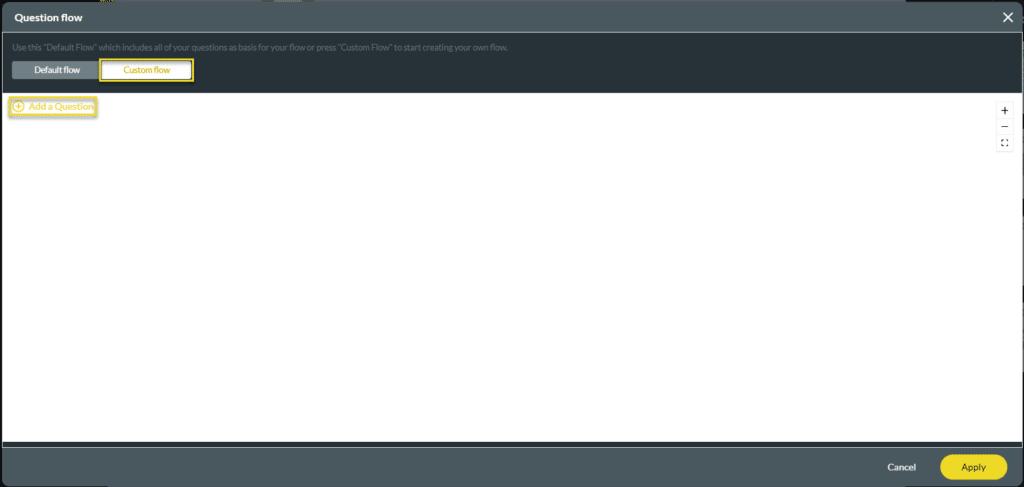
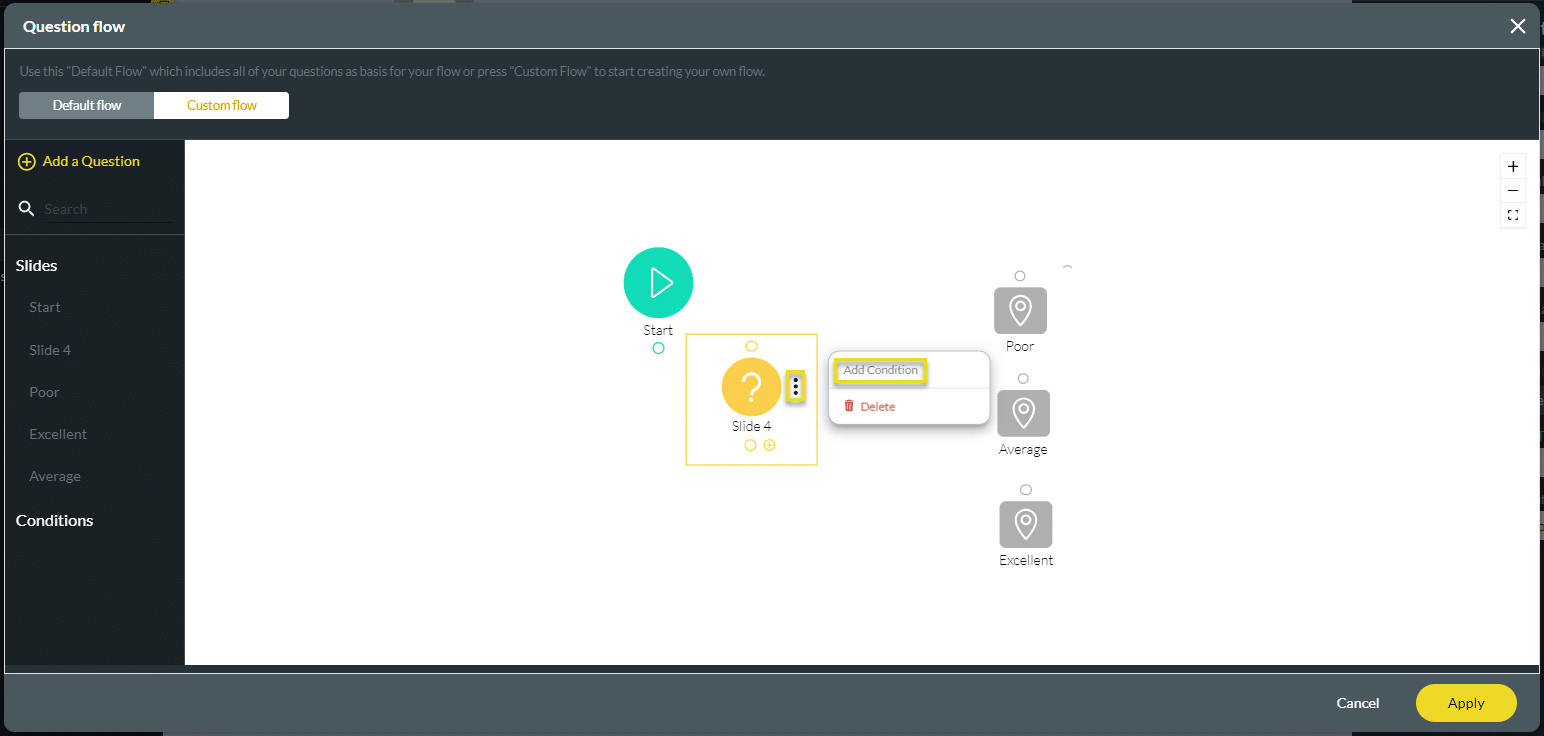
- Click the Flow icon. The Question Flow screen opens.

- Select the Custom flow option.
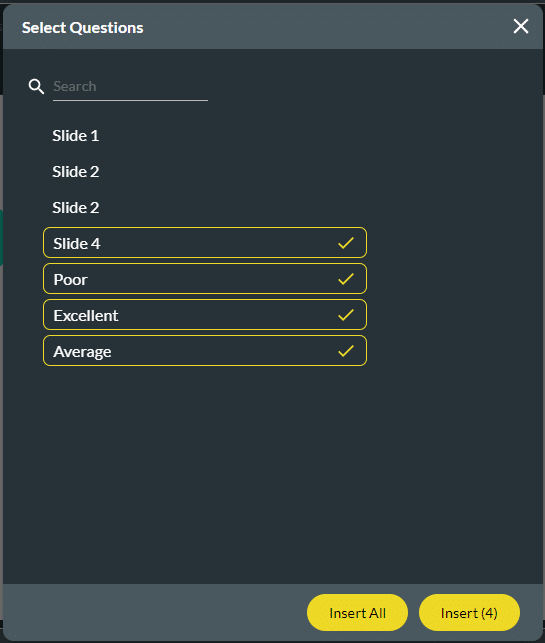
- Click the Add Question option. The Select Question screen opens.
- Click the questions you want to add. For instance, Slide 4 (the star rating question) and the three Finish Slides.
- Click the Insert button.
- Click the Kebab button next to the star rating question.
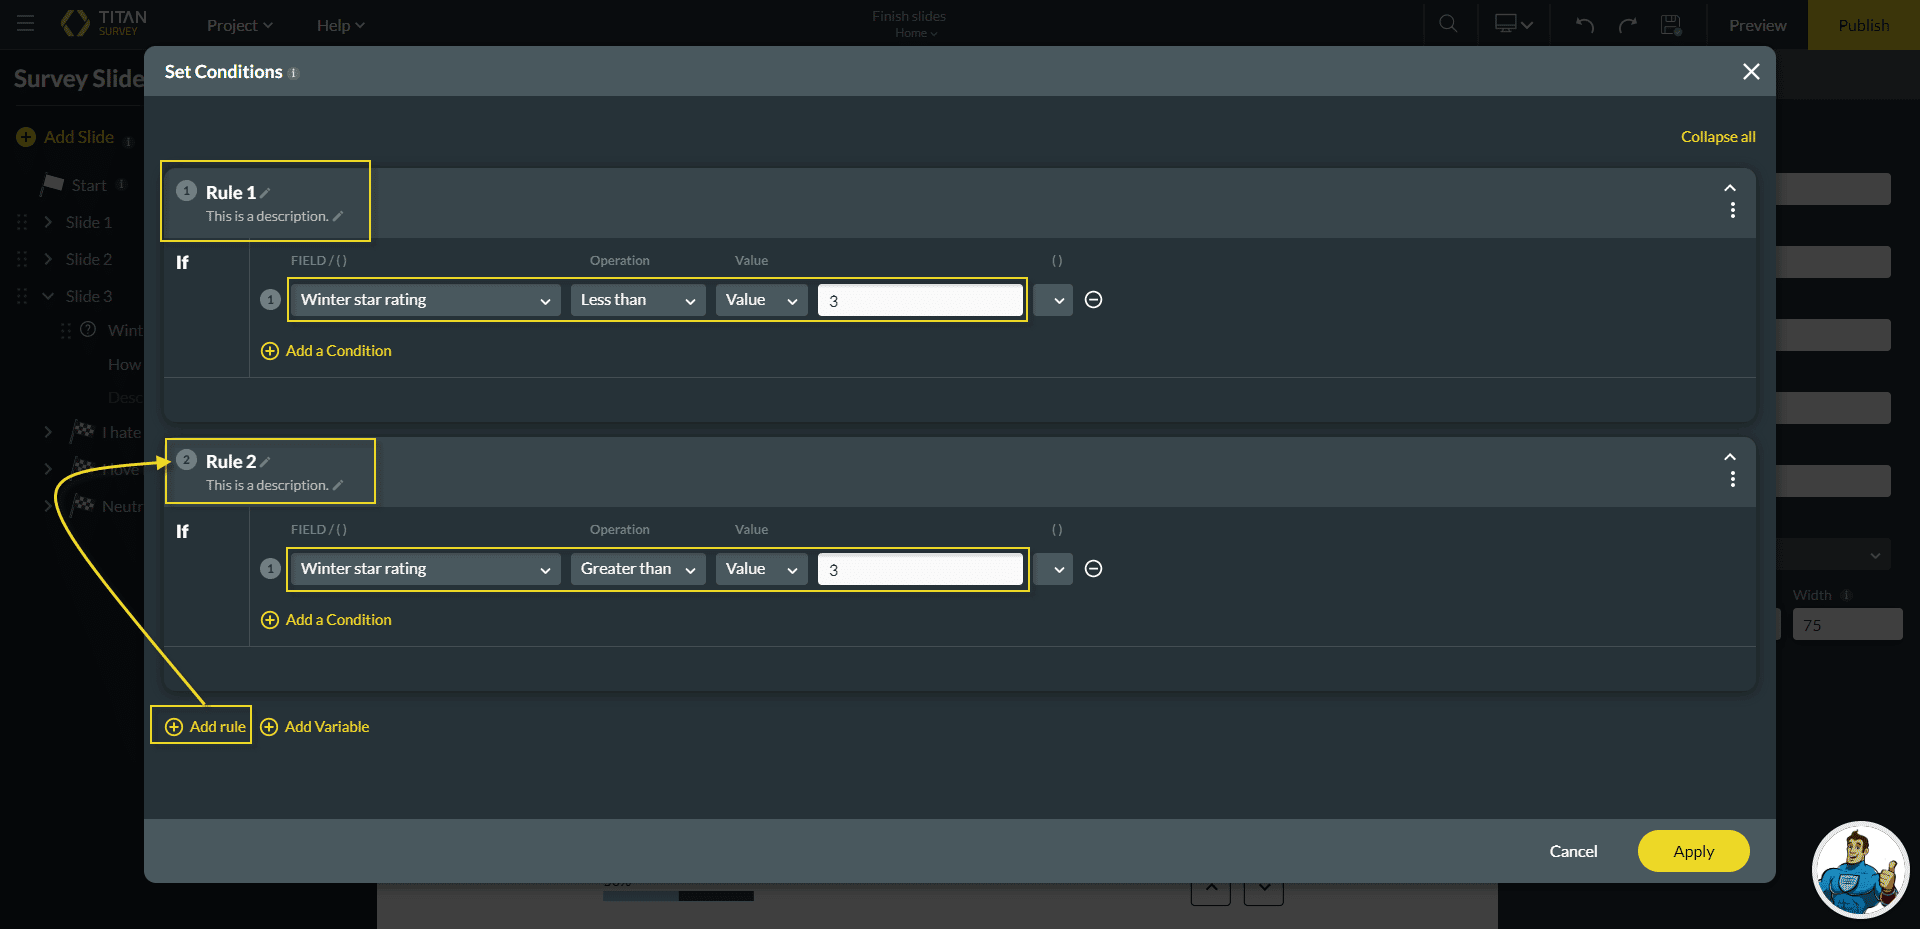
- Click the Add Condition option. The Set Conditions screen opens.
- Set the conditions for Rule 1:
- Search for the name of the star rating slide.
- Set the condition as follows: Star rating slide Less than Value =3
- Click the Add rule option. Rule 2 is added.
- Set the conditions for Rule 2:
- Search for the name of the star rating slide.
- Set the condition as follows: Star rating slide Greater than Value =3
- Click the Apply button.
- Drag the options in a logical format in relation to the condition.
- Hover your mouse pointer over the small circle of the Start slide. The mouse pointer changes to a cross.
- Click and drag the mouse pointer to the slide with the star rating question until the mouse pointer changes to a cross.
- Lift your finger from the mouse button to drop the connecting line on the option. This connects the start slide to the star rating slide.
- Hover with your mouse pointer over the small circle of Less than 5. The mouse pointer changes to a cross.
- Click and drag the mouse pointer to the option on the left until the mouse pointer changes to a cross.
- Lift your finger from the mouse button to drop the connecting line on the option.
- Do this until you have connected all the nodes.

- Click the Apply button.
Hidden Title
Was this information helpful?
Let us know so we can improve!
Need more help?
Book Demo