

Charts for the Word Add-In
Business Background
“A picture is worth a thousand words.” Charts provide a business the satisfaction of allowing viewers to differentiate and compare large volumes of data to understand information faster.
Titan Solution
Titan Web helps improve charts with the Word add-in. The Word add-in integrates seamlessly with Salesforce and is made to suit your individual needs, and the requirements of your project.
How to Video
- 0:02 Intro – How to add a chart into your document using Titan Word and Titan Web.
- 0:11 Learn how to insert a table into your document.
- 0:29 Get the hang of inserting a field into your document.
- 0:57 See how to bring in opportunity info from Salesforce into a table.
- 1:37 Learn how to add a dashboard with Titan Web to your document.
- 2:19 Watch how to configure a chart in Titan Web.
- 3:57 Preview your chart in Titan Web.
- 4:17 Learn how to add your Titan Web chart to your document.
- 4:49 Preview your Titan Web chart in your Word document.
- 5:44 Watch how to configure user access in Titan Web.
- 8:08 Learn how to remove conditions from your Titan Web chart.
- 8:45 Explore how to bind data from Salesforce into your Titan Web chart.
How to Guide
Make sure that you configure the chart before you use the feature in Word.
Use the feature in Word
- Click on the Insert/Edit image option in the Titan Word add-in.
- Click in the Web radio button.
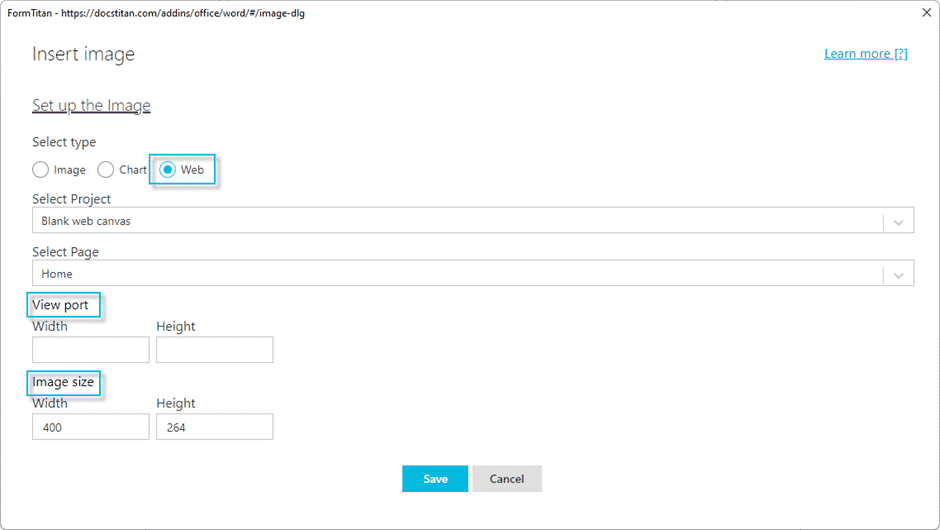
The View port is the window into the Web project. Use this when you have multiple strips on a page.
It is recommended that you use only one strip with only one chart on a page.
- Enter the image size. This is the size of the chart on your Web project, for instance, 600 x 400.
Make sure that your Word document has at least one Salesforce field, otherwise you will see the following error: “There are no filters, please add Salesforce objects to the document”.
- Click on the Save button. The image tags are inserted into the Word document.
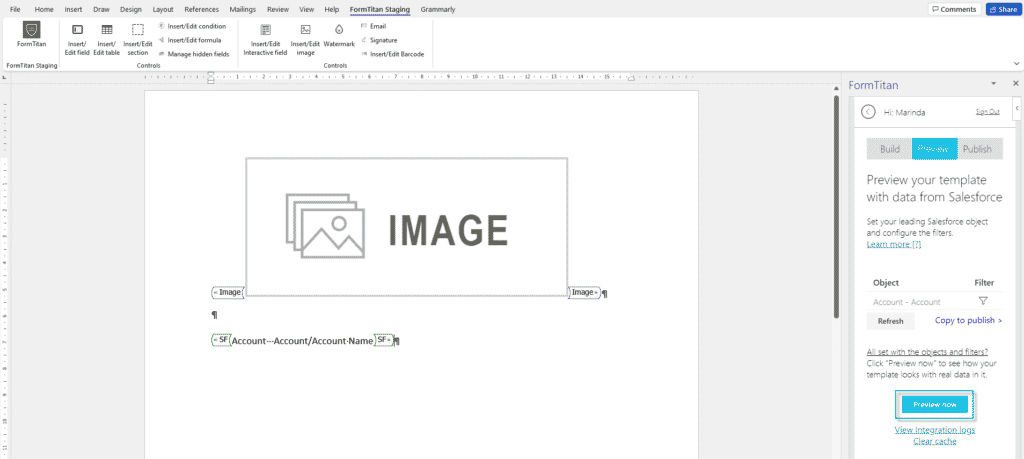
- Click on the Preview Now button. There is a message: “The document is currently rendering, please wait a bit.” The chart is shown in the Word document.
The chart is shown in the Word document.
Configure the chart in Titan Web
A document is generated, for instance, in Salesforce. The RecordID of the object in Salesforce is passed from Salesforce to the Word template. All the merge fields in the Word Document are filled with Salesforce data. The RecordID is sent to the Web project that will be used to generate the chart. This information will be pushed back to the Word template.
This example uses a chart, but you can also add another type of element, for instance, a table, container or widget.
The following must be done in the Web project.
- Create a chart in your Web project. For more information, click here.
Create only one chart per page in the Web project. If you want multiple charts in your web project, place each chart on a new page.
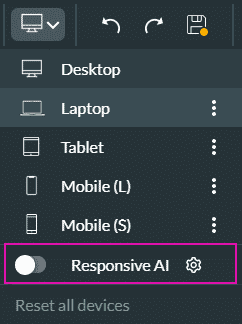
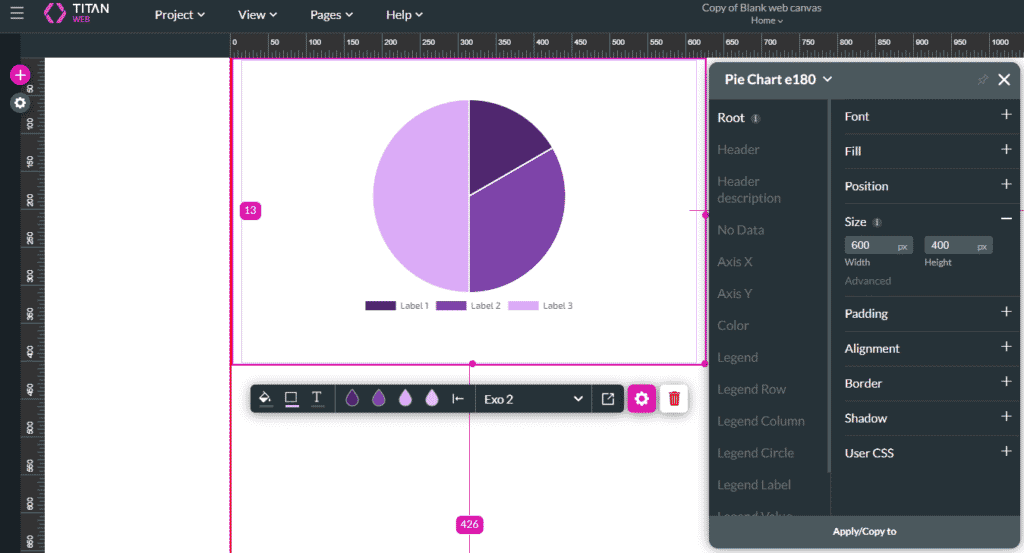
- Switch off the Responsive AI by using the toggle switch. If this option is on, the layout will change according to different layouts, but for this feature, the cart must have the size in Word as it was set in Web.
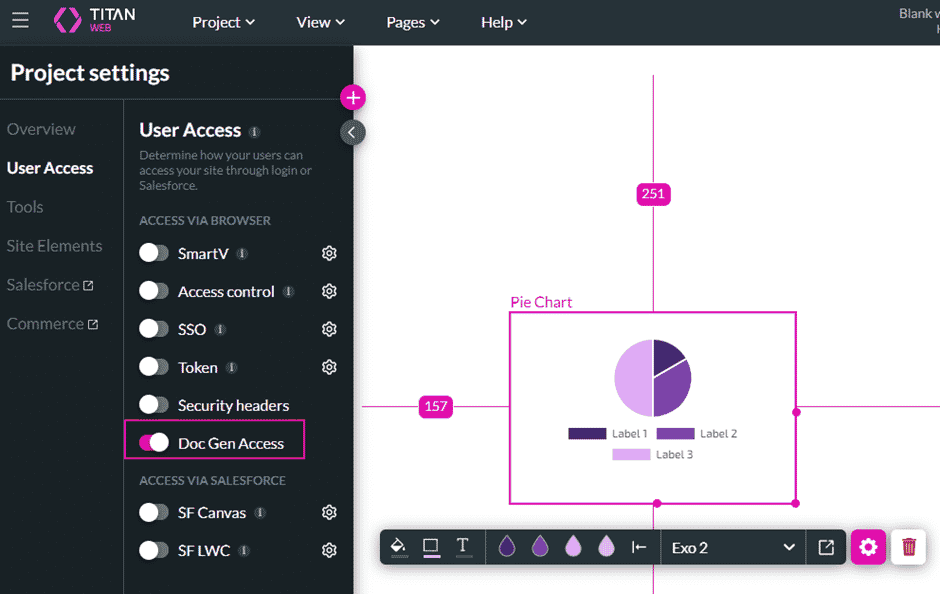
- Switch on the Doc Gen Access under User Access by using the toggle switch. This will generate a unique DocGen RecordID parameter that you can use when adding a chart for a specific Salesforce object in word.
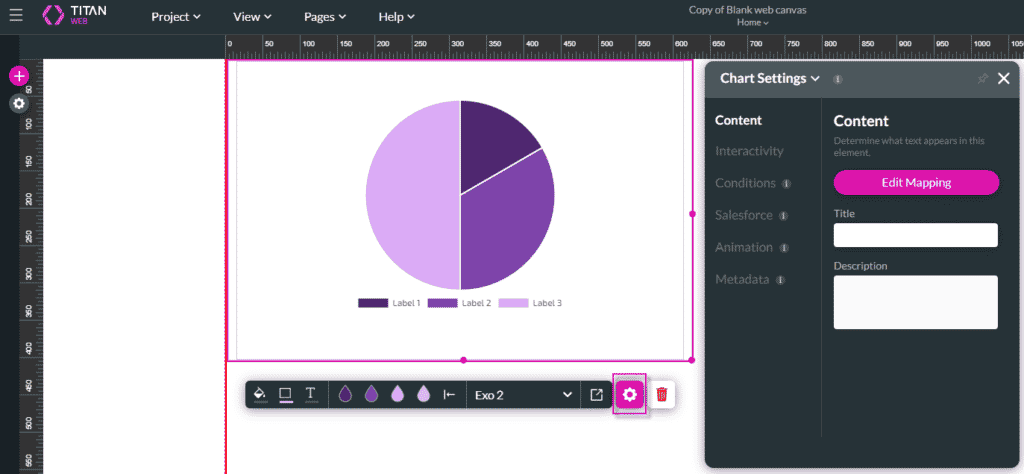
- Click on the Gear icon and under Content, click on the Edit Mapping button.
- Under Conditions, select Doc Gen RecordID from the drop-down list. This will use the RecordID form the Word document in real time.

- Note the chart size on the Web project, for instance, 600 x 400.
- Note the name of your project and the page where your chart is. You will need to select these in Word.
- Save and publish the project.
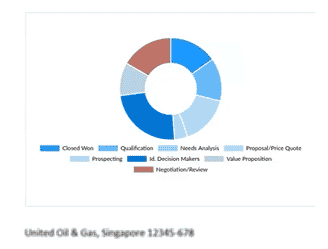
- Go back to the Word template and Preview. There is a message: “The document is currently rendering, please wait a bit.” The chart is shown in the Word document.
The chart for a specific account is shown.
