

PayPlus Processor Configuration
Business Background
When processing a PayPlus payment, you may need to pass the required and custom parameters to identify the type of payment.
Titan Solution
Titan Web lets you define the connections and parameters when integrating with PayPlus as a payment type.
How to Video
Coming soon!
How to Guide
Note:
Prerequisites:
Configure the following as necessary:
- Required processor configuration
- Recurring Settings (if “Recurring” was selected on the Payment Method screen)
- Structured Parameters
- Custom Parameters
- Items
- Customer
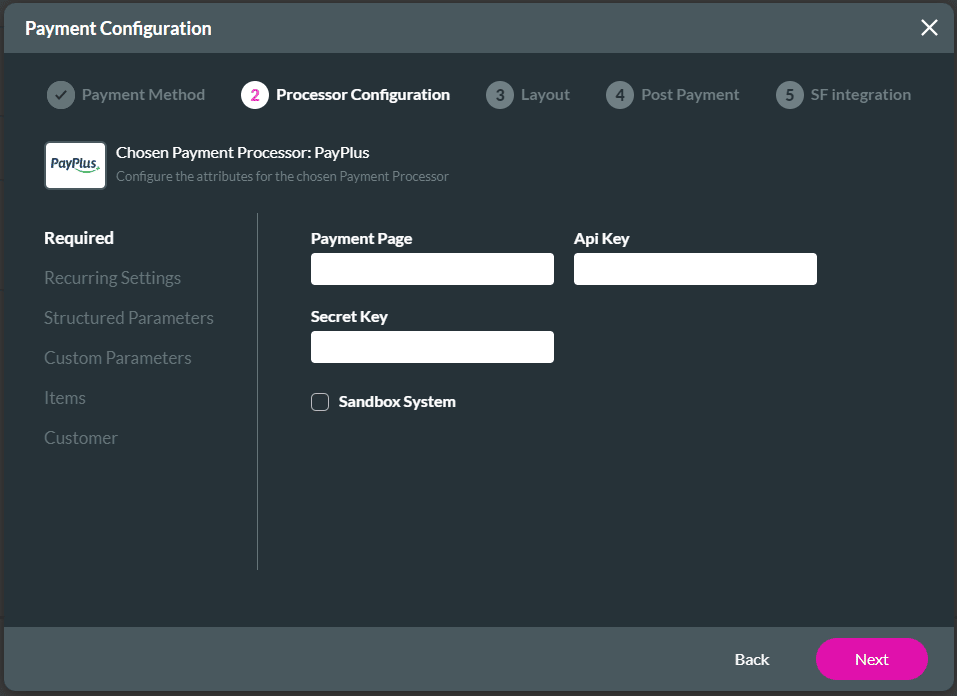
Required
- For Required processor configuration, do the following:
- Add the Payment Page to the field. This is the page where the user adds their purchase, for instance, Google Pay™ is fully integrated into the securely hosted payment pages of PayPlus.
- Add the API Key.
- Add the Secret Key. This key is used to verify that PayPlus sent the data.
- If necessary, select the Sandbox System option. The Sandbox System is an isolated virtual machine in which potentially unsafe software code can execute without affecting network resources or local applications. This is a safe way to test the payment integration.
Recurring Settings
- Select the Recurring Setting option.
- Use the toggle switch to enable the recurring settings.
- Use the Field or Static options to add parameters.
- Use the drop-down list to select a Field parameter.
- Type a Static parameter in the field.
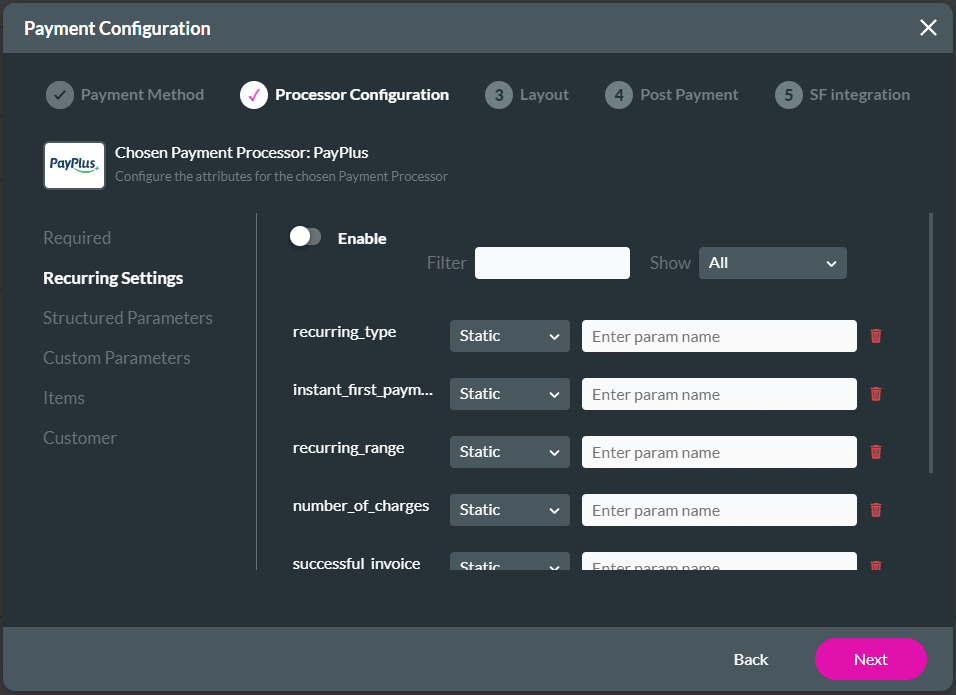
| Attribute | Type | Description |
|---|---|---|
| recurring_type | number | 0 – daily, 1- weekly, 2- monthly |
| instant_first_payment | number | The initial first payment will be immediately. |
| recurring_range | number | The range is 1 if the payment must run every month, 2 if the payment must run every second month, etc. |
| number_of_charges | number | The number of charges in the recurring payment. It is a number from 0 to unlimited. |
| successful_invoice | boolean | In case the invoice company is integrated, this is the initial invoice for every successful payment. |
| start_date | number | The date that the recurring payment will be started. This must be a number from 1 to 28. |
| end_date | string | The date that the recurring payment will stop in the format 2028-01-16. |
Also, refer to the API – Generate Payment Link for more information on the recurring payment attributes.
Structured Parameters
- Select the Structured Parameters option.
- Use the toggle switch to enable the structured parameters.
- Use the Field or Static options to map the language code. It will transfer the language code that is displayed on your page. It will take the general setting of the page by default.
- Use the drop-down list to select a Field parameter.
- Type a Static parameter in the field.

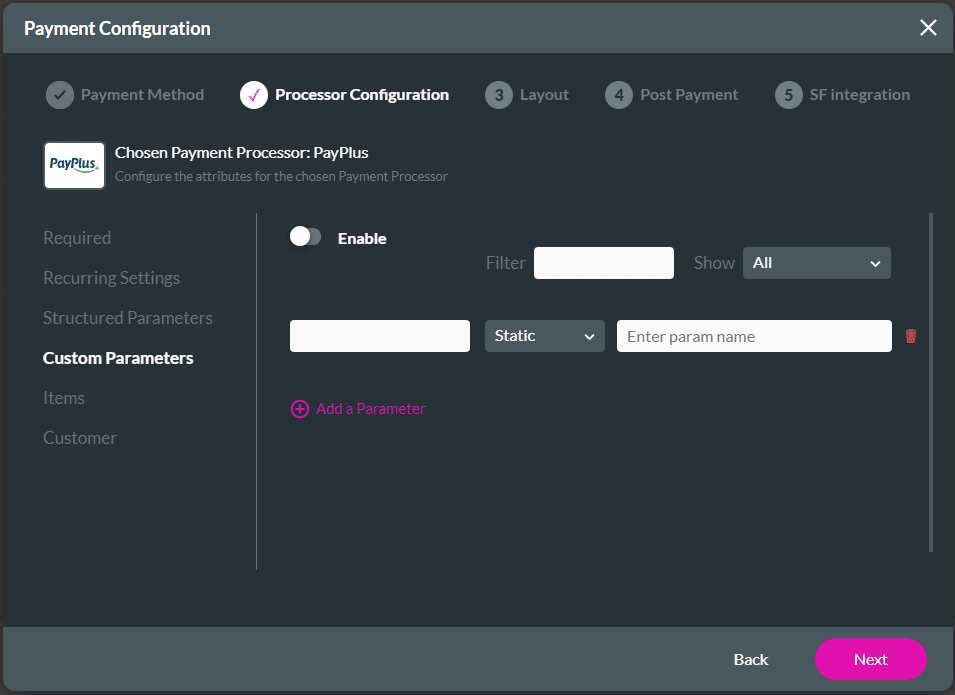
Custom Parameters
- Select the Custom Parameters option.
- Use the toggle switch to enable the custom parameters.
- Use the Field or Static options to add custom parameters.
- Use the drop-down list to select a Field parameter.
- Type a Static parameter in the field.
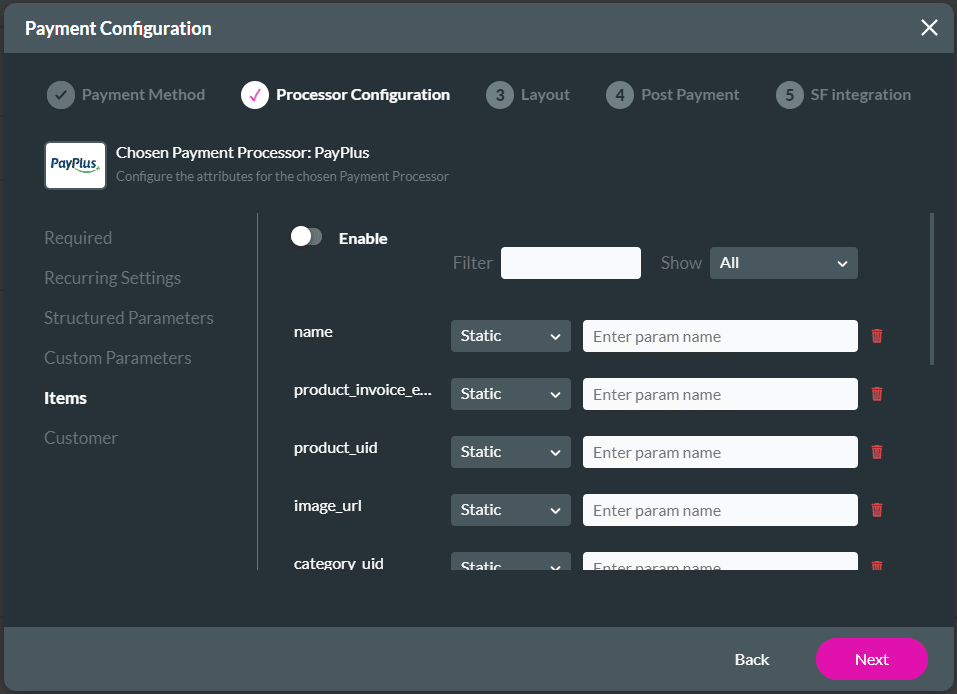
Items
- Select the Items option.
- Use the toggle switch to enable the items.
- Use the Field or Static options to add items.
- Use the drop-down list to select a Field parameter.
- Type a Static parameter in the field.
Customer
- Select the Customer option.
- Use the toggle switch to enable the customer parameters.
- Use the Field or Static options to add customer information.
- Use the drop-down list to select a Field parameter.
- Type a Static parameter in the field.

- Select the Next button. The Payment Configuration > Layout screen opens.
Hidden Title
Was this information helpful?
Let us know so we can improve!
Need more help?
Book Demo