

Metadata
Business Background
Use the Metadata options to more accurately categorize relevant data. There are different metadata options available per element, and the options will help track information provided for the input fields.
The metadata provides backend context about the element, such as its purpose, content, or function. Your users won’t see this.
Titan Solution
Please see the below table for some Metadata examples and how they are used in Titan Web.
| Name | Use |
|---|---|
| Field ID | A unique Field ID is automatically assigned for each element. This also assists with mapping. |
| Parent ID | The Parent ID is the Field ID of the element, which contains the current element. A basic element, such as a strip, which has no parent element, will not contain a parent ID. |
| Type | The type of the element is shown here, for instance, Text, Input Fields, or Button. |
| Tag | Tags are used to internally identify elements. Tagging an element is highly recommended since tags help identify the element in Salesforce mapping, conditions, layer list and search. |
| Comment | Comments can be used to explain, to anyone with access to your project, the meaning of the element. Comments are optional. |
How to Video
- 0:02 An introduction to the different Metadata.
- 0:12 Navigate to the Index Settings.
- 0:21 Learn more about the Field ID.
- 4:28 Preview the updated project.
How to Guide
- Click the + icon to open the list of elements.
- In this article, we show the Text element as an example.
- Select the Text option from the list.
- Click-and-drag the Paragraph element to the canvas.
- Click the Paragraph settings Gear icon. The Text setting screen opens.
- Select the Metadata option from the list. Several metadata options are shown.
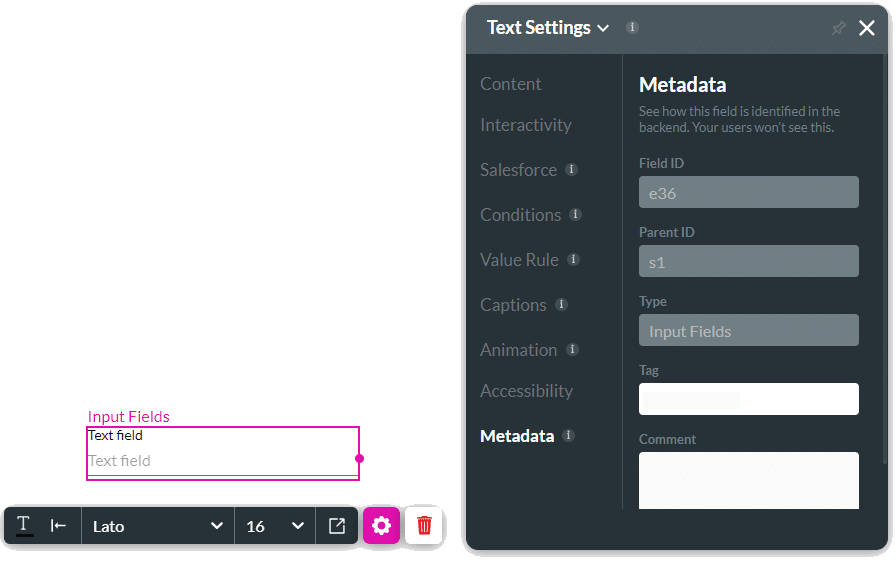
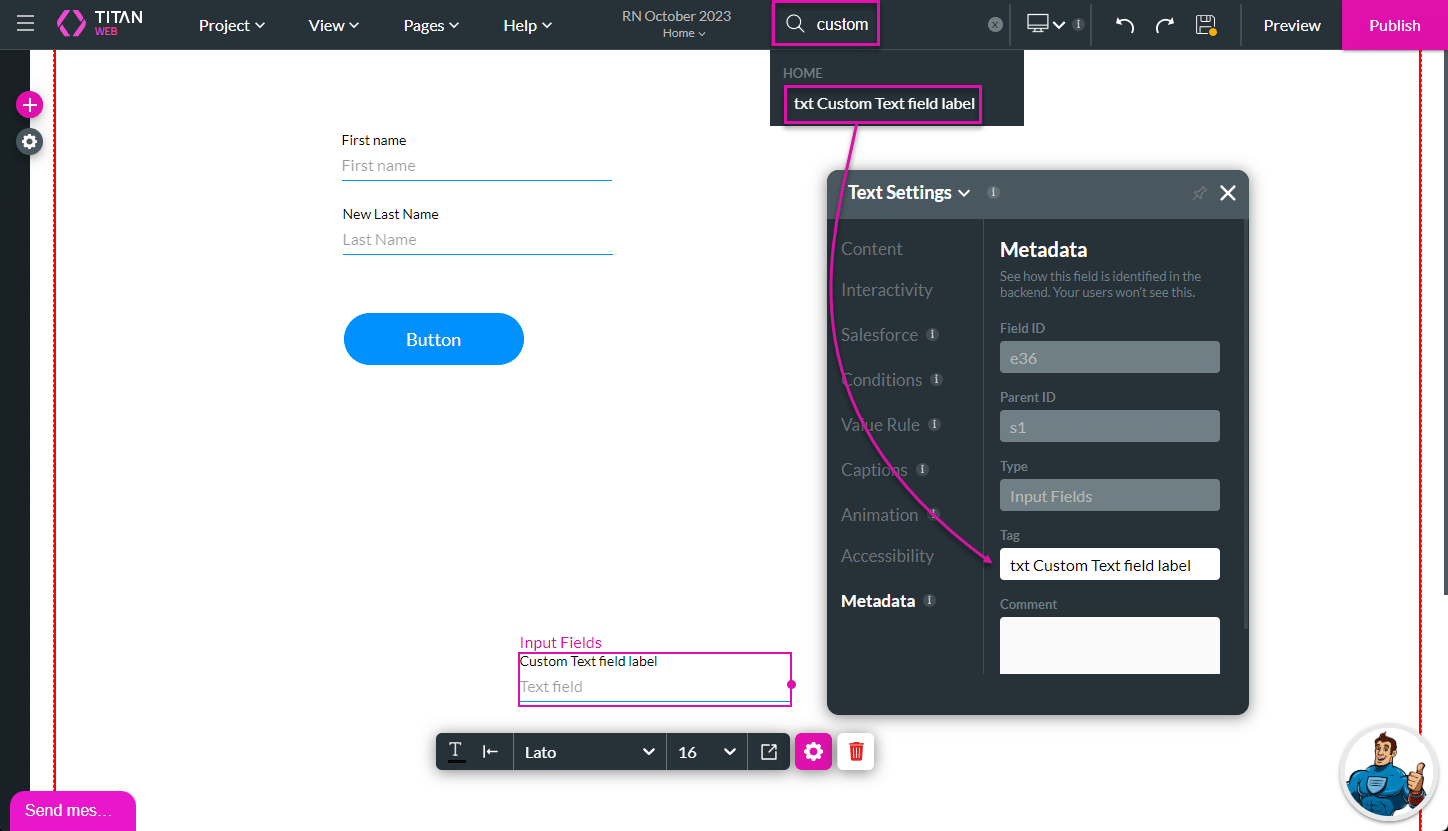
- The field ID option is unique for different types of elements. You can use this option to search for an element.
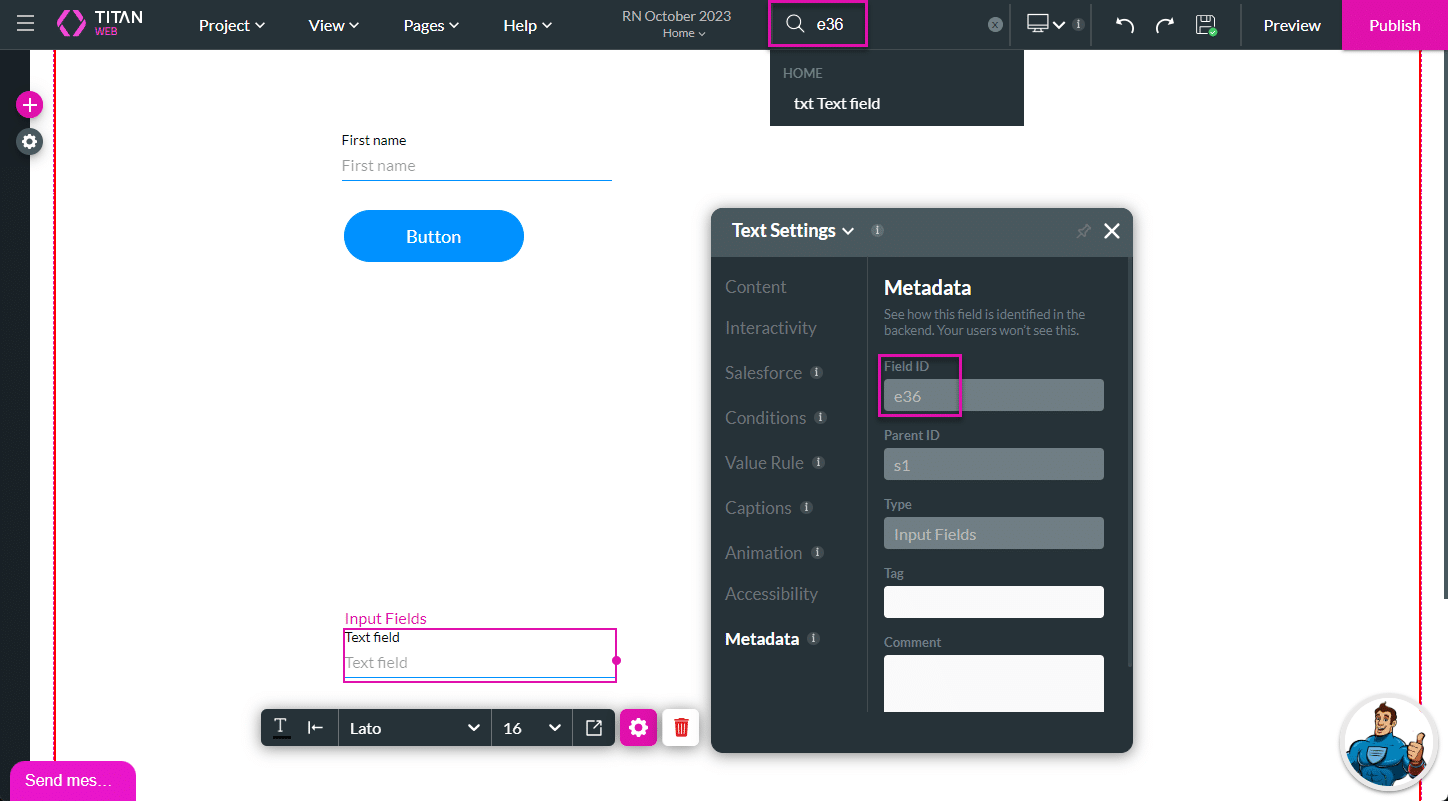
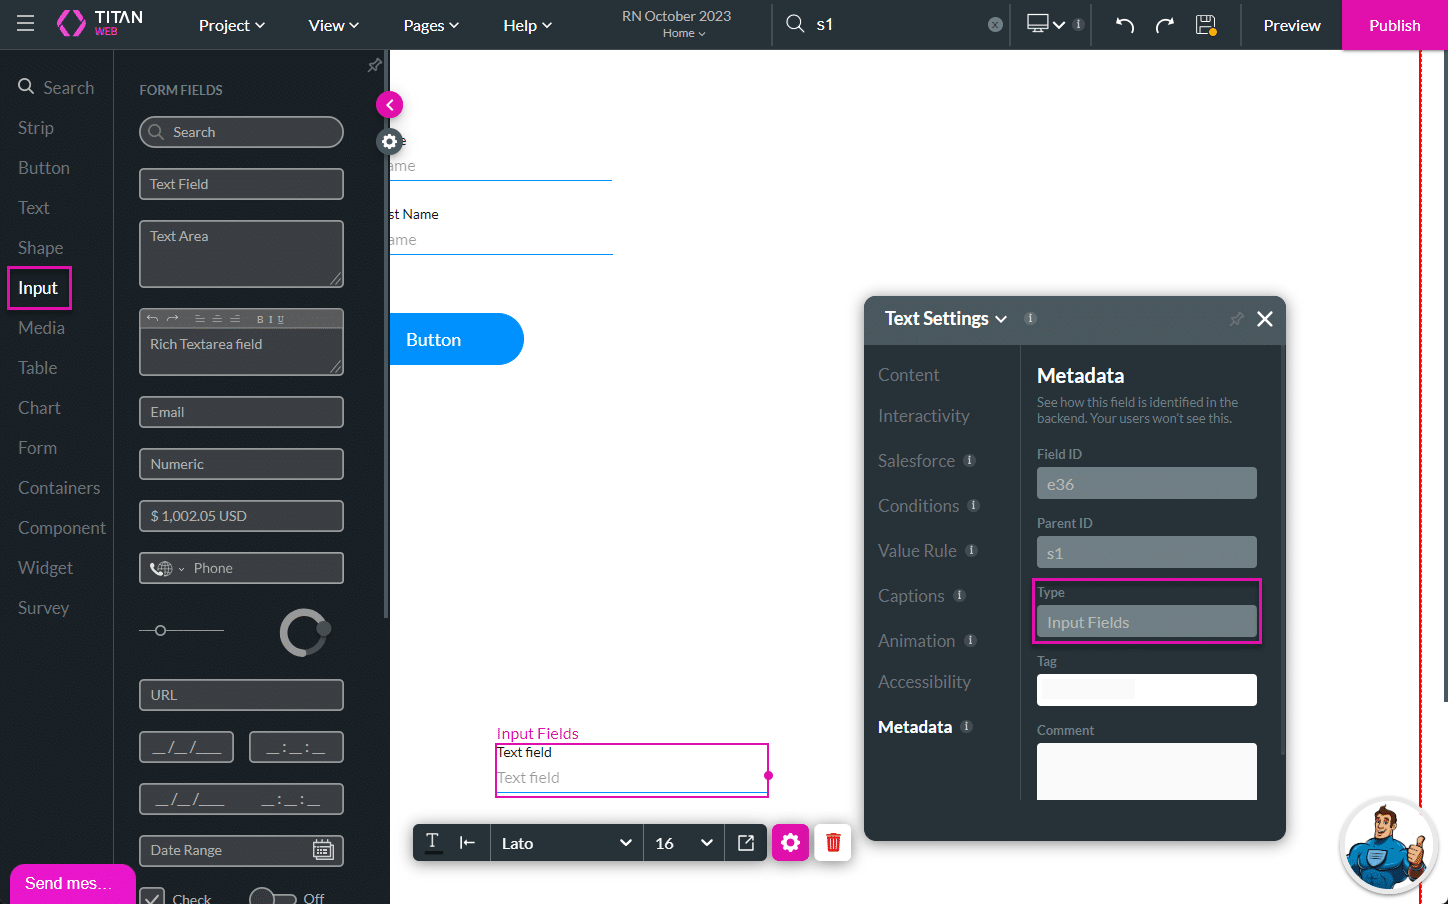
- The Parent ID refers to the strip (S1) in this example.
- The type refers to the type of element. In this example, an Input Field element was added.
- The tag field is empty until you add a custom label. Then, it is populated with the element’s prefix and the label. You can edit the tag manually, and the label will no longer affect it.
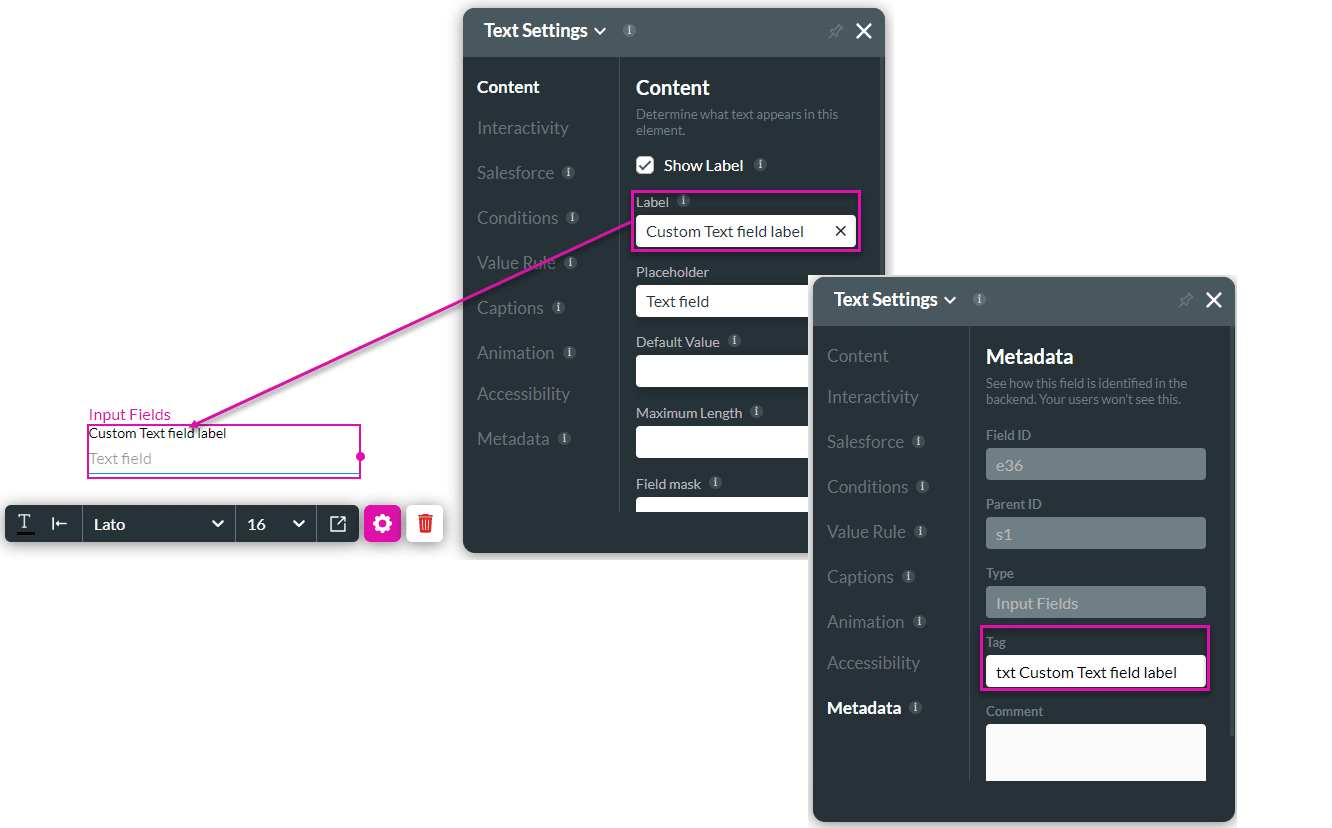
- You can use the tag to search for elements in the project.
The following table lists the prefixes of each element and gives examples of how this feature is used:
| Element Type | Prefix | Trigger Field | Sample Field Value | Sample Metadata Tag |
|---|---|---|---|---|
| Search field | srh | Label | Account | srh Account |
| Text field | txt | Label | First Name | txt First Name |
| Textarea field | txa | Label | Description | txa Description |
| Email field | eml | Label | Private Email | eml Private Email |
| Numeric field | num | Label | Account Number | num Account Number |
| Currency field | cur | Label | Amount | cur Amount |
| Phone Number field | phn | Label | Mobile | phn Mobile |
| Slider field | sld | Label | Minimum Requests | sld Minimum Requests |
| URL field | url | Label | Website Address | url Website Address |
| Date field | dat | Label | Onboarding | dat Onboarding |
| Time field | tim | Label | Updated at | tim Updated at |
| Datetime field | dtm | Label | Closed at | dtm Closed at |
| Date range field | drg | Label | Between | drg Between |
| Signature field | sig | Label | Sign Here | sig Sign Here |
| Checkbox field | chk | Text of the Caption | I Approve | chk I Approve |
| Switcher field | swt | Caption | Enable Access | swt Enable Access |
| Multi select picklist field | msp | Label | Relevant Users | msp Relevant Users |
| Radio field | rad | Label | Account Type | rad Account Type |
| Dropdown field | ddn | Label | Access Reason | ddn Access Reason |
| Circle Slider field | n/a | n/a | n/a | n/a |
| Rich Text Area | rta | Label | Description | rta Description |
| Lookup field | lkp | Label | Contact | lkp Contact |
| Button Group Field | btg | Label | Options | btg Options |
| Signature Field | sig | Label | Sign Here | sig Sign Here |
Hidden Title
Was this information helpful?
Let us know so we can improve!
Need more help?
Book Demo