

Custom Themes
Business Background
Be in control and make your web page unique with custom themes in just a few clicks and no code. Configure your branding once and affect the colors, fonts, and layouts for all projects.
Titan Solution
It has always been easy to configure a unique and effective online presence by using custom styling for the elements in Titan’s products. Now it is even easier as you can add custom themes to your web page that will affect all the elements in the project.
- You can customize the font, colors, and inputs to enhance your branding and customer experience.
- Make sure you have a competitive advantage and improved accessibility with Titan Web’s custom themes that can be used across all your projects (if necessary) for a consistently branded appearance.
How to Video
- Coming soon!
How to Guide
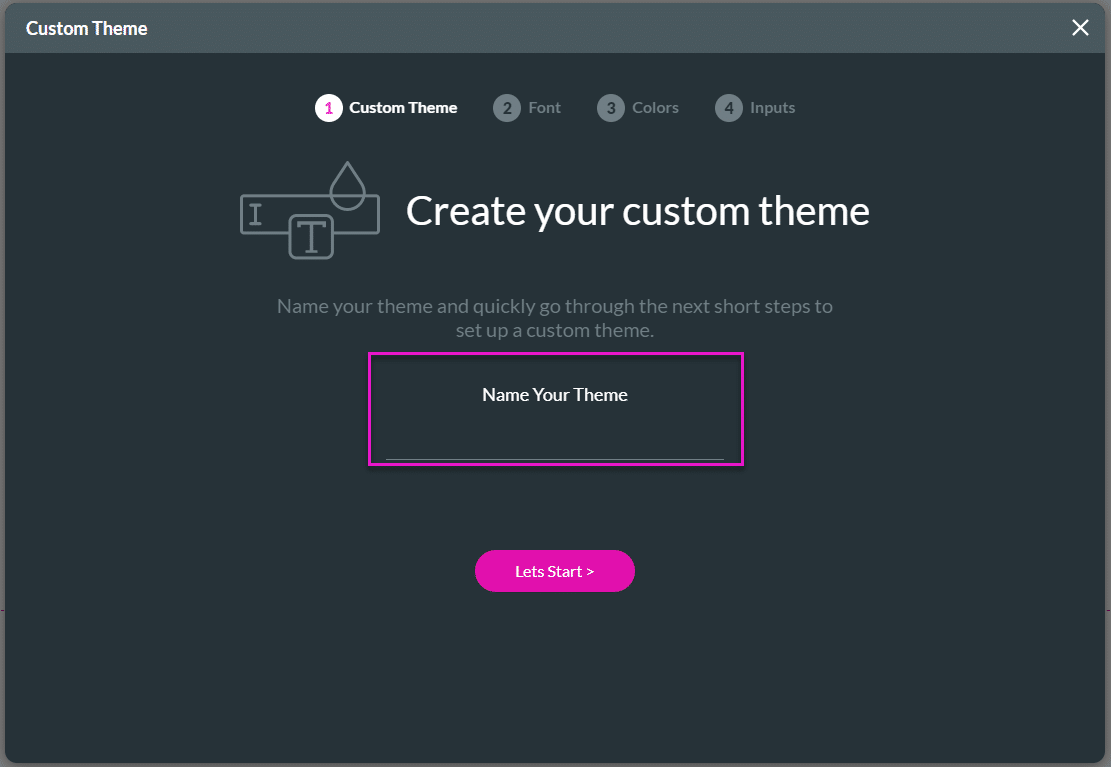
- Click the Project drop-down and select the Theme option. The Theme screen opens on the right side of the project canvas.
- Click the Custom Theme + icon. The Custom Theme screen opens.

- Type a name for your theme and click the Let’s Start button.
- Choose the fonts for the following:
- Main Font: This will affect the fonts of all input fields in the project.
- Title Font: This will affect the fonts of all the title text elements in the project.
- Heading Font: This will affect the fonts of all the heading text elements in the project.
- Paragraph Font: This will affect the fonts of the paragraph text elements in the project.
- For Main Font, use the drop-down list to select the font family for the label and the input font.
- Select the font color.
- For Title, Heading, and Paragraph Fonts, use the drop-down list to select the font family for the label and the input fonts.
- Use the drop-down list to select the font size.
- Select the font color.
- Click the Next button.

- Choose the colors as follows:
- Primary Colors: This will affect the main color in most elements, for instance, buttons and input elements.
- Supporting Colors: This will affect the supporting color in more complex elements, for instance, accordion and table elements.
- For Primary Colors, select the primary color and the font color of the element.
- For Supporting Colors, select the supporting color and the font color of the element.
- Click the Next button.

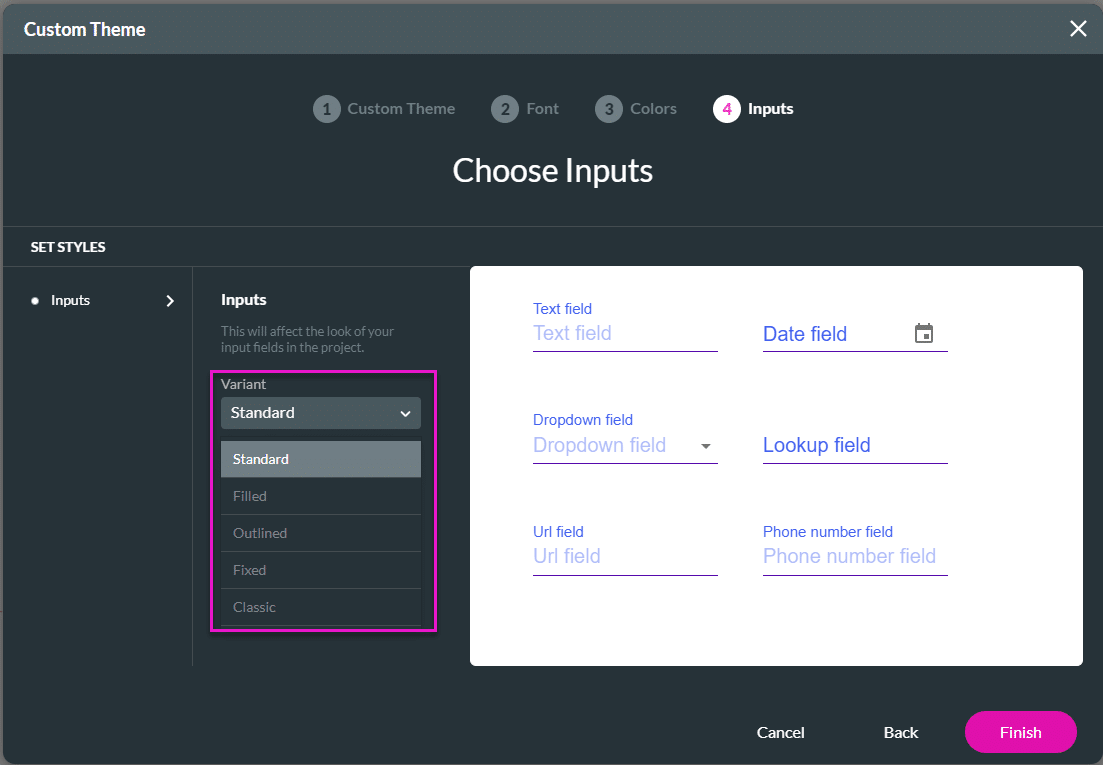
- Use the drop-down list to select the variant. This will affect the look of your input fields in the project.
- Select the Standard option for a basic or common look of elements.
- Select the Filled option for a color-filled look of elements.
- Select the Outline option for an element with a border.
- Select the Fixed option to fix the label position of the element in comparison to the input. The label will not overlap the input of the element.
- Select the Classic option for a classic quality look of elements.
| Variant | Example |
|---|---|
| Standard | 
|
| Filled | 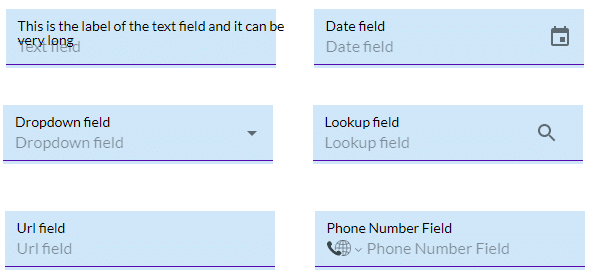
|
| Outline | 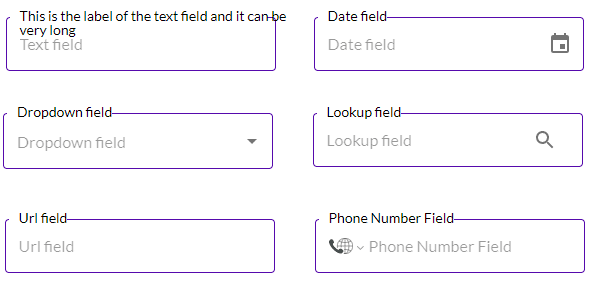
|
| Fixed | 
|
| Classic | 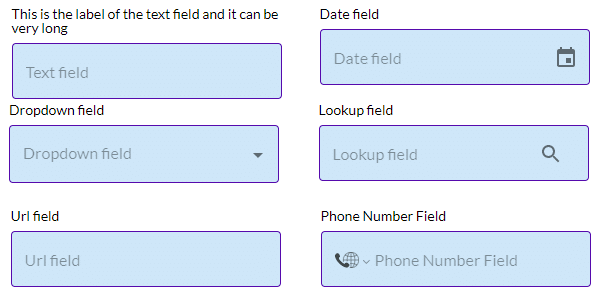
|
- Click the Finish button.
Your custom theme is added to the list and will be available for all your projects.
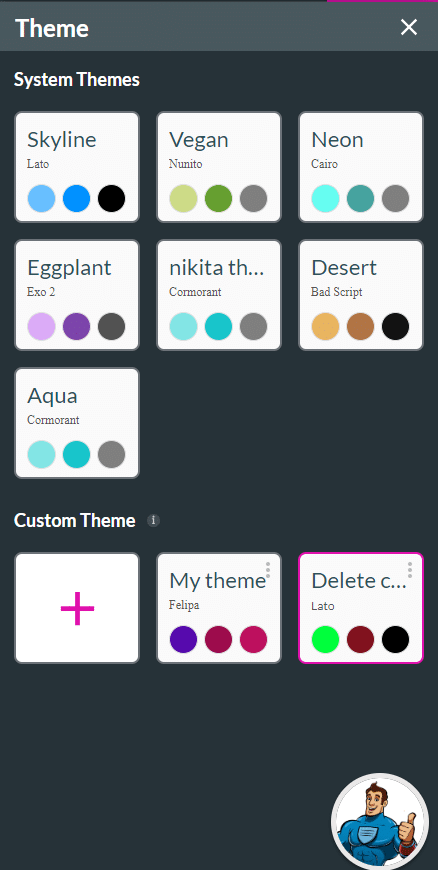
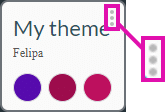
Use the Kebab icon to edit or delete the custom theme:
Learn more about Titan’s native integration with the Salesforce Experience Cloud.
Easily design, deploy, and measure custom web applications directly from Salesforce using Titan’s drag-and-drop web page builder.