

Credit Guard Payments
Business Background
Do you want to add payment types to your Web project? Now, you can add Credit Guard as one of the payment options to configure payments into your platform or marketplace and integrate the payment with your Salesforce.
CreditGuard offers a comprehensive payment gateway that supports various transaction types, including credit/debit card payments, recurring billing, and tokenized transactions. It caters to both online and in-person payments. It provides security measures, including PCI DSS Level 1 compliance, SSL encryption, and advanced fraud detection systems. These features ensure the secure processing of transactions and the protection of sensitive customer data.
Titan Solution
To enhance the user experience on your website, add Credit Guard as a payment option. You can seamlessly integrate Credit Guard payments with your Salesforce account.
You can add the following:
- Different currencies
- Single payments
You can configure different actions on payment:
- Send an email
- Redirect the user to another internal or external page
- Push payment data to Salesforce
How to Guide
Prerequisite:
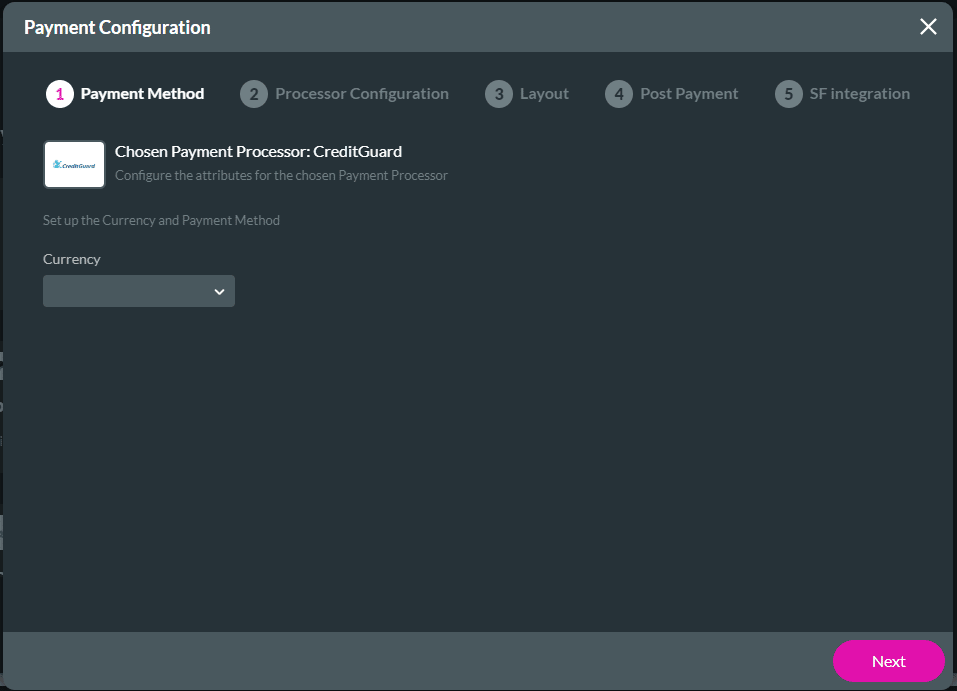
- Select the Credit Guard option. The Payment Configuration screen opens.

- Set up the following:
Payment Method
- Use the drop-down list to select a currency. This is a list of the currencies that Credit Guard supports. The options are:
- Israeli New Shekel
- Dollars
- Euros
- Pound Sterling
- Japanese yen
- Dynamic
You can select “Dynamic” to give the end-user the option to add a currency type not listed.

Add the dynamic value as a variable. The dynamic values must be as follows:
- ILS
- USD
- EUR
- GBP
- JPY
- Click the Next button. The Payment Configuration > Processor Configuration screen opens.
Processor Configuration
Configure the following as necessary:
Required
- For Required processor configuration, add the following mandatory fields:
- User
- Password
- Terminal
- Gateway URL
- Merchant ID

Structured Parameters
- Select the Structured Parameters option.
- Use the toggle switch to enable the structured parameter.
- Use the Field or Static options to add the Email parameter.
- Use the drop-down list to select a Field parameter.
- Type a Static parameter in the field.

- Click the Next button. The Payment Configuration > Layout screen opens.
Layout
- Add a label in the field.
- This is mandatory.
- This description will appear on the Configure Project Payments Settings screen under the My Payments list.
- Use the drop-down list to select the total amount if you don’t use installments.

- If needed, use the drop-down list to select the number of installments. You must have added an input element or variable on your project, for instance, Installments. Two extra fields are added:
- Use the drop-down list to select the first payment amount option. You must have added an input element or variable to your project, for instance, First payment.
- Use the drop-down list to select the every payment amount option. You must have added an input element or variable to your project, for instance, Every payment.
- Use the drop-down list to select the terminal language.

- If necessary, select Static from the Number of Installments drop-down list and add a number in the field.
- For a number of installments larger than 1, do the following:
- Use the drop-down list to select the first payment amount option. You must have added an input element or variable to your project, for instance, First payment.
- Use the drop-down list to select the every payment amount option. You must have added an input element or variable to your project, for instance, Every payment.
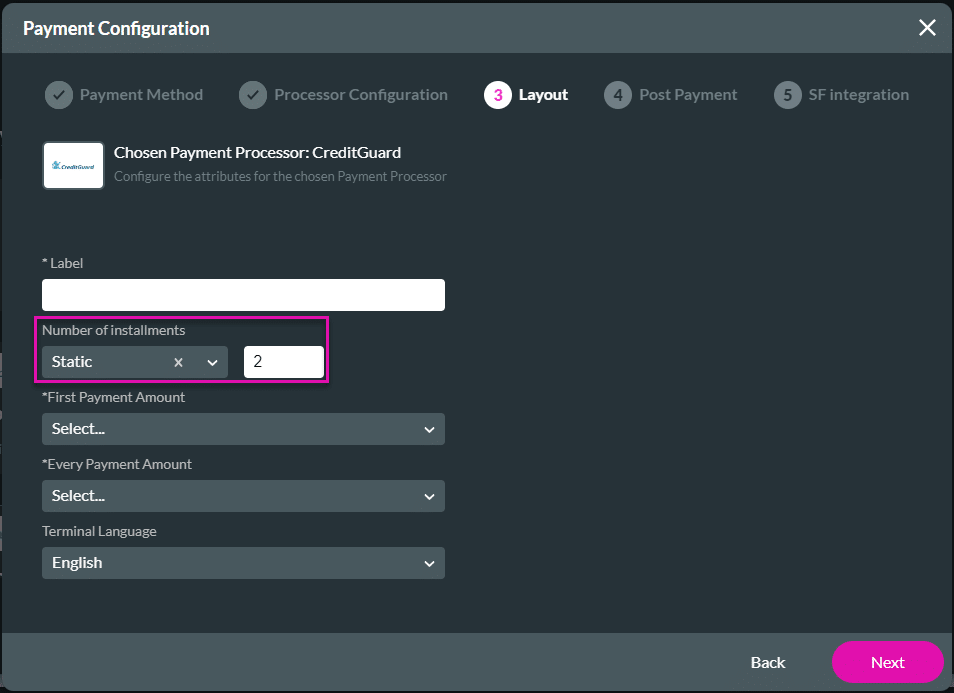
- Use the drop-down list to select the terminal language. This is the language of the “message” and “user message” fields. Select one of the following:
- Hebrew
- English
- Click the Next button. The Payment Configuration > Post Payment screen opens.
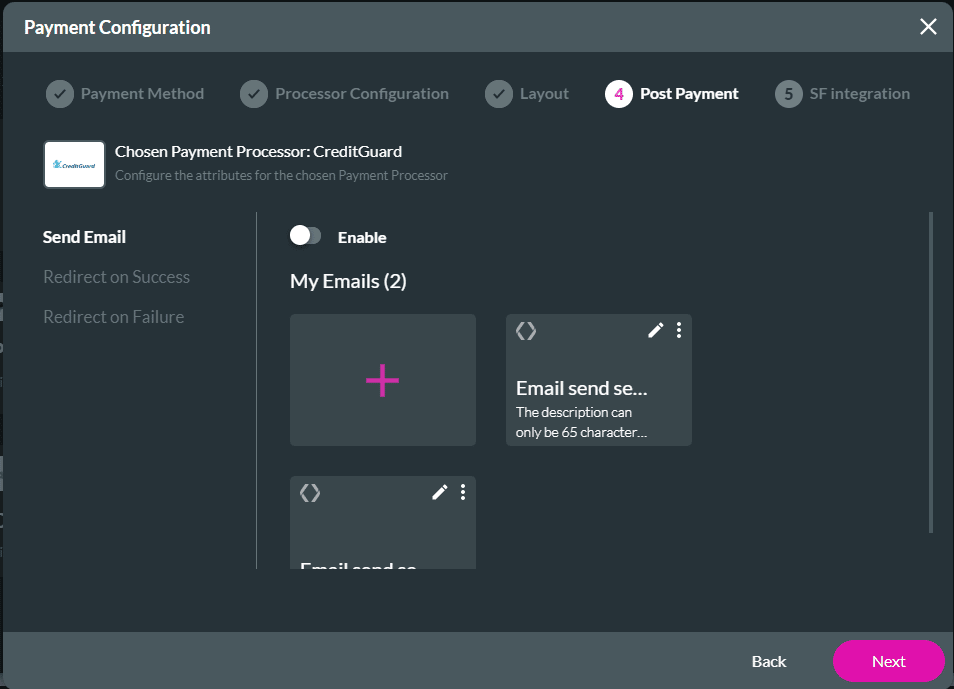
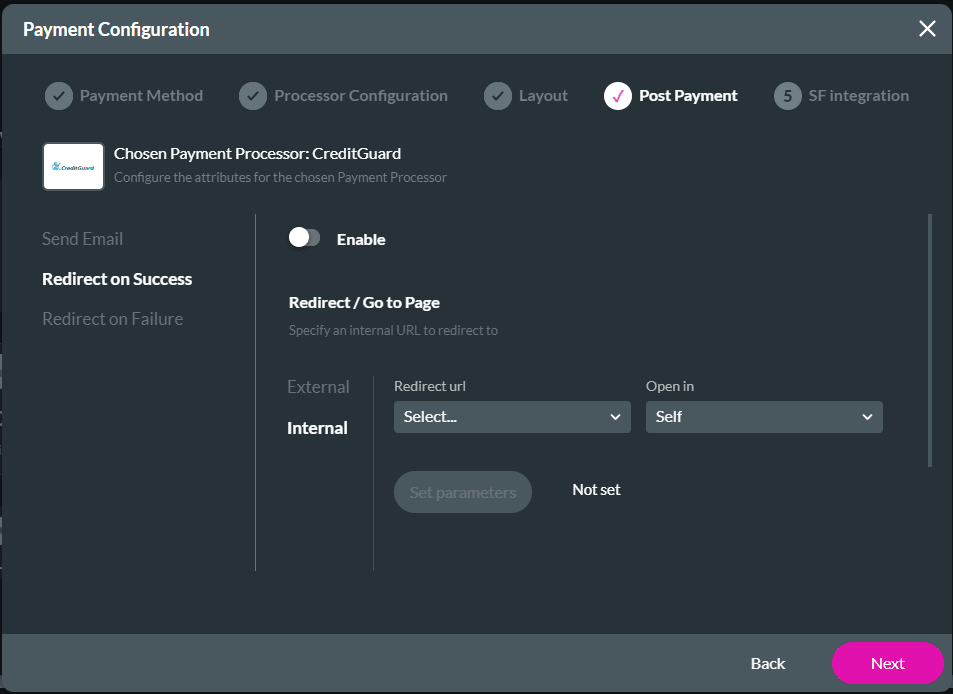
Post Payment
You can do the following:
- Send an email.
- Redirect the user to an internal and/or external link when the payment processing has finished.
- Redirect the user to an internal and/or external link when the payment processing has failed.
- To send an email, use the toggle switch to switch on the option.
- You can configure an email that will be sent when the transaction has been processed.
- Select the configured email.
- Select the Redirect on Success option, if necessary
- Use the toggle switch to switch on a redirect action on success action.
- Configure an External redirection.
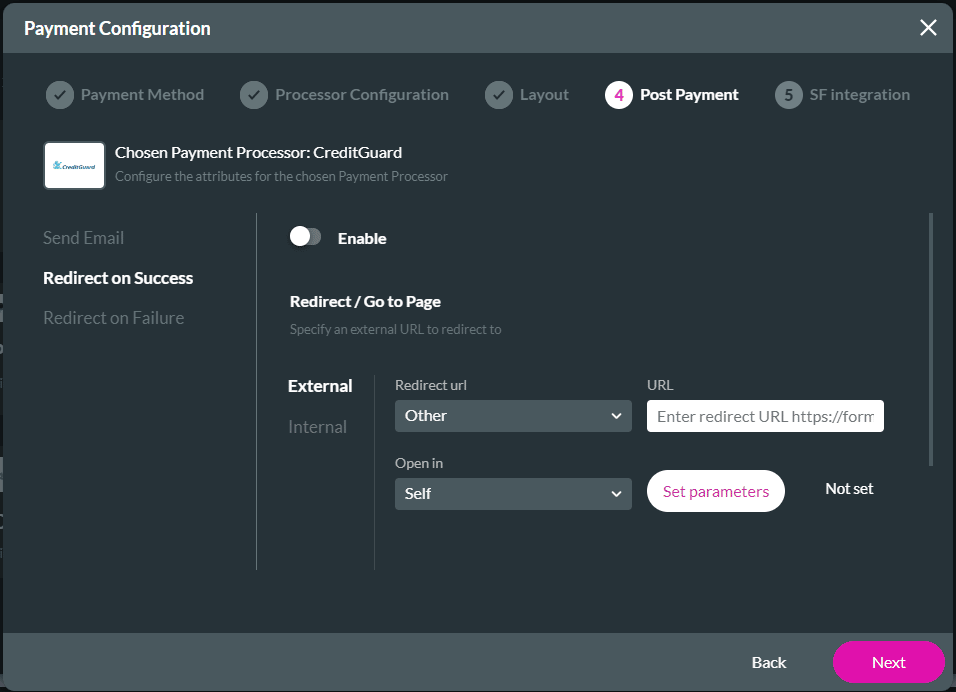
- Configure an Internal redirection.
- Select the Redirect on Failure option, if necessary
- Use the toggle switch to switch on a redirect action on failure action.
- Click the Next button. The Payment Configuration > SF Integration opens.