

Animation Container Interactivity
Business Background
Customize your web page with animation using multiple images and configure unique behavior for the animated container.
Titan Solution
Add the animated container to your web page with Titan Web. You can add interactivity to the multi-image, SVG, or Lottie items. The different images in the container can appear on different triggers; for instance, as a user clicks on the next step in a process, the image in the animation container can show another image.
How to Video
- Coming soon!
How to Guide
In this article, we will look at the following:
- How to add animation interactivity:
- for images and SVG items
- for Lottie items
Note:
Prerequisite:
Add an animation container:
- Add an image item: Add static images and configure the animation per image.
- Add an SVG item: Add an SVG item with subclasses. The subclasses have IDs, and the animation is added to each subclass.
- Add Lottie item: Add a Lottie item, a JSON-based animation file format that allows you to ship animations on any platform as easily as shipping static assets. They are small files that work on any device and can scale up or down without pixelation.
Add animation interactivity
Add animation interactivity to trigger the animation according to your business logic. You can add the interactivity to an element, such as a button.
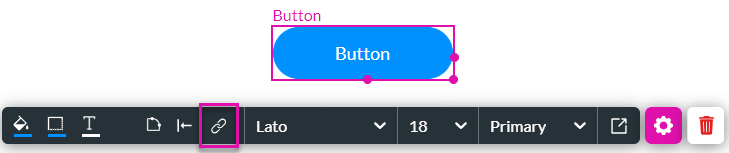
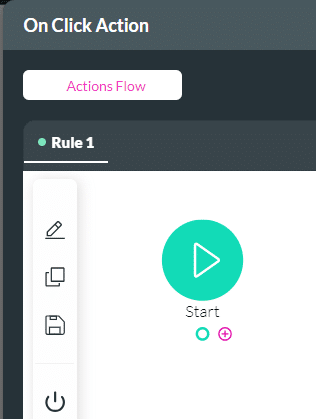
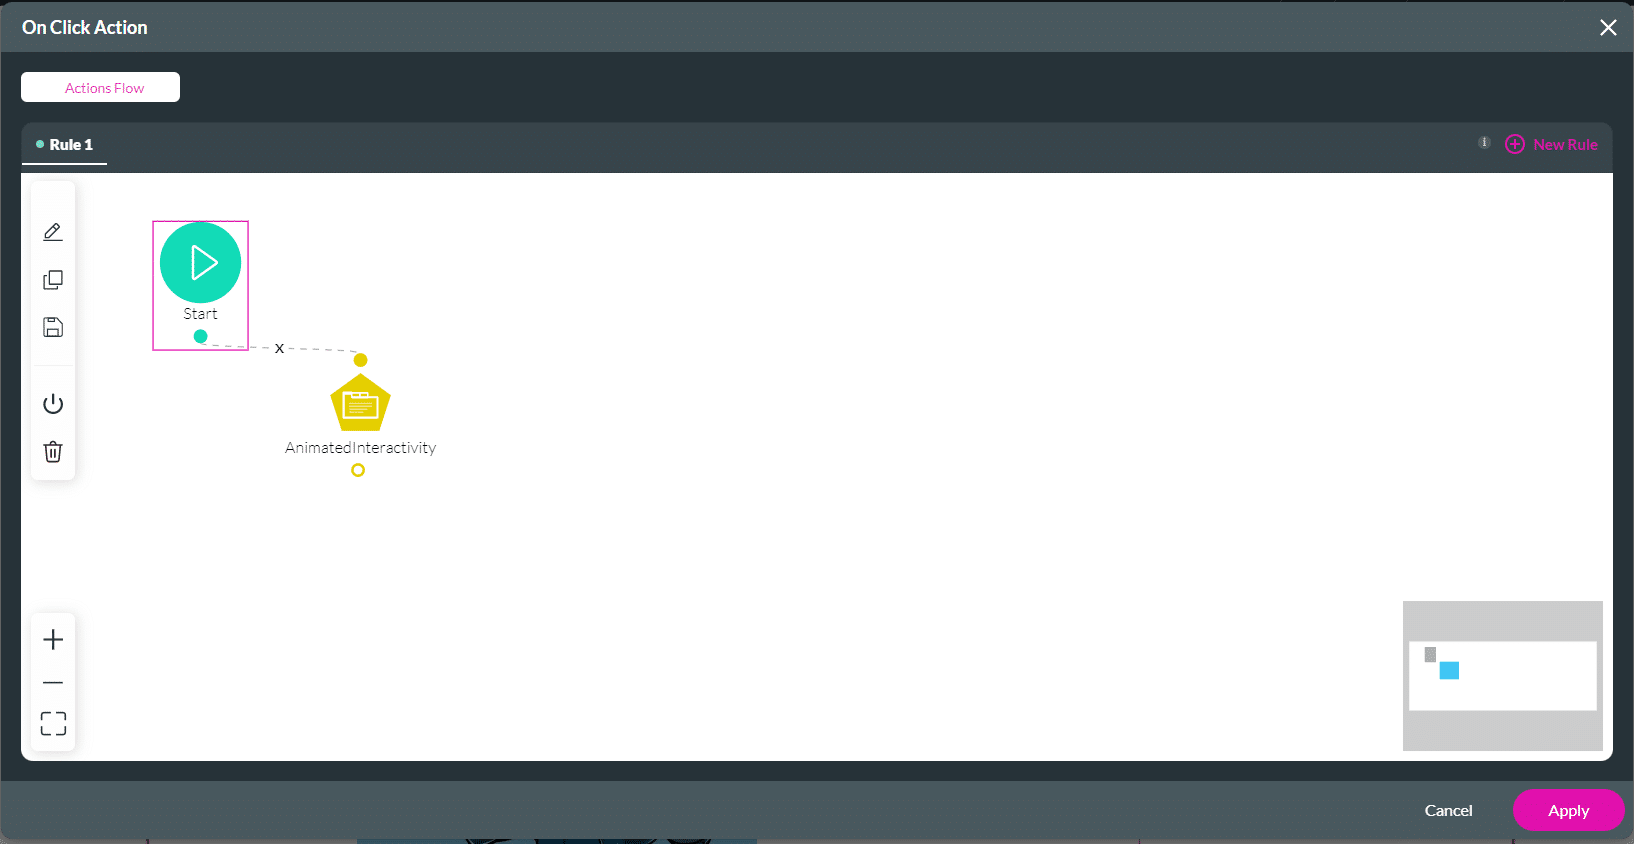
- Click the On Click Action icon on the button element.
- Click the + icon next to Start.
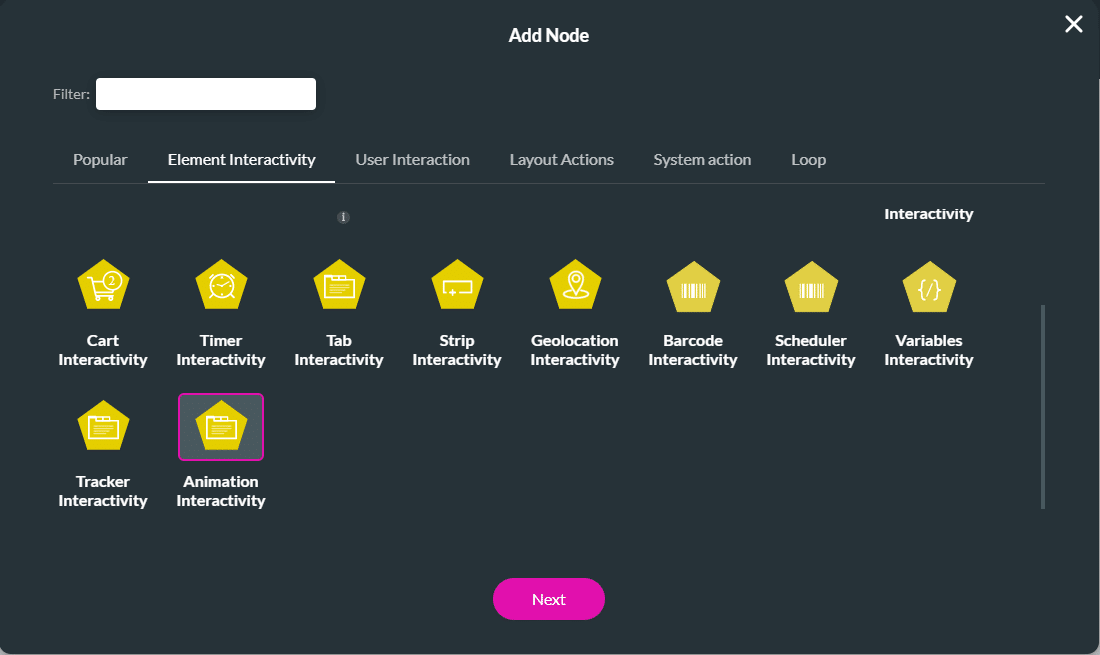
- Under Element Interactivity, scroll down and click the Animation Interactivity option.
- Click the Next button. The Add Node/Animation Interactivity screen opens.
Add animation interactivity for images and SVG
- Use the Element drop-down list and select the animation element.
- Use the radio buttons to select an option:
- Reset: reset the animation to the start of the animation.
- Prev Step: jump to the previous image in the animation container.
- Next Step: jump to the next image in the animation container.
- Go to Step: jump to the specified step.
- Finish: stop the animation.
- Show: show the image in the animation container.
- Hide: hide the image in the animation container.
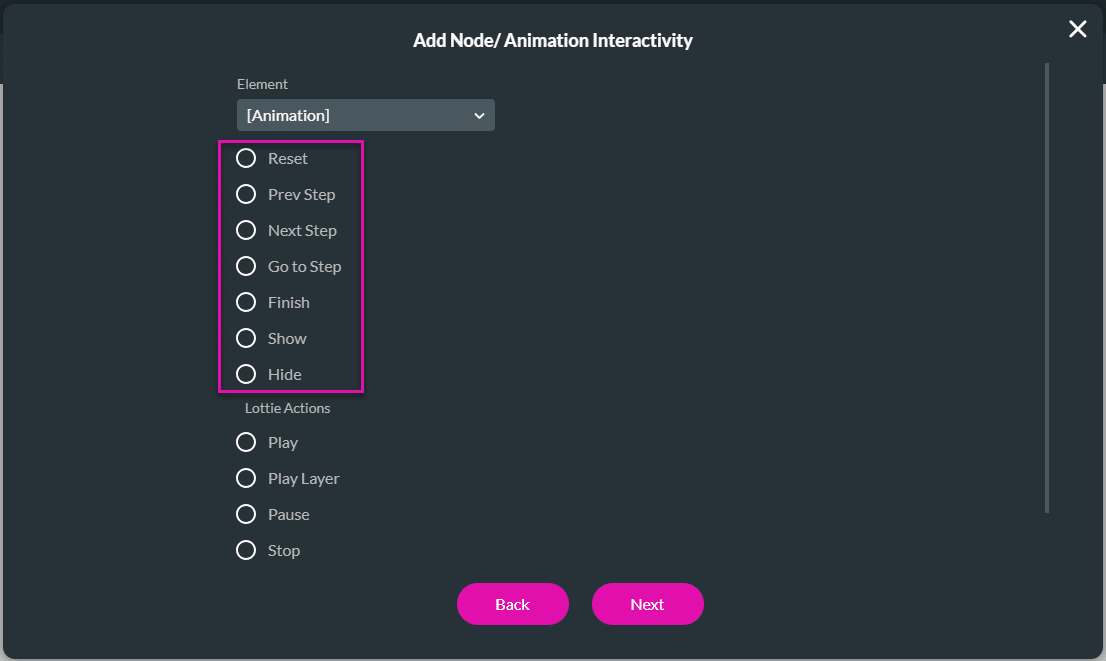
- Click the Next button.
- Insert a tag if necessary and click the Insert button. The interactivity is added to the On Click Action screen, finally click the Apply button.
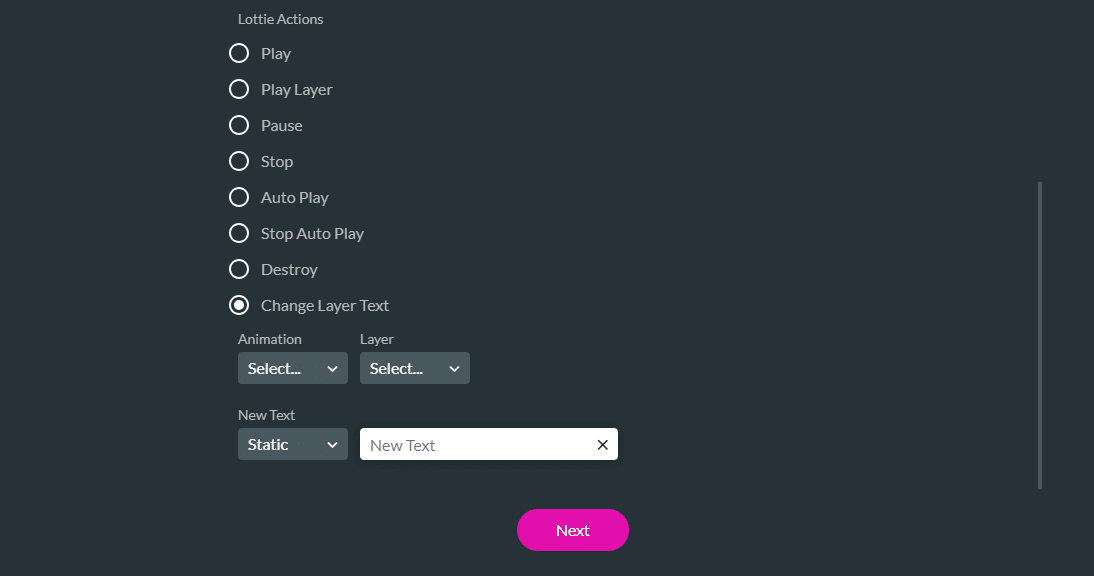
Add animation interactivity for Lottie
- Use the Element drop-down list and select the Lottie animation element.
- Use the radio buttons to select an option:
- Play: play the animation.
- Play Layer: play a specific layer of the animation.
- Use the drop-down lists to select an animation and a layer.
- Pause: pause the animation.
- Stop: stop the animation.
- Auto Play: auto plays the animation
- Stop Auto Play: stops auto playing the animation
- Destroy: remove the animation from the page.
- Change the Layer Text: change the text on a Lottie animation element.
- Use the drop-down lists to select the following:
- Animation
- Layer
- New Text
- Field: select the option from the drop-down list.
- Static: Type the text in the field.
- Use the drop-down lists to select the following:
- Click the Next button.
- Insert a tag if necessary and click the Insert button. The interactivity is added to the On Click Action screen.
Hidden Title
Was this information helpful?
Let us know so we can improve!
Need more help?
Book Demo