

Distribute Surveys from a Salesforce Object
Business Background
Use Titan Survey to create web or email surveys that integrate into Salesforce easily. Build Salesforce-integrated surveys quickly with Titan’s no-code platform. With Titan Survey, you can distribute a survey from a Salesforce object.
Titan Solution
- Follow the guide below to learn how to publish a survey distributed from a Salesforce object created with zero code.
- Configuring your Salesforce object settings and adding conditions to your distribution methods in a survey is fast, with a few clicks that can save you time and increase the professionalism of your business.
How to Guide
- In Titan, create a new Web Survey Project.
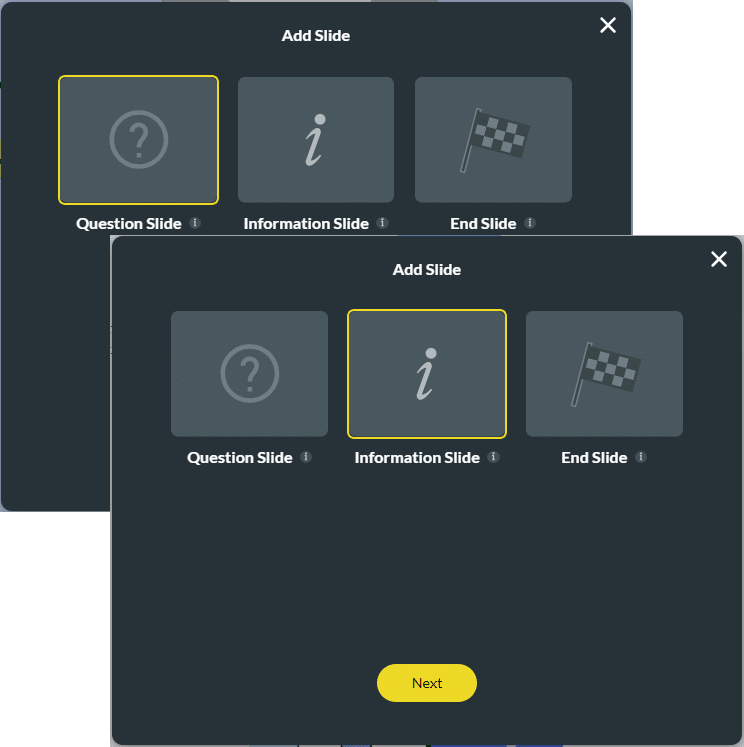
- Add question and/or information slides.
- Click the Publish button. The Distribution screen opens.
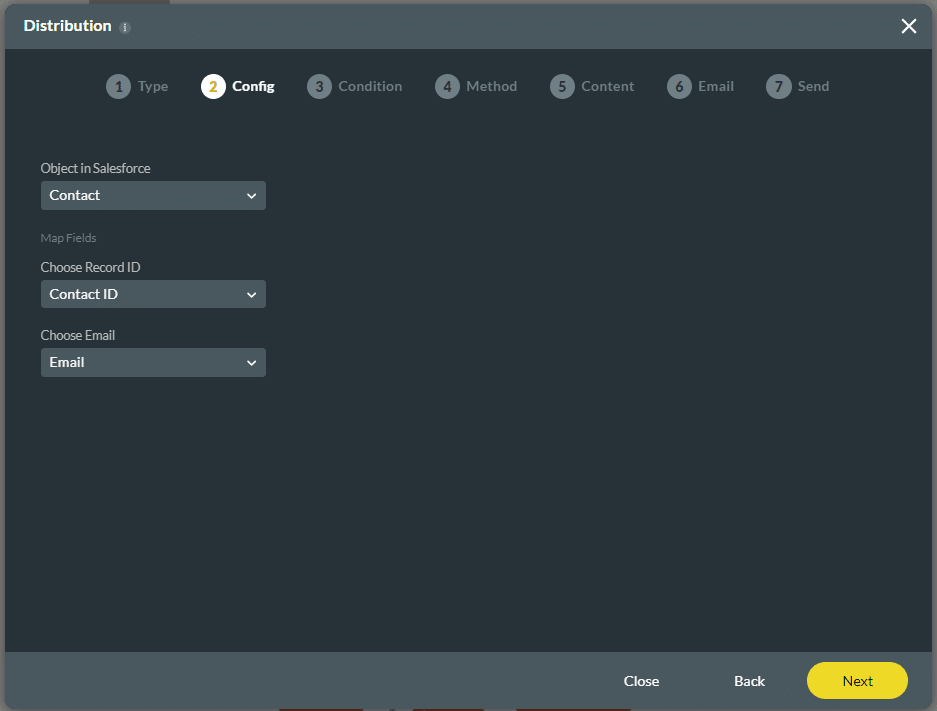
- Click the Object option and then the Next button.

- Select the Object in Salesforce from the drop-down list, for instance, Contact, to identify your recipients.
- Choose the Record ID from the drop-down list, for example, Contact ID, to select the object’s ID.
- The ID will be used to identify your recipient and added to the survey distribution list.
- Select the ID of the object from the Record ID drop-down list.
- It will be used to identify your recipient, and it will be added to the survey distribution list.
- Select the email from the drop-down list.
- Click the Next button.
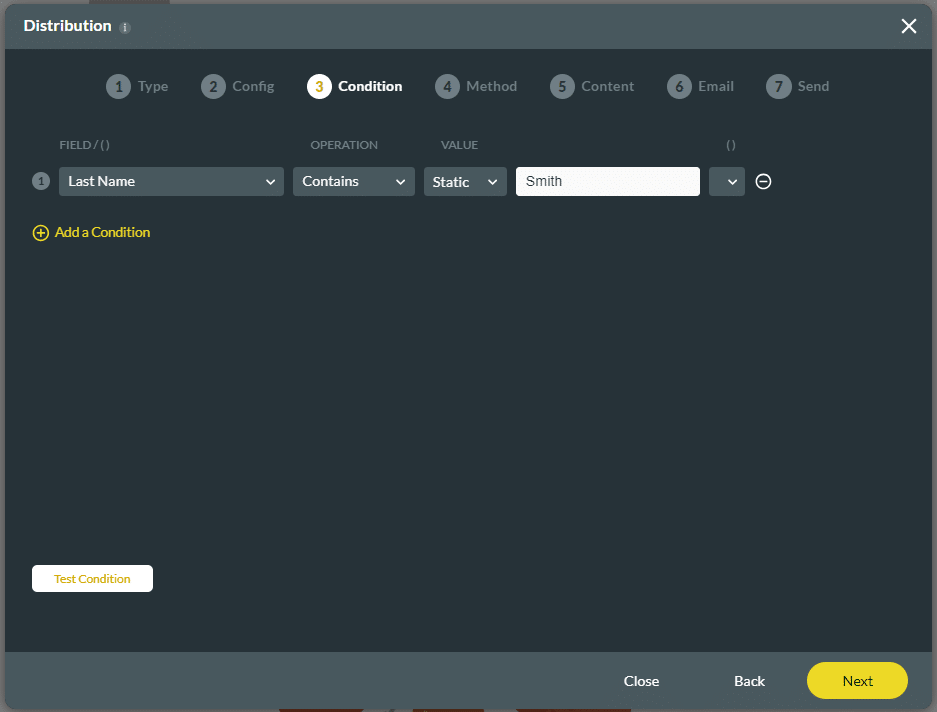
- Click the Add a Condition option. A condition field is added.
- Set a condition, for instance, “Last Name Contains Static value” to filter your recipients.
- Click the Test Condition button to test the condition.
- If the condition is not valid, a No Data Found pop-up is displayed.
- If the condition is valid, the record is shown.
- Click the Next button.
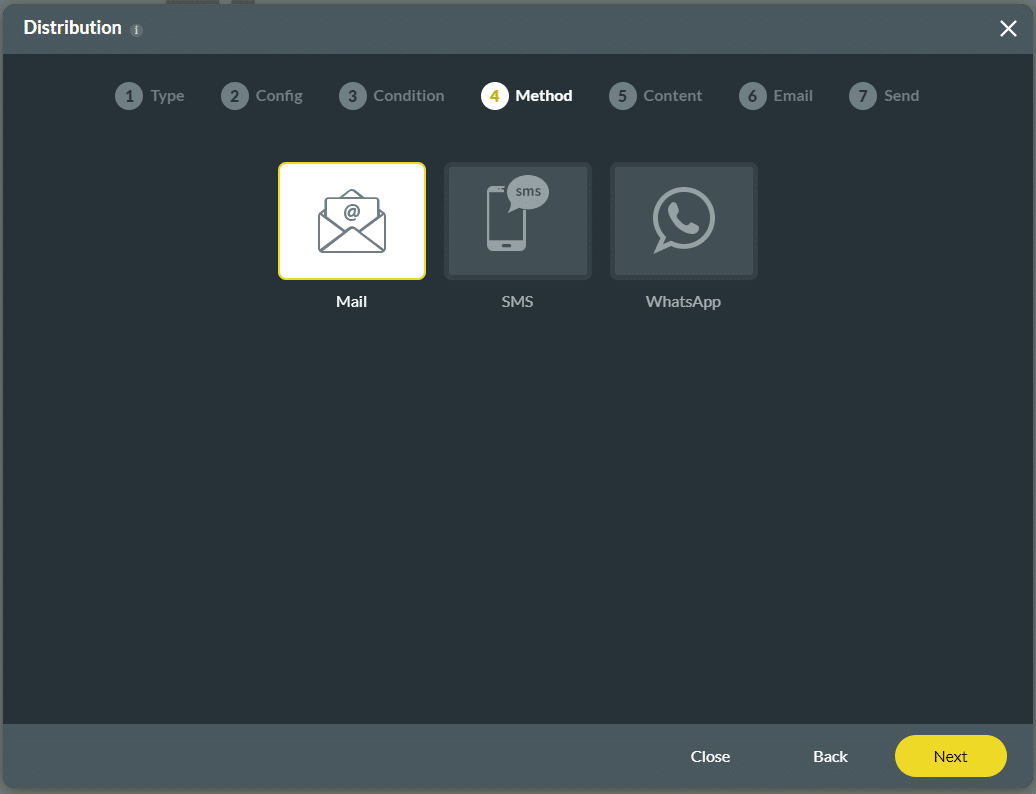
- Click the Mail option and then the Next button. You can select either an email template or create a custom email.
- If required, use the Email template.
- Select the Organizational Email Template from the drop-down list. This template was configured in Salesforce.
- Choose Email from the drop-down list. The options in the drop-down list are linked to the object you selected in Salesforce in step 4. This is the email of the customer who will receive the survey.
- Choose the From Email Address from the drop-down list.
- For more information on this email address in Salesforce, click here.

- As an alternative, click Custom Email.
- Choose the From Email Address from the drop-down list. For more information on this email address in Salesforce, click here.
- Choose Email from the drop-down list. The options in the drop-down list are linked to the object you selected in Salesforce in step 4. This is the email of the customer who will receive the survey.
- Type a subject in the Subject line. This field is mandatory.
- Type a body in the Body of the email.
- Click the Next button.
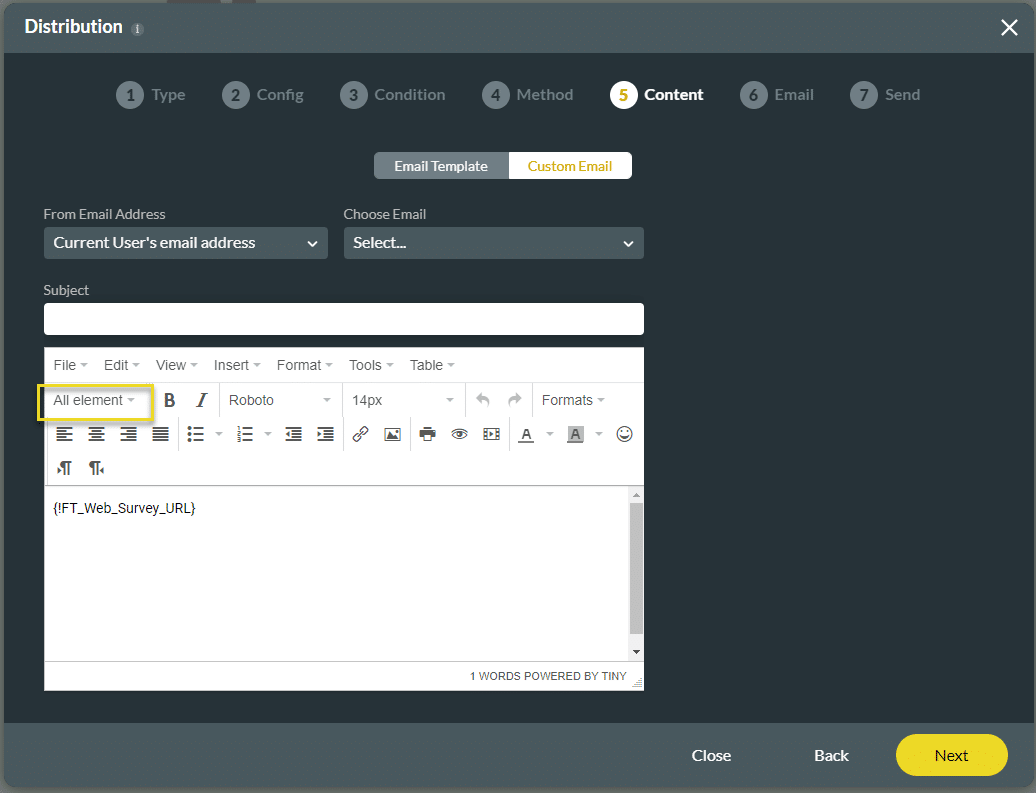
Note:
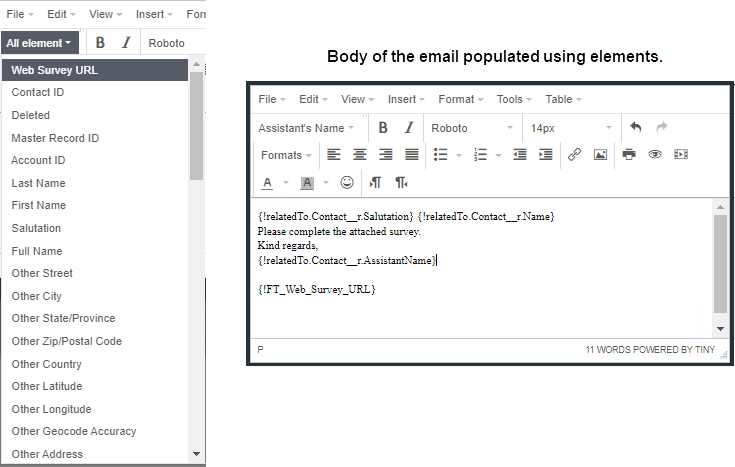
The Web Survey URL is added by default. You can add more elements by clicking on the Add Elements (Merged field) option.
- Send a test email, if required.
- Add a Record ID in the field. Choose a specific record ID for the object you chose in the ‘Config’ step. For example, if you distribute to contacts, enter a specific contact ID to test your survey.
- Enter your email address in the field. This is the email address to which the test survey will be sent.
- Click the Send Test Email button.
- Click the Next button.

- Type the email address of the Survey Result’s Recipient in the field.
- Type any comment in the field. This is a mandatory field. The comment will be displayed in Salesforce under Survey Distribution.
- Send the email.
- Send Now is the default option.
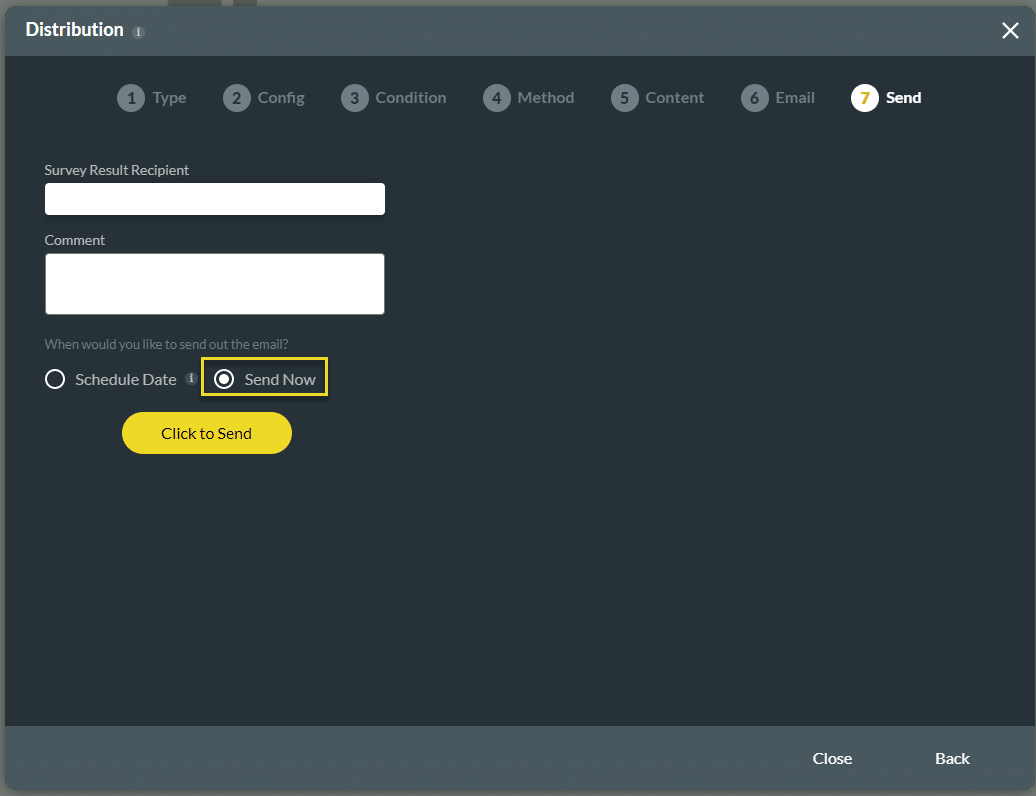
- Schedule a date. Click the calendar icon to schedule a date and time.

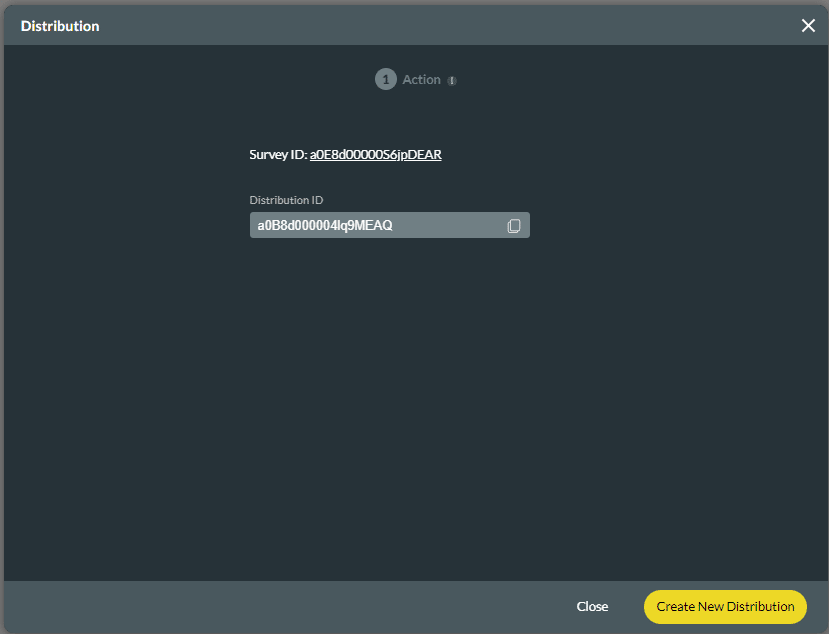
- Click the Click to Send button. After a few moments, the Distribution screen opens. It shows the Survey ID and the Distribution ID.
- Click the Close button.
Interested in the Titan/Salesforce Integration? Read about Salesforce Surveys, check out different types of surveys for Salesforce, and view Titan Survey on the Salesforce AppExchange.
Hidden Title
Was this information helpful?
Let us know so we can improve!
Need more help?
Book Demo