Doc Gen with Word Add-in for Insert Fields
Business Background
Use the Titan add-in for Microsoft Word to insert fields in a document template.
Titan Solution
- With Titan, you can add fields in documents with dynamic data directly in Microsoft Word from one of the following sources:
- Salesforce
- System
- Titan Web project
- Submission
How to Guide
Note:
Prerequisites:
- Make sure that you have installed the Word add-in.
- Sign in to use the Titan Word add-in.
- Open Microsoft Word. The Form Titan tab is added to the Word toolbar if you have installed it successfully.
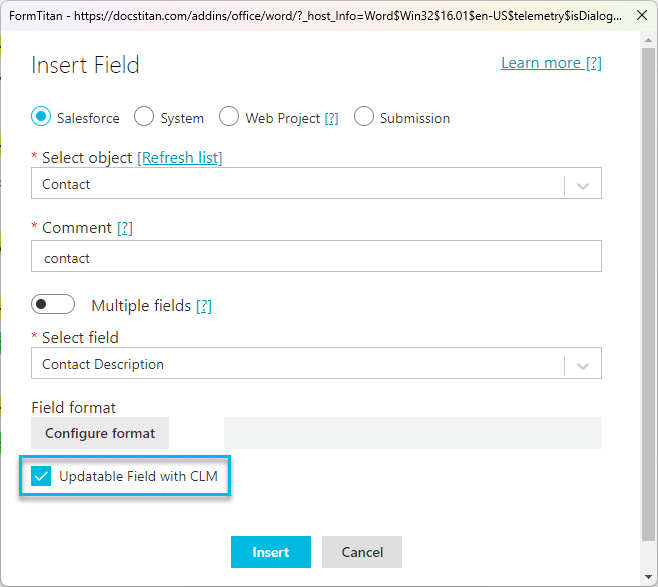
- Select the Insert Field option. The Insert Field screen opens.

- Configure one of the following:
Salesforce
This is the default option.
- Use the drop-down list to select the Salesforce object.
- Type a comment in the field. This is mandatory.
- Use the toggle switch for multiple fields if necessary.
- Use the drop-down list to select the field.
- Repeat this until you have added all the fields necessary.

- Use the drop-down list to select the field if you are not using multiple fields.
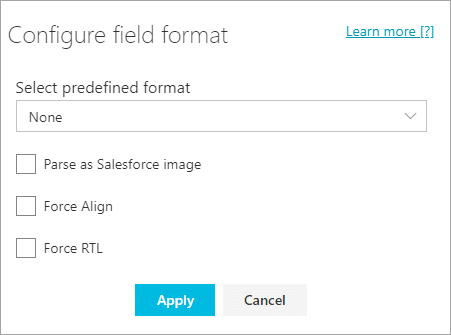
- Click the Field format button to configure the field format. The Configure Field Format screen opens.

- Use the drop-down list to select the predefined format. Some of the options are:
- Lower case
- Upper case first
- Capitalize
- Remove margins

- Depending on the option selected, click the checkbox to configure the following:
- Parse as Salesforce image
- Force Align
- Force RTL
- Use a radio button to select the type:
- Custom
- Predefined
- Click the Apply button.

- Click the checkbox to mark the field as updatable with CLM if the Salesforce field must be updatable through the CLM process.
- If a collaborator changes the field in the document and the owner approves the change, the field in Salesforce will be updated.
- Click the Insert button.

The field is inserted:

System
- Click the System radio button.
- Use the drop-down list to select the field:
- Now
- IP
- If Now is selected, click the Configure format button.

- Use the drop-down list to select the predefined format.
- Do the following if you want to change the predefined format:
- Use the drop-down lists to select the day, month, and year formats.
- Use the drop-down lists to select the hour, minute, and second formats.
- Type a date and/or time separator in die relevant field.
- Type a custom format in the field if necessary.
- Click the Apply button.

The field is inserted:

Web Project
Learn how to use a Web project to insert fields in a Word template.

Submission
- Click the Submission radio button.
- Use the drop-down list to select the project.
- Type a comment in the field.
- Type a submission mapping key in the field.
- Click the Insert button.

The field is inserted:

Hidden Title
Was this information helpful?
Let us know so we can improve!
Need more help?
Book Demo

