Edit an Existing Collaborator
What happens when you Edit a Collaborator?
You can edit existing Salesforce users, Salesforce profiles, and Salesforce permission sets. Modify existing collaborators’ details, such as the first and last names or email address, and determine permission for specific projects. Enable or disable access to certain projects.
How do you Edit a Collaborator?
- Click the My Account tab and select the Users subtab.
Edit a Salesforce User
- Click the Edit icon on the Salesforce user option to make changes to the collaborators’ details and permissions. The Edit Collaborators screen opens.

- Edit the following details:
- Edit the first and last names in the relevant field.
- Edit the Email address or Salesforce Username in the field.
- Edit the User ID in the field and click the Next button. The Edit Collaborators screen opens.

- Use the Search field to search for a project.
- Click the checkbox to give the Salesforce user permissions for a specific project. You can give permission for each project type, such as Forms, Sign, Web, CLM, Flow, and more.

- Click the Application Access tab to grant users access to the Sign Wizard in Salesforce and the Titan Documents add-on in MS Word.
- Click the Finish button.
Edit a Profile User
- Click the Edit icon on the Profile user option to make changes to the collaborators’ details and permissions. The Edit Collaborators screen opens.

- Use the Search field to search for a Profile user.
- Select the Profile user option from the list and click the Next button.

- Click the checkbox to give the Profile user permissions for a specific project. You can give permission for each project type, such as Forms, Sign, Web, CLM, Flow, and more.

- Click the Application Access tab to grant users access to Sign Wizard in Salesforce and Titan Documents add-on in MS Word.
- Click the Finish button.
Edit Permission Sets
- Click the Edit icon on the Permission Set option to make changes to the permission set group. The Edit Collaborators screen opens.

- Use the Search field to search for a permission set group.
- Select the permission set option from the list and click the Next button.

- Click the checkbox to give the Permission set group permissions for a specific project. You can give permission for each project type, such as Forms, Sign, Web, CLM, Flow, and more.

- Click the Application Access tab to grant users access to Sign Wizard in Salesforce and the Titan Documents add-on in MS Word.
- Click the Finish button.
Enable or Disable Salesforce users
Choose and give a collaborator permission to generate documents. Once the documents are generated, you can enable or disable collaborators from accessing specific projects.
- Click the Permission set group icon. The Salesforce Users screen opens.

- Click the Enable option on the status tab to allow users to generate documents and access specific projects.
- Alternatively, you can click the Disable option to deny users access to generate documents or access specific projects.

Remove a Collaborator
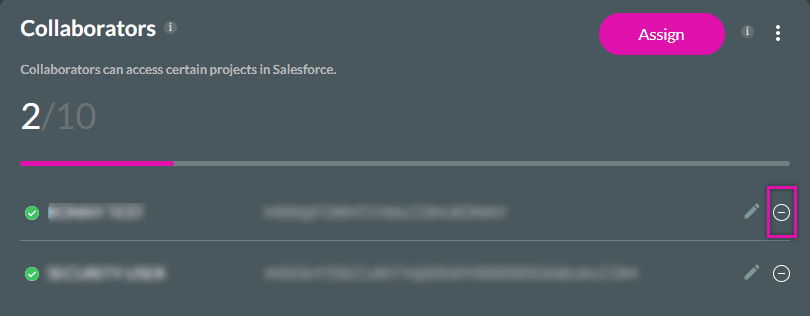
- Click the Remove icon to remove a Collaborator. A confirmation message will display.

- Click the Yes button to confirm your action.

Check out these articles for more information on users:
Hidden Title
Was this information helpful?
Let us know so we can improve!
Need more help?
Book Demo

