

Auto PDF Document Generation
Business Background
Download the contents of a single webpage in a project as a PDF using a few clicks and no code. Alternatively, push a single webpage as a PDF to Salesforce.
Titan Solution
You can download the contents of your webpage as a PDF or push the PDF to Salesforce. You can download one webpage at a time. You can send the PDF to the customer (for instance, via email) by configuring the relevant condition according to your business needs.
How to Guide
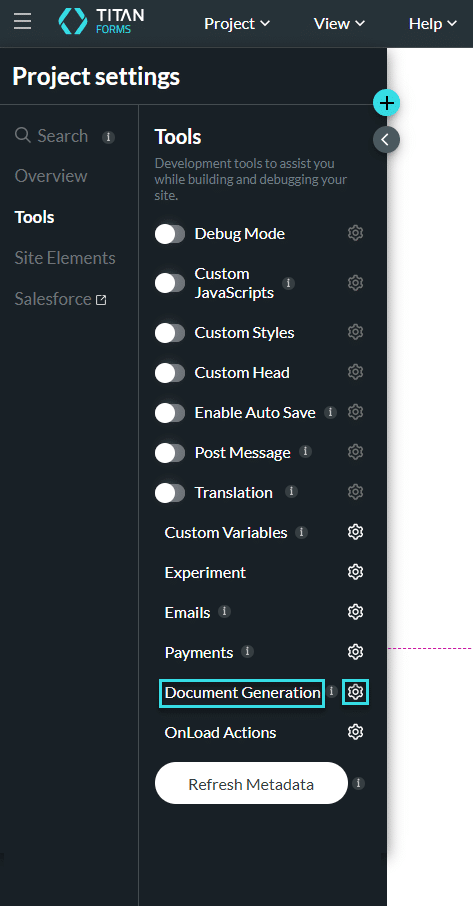
- Click the Gear icon to open the Project Settings.
- Click the Tools option and then click the Gear icon next to Document Generation.
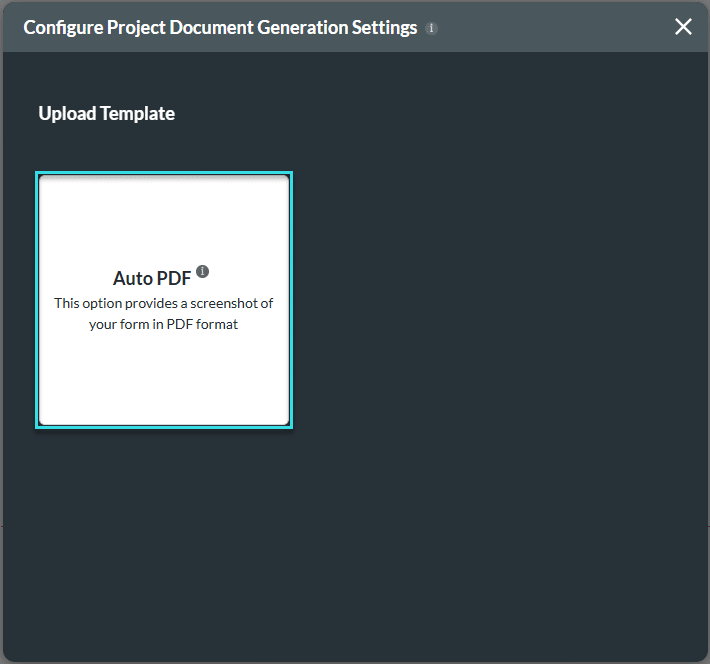
- Click the block. The Auto PDF Settings screen opens.
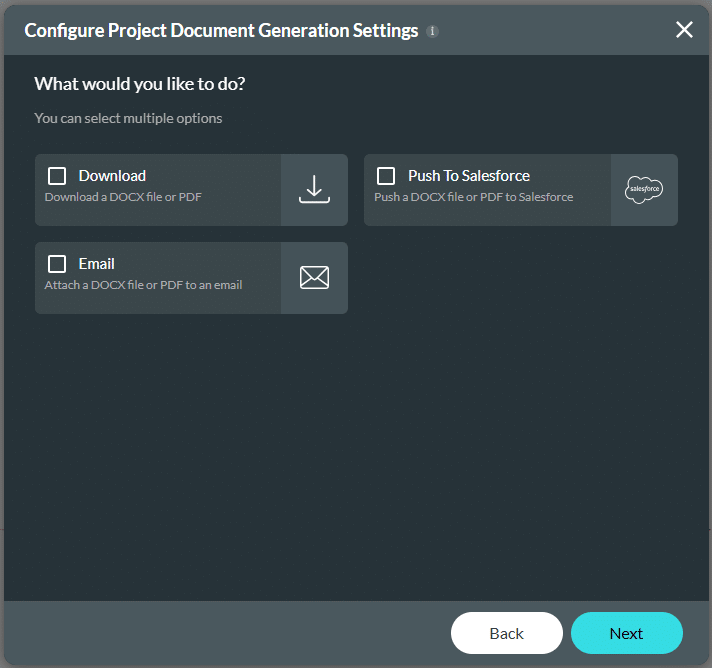
- Use the checkboxes to select option(s):
- Download: Download the Auto PDF.
- Push to Salesforce: Push the PDF to Salesforce.
- Email: Attach the file to an email.
- Click the Next button.
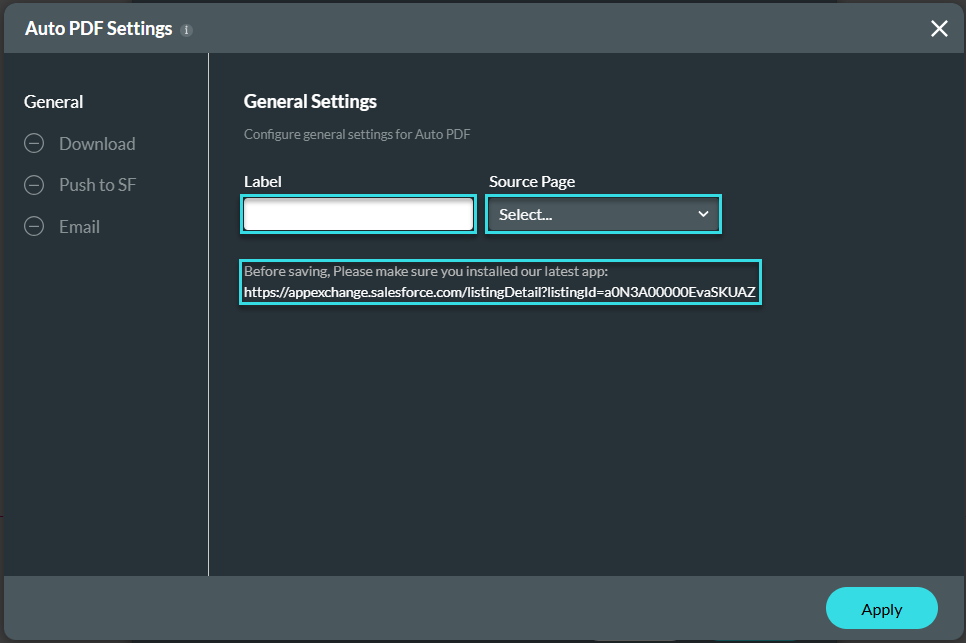
- Under General, add a label in the field.
- Use the drop-down list to select the source page. This is a page in your Web project.
Note:
The options on the left of the screen under General depend on the options you selected on the previous screen.
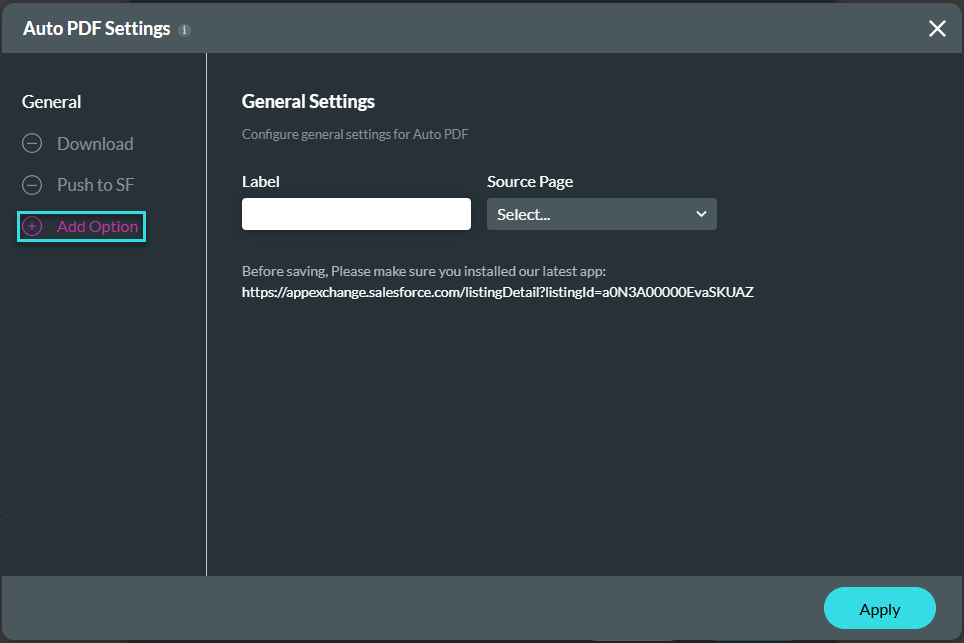
You can add options:
- Click the + icon in front of Add Option.
- Click the + icon in front of an option to add it to the list.
- If necessary, right-click on the AppExchange link to open it in a new window and install the latest version of our app.
- Configure the options that you selected:
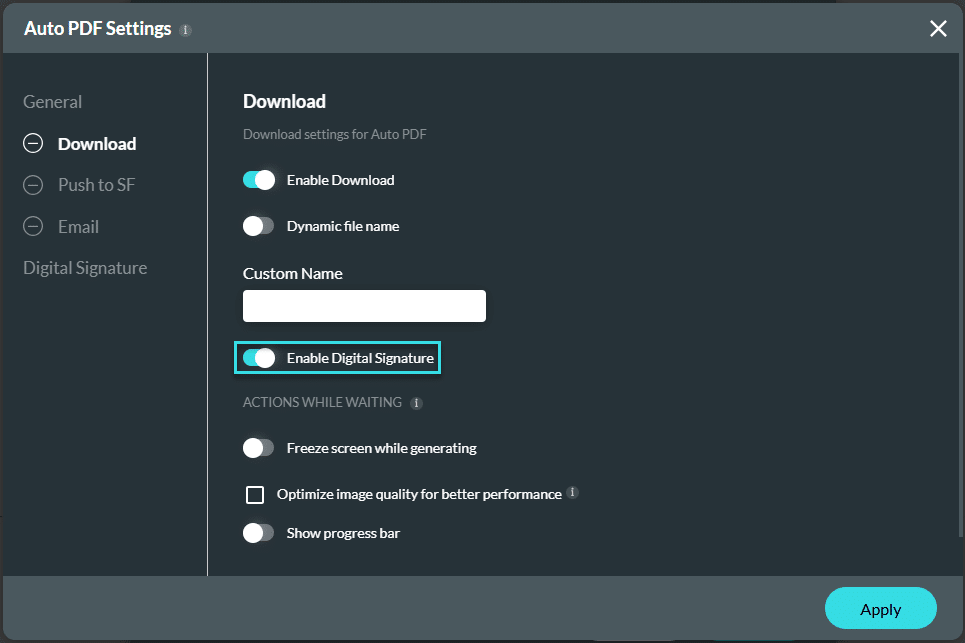
Download
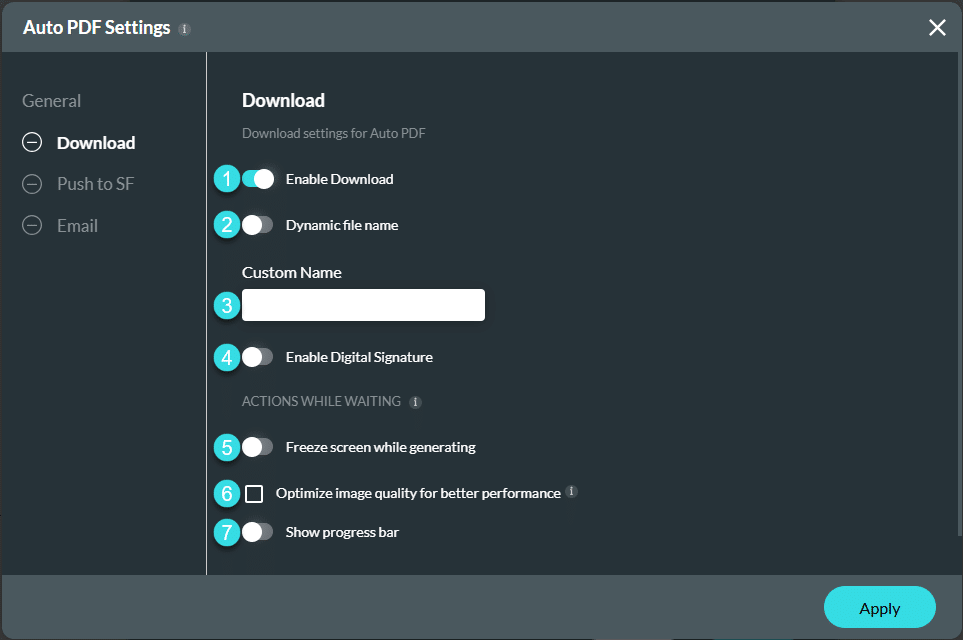
- Click the Download option.
- Use the toggle switch to enable the Download functionality.
- Use the toggle switch to add a dynamic file name if necessary.
- The Custom Name field changes to a drop-down list where you can select the dynamic file name.
- Type a custom name.
- Use the toggle switch to enable digital signatures, if necessary. The option Digital Signature is added to the left of the screen.
- Use the toggle switch to enable the actions while waiting: Freeze the screen while the template is generating.
- Click the checkbox to optimize the image quality for better performance.
- This will reduce the image quality to 80% of the original and will therefore reduce the file size.
- Use the toggle switch to enable the actions while waiting: Show a progress bar.
Push to Salesforce
- Click the Push to Salesforce option.
- Use the toggle switch to enable the Push to Salesforce functionality.
- Use the toggle switch to add a dynamic file name if necessary.
- The Custom Name field changes to a drop-down list where you can select the dynamic file name.
- Type a custom name.
- Use the toggle switch to enable a Digital Signature.
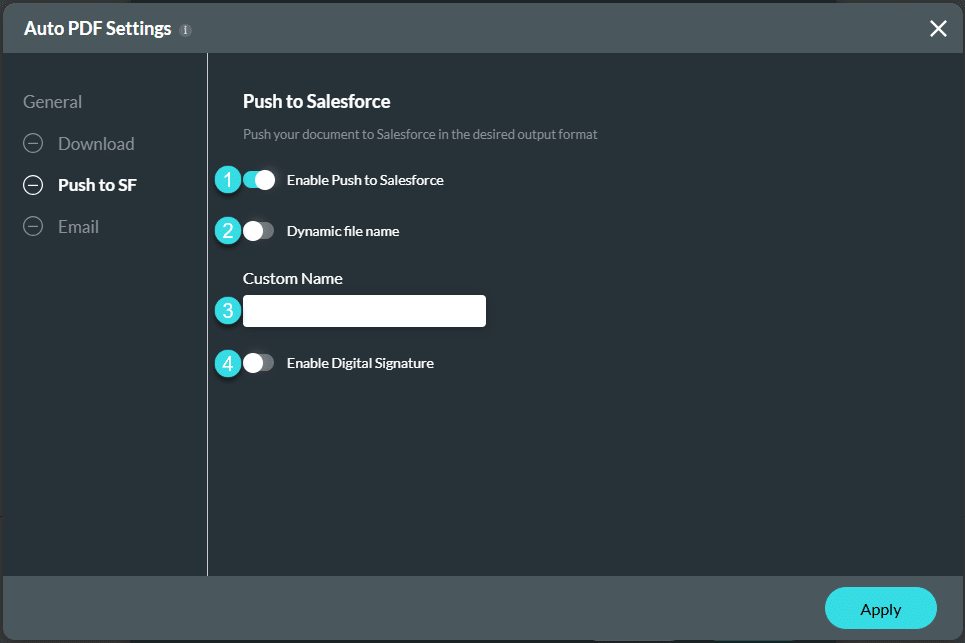
- Make sure that you configure the Salesforce Push.
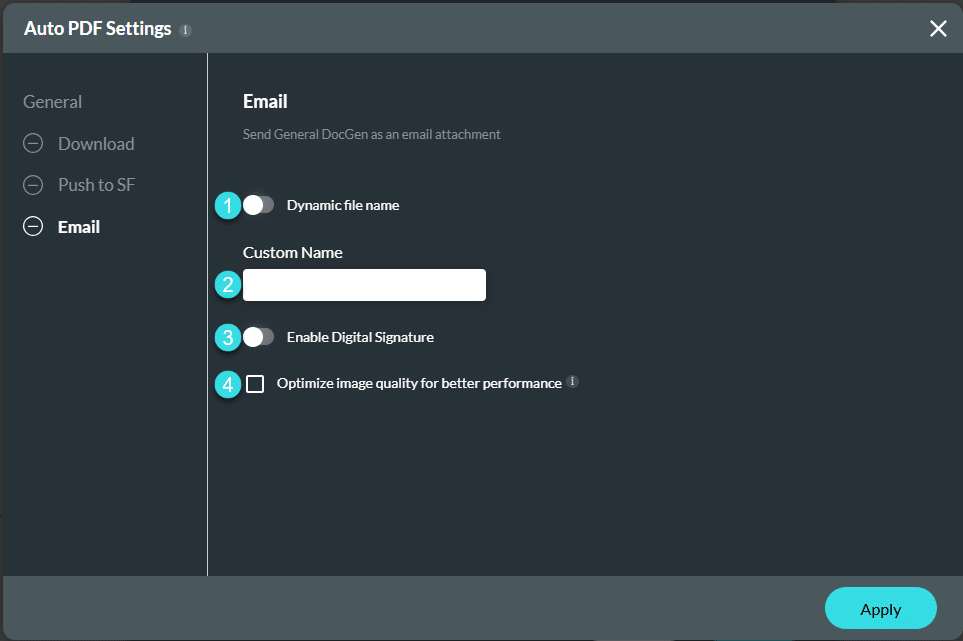
- Click the Email option.
- Use the toggle switch to add a dynamic file name if necessary.
- The Custom Name field changes to a drop-down list where you can select the dynamic file name.
- Alternatively, type a custom name.
- Use the toggle switch to enable digital signatures, if necessary. The option Digital Signature is added to the left of the screen.
- Click the checkbox to optimize the image quality for better performance.
- This will reduce the image quality to 80% of the original and will, therefore, reduce the file size.
- Use the toggle switch to add a dynamic file name if necessary.
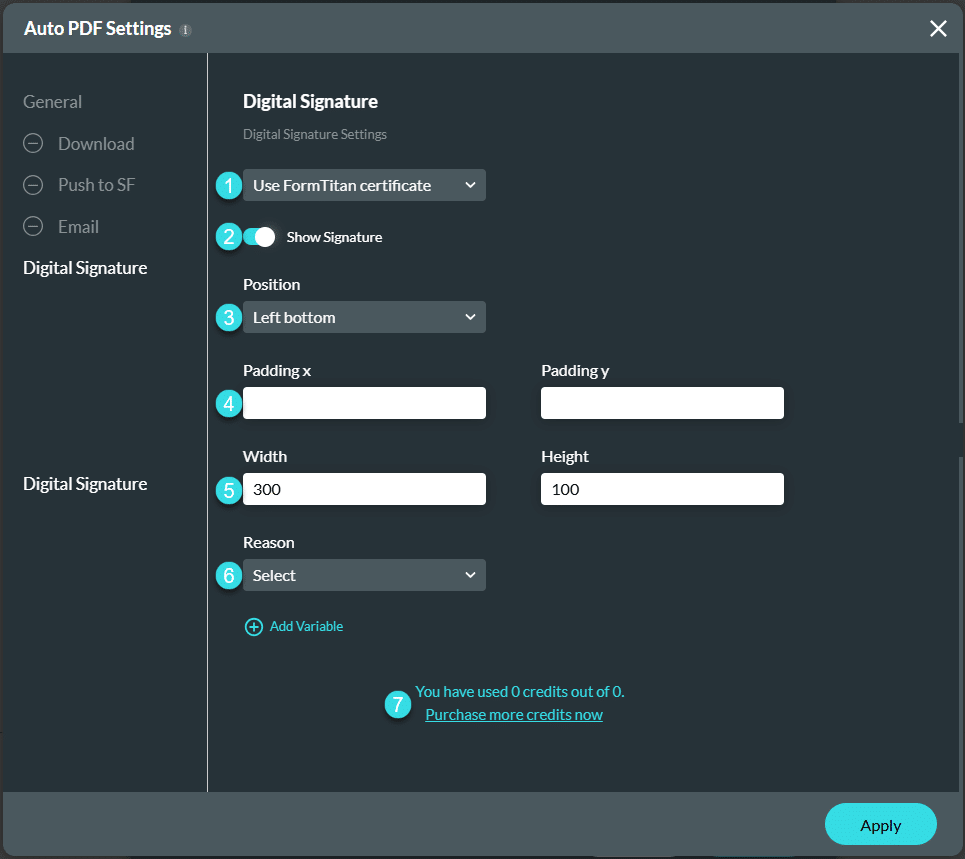
Digital Signature
Note:
Make sure that you used the toggle switch to enable a Digital Signature, either under the Download, Push to Salesforce or Email option.
- Use the drop-down list to select an option.
- Use Form Titan certificate
- Use your certificate. If you select this option, the rest of the screen options are no longer shown.
- Use the toggle switch to show the signature.
- Use the drop-down list to select a position.
- Left bottom
- Right bottom
- Left top
- Right top
- Type the value for the padding in the X and Y fields.
- Type the value for the width and height in the fields.
- Use the drop-down list to select a reason.
- Other. Add the reason in the field.
- Variable (This is a variable that you added to the project.)
- Purchase more credits if needed.
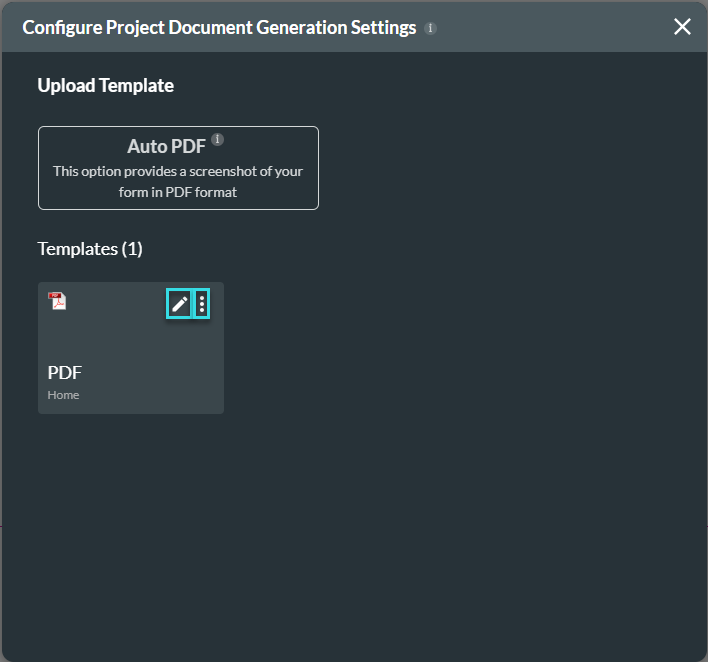
- Click the Apply button. The PDF template is added.
- Use the Edit icon to edit the template.
- Use the Kebab icon to do one of the following:
- Turn Off
- Delete
Hidden Title
Was this information helpful?
Let us know so we can improve!
Need more help?
Book Demo