

Titan Loop for Flow
Business Background
Sometimes you may have a collection of items that you want to evaluate one by one. You can loop on a list of items in a variable and run an action for each item. You can create, update, or delete a number of records at once.
Titan Solution
- With Titan, you can add a loop to your Flow project.
- You can evaluate a list of items one by one, for instance, a variable, and add an action to the evaluation.
How to Video
Coming soon!
How to Guide
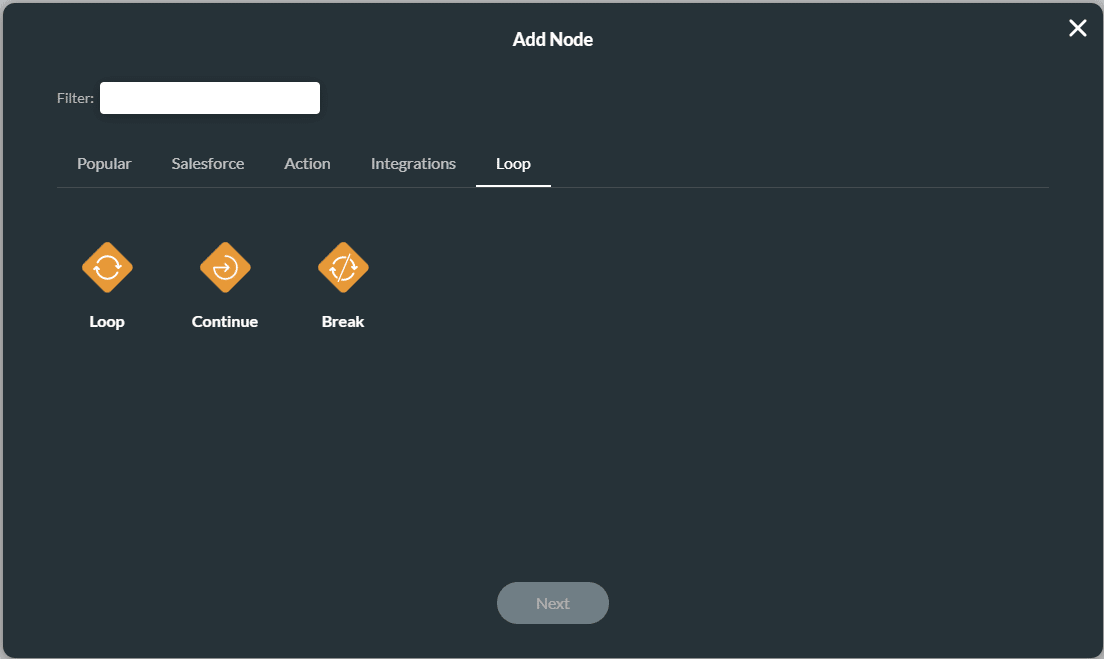
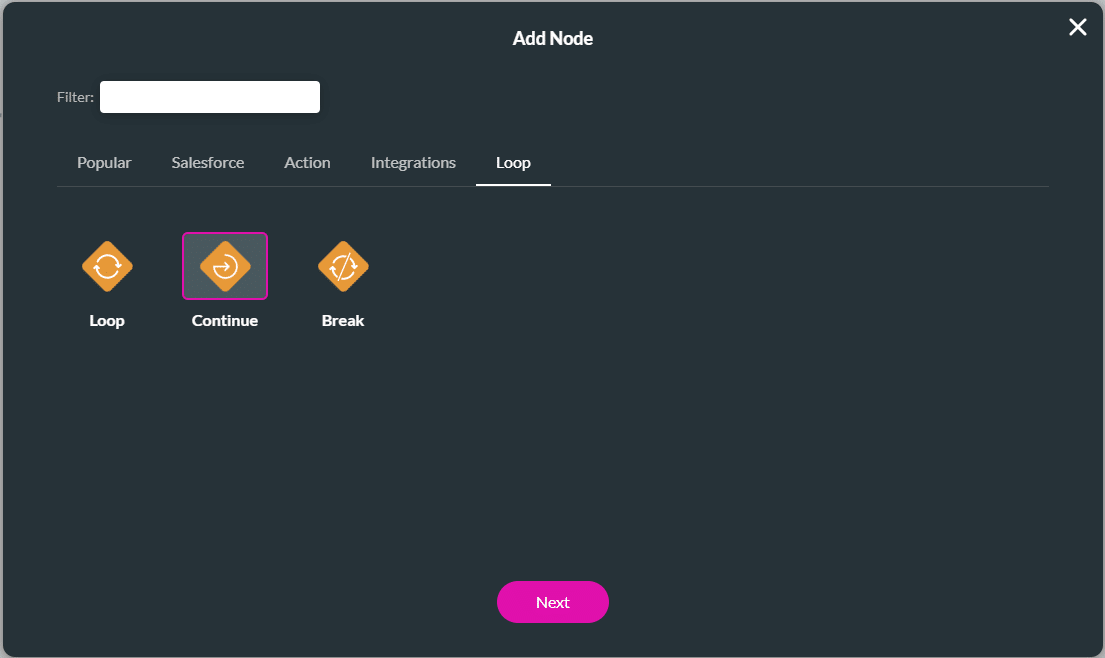
The following options are available:
- Loop: evaluate each item in a list.
- Continue: after one item is evaluated and the action is executed, continue with the next item.
- Break: stop the Loop process.
- Open a Flow project.
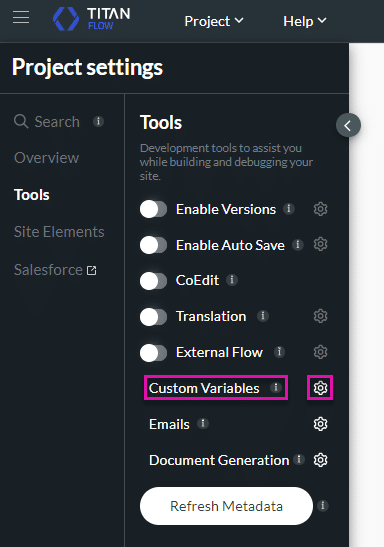
- Under Project Settings, select Tools and click on the Custom Variables Gear icon. The Custom Variables screen opens.
- Add Static Variables.
- Take note of the split delimiter. In this example, semi-colons are used.
- A split delimiter is a character or sequence of characters that splits a string into multiple parts or segments.
- Take note of the split delimiter. In this example, semi-colons are used.
- Click the Apply button.

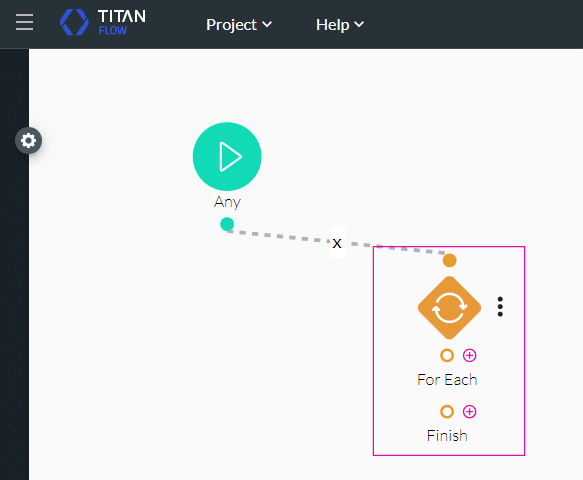
- Click the + icon. The Add Node screen opens.
- Under Loop, click the Loop option and click the Next button.

- Select the relevant custom variable from the Loop on Element drop-down list.
- Select the option for the Split Delimiter.
- Static: Type the delimiter, for instance, a semi-comma.
- Field: Use the drop-down list to select the split delimiter.
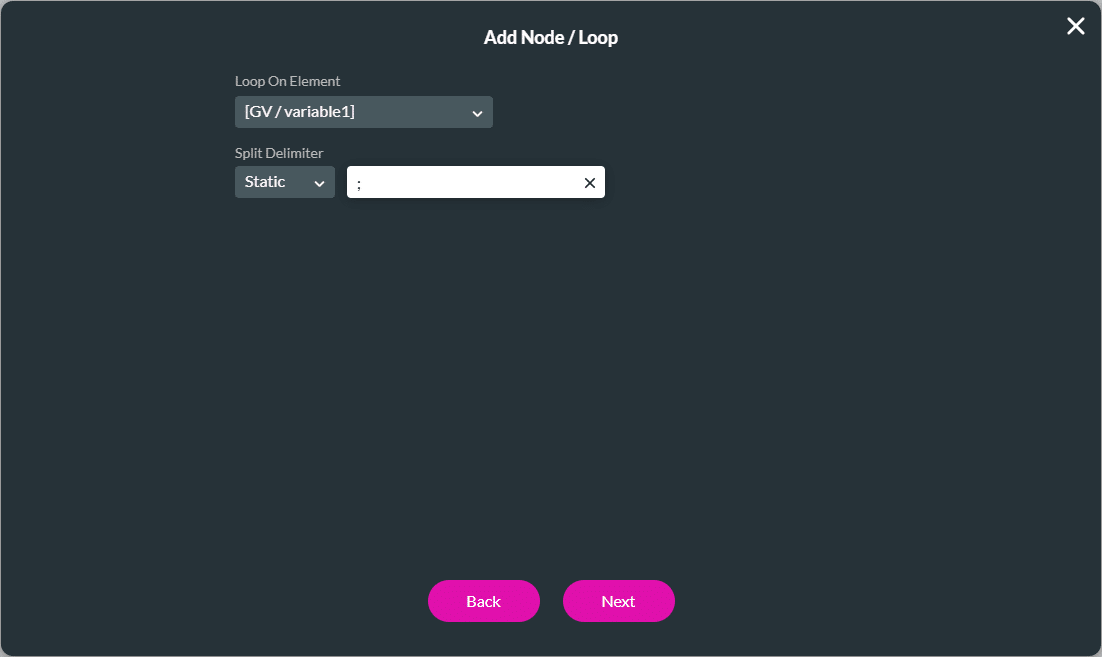
- Click the Next button.
- If necessary, add a tag and click the Insert button. The Loop Node is added to the Flow.
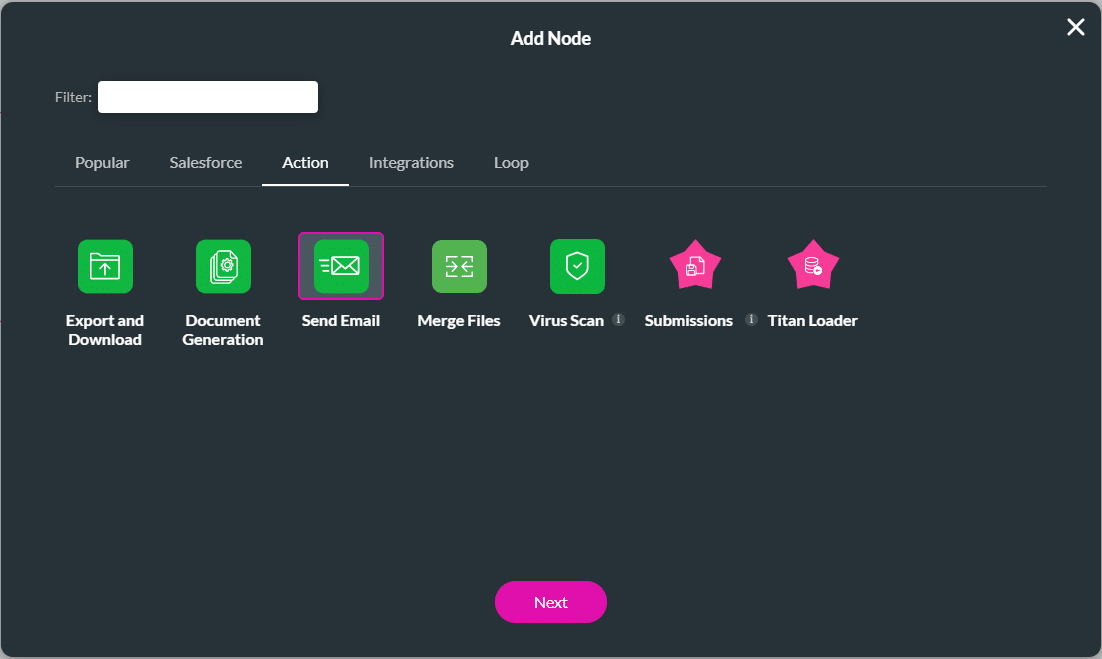
- Click the For Each + icon. The Add Node screen opens.
- Click the Action option and select the Send Email option.
- Click the Next button. The Add Node/Send Email screen opens.
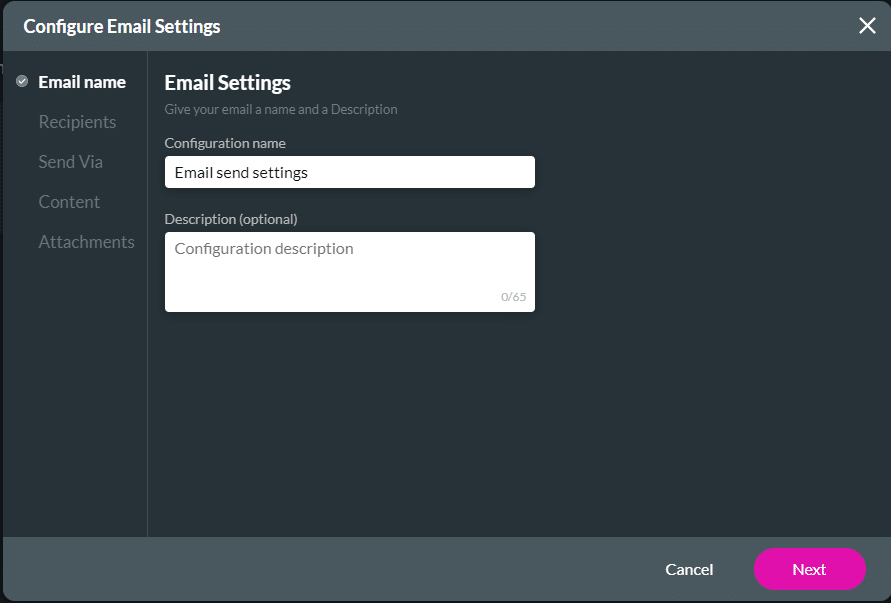
- Click the + icon to add an email. The Configure Email Settings screen opens.

- Under the Email name option, type the following:
- Configuration name. This is mandatory.
- Description. This is mandatory. There is a 65-character limit on this field.
- These two fields are shown when the email configuration is added to the Add Node/Send Email screen.
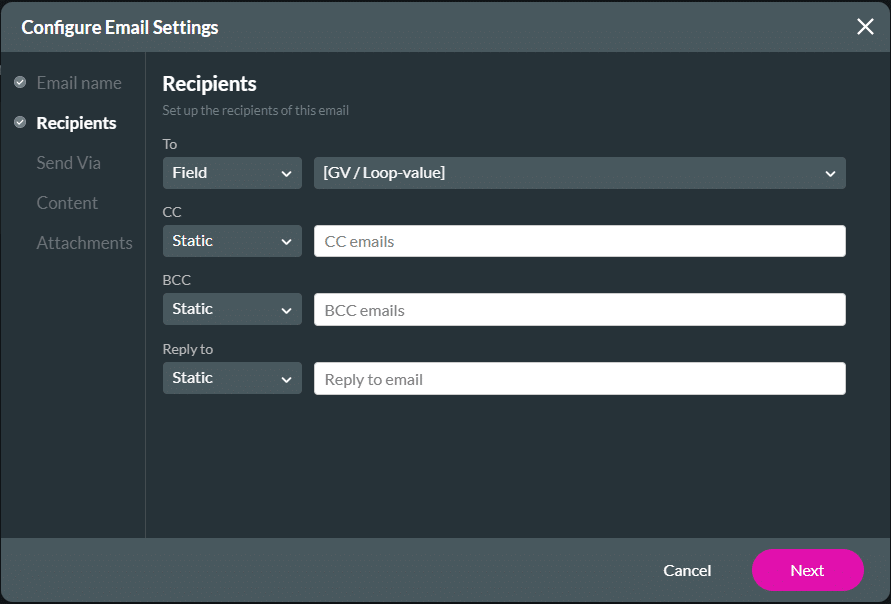
- Under the Recipients option, set up the recipients of the email.
- Add a Field value for the To option. This is mandatory.
- Field: Use the drop-down list to select the Loop value.
- You can add CC, BCC, and Reply to fields as well. These are optional.
- Add a Field value for the To option. This is mandatory.
- Click the Next button.
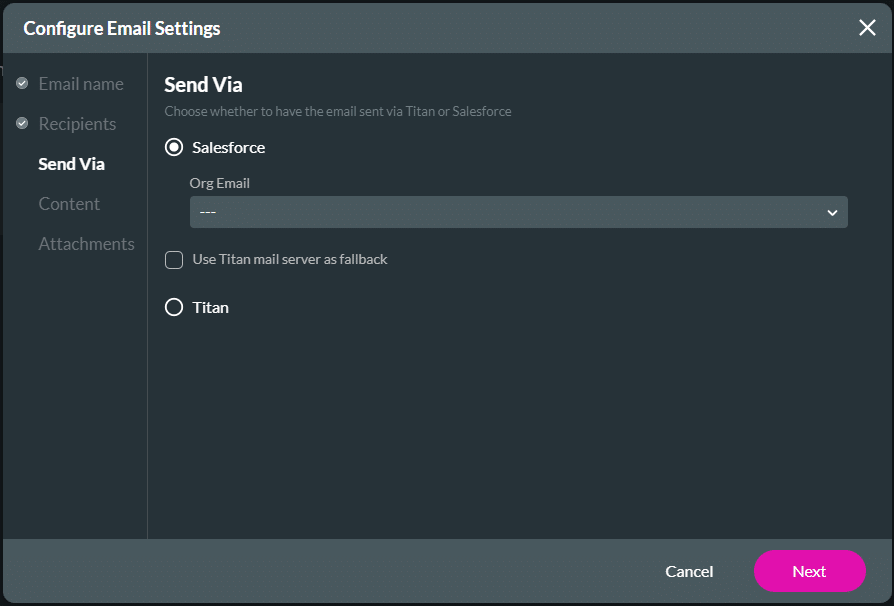
- Under the Send Via option, you have two options with which you can send the email:
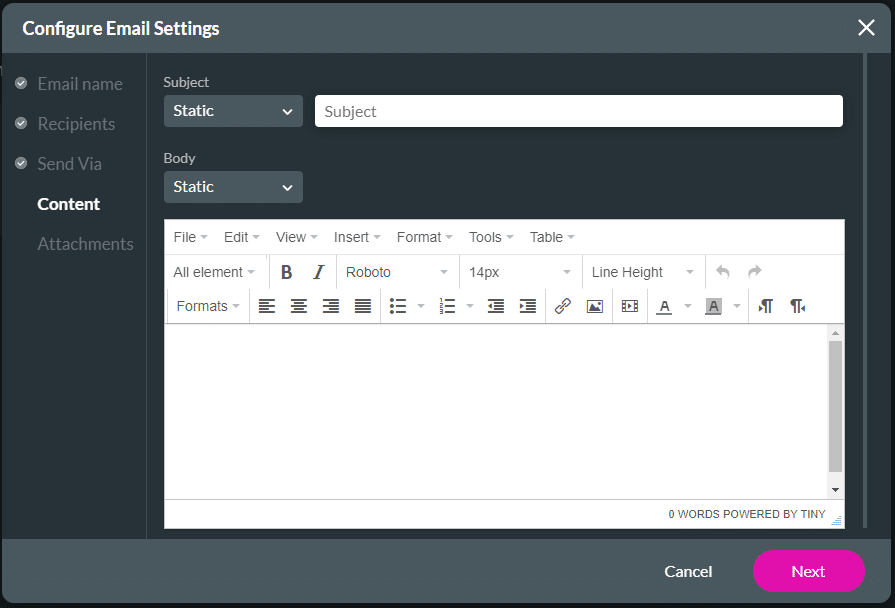
- Configure the Content.
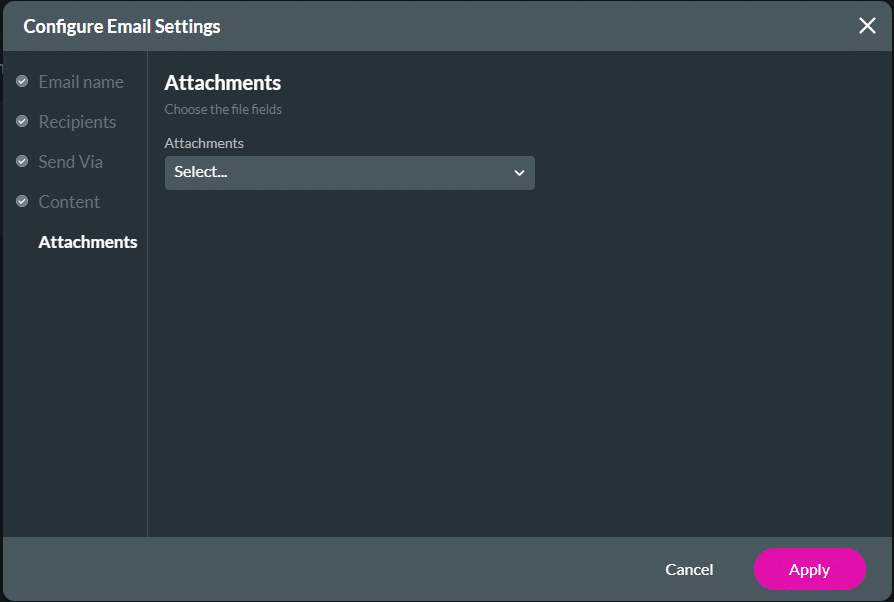
- If necessary, add Attachments.
- Click the Apply button. The email is added to the Add Node/Send Email screen.
- Click the Next button. The Email node is added to the Flow.

- Click the + icon of the Email node.
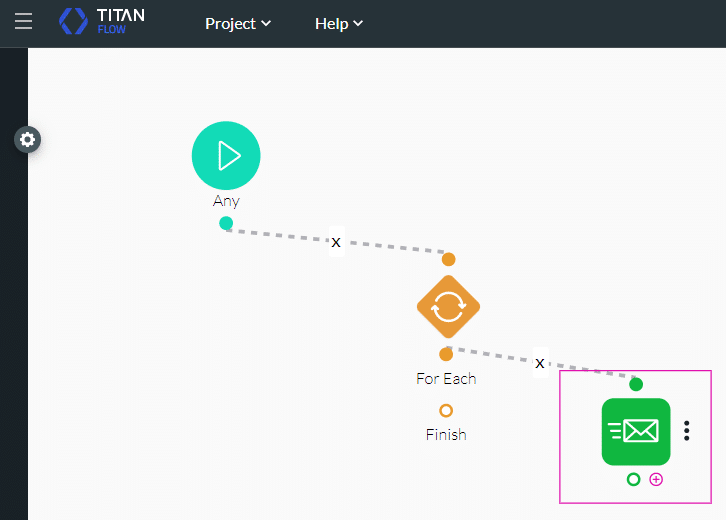
- Under Loop, click the Loop Continue option and click the Next button,
- Add a tag if necessary, and click the Insert button. The Continued Loop is added to the Flow.

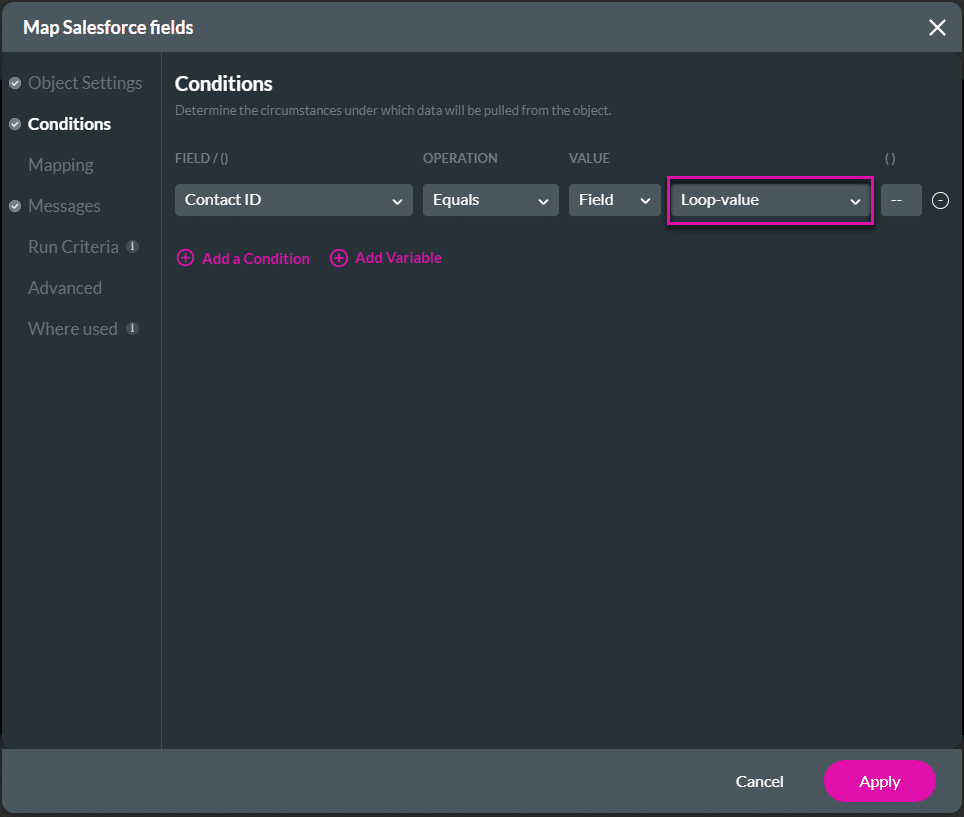
You can also update an object in Salesforce.
Note:
There is a 50 record limit: Only 50 records in Salesforce can be updated in one loop.
Make sure that you select the Loop value in the Condition:
Learn more about Titan for Salesforce.
Hidden Title
Was this information helpful?
Let us know so we can improve!
Need more help?
Book Demo