Trigger Titan Flow from Salesforce Flow
Business Background
Salesforce Flow provides robust automation tools, but it has limitations when it comes to handling complex document processes, third-party integrations, and data management across different environments. Without extended capabilities, teams face manual workarounds, increased development effort, and reduced agility. Integrating Titan Flow addresses these challenges by enabling no-code automation for advanced workflows, bringing greater flexibility, efficiency, and scalability to business operations.
Titan Solution
Titan extends the power of Salesforce Flow by providing a no-code platform that eliminates the need for custom development and manual workarounds. With Titan Flow, users can automate complex tasks directly from Salesforce triggers, such as document generation, merging, integration with third-party systems, and cross-environment data sharing.
This solves key business challenges by reducing development time, improving process efficiency, and enabling teams to build and scale advanced workflows with ease. Titan empowers organizations to move faster, innovate without code, and fully leverage their Salesforce investment.
Also, learn how to Send Parameters from a Salesforce Flow to a Titan Flow.
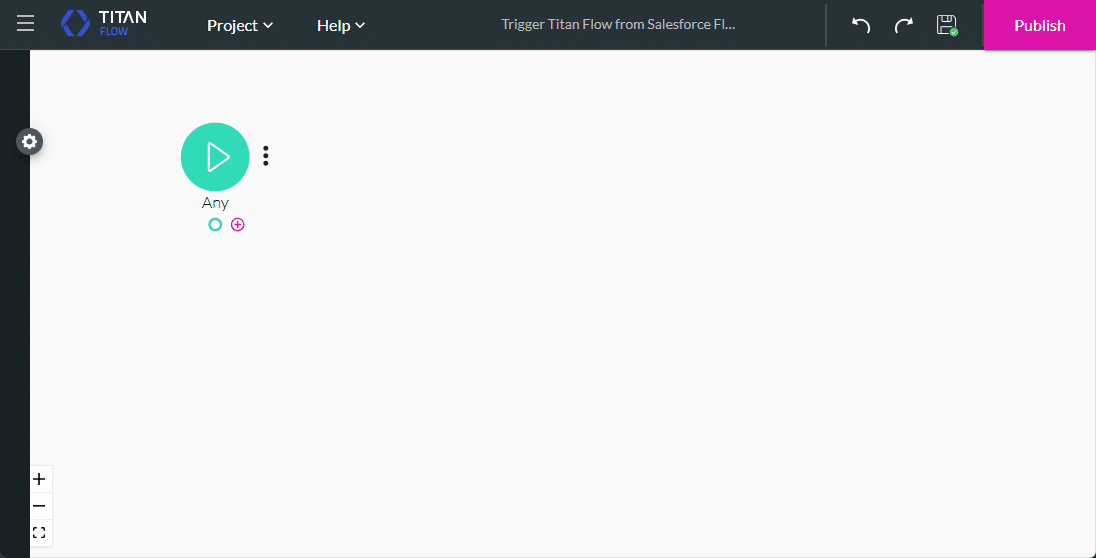
How to Guide
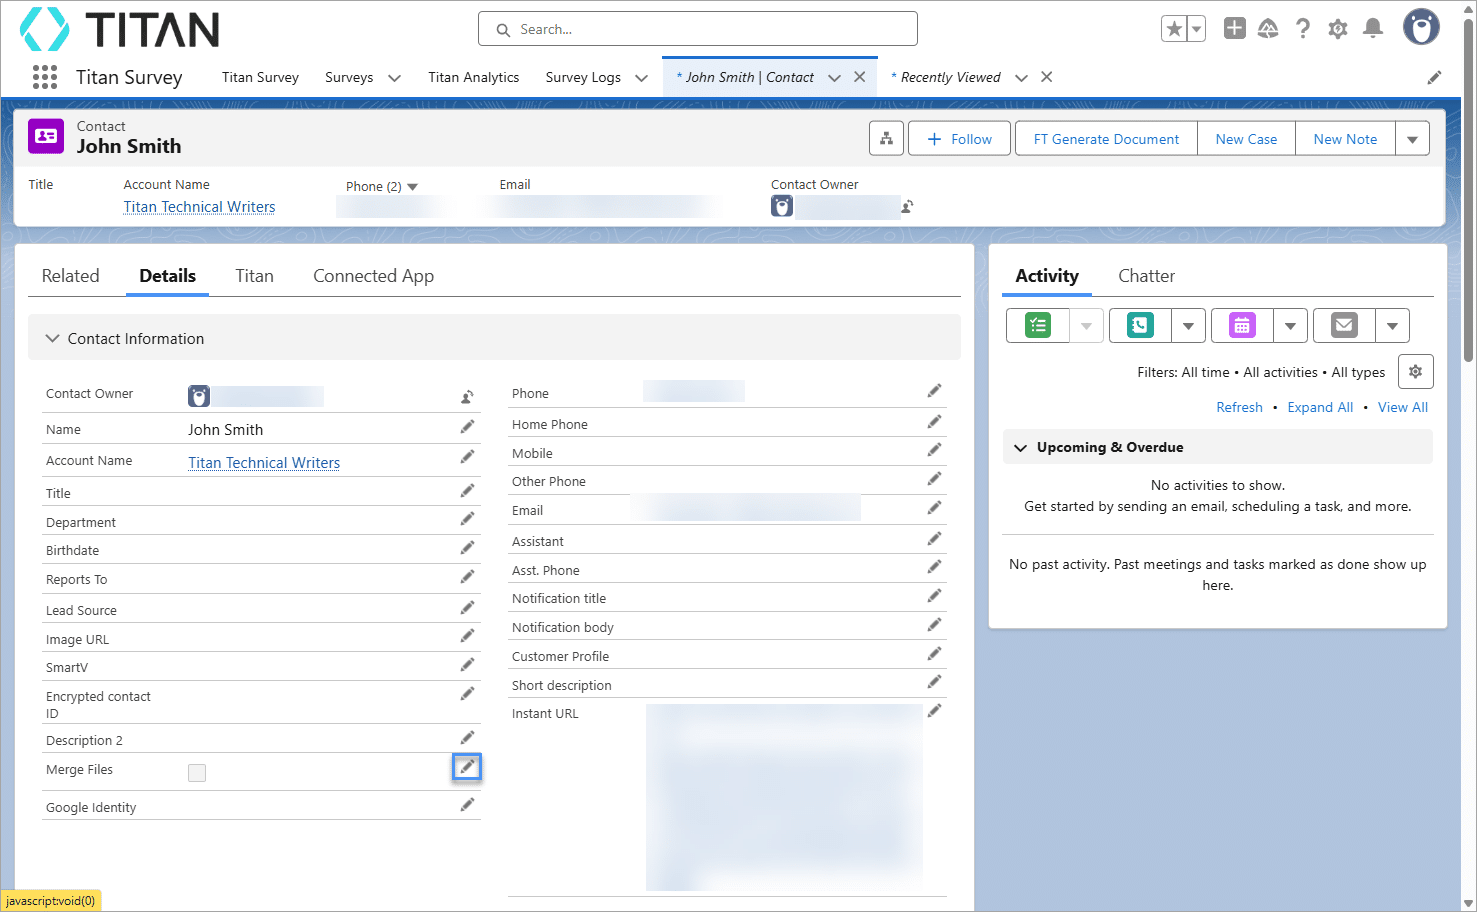
In this example, the documents on a contact will be merged when a checkbox on the record in Salesforce is enabled. The checkbox was added as a custom field on the object.
Prerequisites
- On the Titan Dashboard, click the New Project button.
- Select the Flow project type and click the Next button.
- Type a name for the flow and click the Let’s Go! button.
- Click the Gear icon to open the Project Settings and select the Tools option.
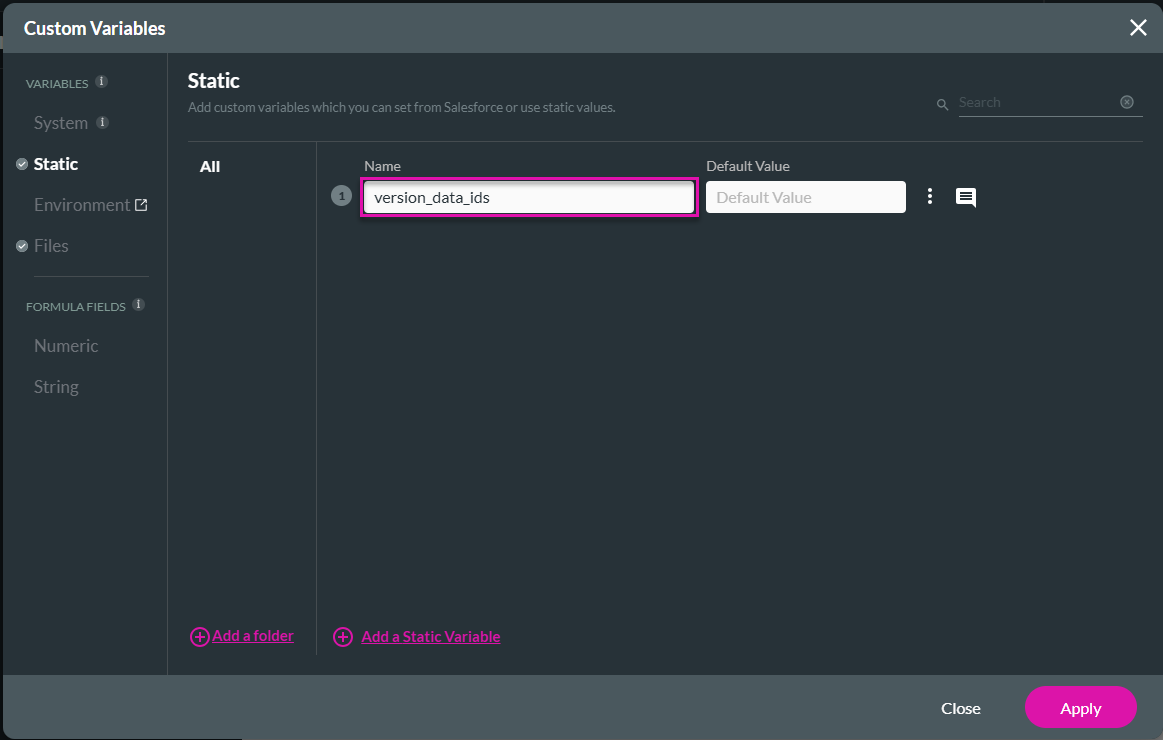
- Click the Gear icon next to the Custom Variables option.
- Add a static variable. This variable will be used to hold the record IDs of the appropriate Salesforce File records.
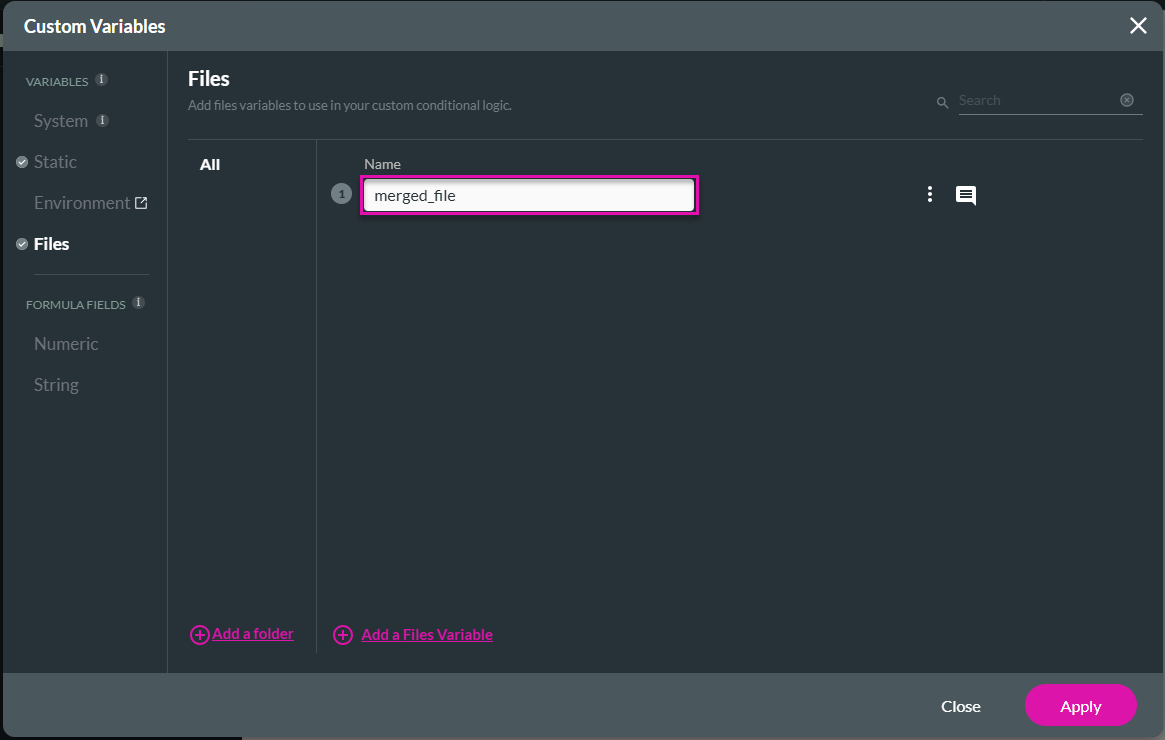
- Add a files variable. This variable will be used to hold the final merged file output.
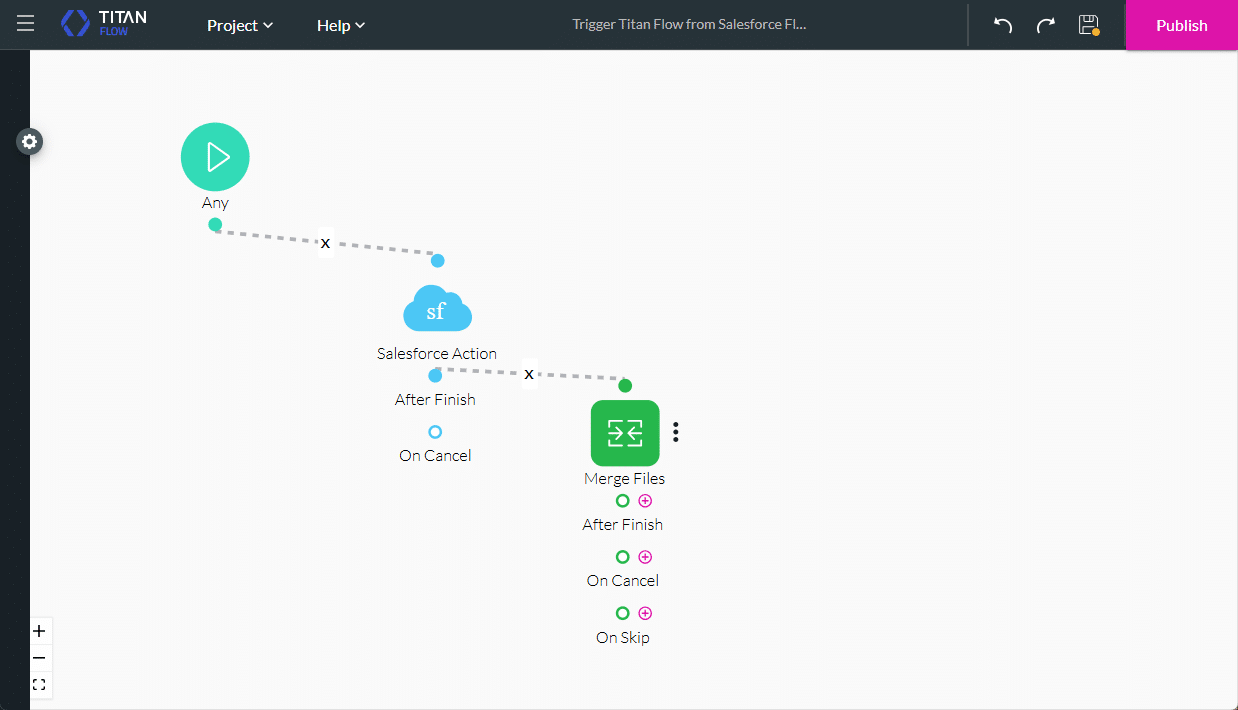
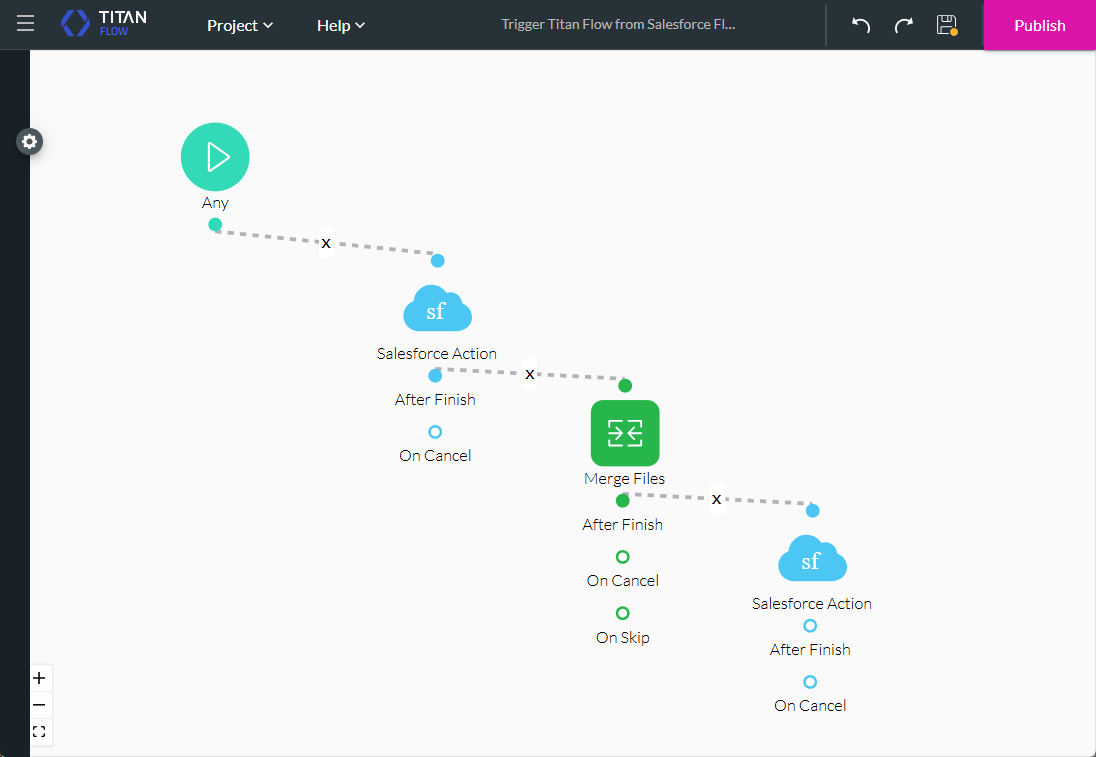
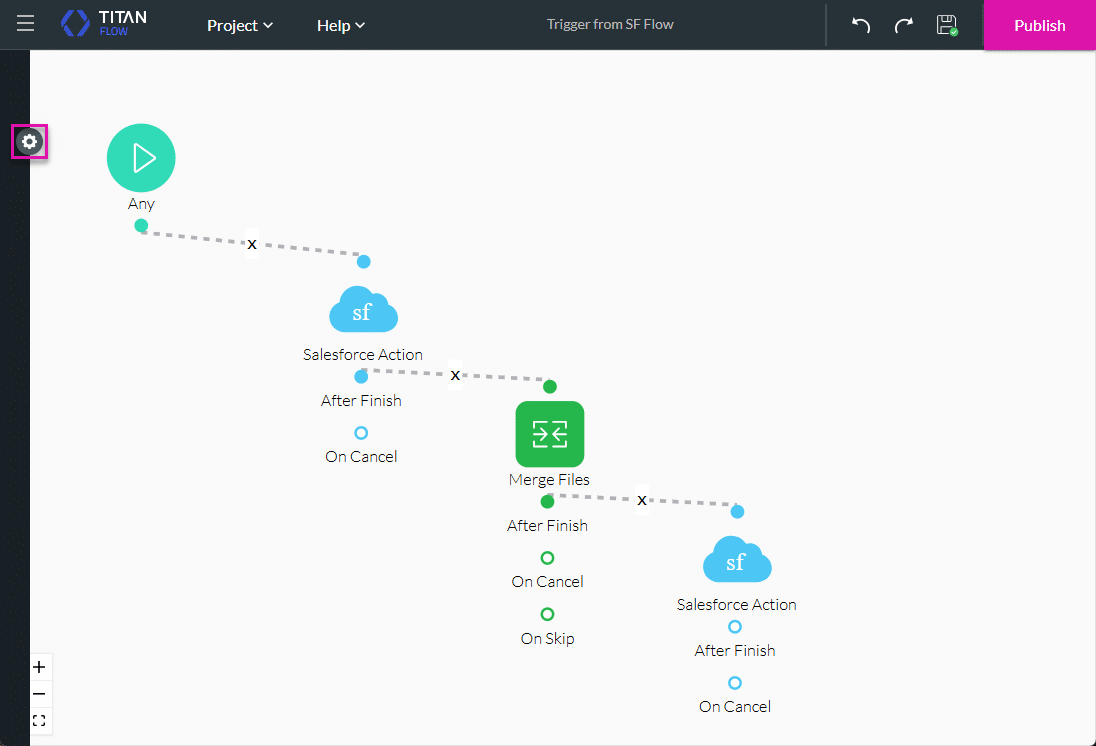
Configure a Flow in Titan
Configure a Salesforce Get
This Salesforce Get will bring all the documents linked to a recordID.
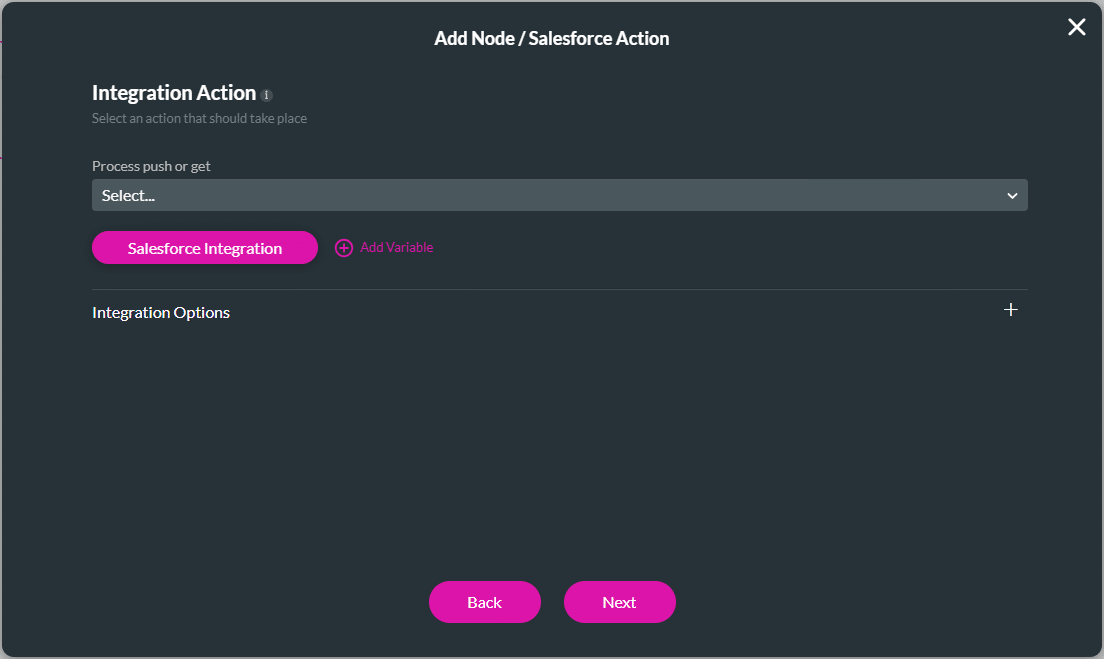
- Click the + icon to add a node.
- Select the Salesforce Action node and click the Next button.

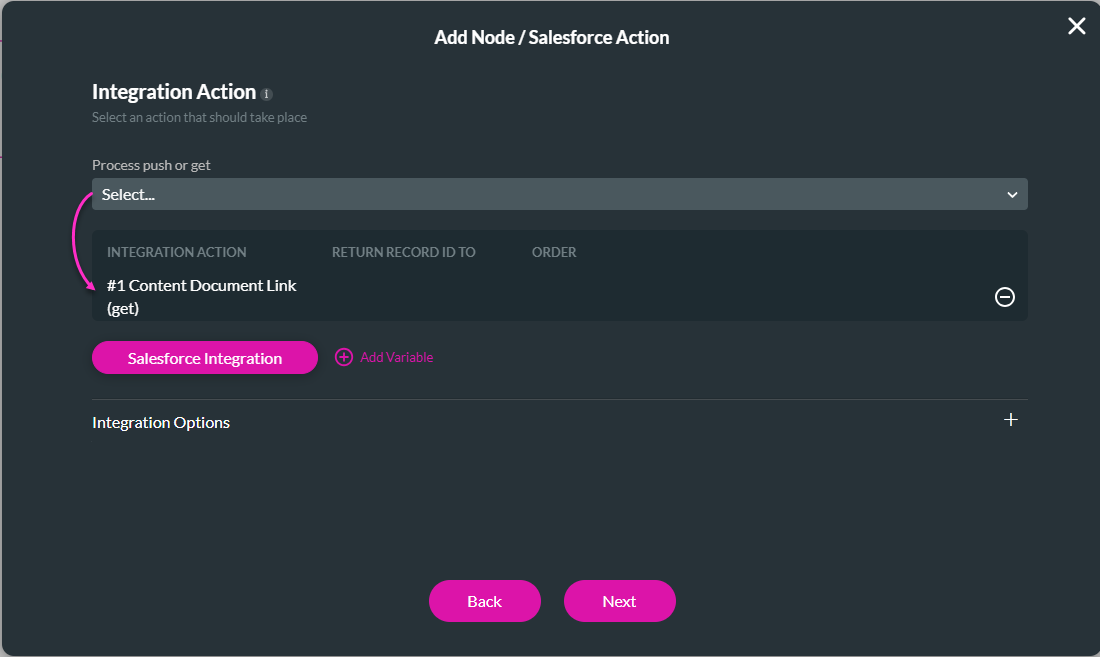
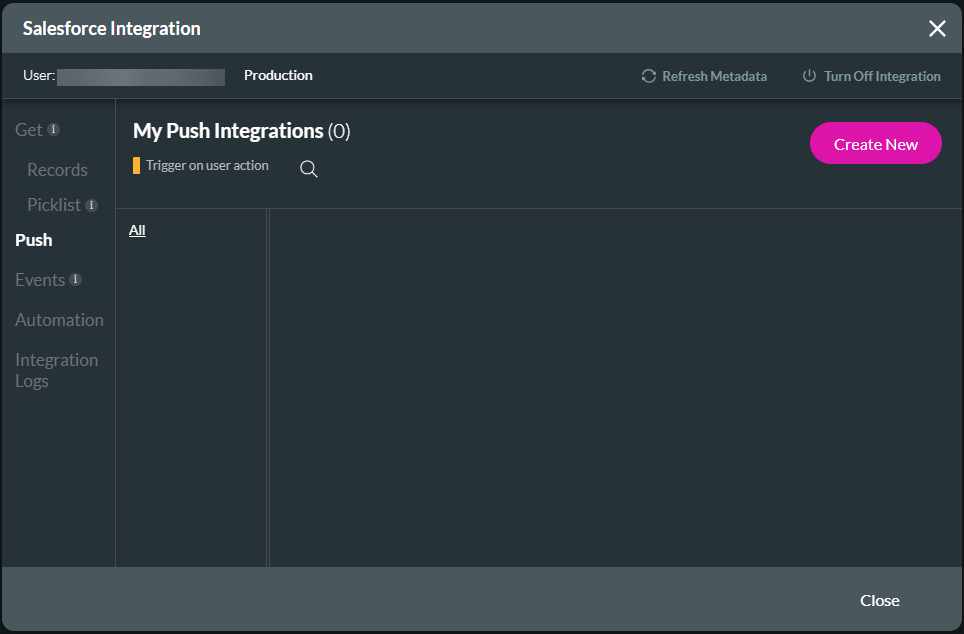
- Click the Salesforce Integration button.
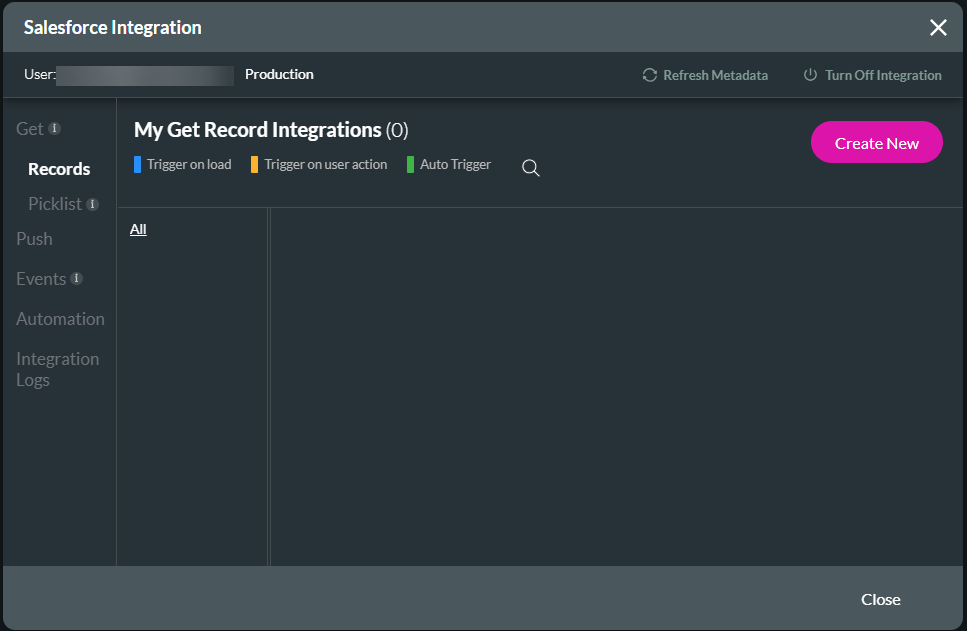
- Click the Create New button to create a Salesforce Get.
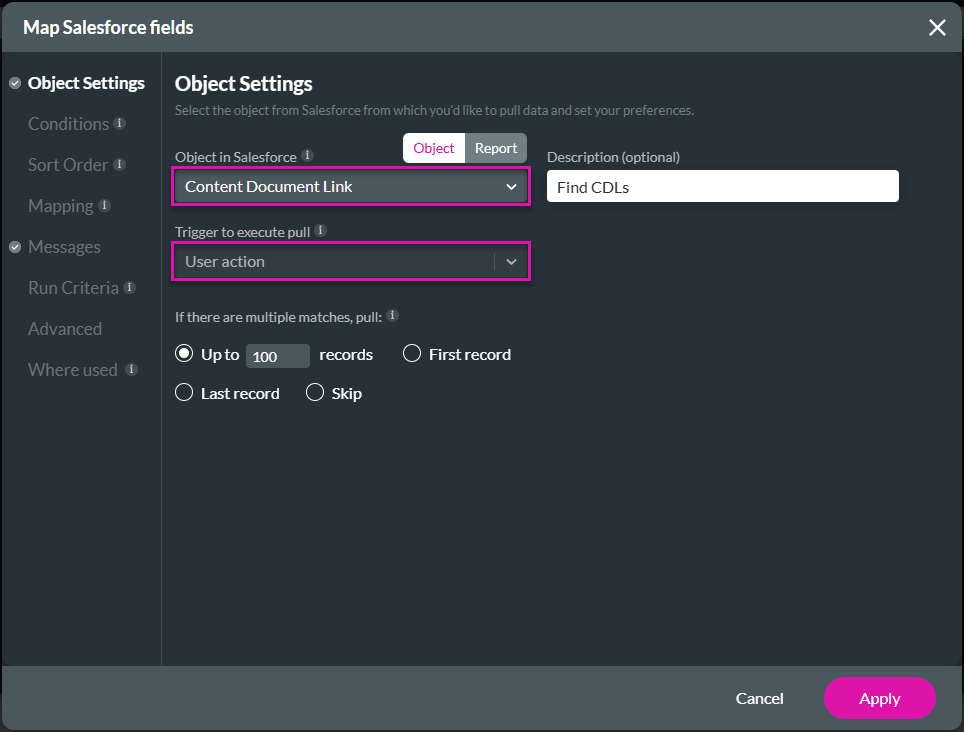
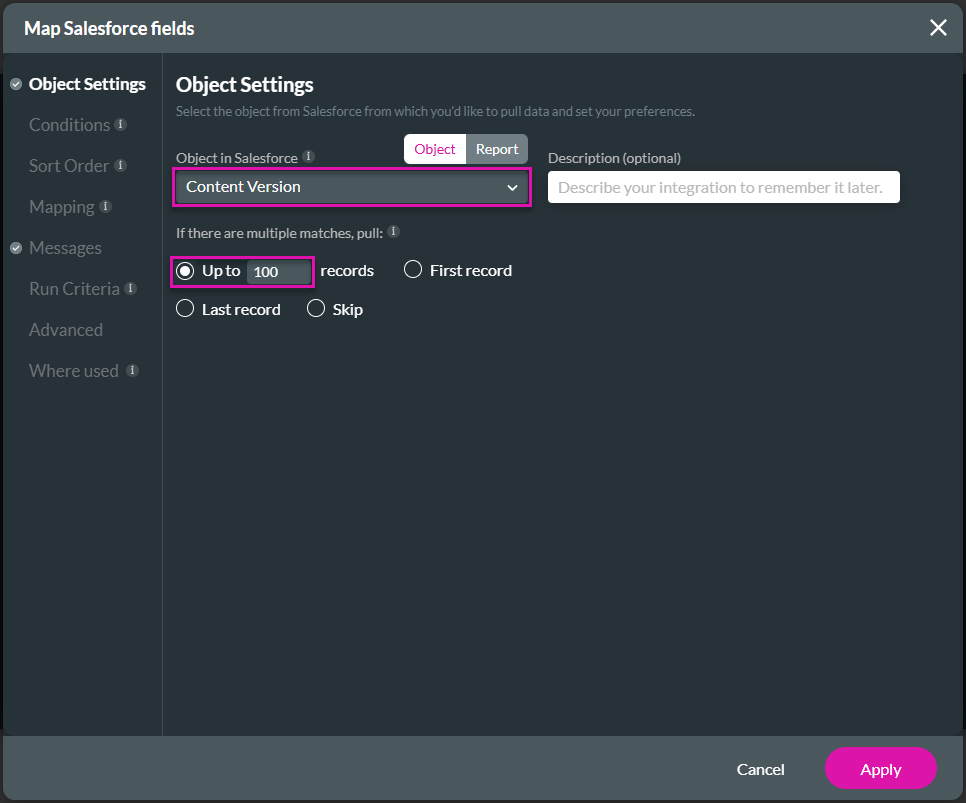
- Use the drop-down list to select the object in Salesforce. For this example, select the Content Document Link object.
- The trigger to execute the pull is added by default.
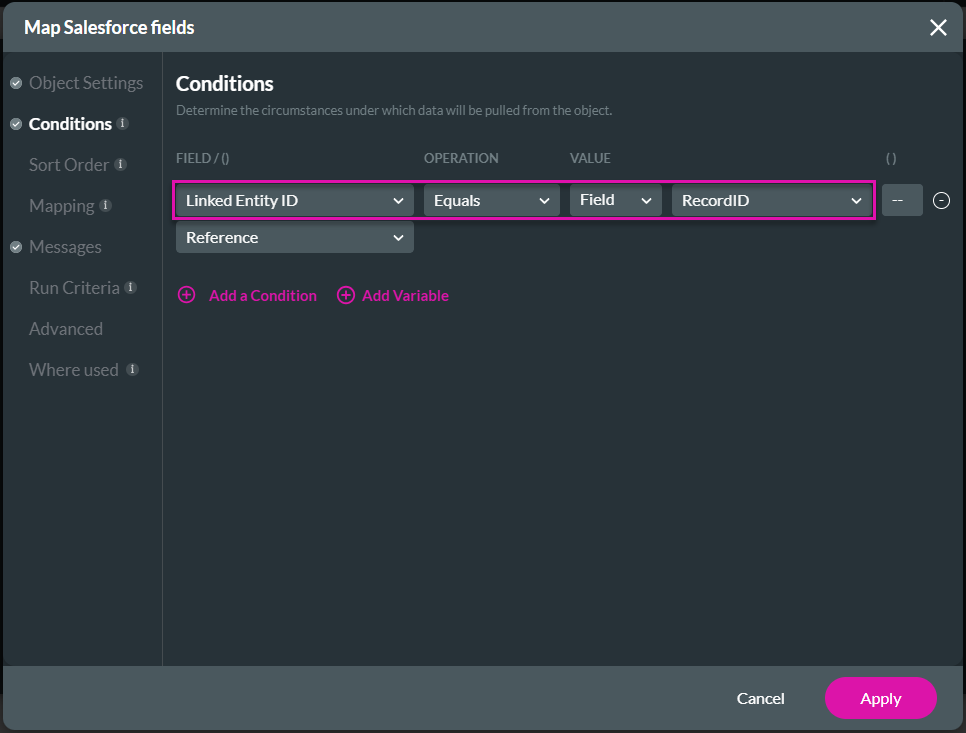
- Under Condition, set the condition as follows:
- Linked Entity ID equals the Record ID. This will filter for file records that are linked to the Salesforce Record ID of the Contact record that initiates the flow.
- Click the Apply button.
- Click the Kebab icon and select the Add Child option.
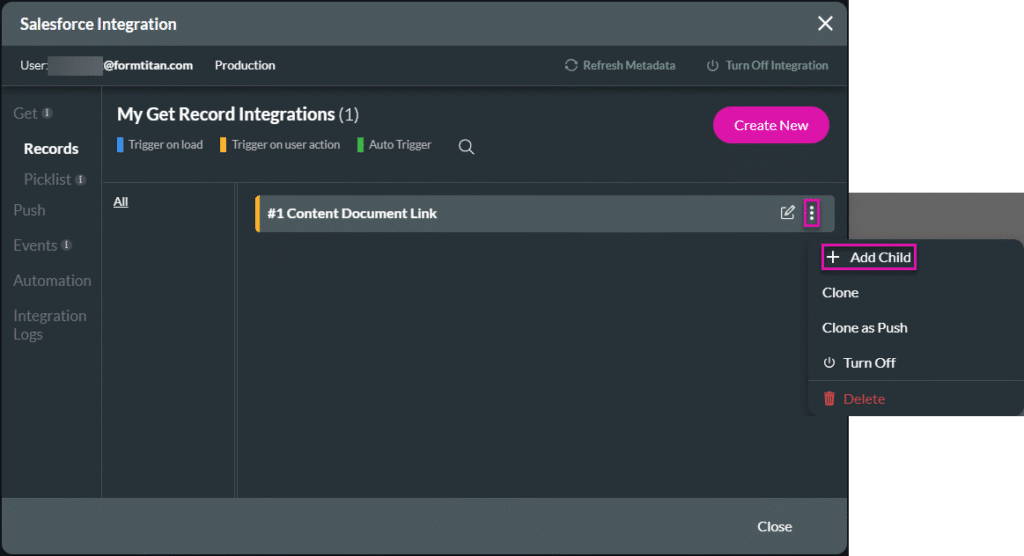
- Use the drop-down list to select the Content Version object in Salesforce.
- Set the number of records to be returned to a large value, such as 100.
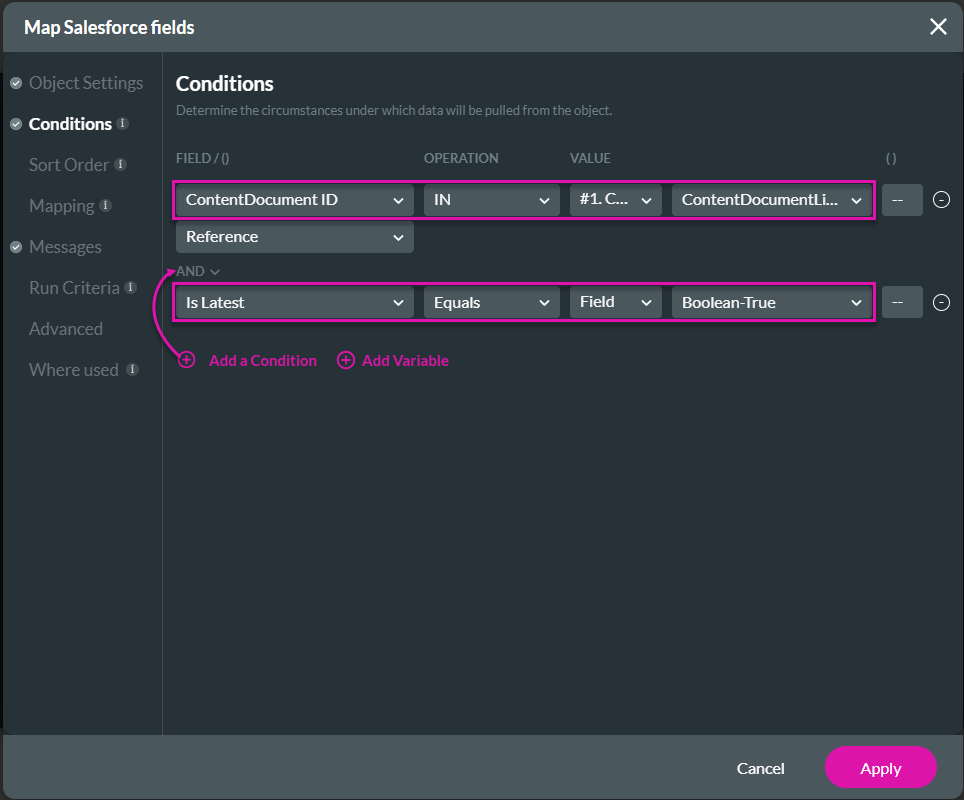
- Under Condition, use the drop-down lists to set the conditions as follows to return a list of the latest versions of all files that are contained in the file links from the first Get:
- ContentDocumentID IN #1 parent query – ContentDocumentID
- AND
- This will return a list of the latest versions of all files that are contained in the file links from the first GET.
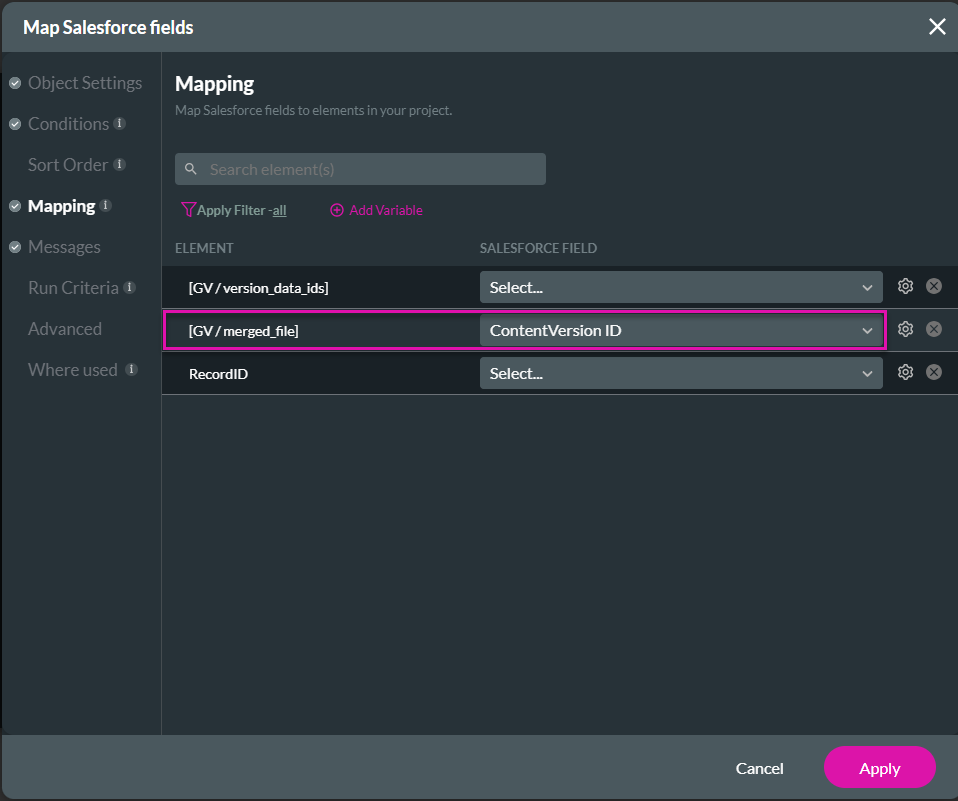
- Under Mapping, use the drop-down list to map the files variable that you created earlier to the ContentVersionID field.
- Click the Apply button.
- Click the Close button.
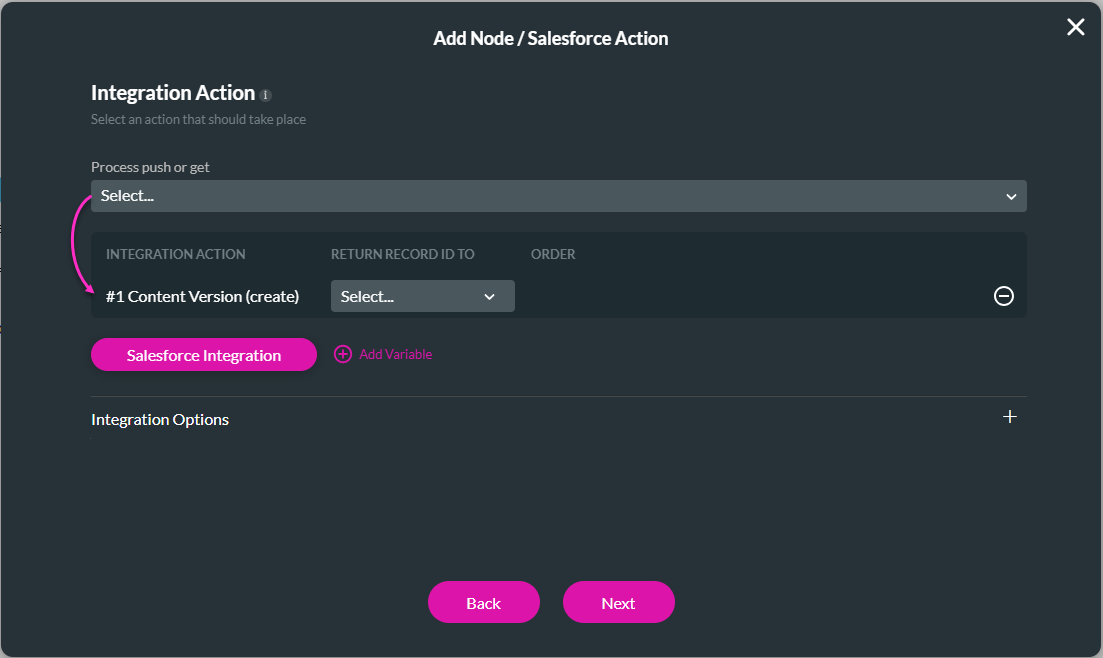
- Use the drop-down list to select the Get and click the Next button.
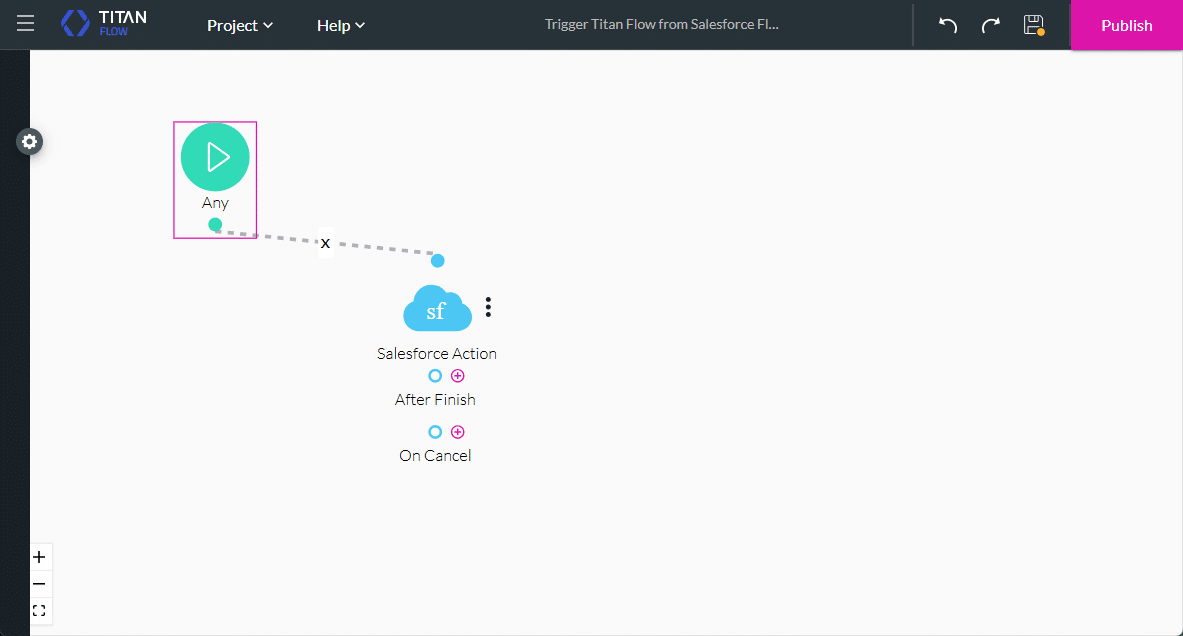
- If necessary, change the tag and click the Insert button. The Salesforce Action node is added to the flow.
Configure a Merge Files node
This node will merge the different files that the Salesforce Get brought back.
- Click the + icon to add a node.
- Under Action, click the Merge File option and click the Next button.
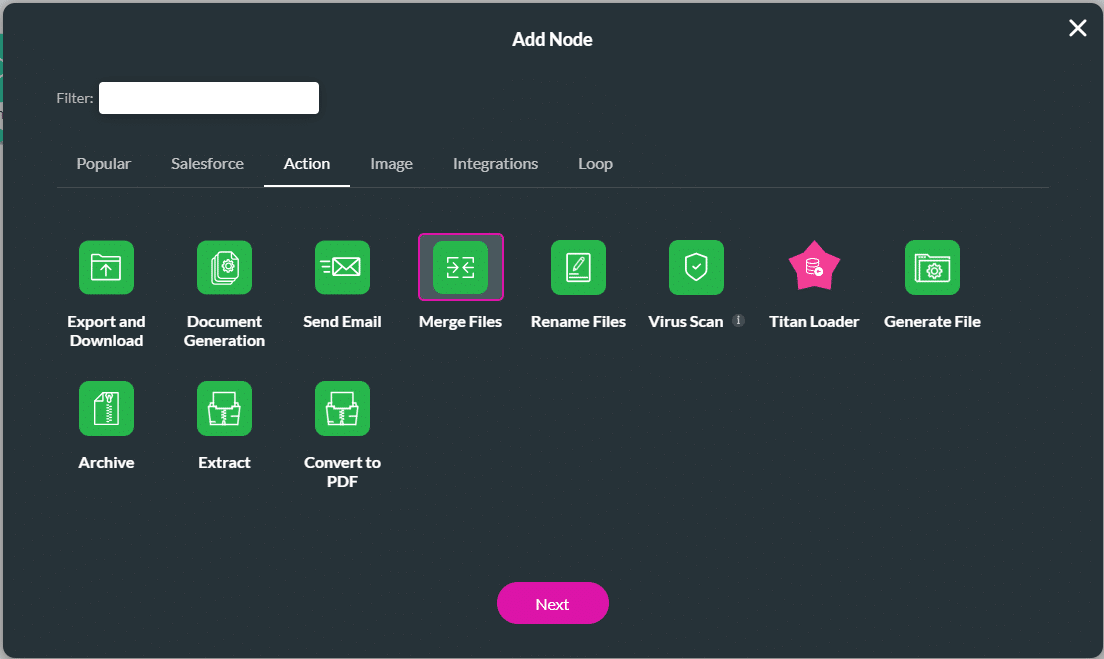
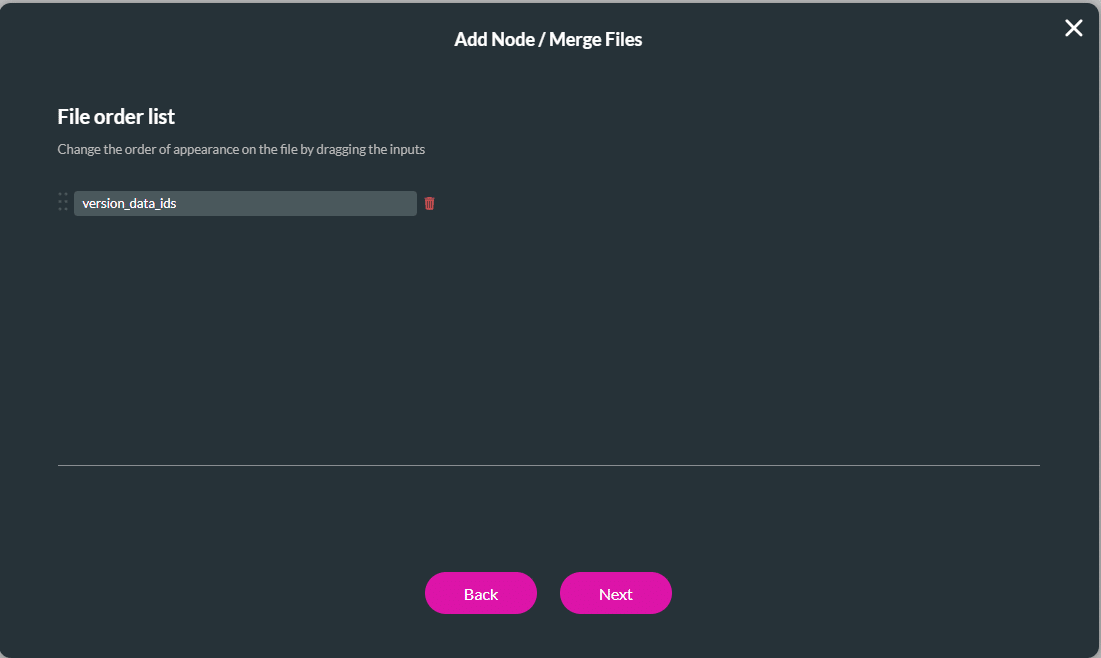
- Use the drop-down lists and select the variables.
- Type a custom name in the field.

- Click the Next button.
- If necessary, change the tag and click the Insert button. The Merge Files node is added to the flow.
Configure a Salesforce Push
This Push will return the merged file to the Salesforce object using the recordID.
- Click the + icon to add a node.
- Select the Salesforce Action node and click the Next button.
- Click the Salesforce Integration button.
- Select the Push option and click the Create New button.
- Use the drop-down list to select the object in Salesforce. For this example, select the Content Version.

- Under Mapping, use the drop-down lists to map the following fields. This will attach the merged files to the Contact record in Salesforce where the flow was initiated.
- Click the Apply button.
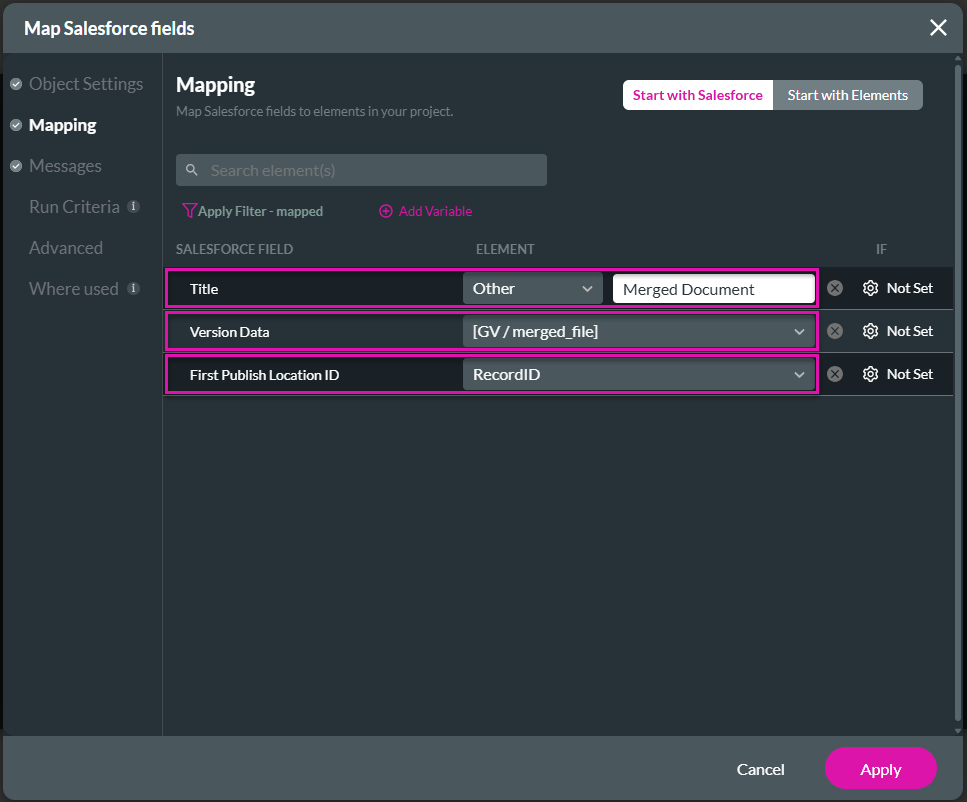
- Click the Close button.
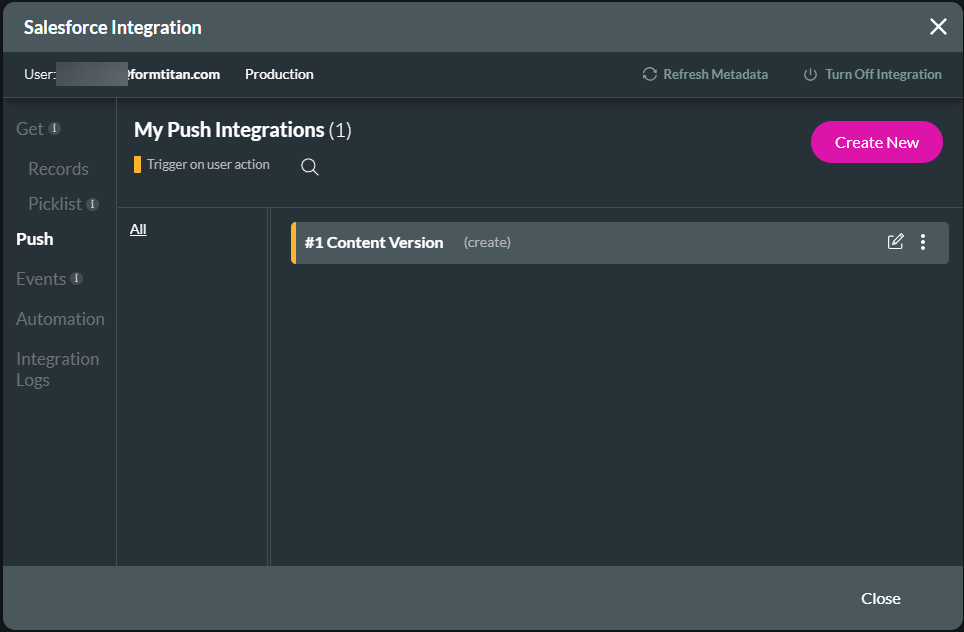
- Use the drop-down list to select the push and click the Next button.
- If necessary, change the tag and click the Insert button. The Salesforce Action node is added to the flow.
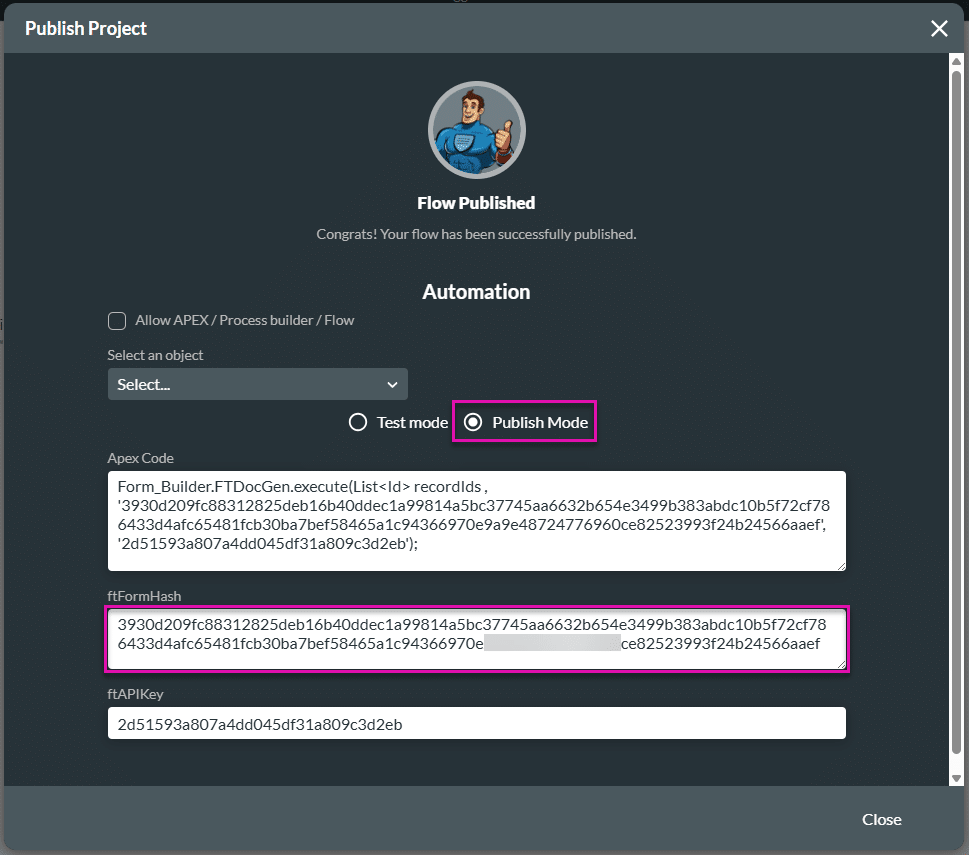
- Click the Save and Publish buttons.
- Select the Publish Mode radio button.
- Take note of the ftFormHash. You will need this for the Salesforce Flow.
Configure a Flow in Salesforce
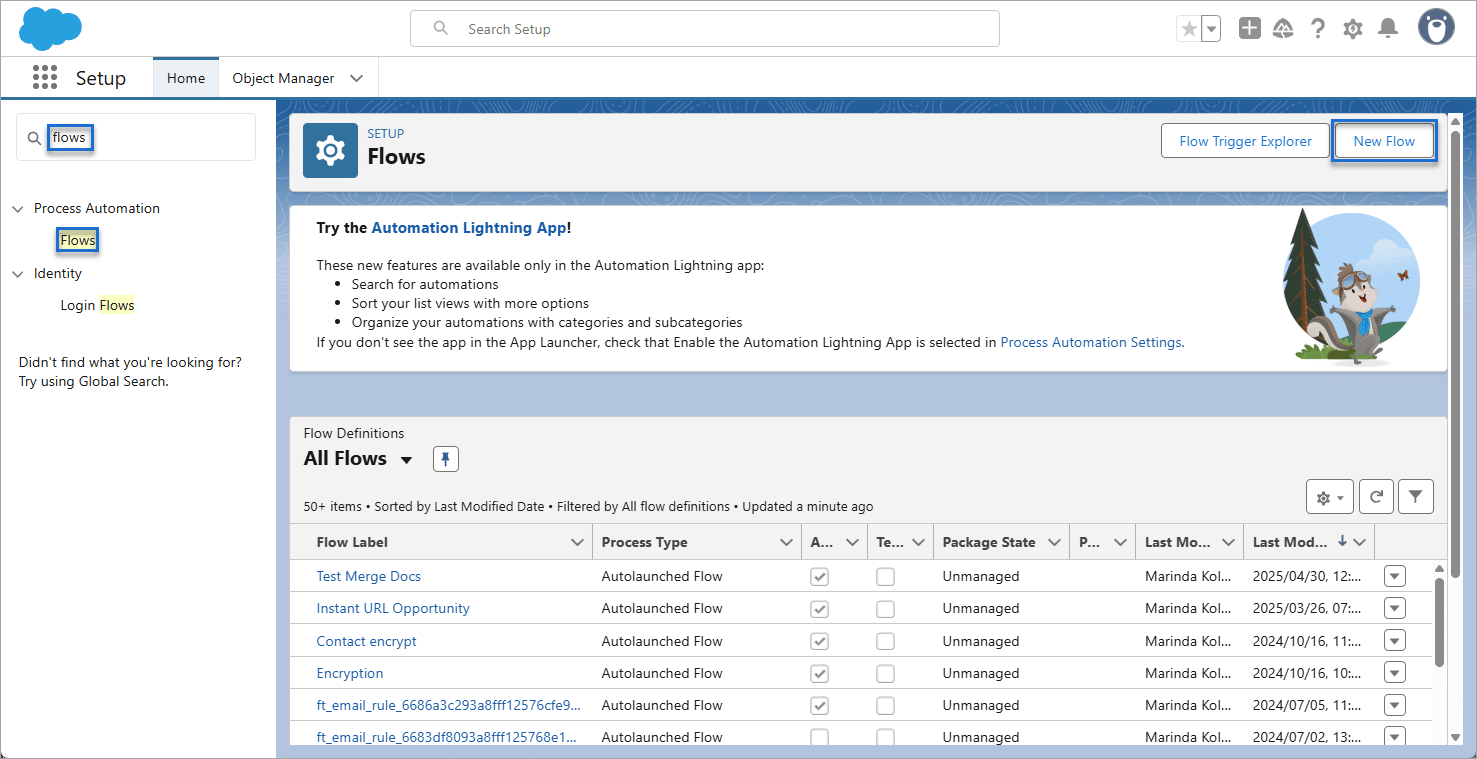
- Click the Gear icon to open the Setup Menu and click the Setup option.

- Search for “flows” and select the Flows option.
- Click the New Flow button.
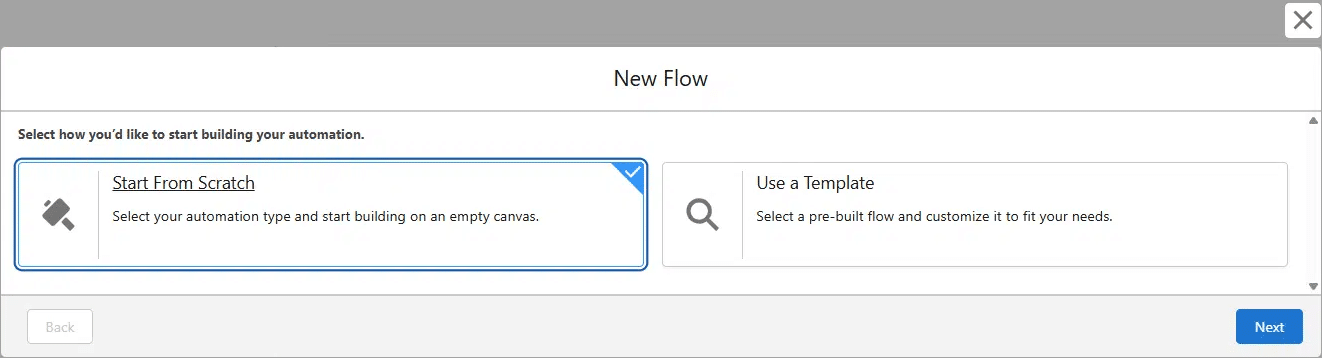
- Select the Start from Scratch option and click the Next button.
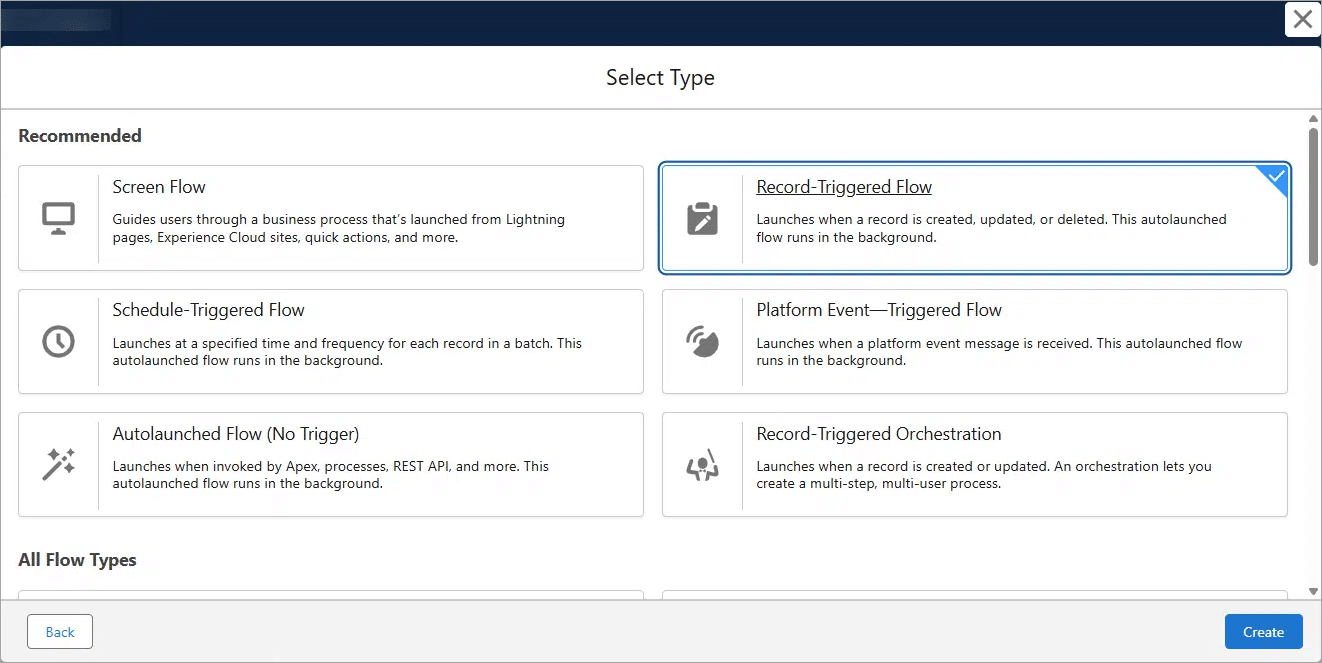
- Select an option. In this example, a record-triggered flow was selected.
- Click the Create button.
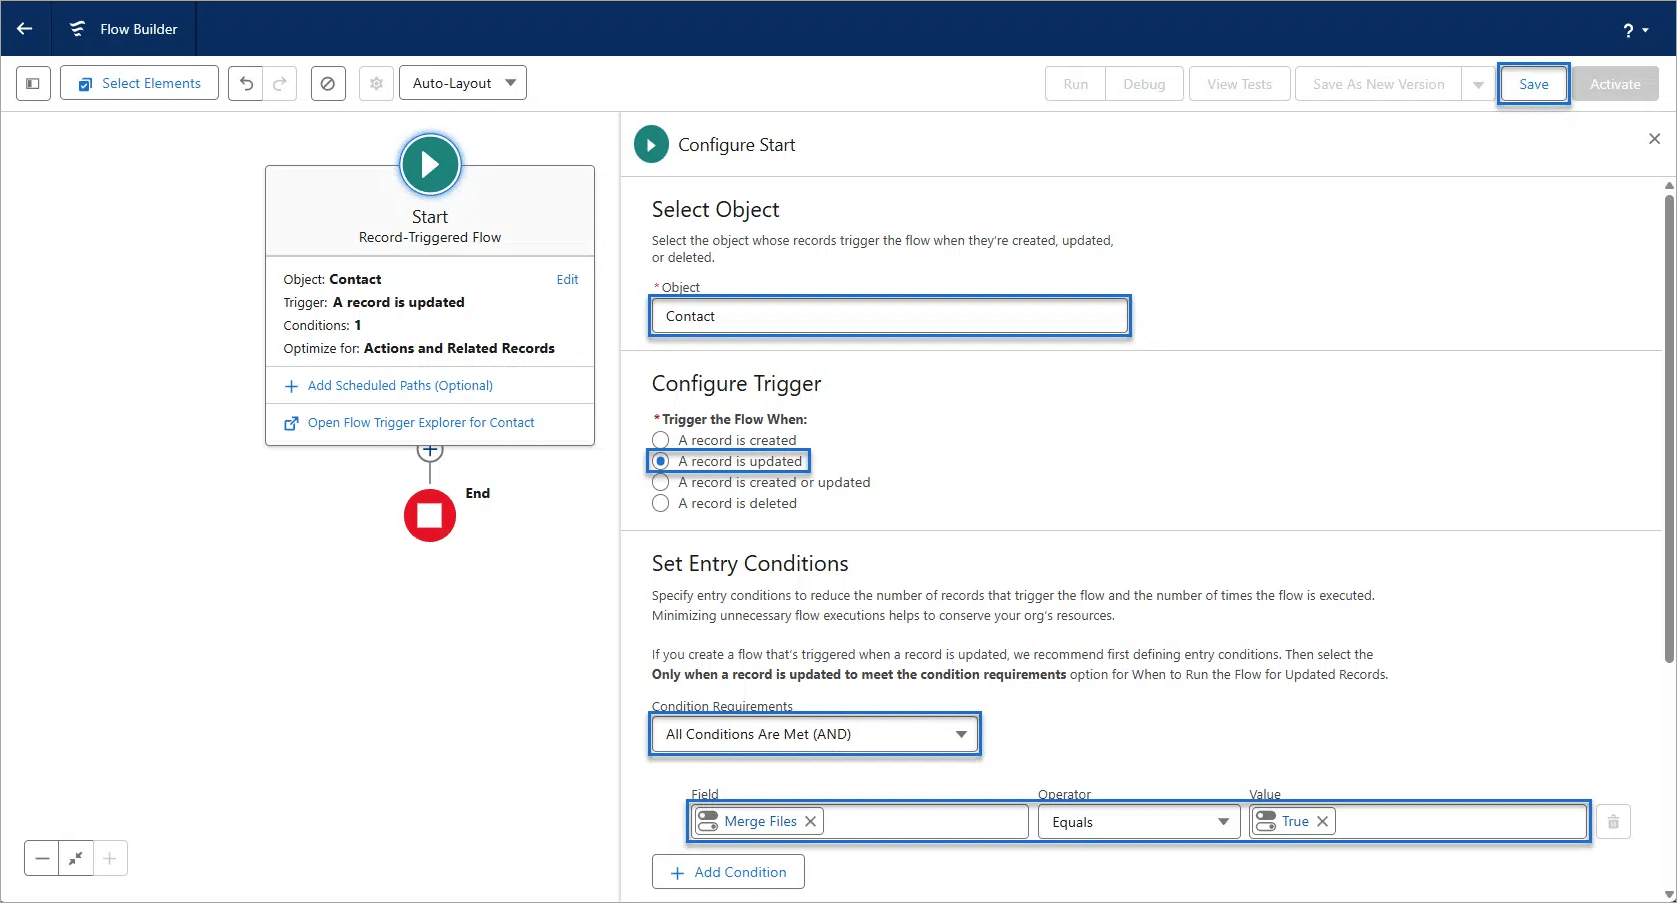
- Use the drop-down list to select the object.
- Select the relevant Configure Trigger radio button.
- Add a condition that the merged file field equals true.
- Click the Save button.
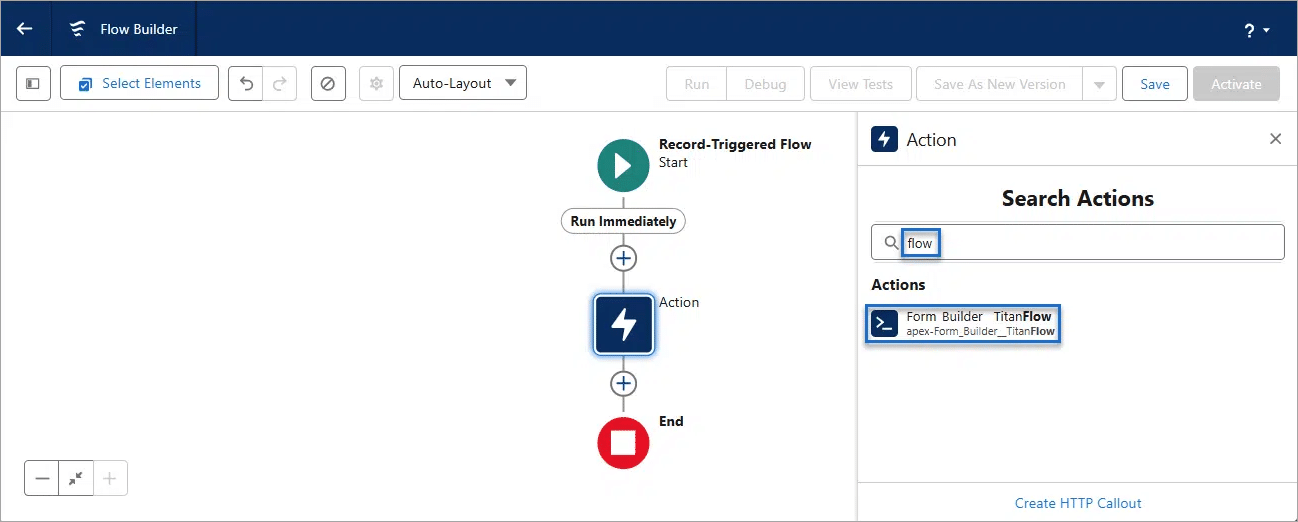
- Click the + icon to add an element and select the Action option from the list.

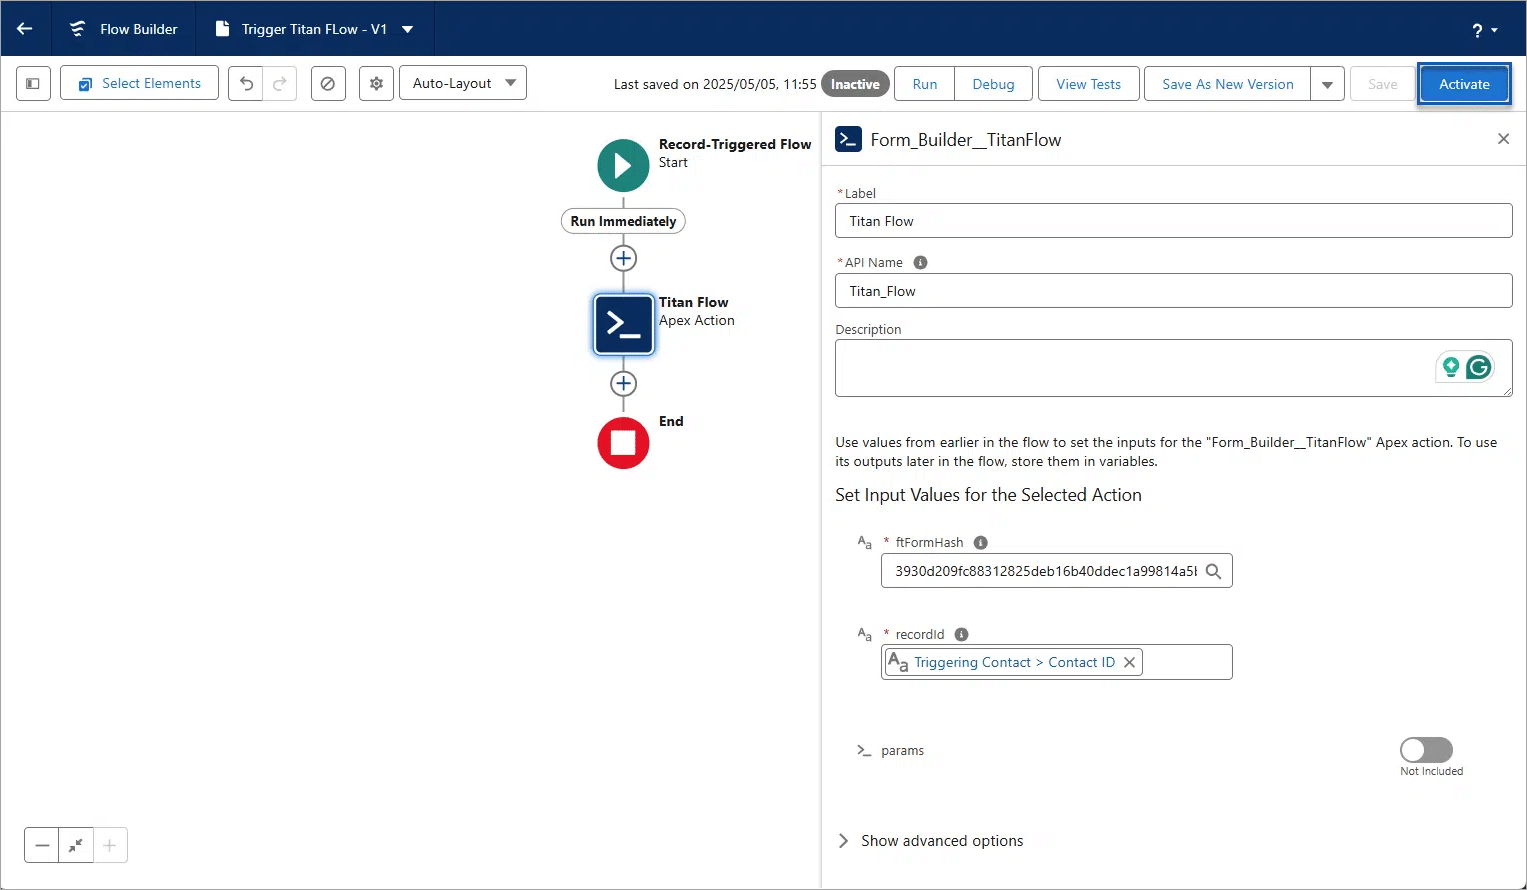
- Search for “flow” and select the Form Builder TitanFlow option.
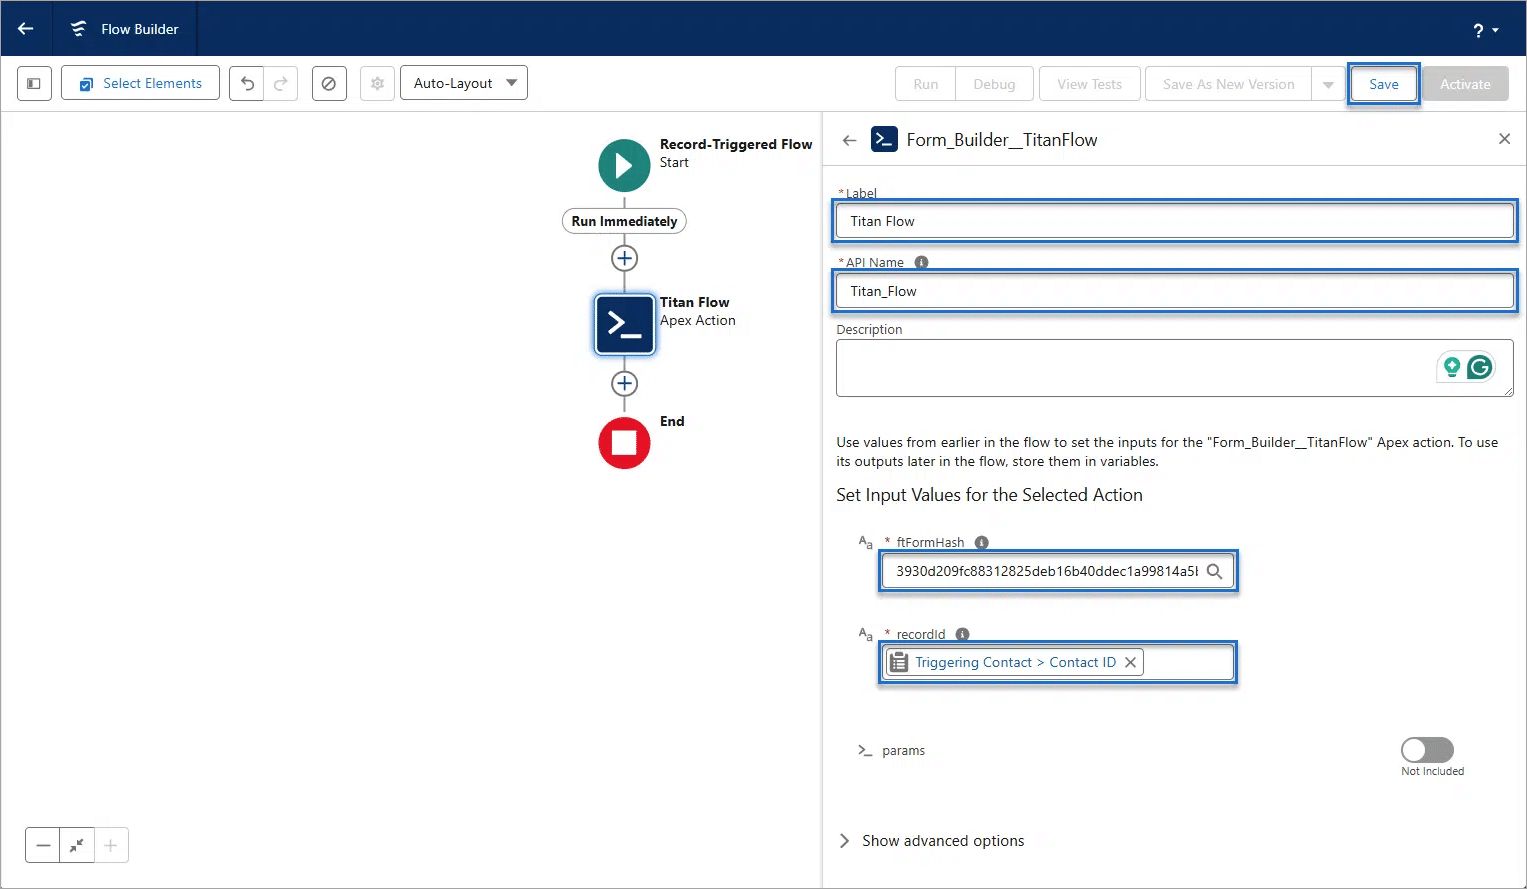
- Type a label for the action. The API name is added automatically.
- Paste the ftFormHash from the Titan Flow project in the field.
- Select the recordID.
- Click the Save button.
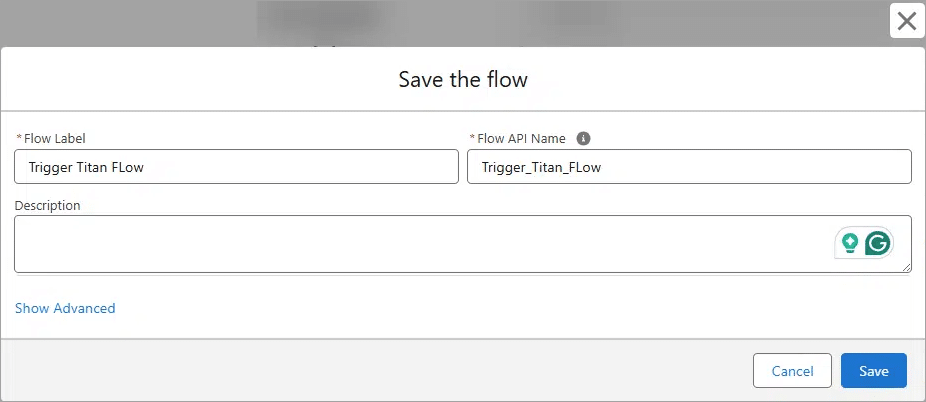
- Type a flow label. The Flow API Name field is added automatically.
- Add a description if necessary.
- Click the Save button.
- Click the Activate button.
Trigger an Action in Salesforce
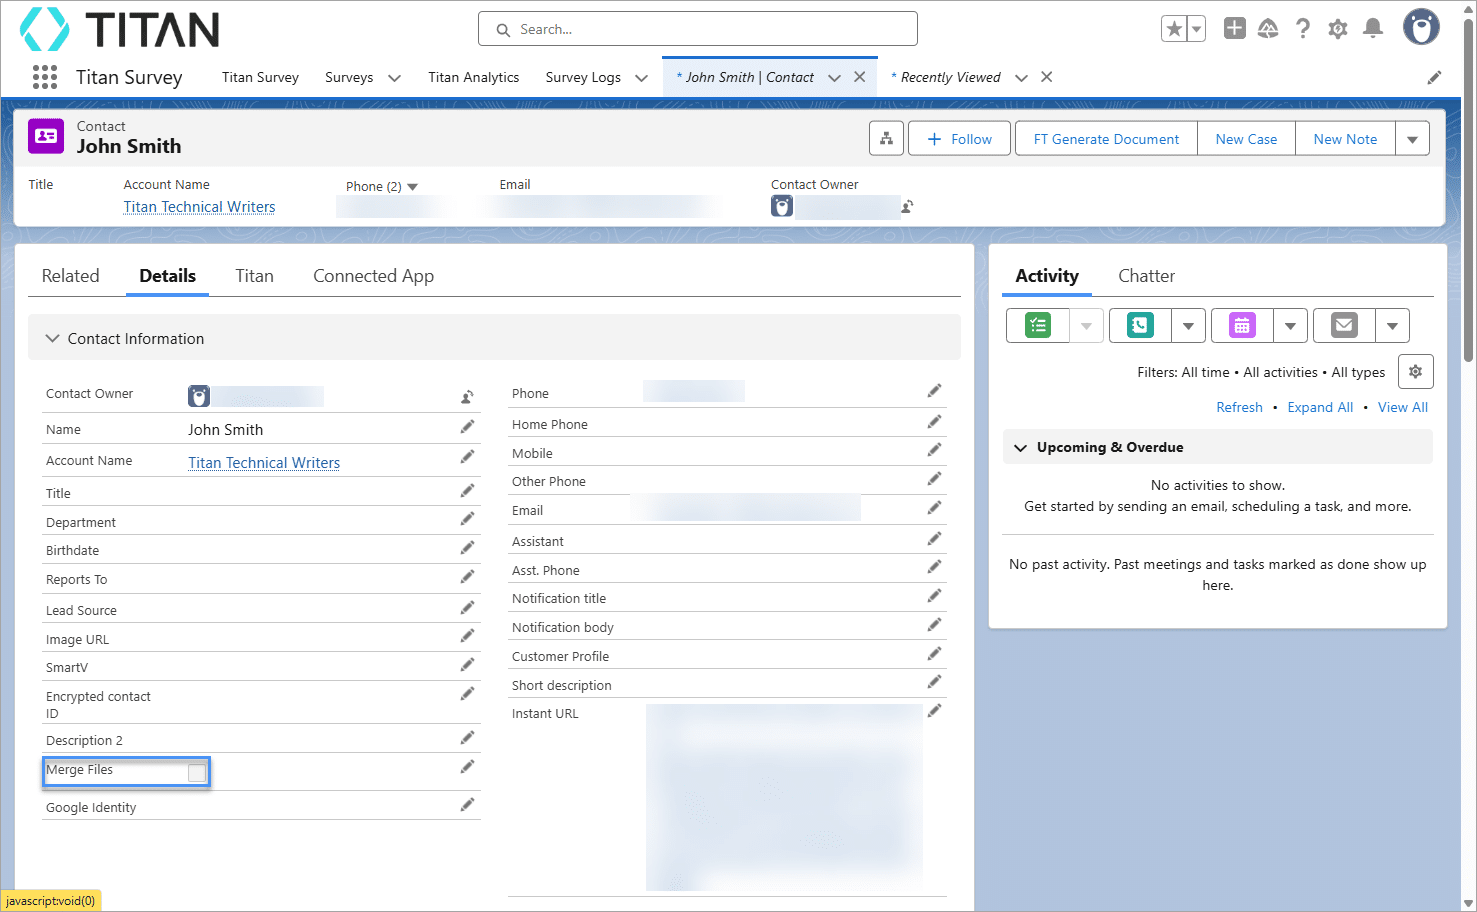
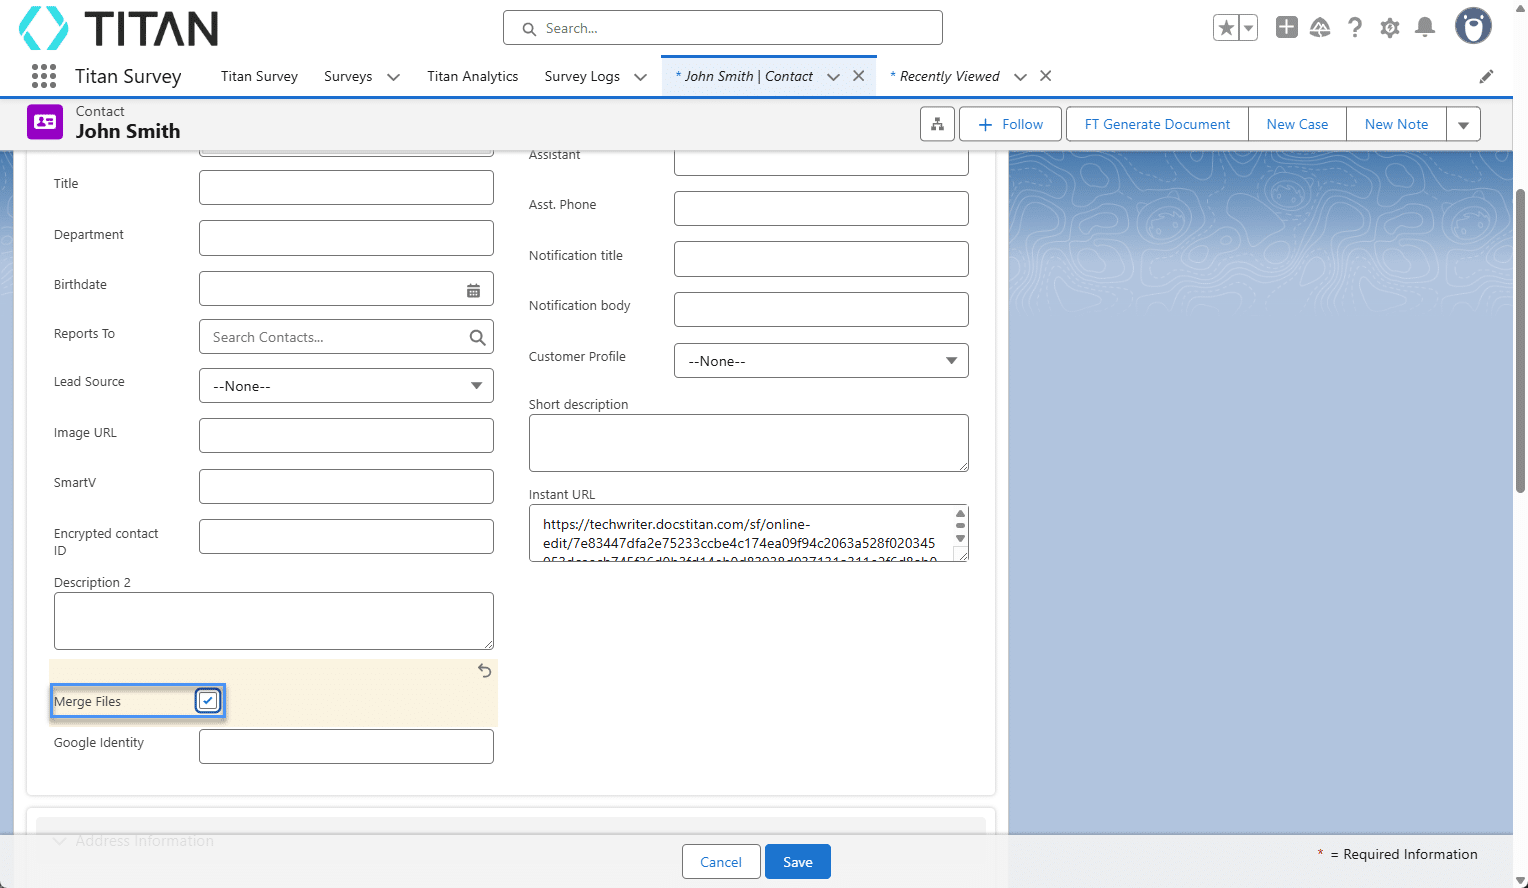
- Click the Edit icon next to the Merge Files custom checkbox on the record.
- Click in the Merge Files checkbox to enable it.
- Click the Save button. The checkbox is cleared, and this action triggers the Salesforce Flow.
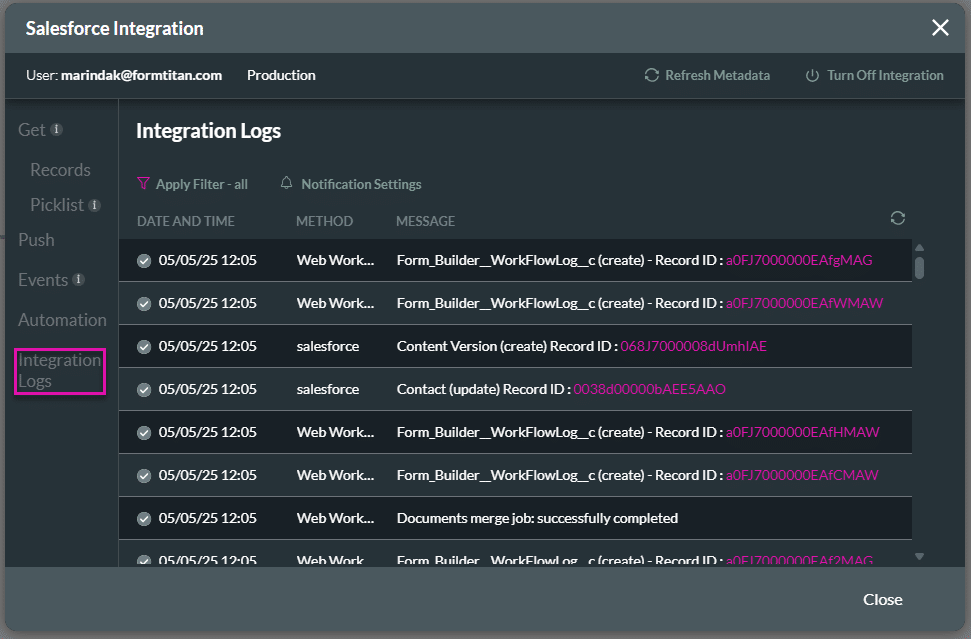
- Browse to the Titan project.
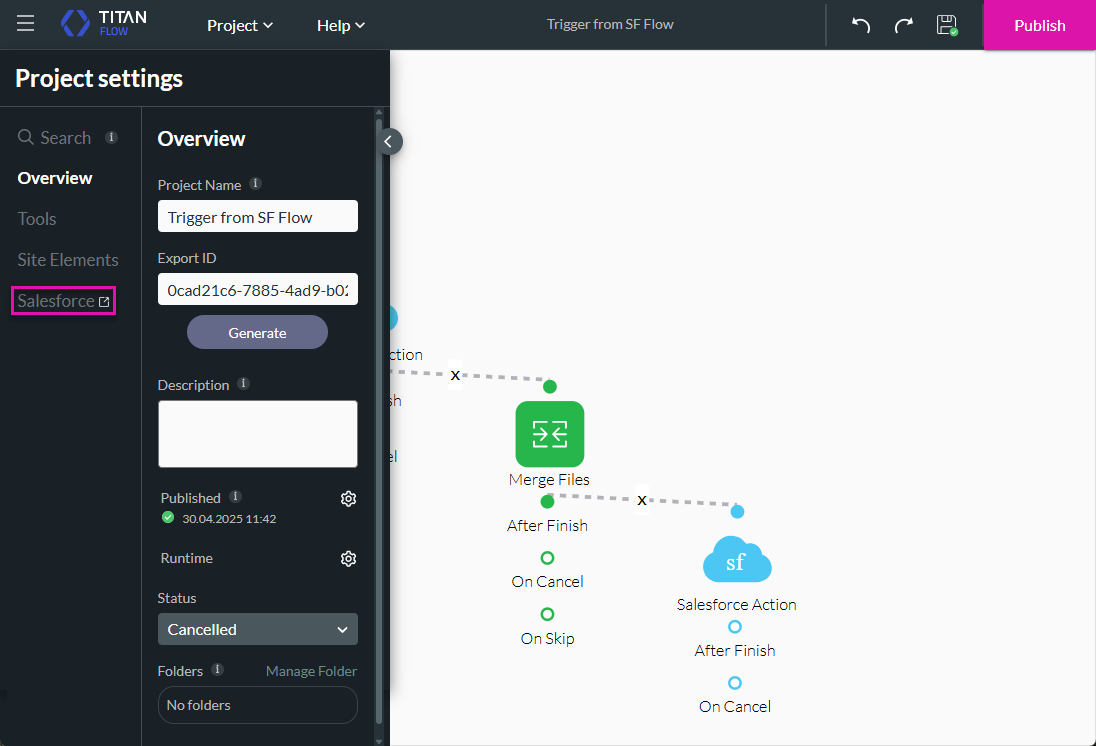
- Click the Gear icon to open the Project settings.
- Click the Salesforce option.
- Click the Integration Logs option. Here you will see all the integration logs.