Send Parameters from Salesforce Flow to Titan Flow
Business Background
Standard Salesforce Flows are limited when it comes to passing dynamic parameters into external automation systems. As business processes grow more complex, requiring actions like conditional document processing, customized email handling, passing parameters through different sections, and record-level control, these limitations lead to rigid workflows, manual intervention, and higher development overhead. Without a flexible way to pass structured data and conditions into automated processes, organizations struggle to scale and adapt their operations effectively.
Titan Solution
Titan solves this challenge by enabling Salesforce Flows to pass custom parameters into Titan Flows through a no-code, secure integration. This allows teams to design intelligent, conditional workflows – such as deciding whether to attach a file to a record or send it by email (and much more), based on values received from Salesforce. With Titan’s Apex-defined parameter support and dynamic input handling, businesses can easily orchestrate multi-step logic, automate file operations, and customize output actions, all without writing code. This streamlines operations, reduces manual work, and empowers non-technical users to build highly flexible, scalable automation.
Be sure to also read about Triggering a Titan Flow from a Salesforce Flow.
How to Guide
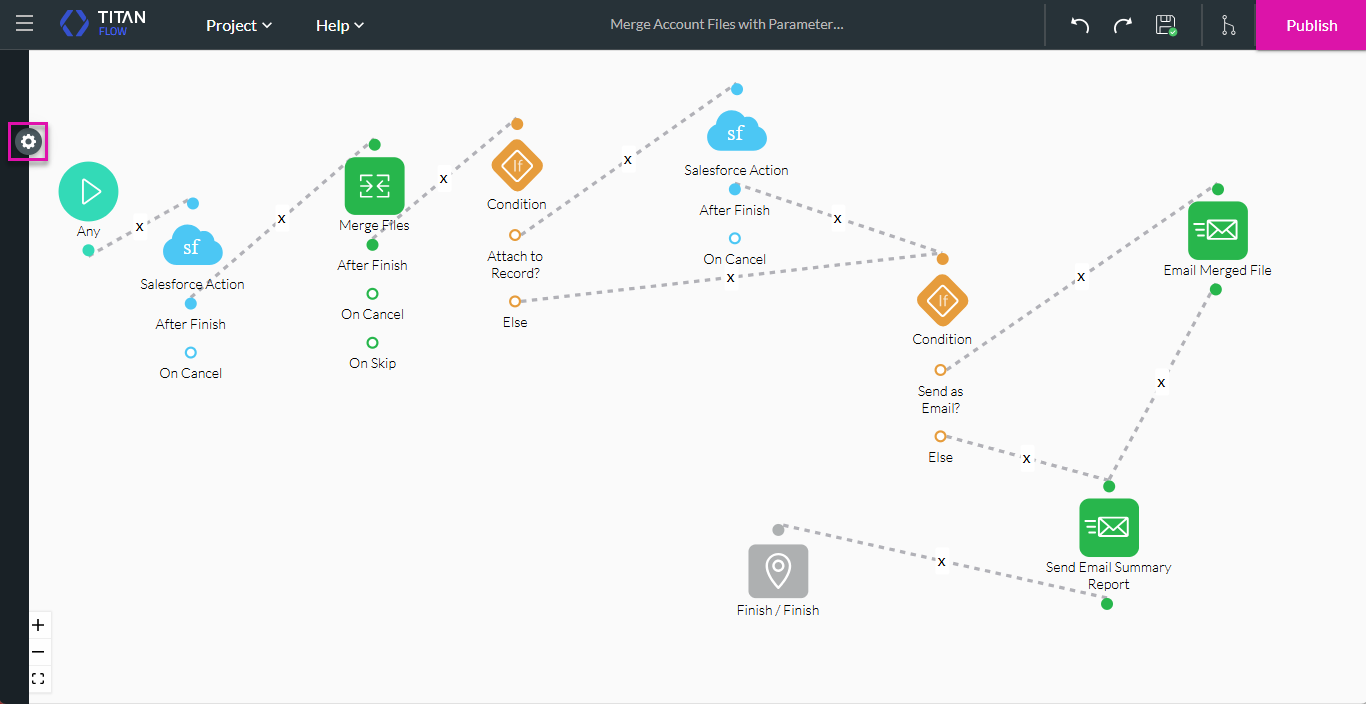
Call a Titan Flow from a Salesforce Flow and pass parameters from the Salesforce Flow into the Titan Flow. In this example, the Titan Flow merges files attached to an account record in Salesforce. Based on the values of the parameters passed from a Salesforce flow, a series of actions occurs.
Prerequisites
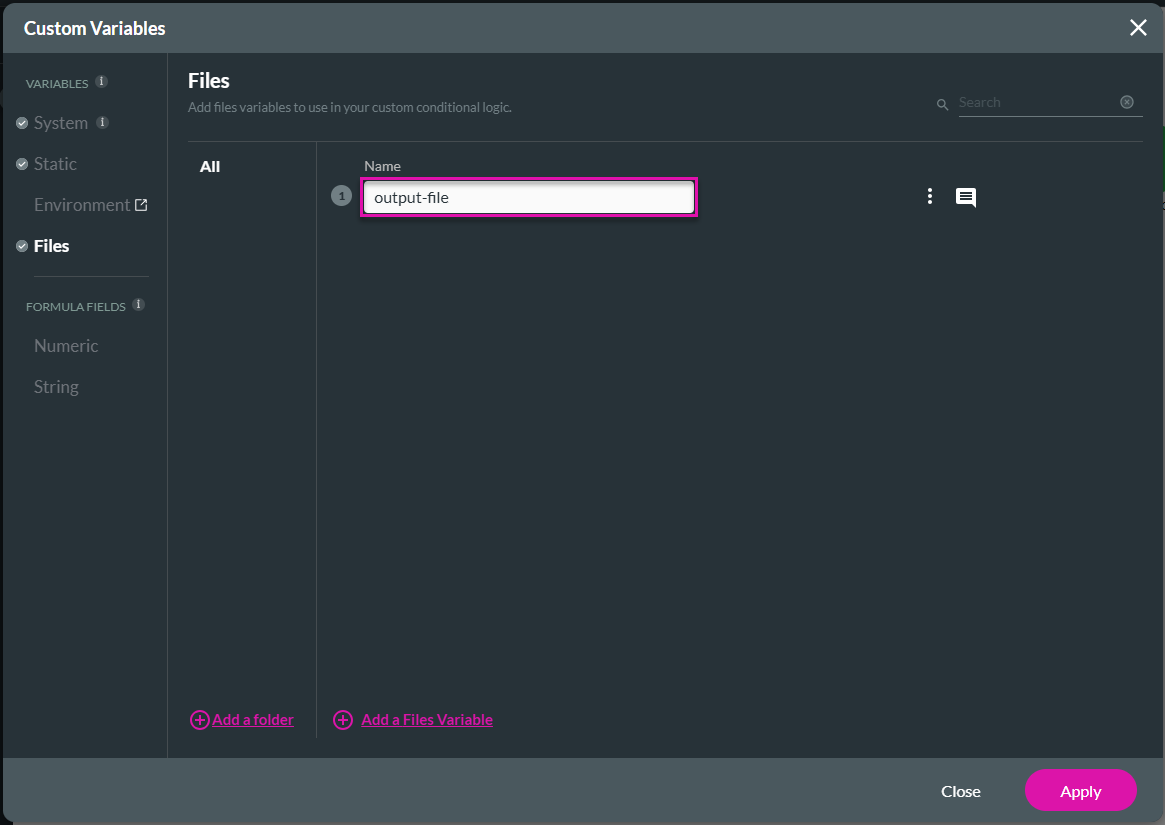
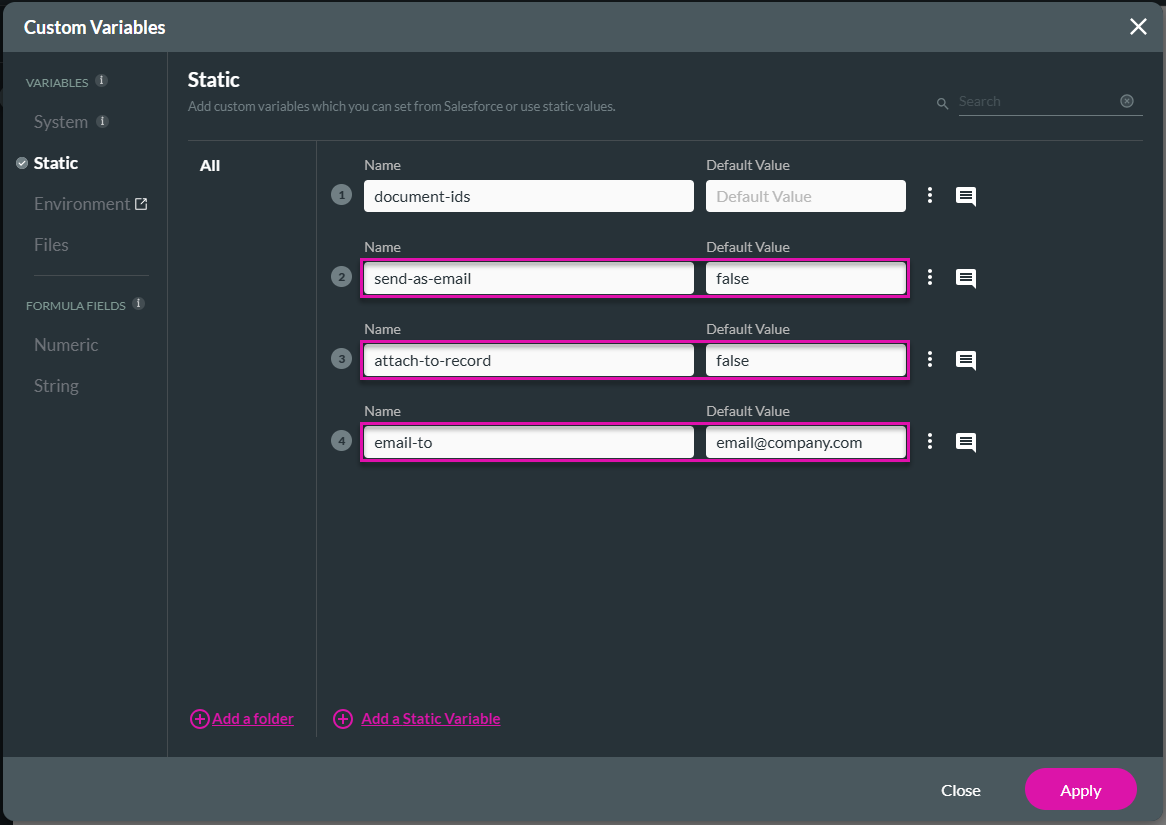
1. Add custom variables
- Add the following static variables.

The first variable will hold the document IDs.
The other three variables will be used for the following actions in the Salesforce Flow:
- send as email
- attach to record
- email to
- Add the following file variable. This variable will hold the contents of the merged file.
2. Configure a flow in Titan
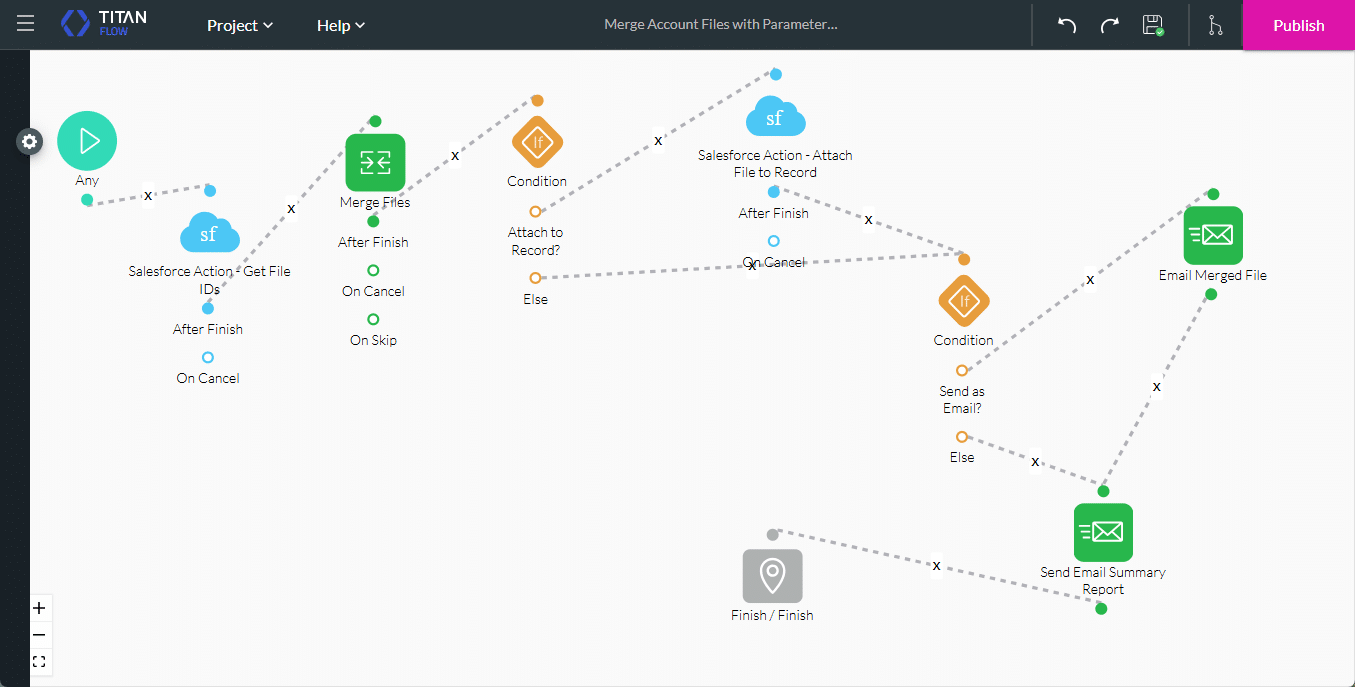
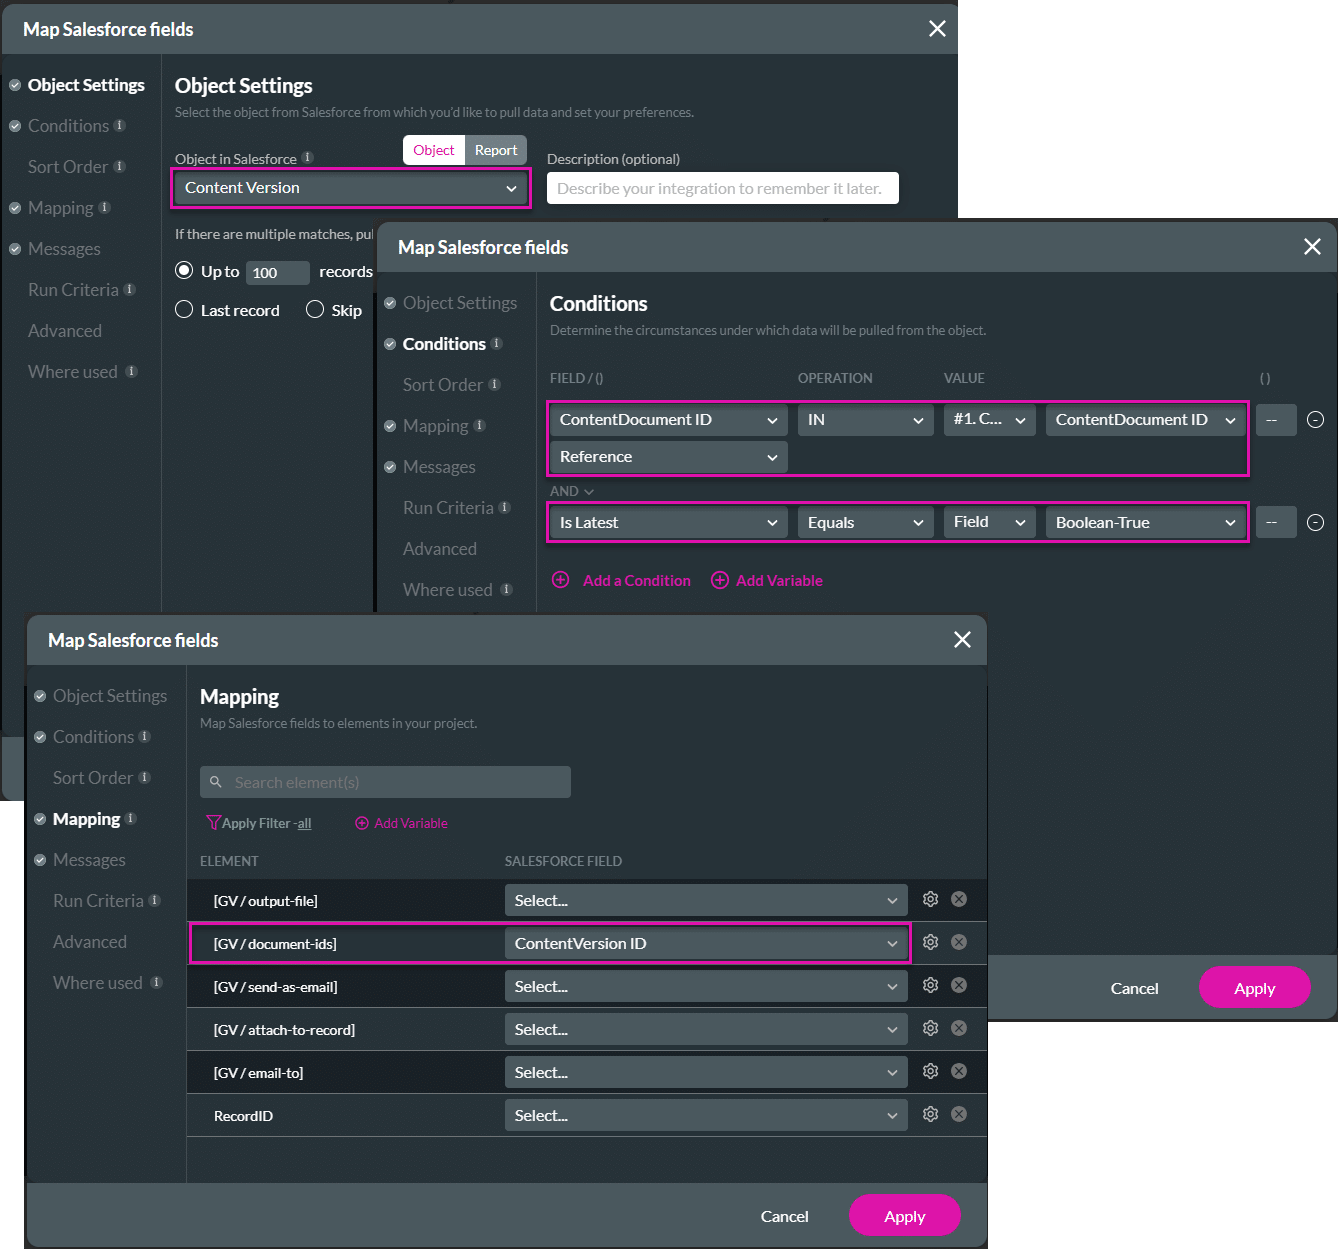
- Configure a Salesforce Get Action node with the following parameters.
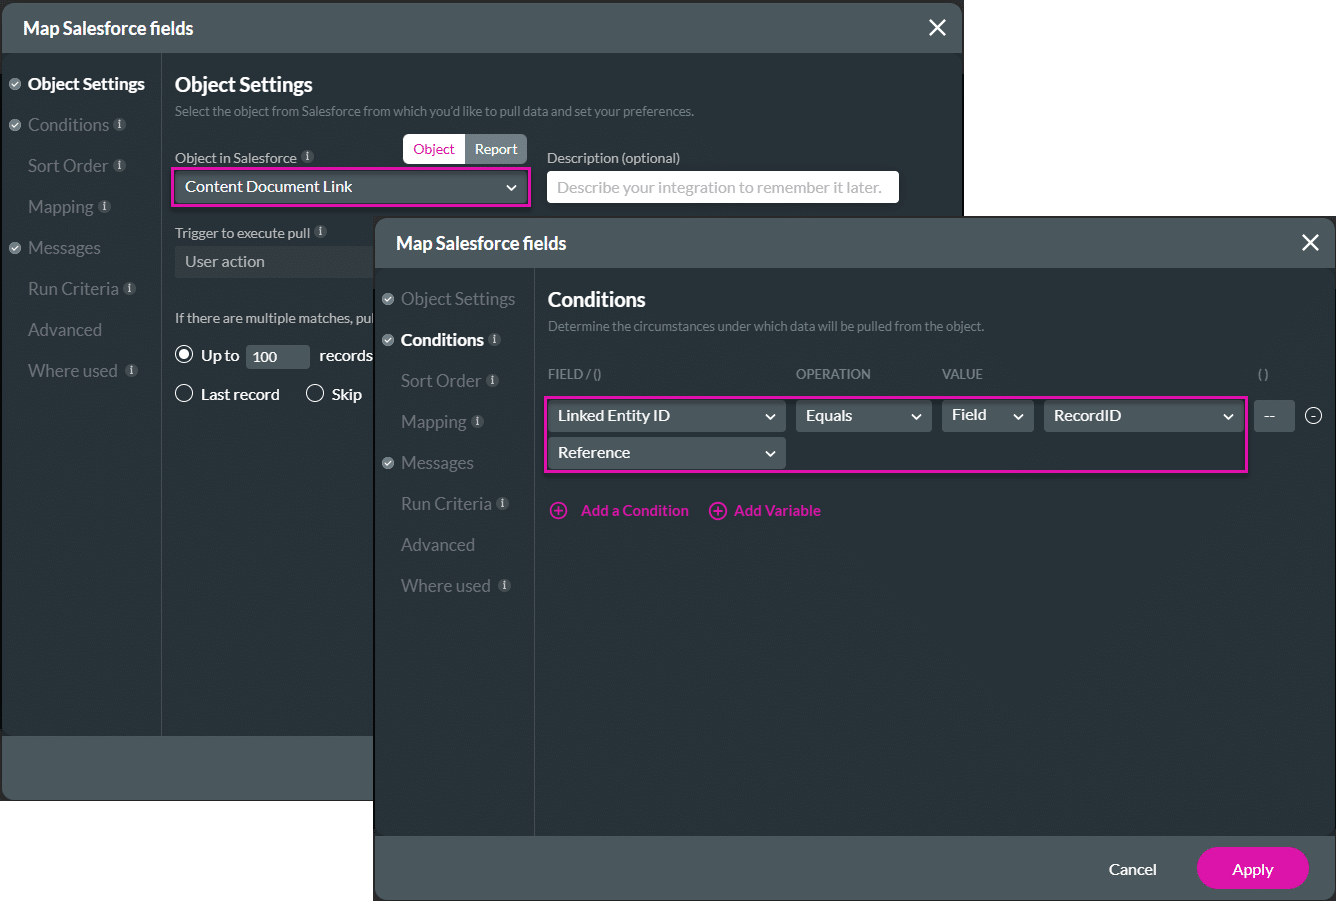
- Add a child to the Salesforce Get using the following parameters.
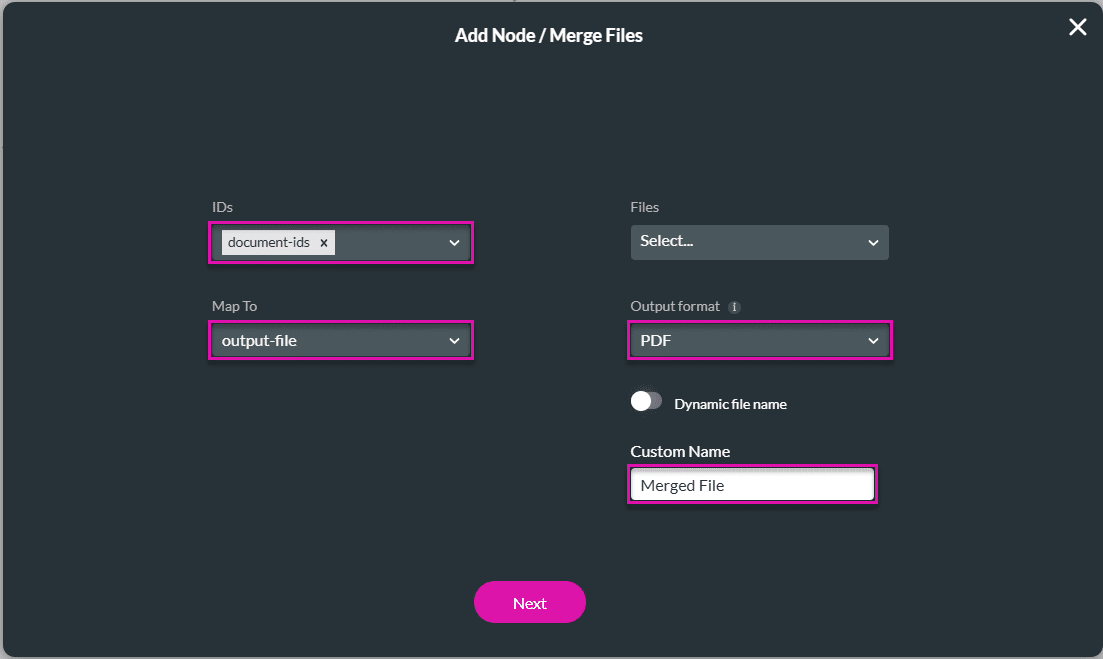
- Configure a Merge Files node as follows.
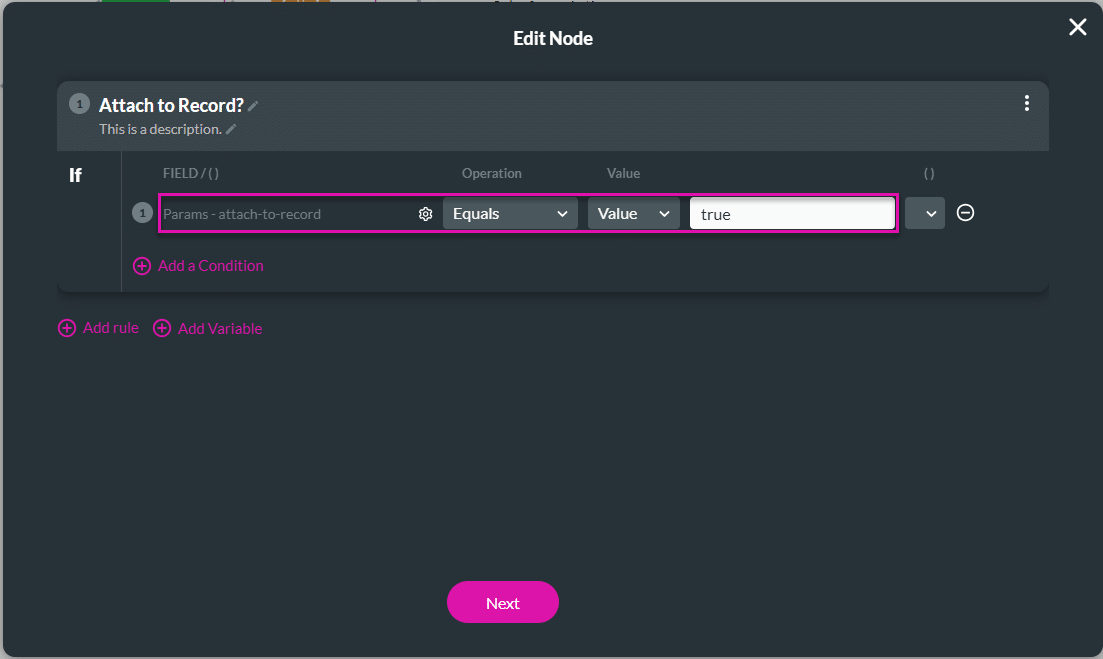
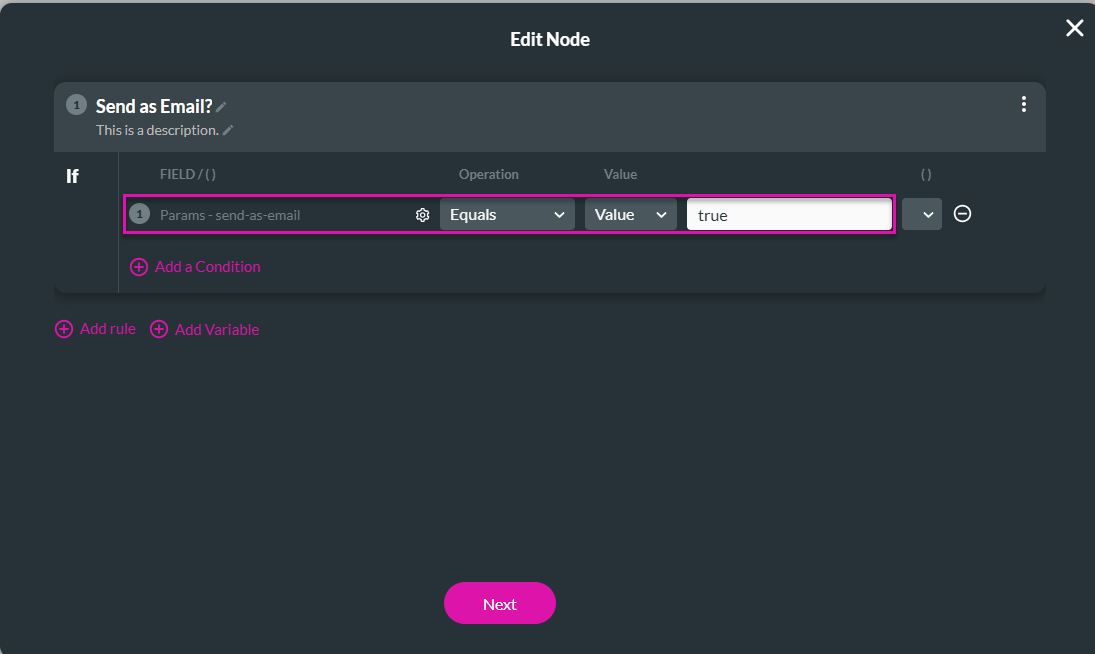
- Configure a Condition node.
- If the parameter “attach to record” is true, a Salesforce Push will run to attach the file to the record.
- If the parameter is false, the Salesforce Push will not run, and the file will not be attached to the record.
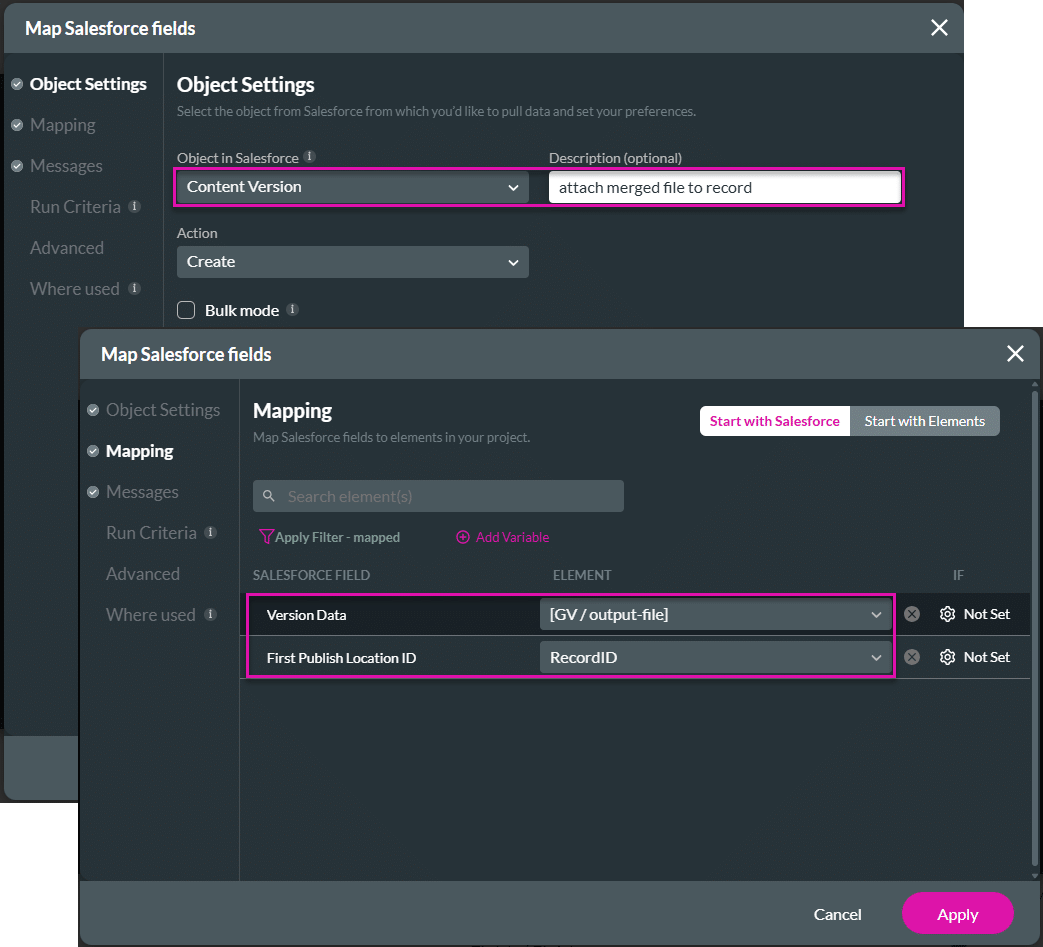
- Configure a Salesforce Push Action node with the following parameters.
- Configure a second Condition node as follows.
- If the parameter “send as email” is true, the merged file will be attached to an email and sent to the designated recipient.
- If the parameter is false, the merged file will not be sent as an email to the designated recipient.
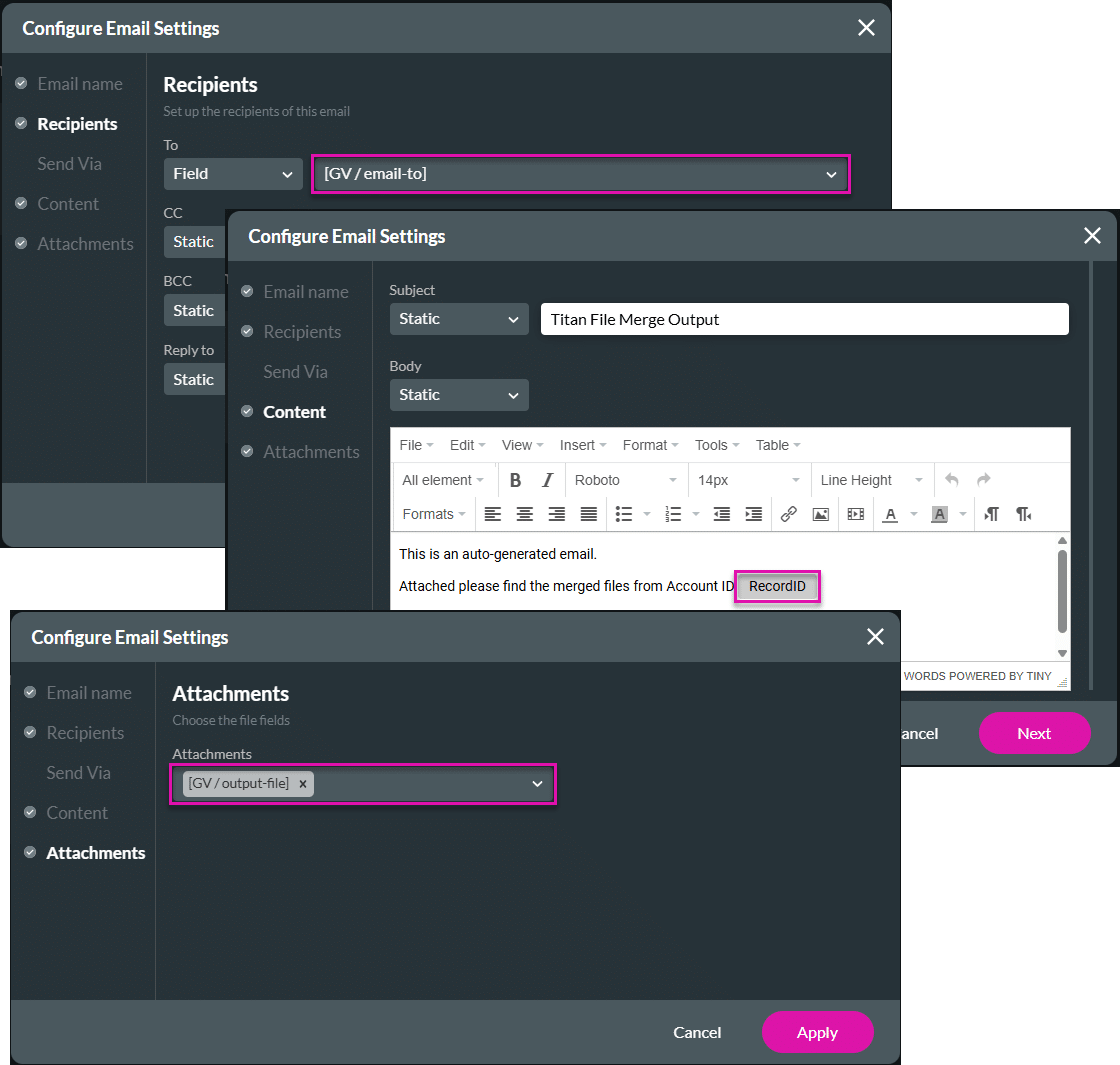
- Configure an Email node to send the merged file. This node will send an email when the action is triggered in Salesforce.
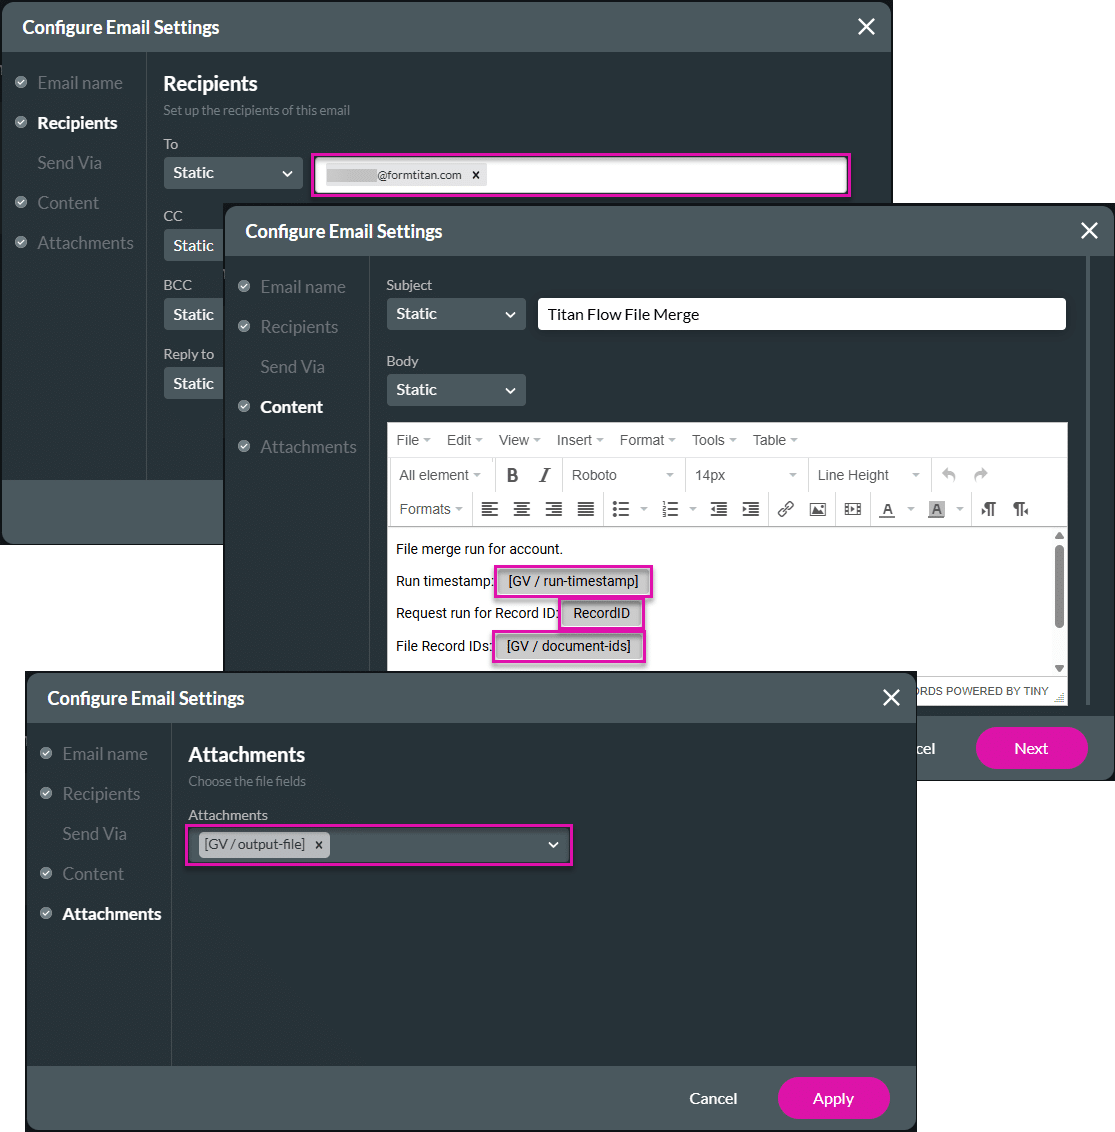
- Configure an Email node to email a summary report containing the variables and parameters to a recipient.
- Add a Finish node to the flow to send back the static variables with the values they have at the current state.

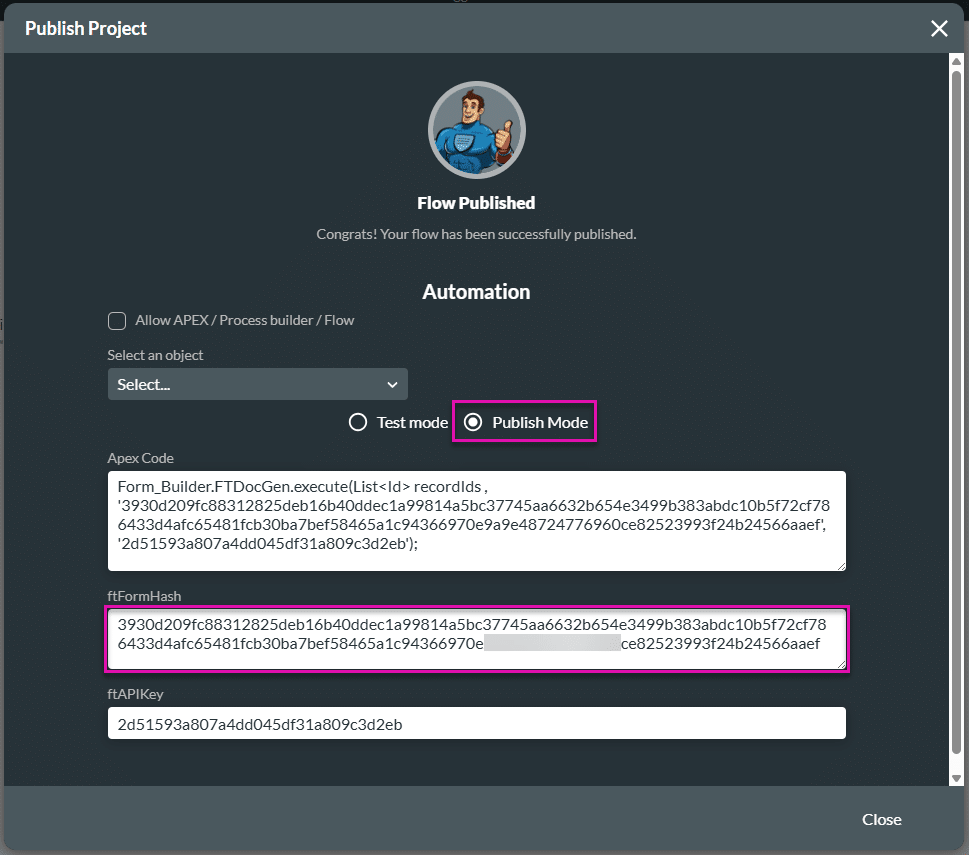
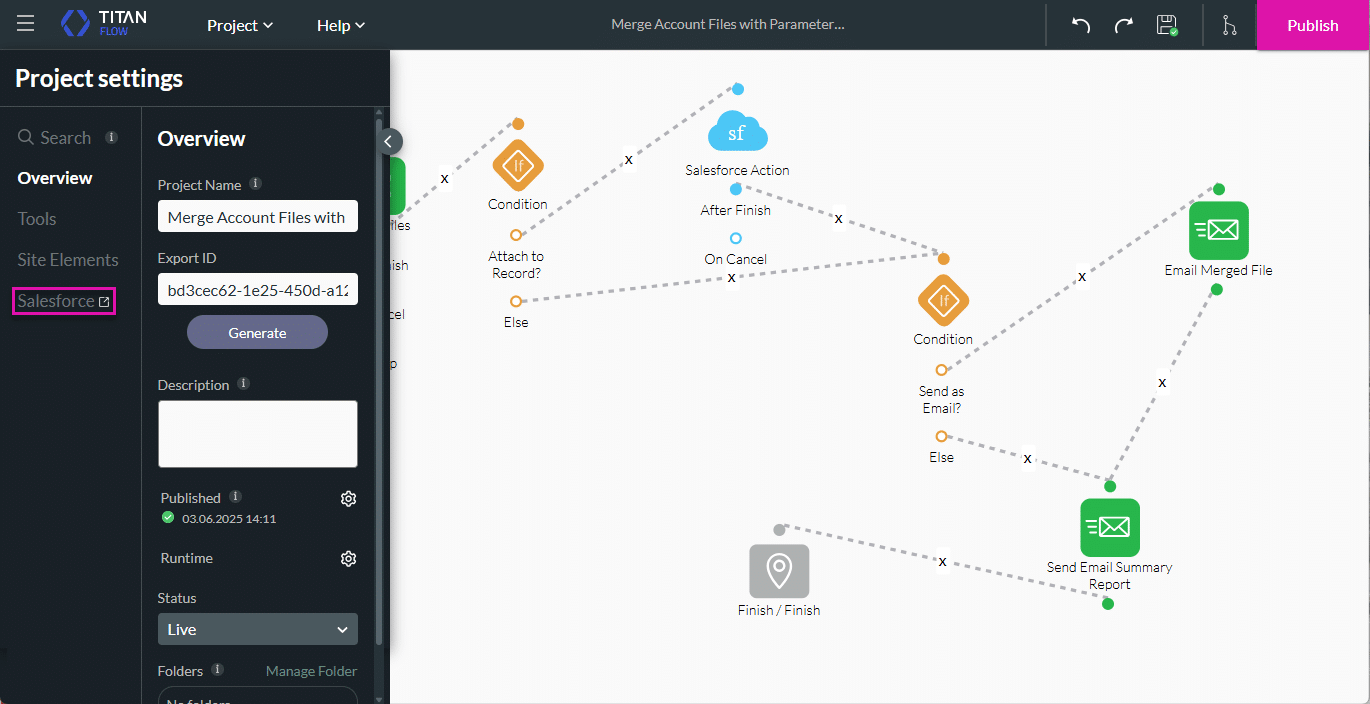
2.7. Take note of the ftFormHash
- In the Titan Flow project, click the Save and Publish buttons.
- Select the Publish Mode radio button.
- Take note of the ftFormHash. You will need this for the Salesforce Flow.
2. Add a custom checkbox to the account object
Configure a Flow in Salesforce
1. Configure a Start node
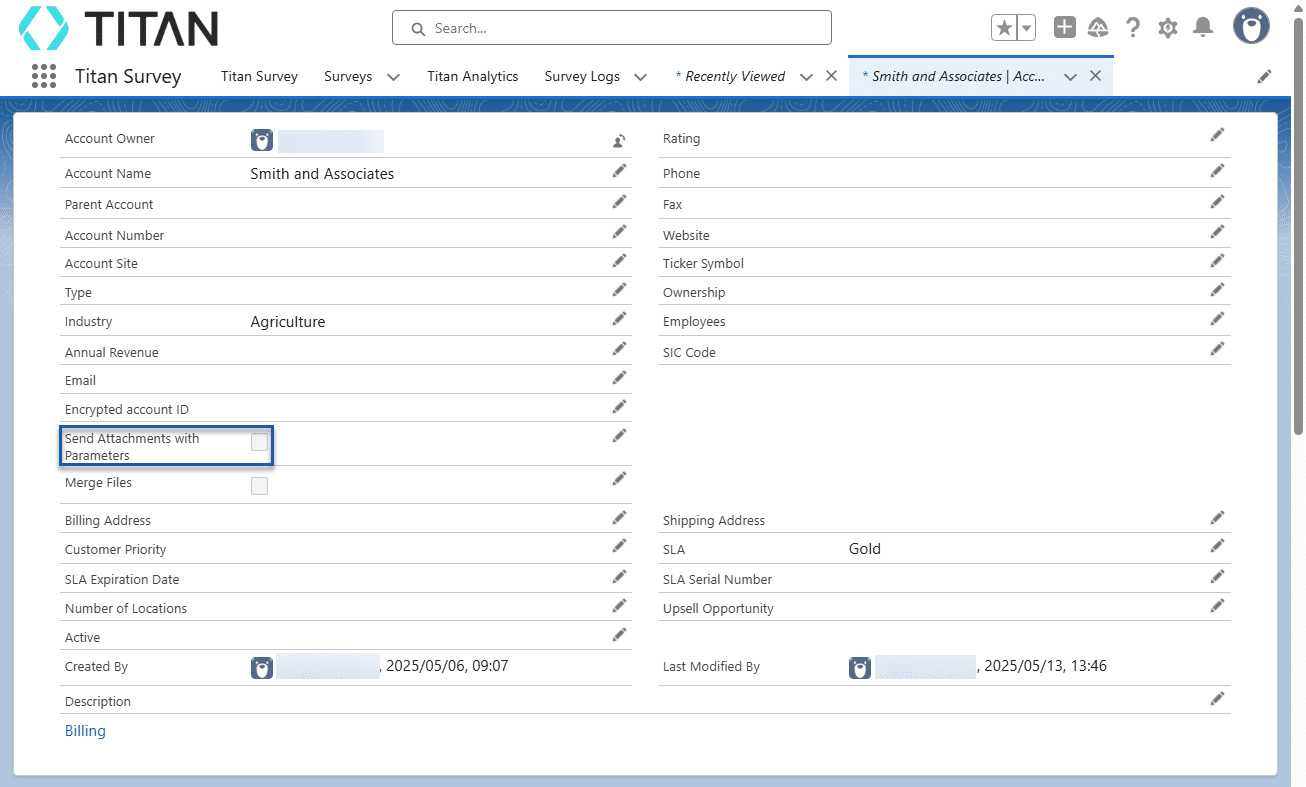
The Salesforce Flow will be triggered when the Send Attachment with Parameters custom checkbox is checked.
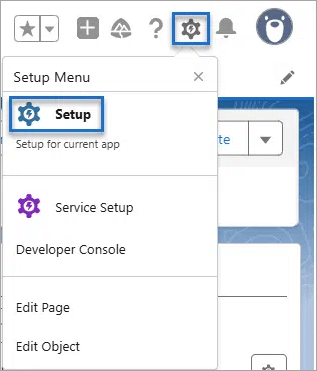
- Click the Gear icon to open the Setup Menu and click the Setup option.
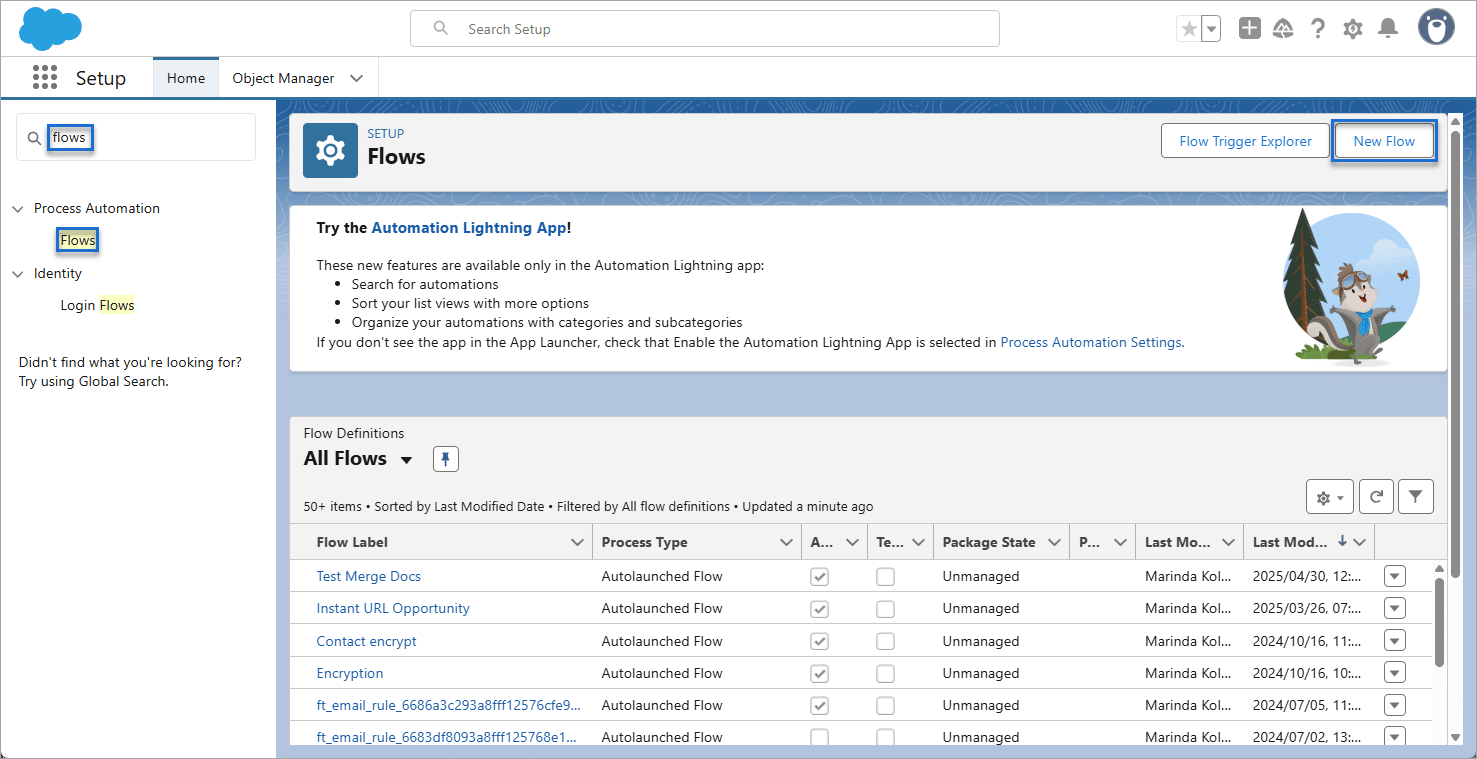
- Search for “flows” and select the Flows option.
- Click the New Flow button.
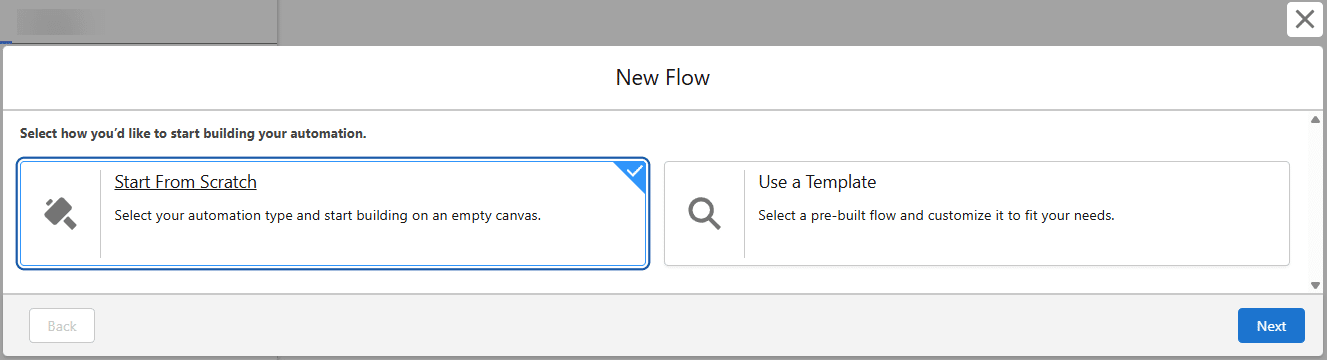
- Select the Start from Scratch option and click the Next button.
- Select an option. In this example, a record-triggered flow was selected.
- Click the Create button.

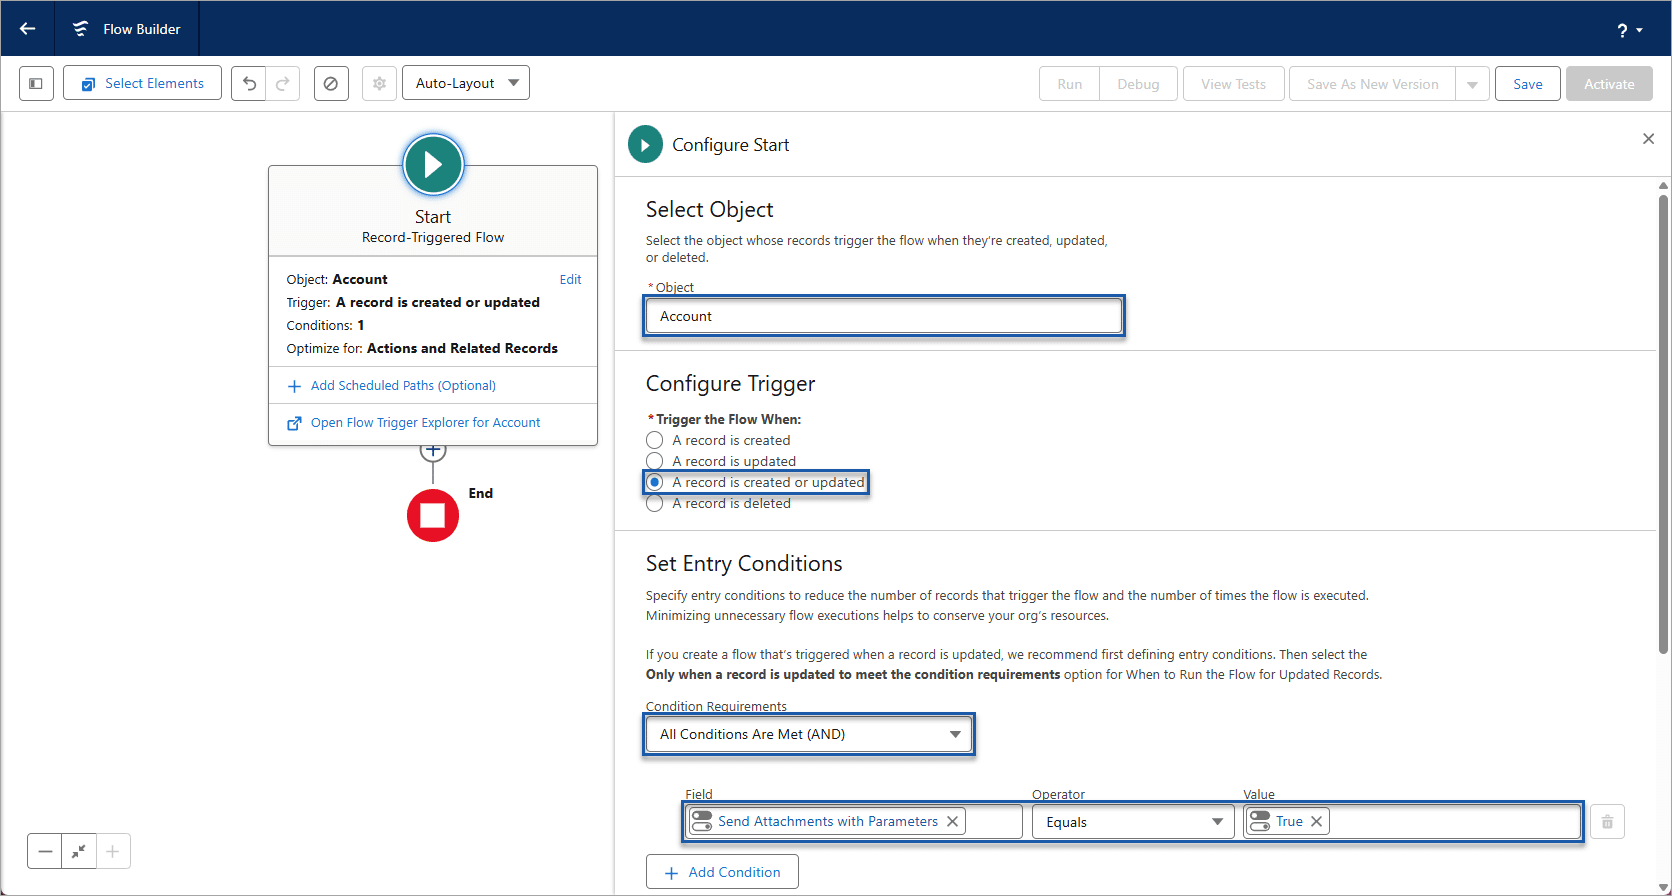
- Use the drop-down list to select the object. In this example, Account is used.
- Select the relevant Configure Trigger radio button.
- Add a condition. In this example, the Send Attachments with Parameters custom checkbox equals true.
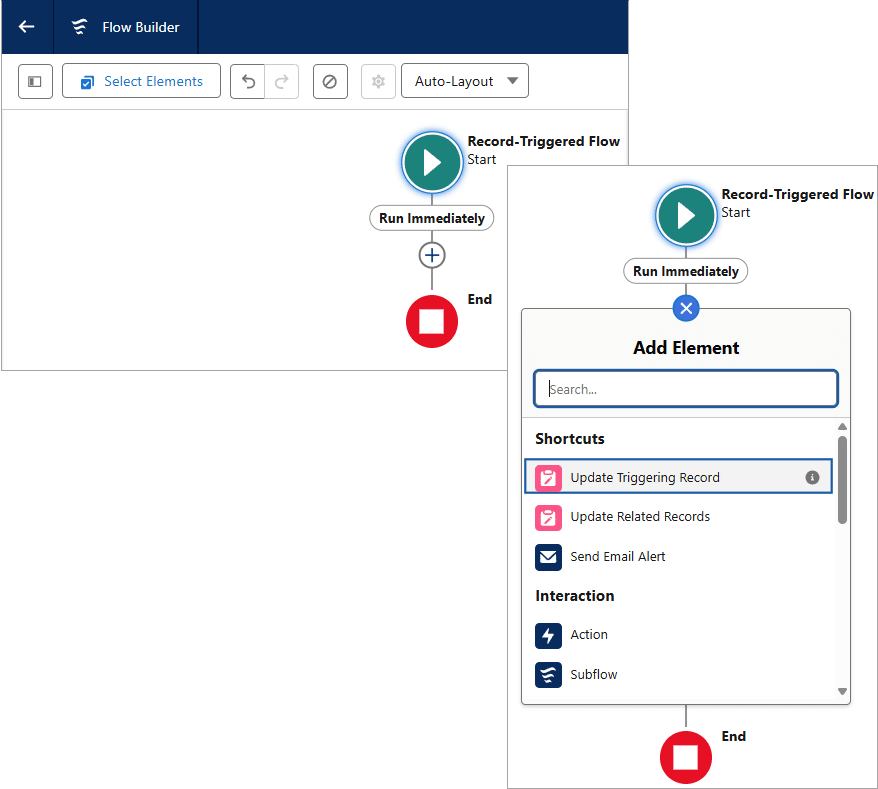
2. Configure an Update Triggering Record node
- Click the + icon to add an element and select the Update Triggering Record option from the list.
- Type a label. The API name is added automatically.
- Select the relevant How to Find Records to Update and Set Their Value radio button.
- Set the field and value. The Send Attachments with Parameters custom checkbox added to the account record is false.
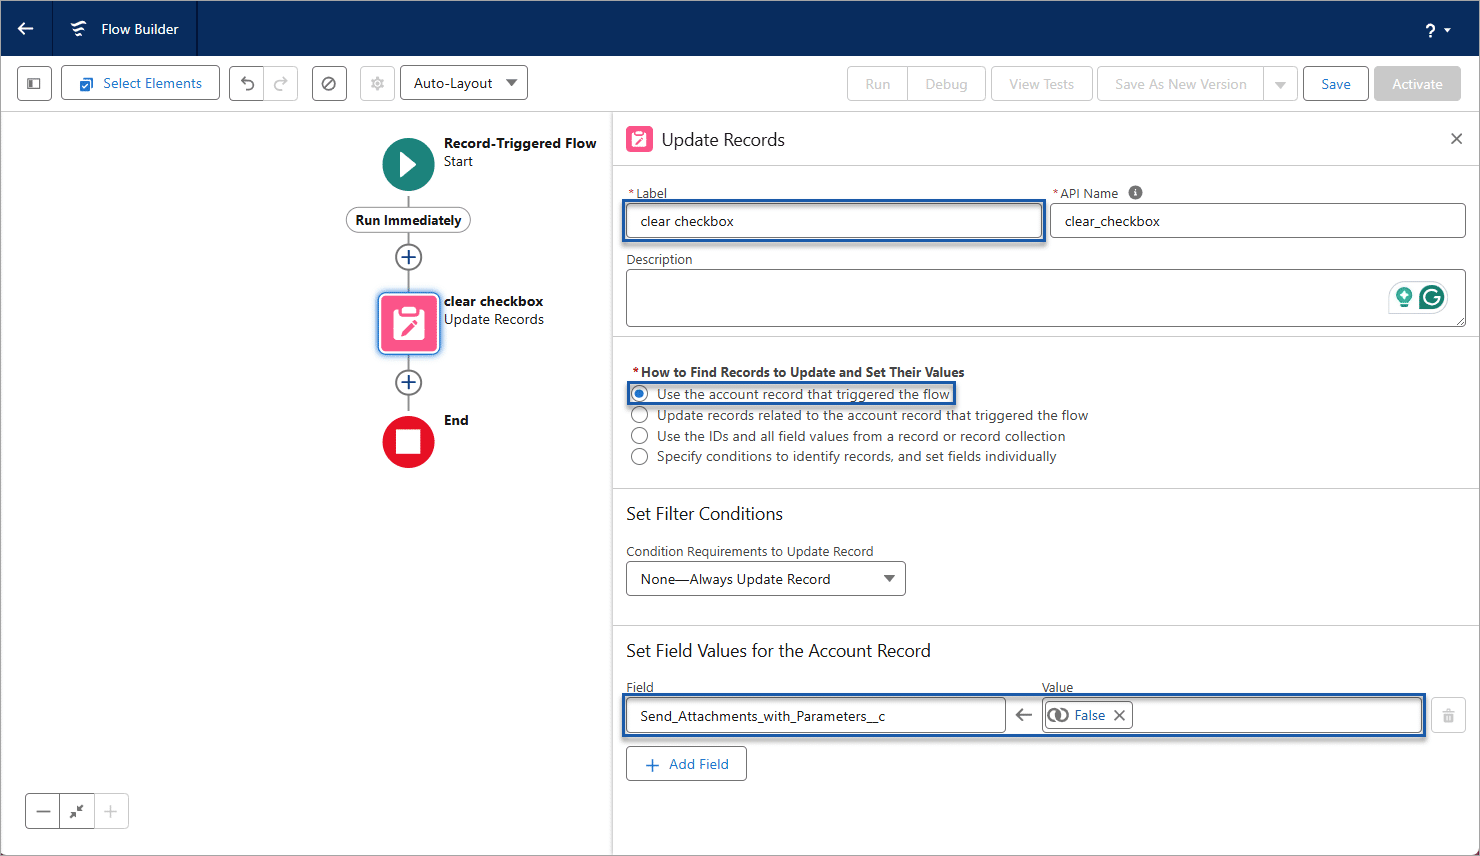
- Click the Save button.
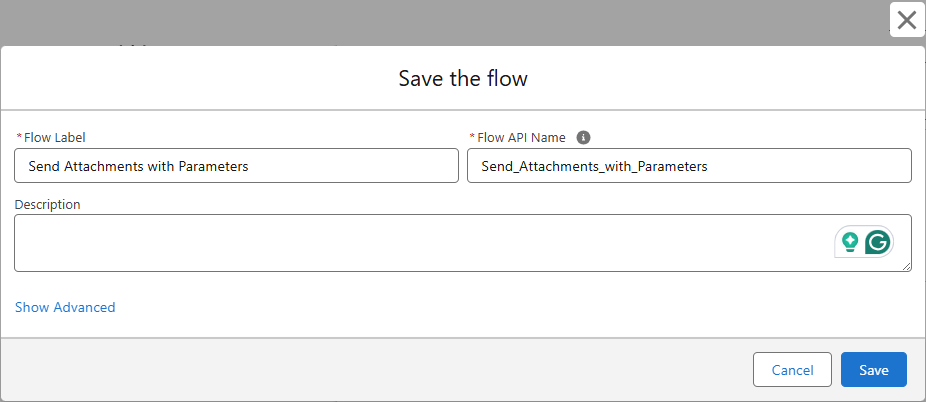
- Type a flow label. The Flow API name is added automatically.
- Click the Save button.
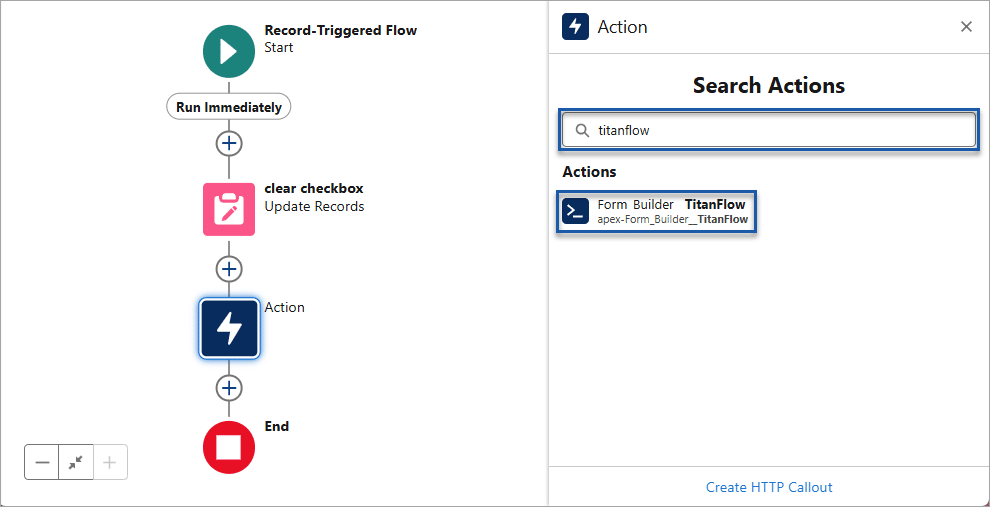
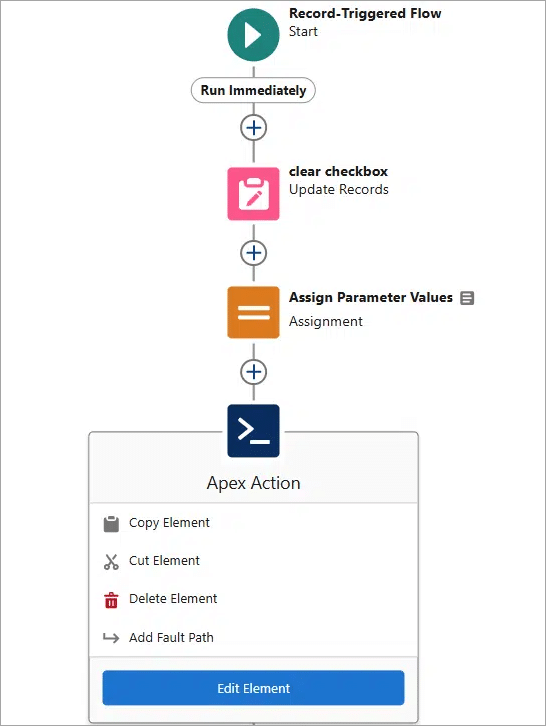
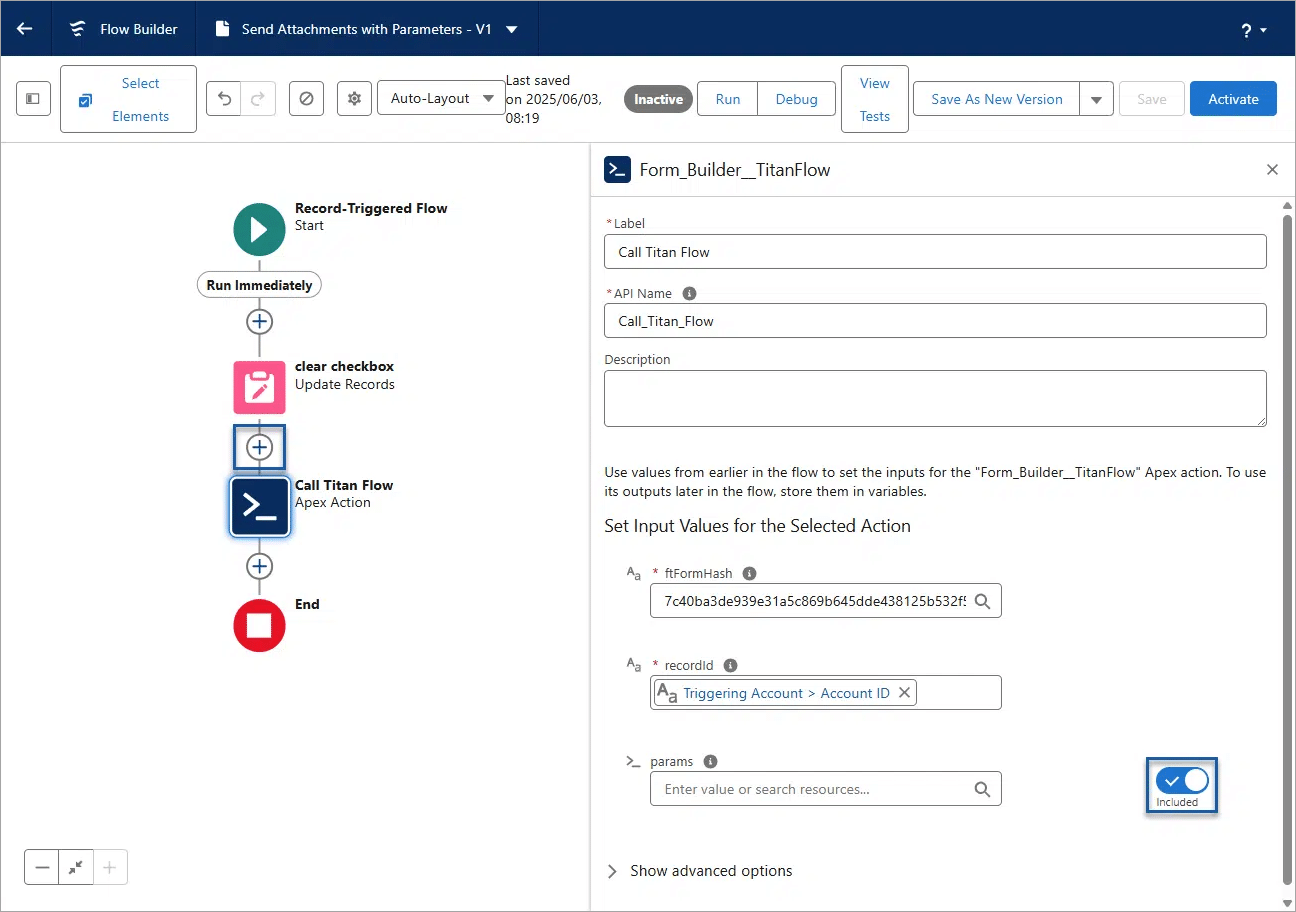
3. Add an Action node to call the Titan Flow
- Click the + icon beneath the Update Records node and select the Action option.
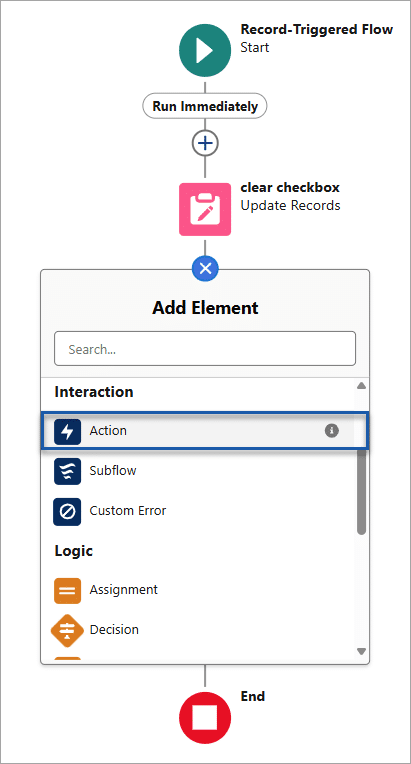
- Search for and select the Form Builder TitanFlow option.
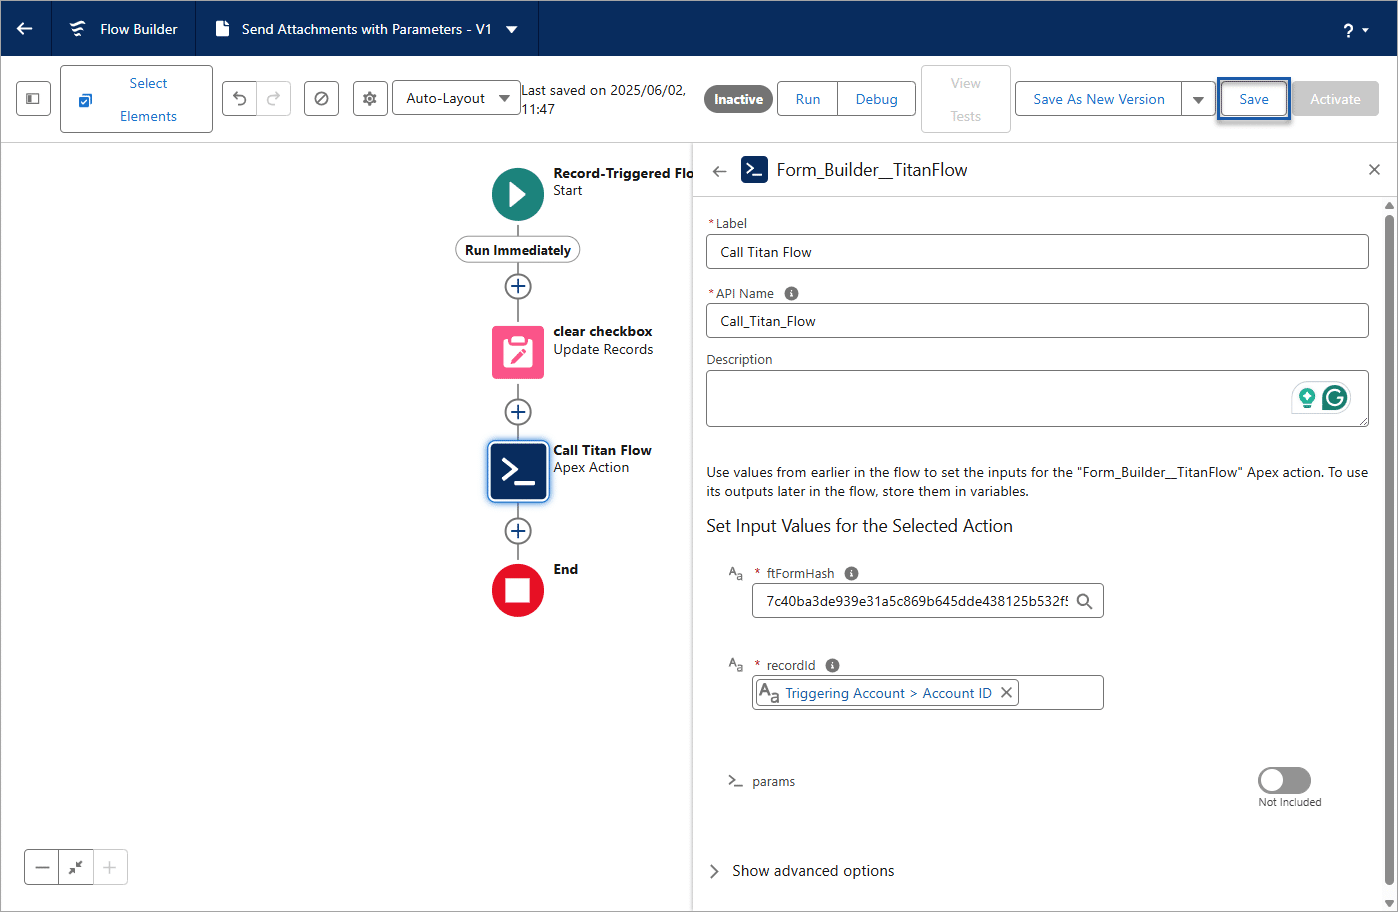
- Type a label in the field. The API name is populated automatically.
- Copy the ftFormHash from the Titan Flow project and paste it in the field.
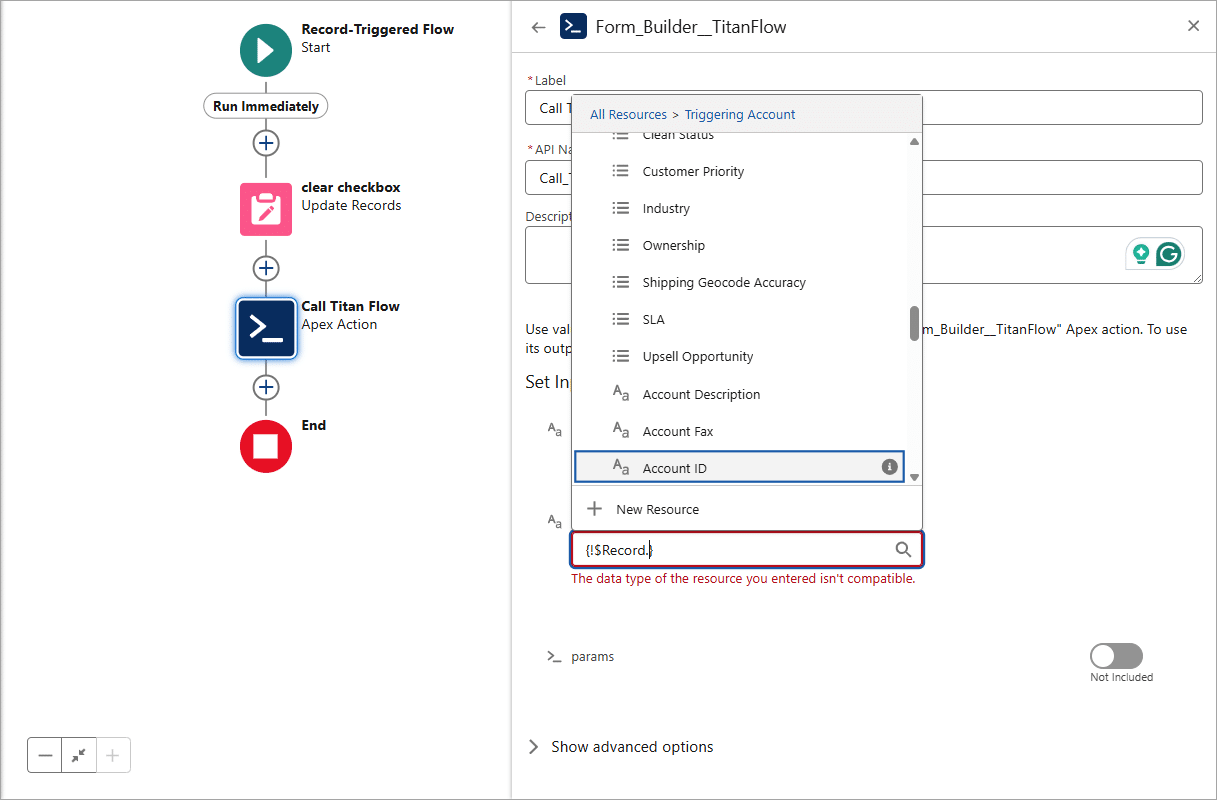
- Click in the recordid field.
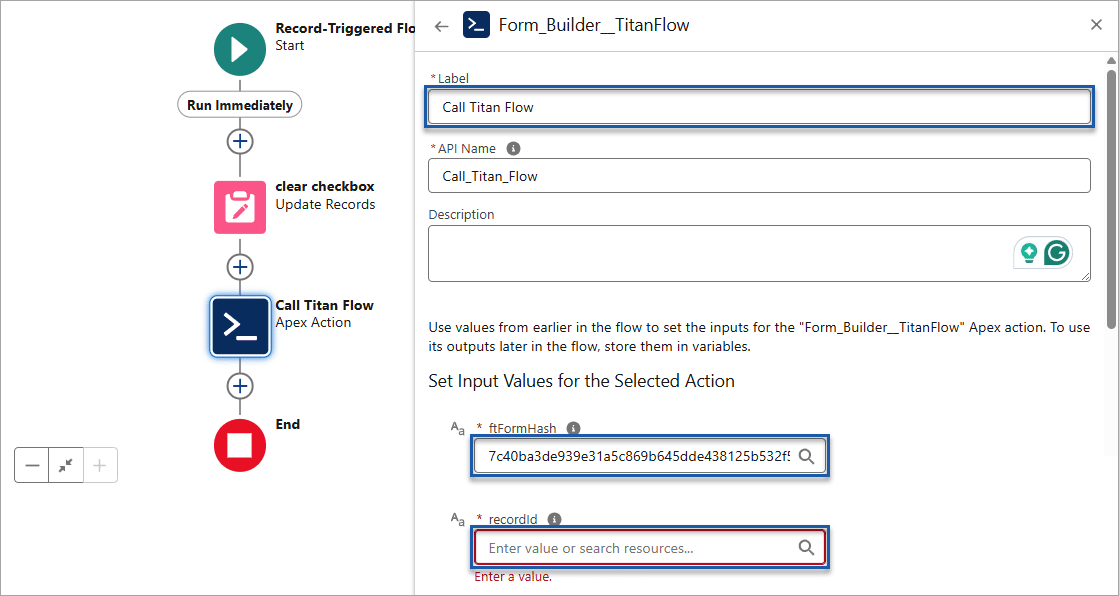
- Search for and select the Triggering Account option.
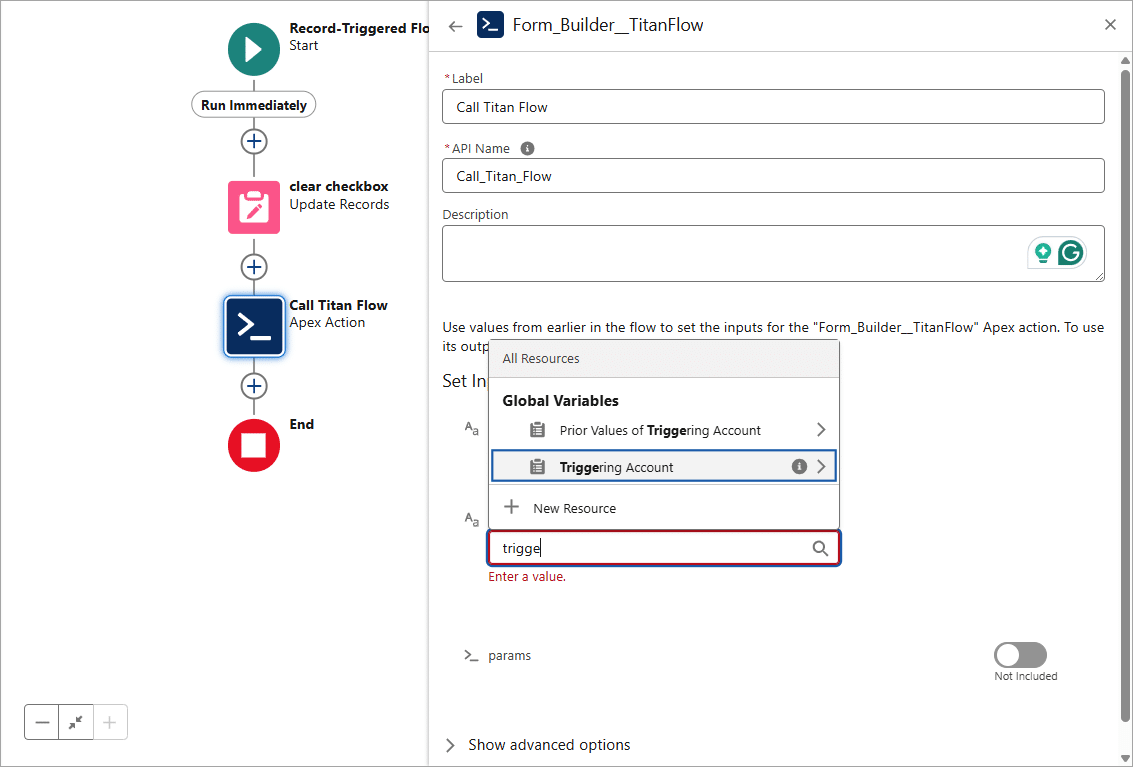
- Select the Account ID option.
- Click the Save button.
4. Add Resources to the Flow
A series of resources must be created to add parameters to the Salesforce Flow.
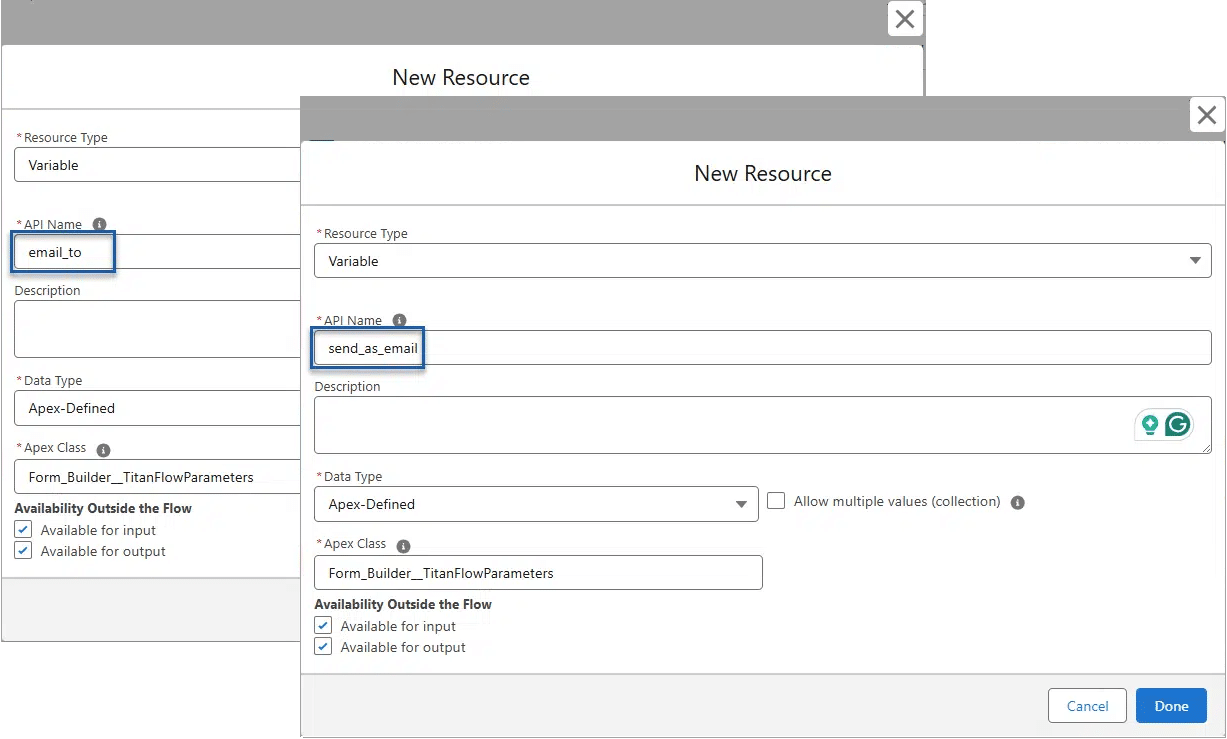
An Apex-defined variable must be created for each of the following Titan Flow variables:
- attach to record
- email to
- send as email
Apex-defined variables are simply variables that you define within Apex code to store data temporarily during the execution of a program. These variables hold different types of data, such as numbers, text, Boolean values, objects, or collections of data. Variables in Apex are declared with a specific data type and can be initialized with values.
An Apex variable collection must then be created to hold all these variables.
Apex variable collections are containers that hold multiple values in a single variable. They allow you to store and manipulate groups of related data items together. The main types of collections in Apex are lists, sets, and maps.
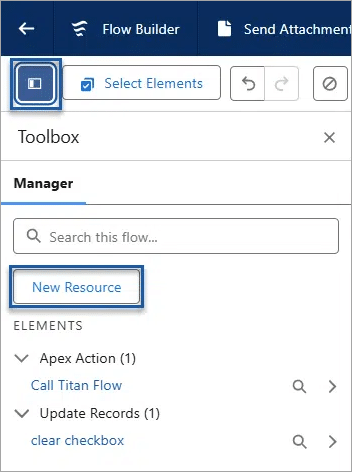
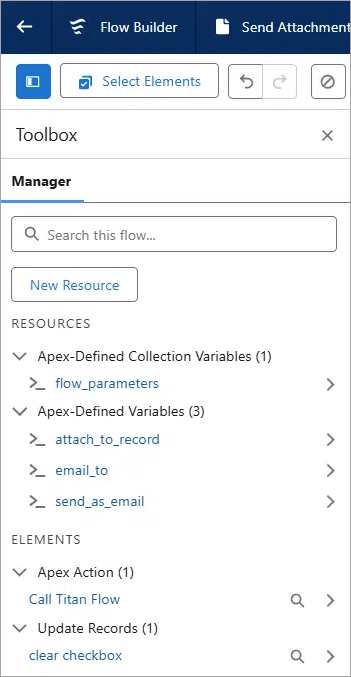
- Click the icon to open the Toolbox and click the New Resource button to create the Apex-defined variables.
- Use the drop-down list to select the resource type.
- Type an API name in the field and add a description, if necessary.
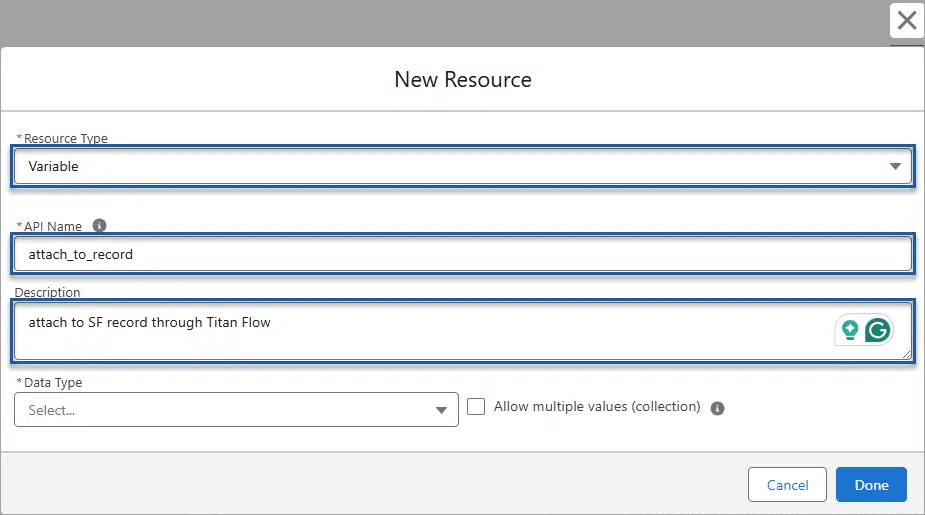
- Use the drop-down list to select the Apex-defined data type.
- Search for and select the Form_Builder__TitanFlowParameters Apex class.
- Enable the Available Outside the Flow checkboxes:
- Available for input
- Available for output
- Click the Done button. The Apex-defined variable is added to the list.
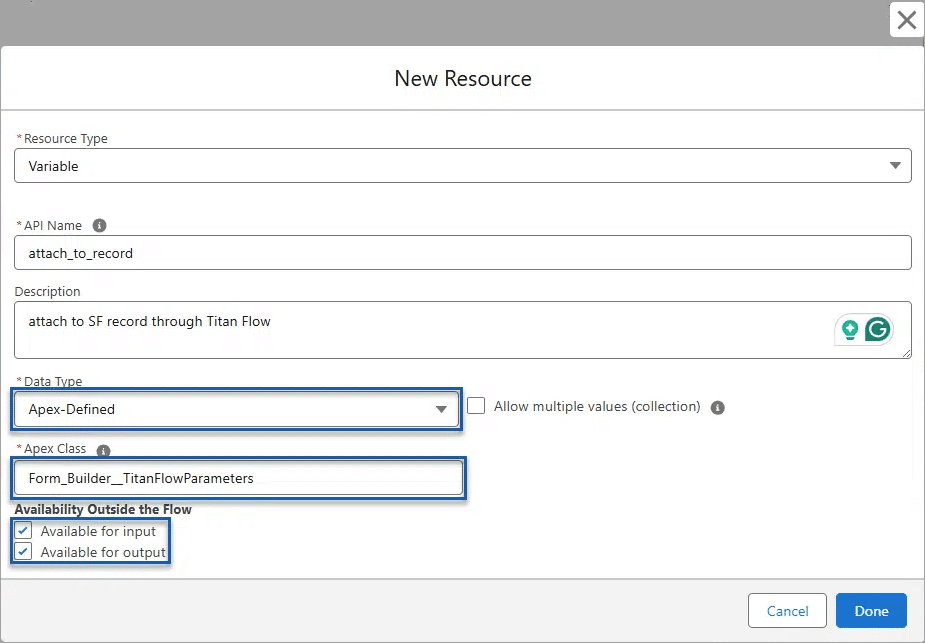
- Click the New Resource button and repeat the steps for the other two variables.
- Click the New Resource button to create the Apex variable collection.
- Use the drop-down list to select the resource type.
- Type an API name in the field and add a description, if necessary.
- Use the drop-down list to select the Apex-defined data type.
- Enable the Allow multiple values (collection) checkbox.
- Search for and select the Form_Builder__TitanFlowParameters Apex class.
- Enable the Available Outside the Flow checkboxes:
- Available for input
- Available for output
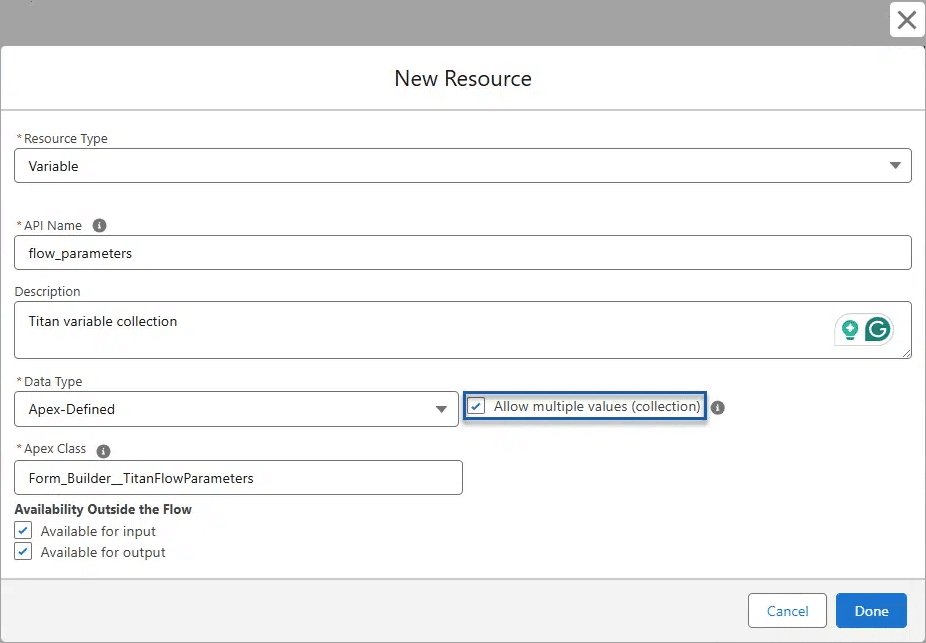
- Click the Done button. The Apex-defined collection variable is added to the list.
- Click the Save button.
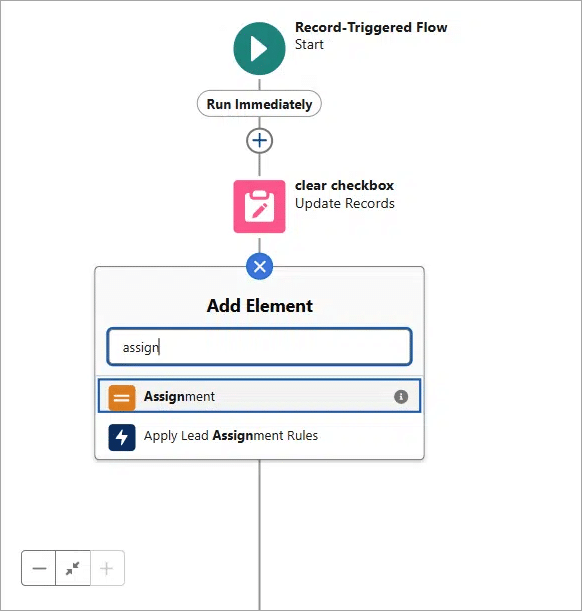
5. Create an assignment action
Assign keys and values to the Apex-defined variables and add them to the collection variable. The collection variable is then passed to the Titan Flow using the parameters on the Salesforce Flow.
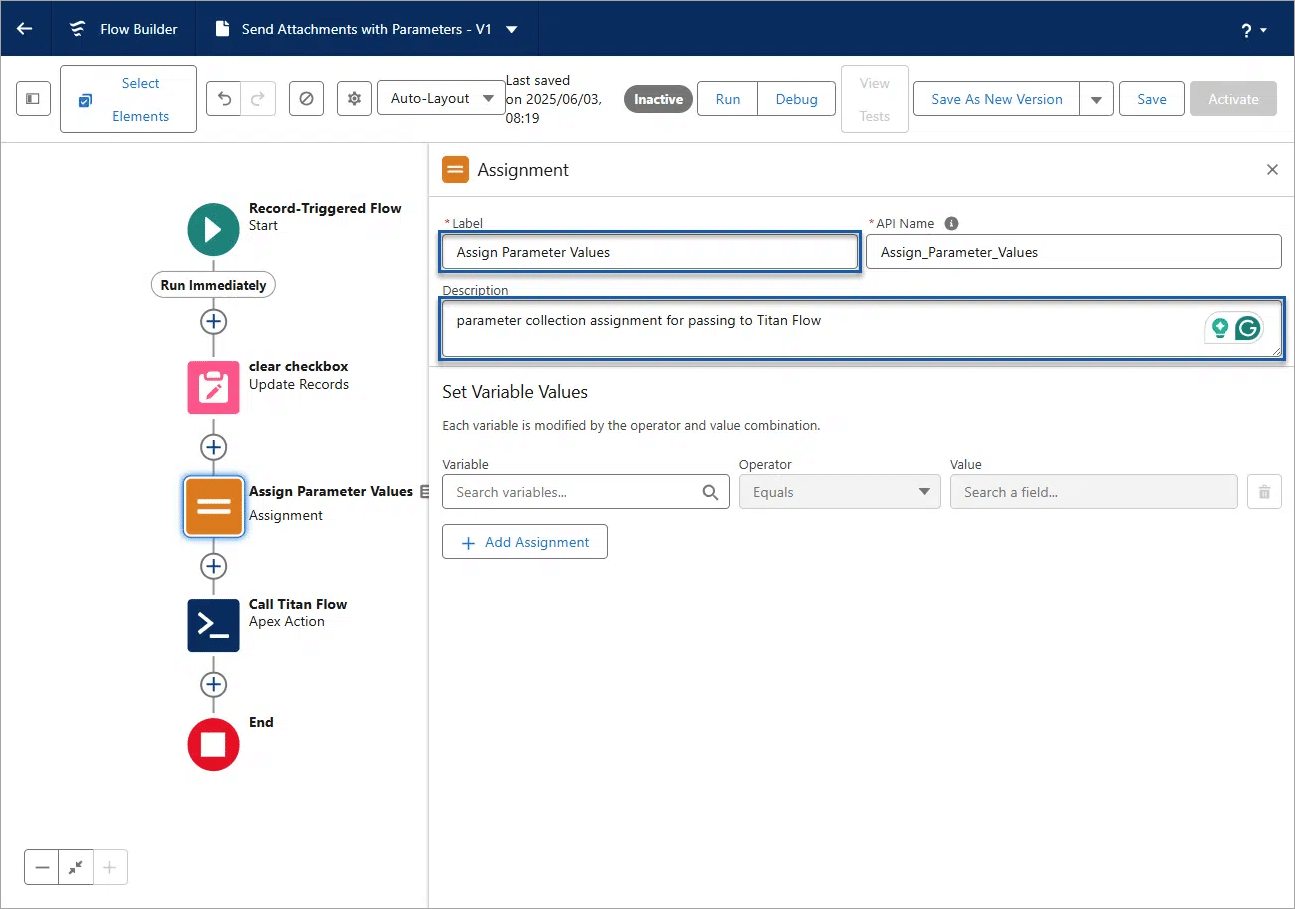
- Search for and select the Assignment element.
- Type a label in the field. The API name is added automatically.
- Add a description if necessary.
- Click in the Variable field and select the attach_to_record option.
- Select the key option and leave the operator as “equal”.
- Type the value in the field. It must be precisely the same as the static variable name on the Titan Flow Custom Variable screen.
- Click the Add Assignment button.

- Repeat the steps to set the variable values for the other Titan Flow variables.
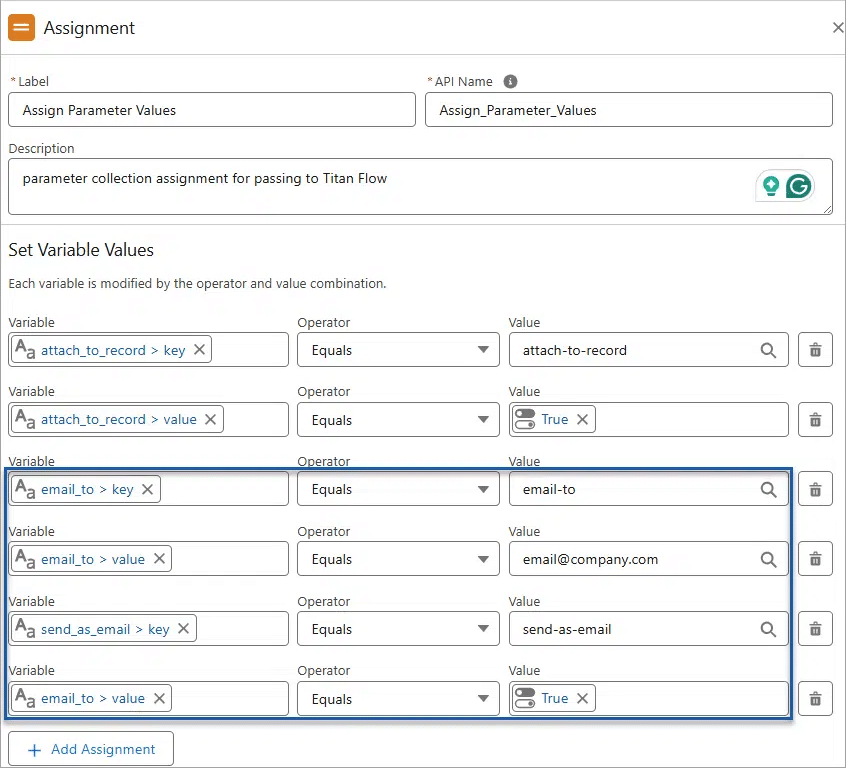
- Click the Add Assignment button.
- Click in the Variable field and select the Apex-defined collection variable flow_parameters option.
- Change the operator to Add.
- Click in the field and select the value. In this case, it is the Apex-defined variable called attach_to_record.
- Click the Add Assignment button.
- Repeat the steps for the other Apex-defined variables.
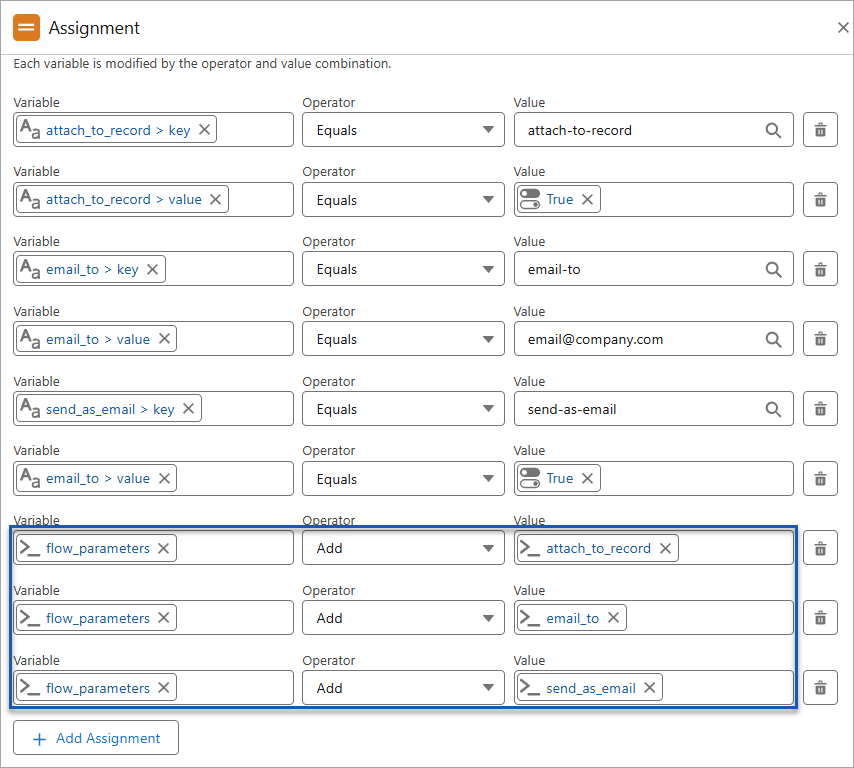
- Click the Save button.
7. Add Parameters to the Apex Action node
- Click the Apex Action node and click the Edit Element button.
- Use the toggle switch to enable the params.

- Click in the params field and select the flow_parametes option.
- Click the Save button.
- Click the Activate button.
Trigger an Action in Salesforce
- Click the Edit icon next to the Send Attachments with Parameters custom checkbox.
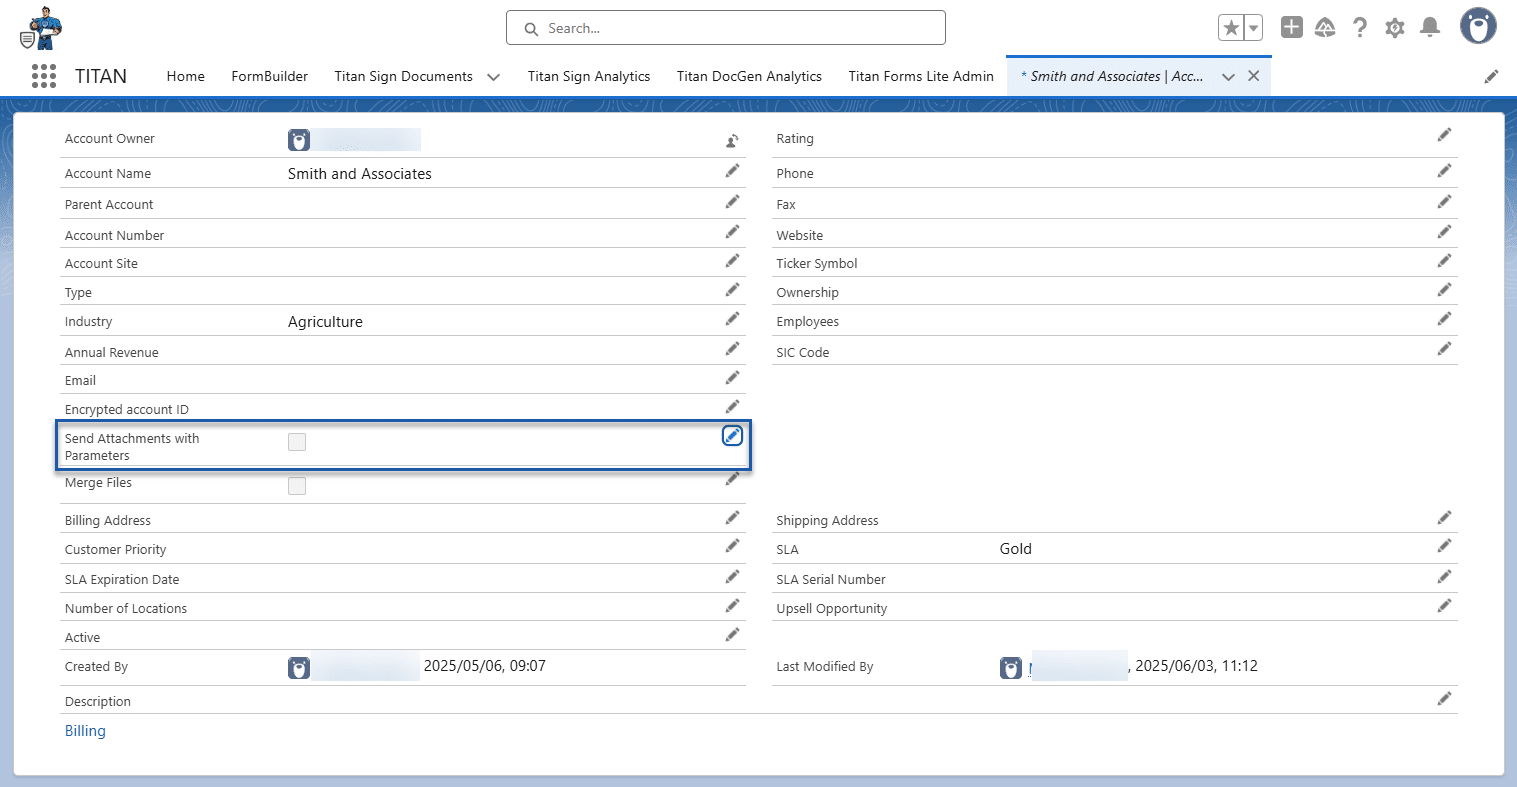
- Enable the checkbox and click the Save button. The checkbox is cleared, and this action triggers the Salesforce Flow.
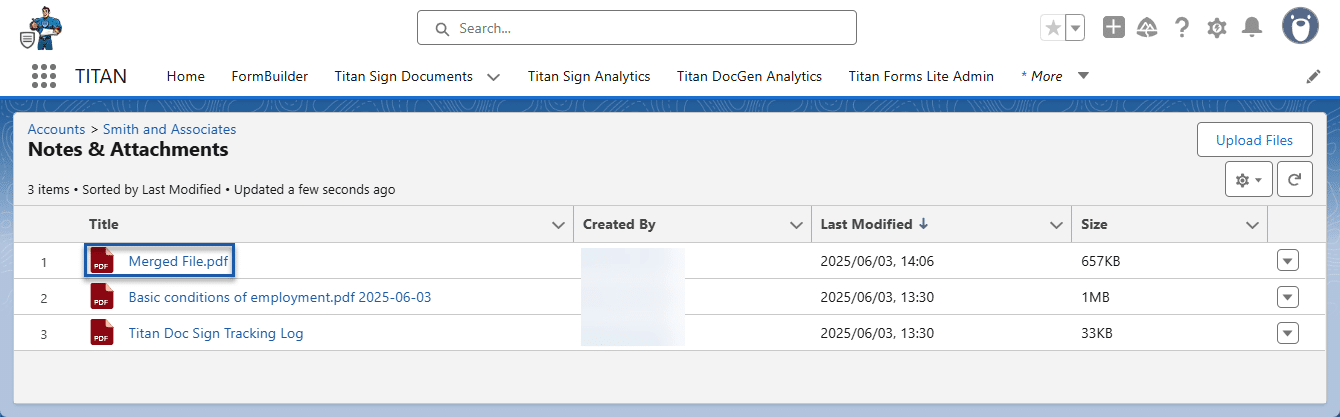
- Open the Notes & Attachments section on the record. You will see the merged file.
- Wait a couple of minutes if you don’t see it immediately.
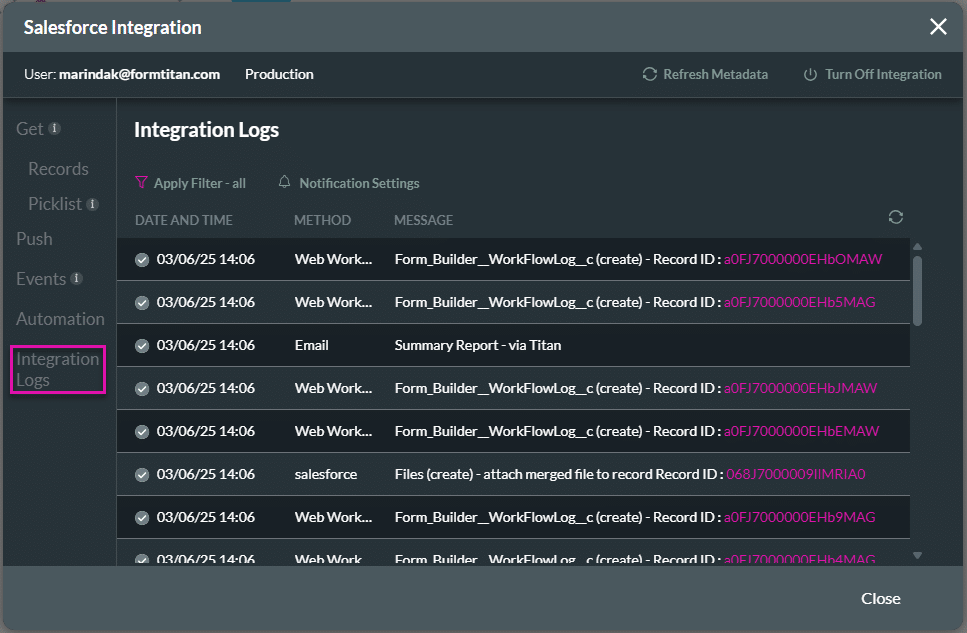
- Browse to the Titan project.
- Click the Gear icon to open the Project settings.
- Click the Salesforce option.
- Click the Integration Logs option. Here you will see all the integration logs.