

Set Color and Background Color for Affected Elements
Description
Dynamically customize colors based on user action or information from Salesforce that will affect the selected elements.
How to Guide
Note:
Prerequisite:
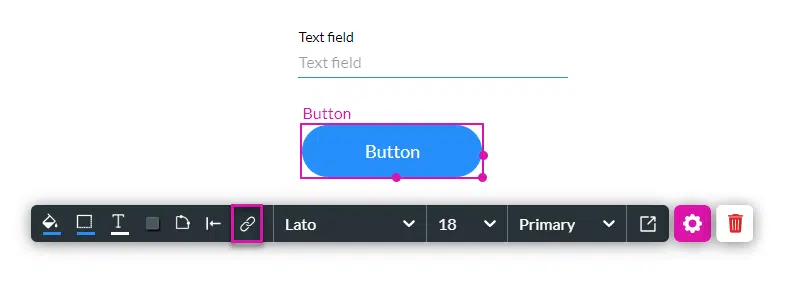
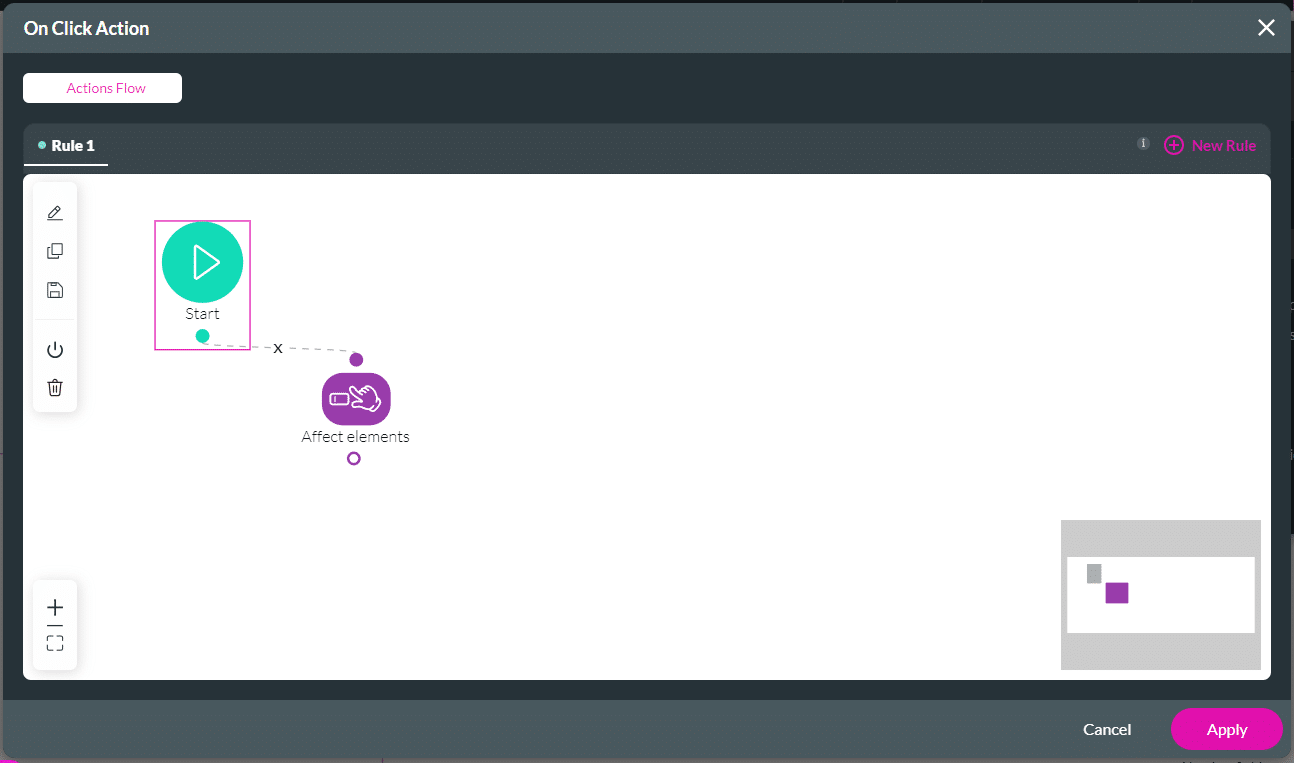
1. Add an Affected Element node to an element such as a button.
2. Alternatively, configure a condition.

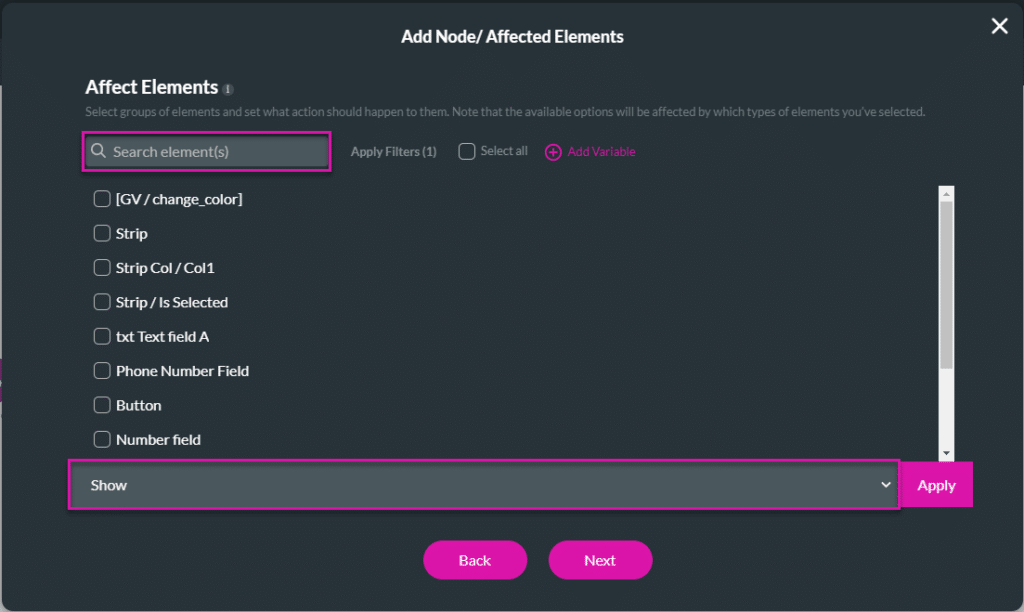
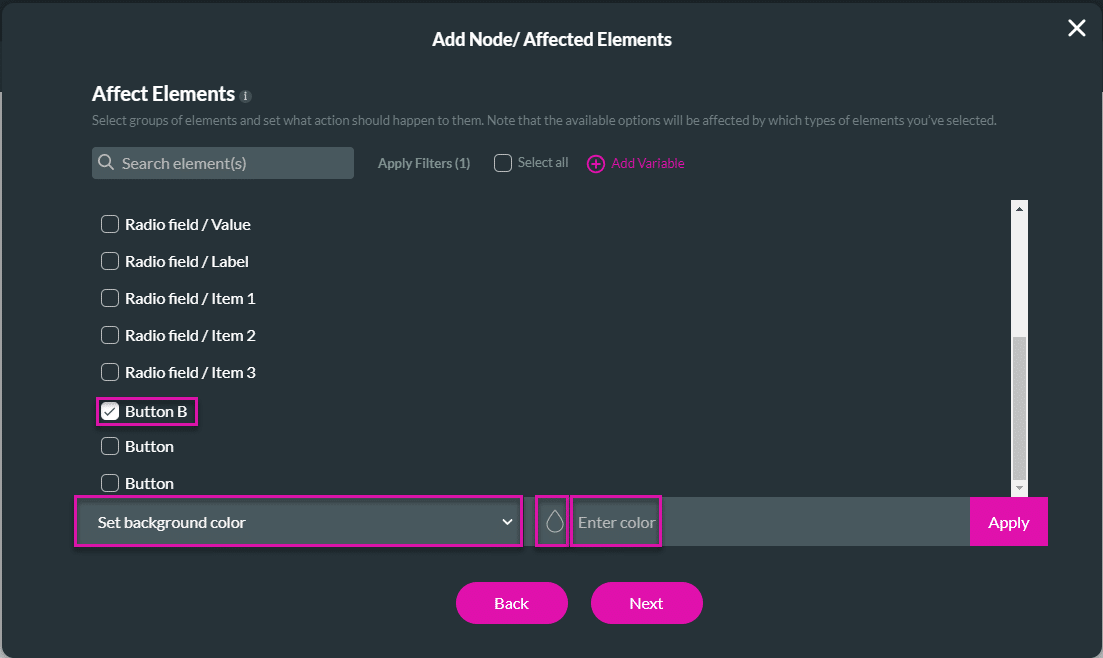
- Select the element/s you want to affect by clicking the relevant checkbox/es.
- These are all the elements in your project.
- If necessary, use the Search element/s field.
- Use the drop-down list to select an option:
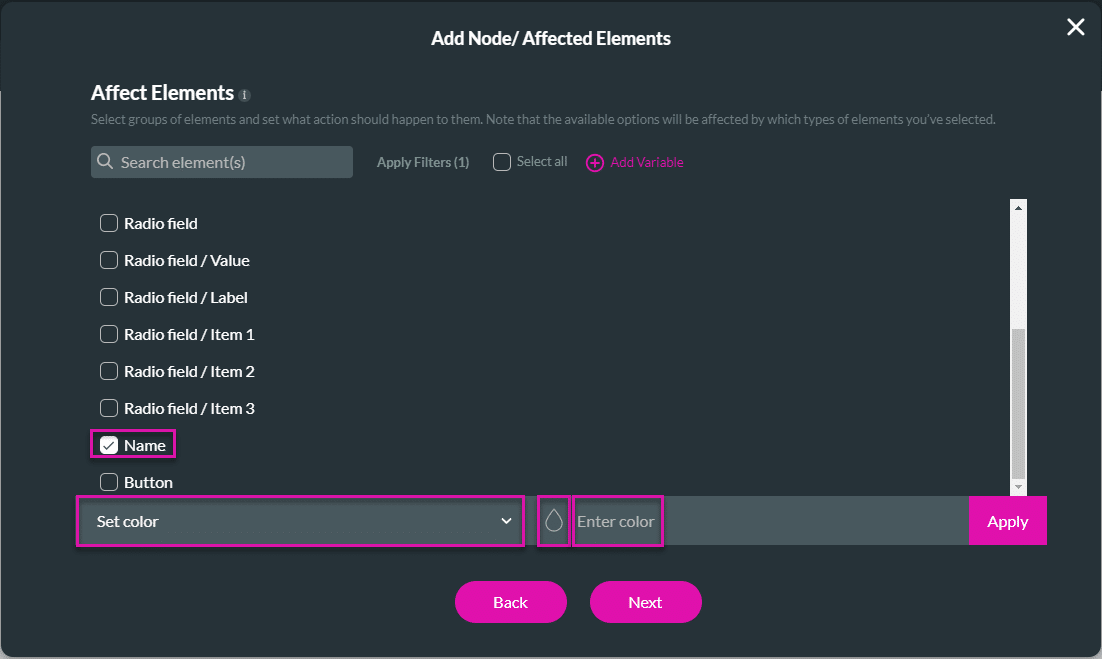
Set color
This will change the font color.
- Use the drop-down list to select the Set color option.
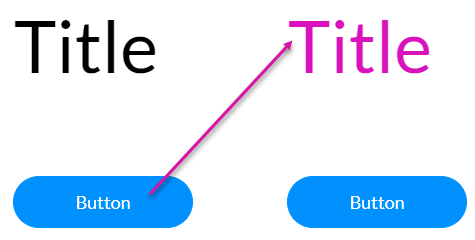
- Use the color selector to choose a color or enter the code in the field. In this example, the Name field’s color will change.
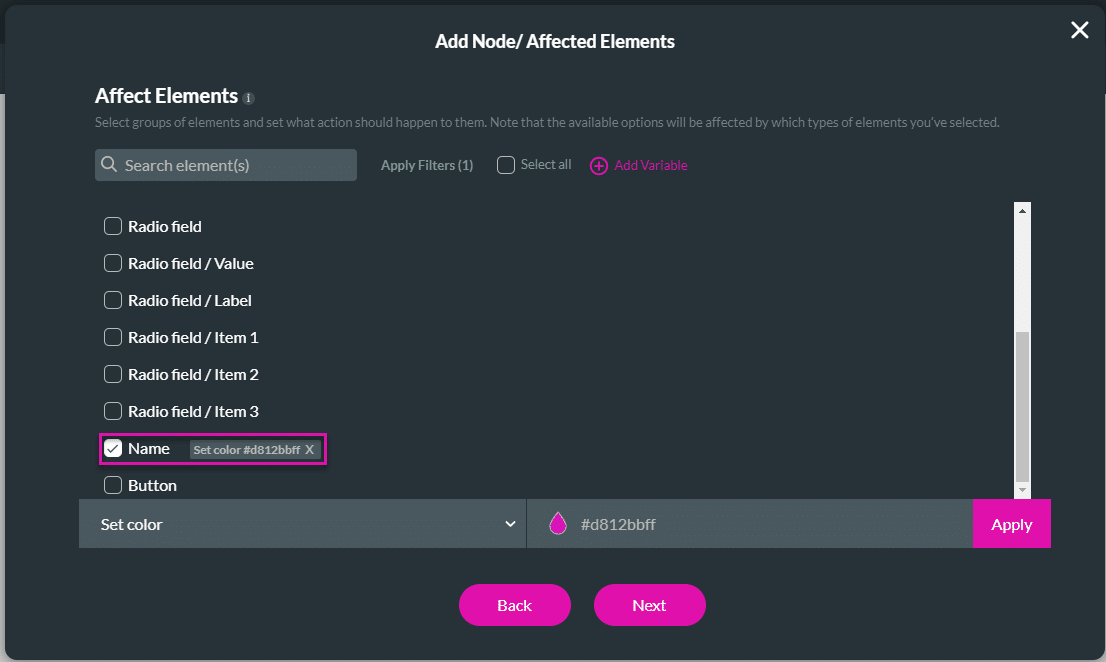
- Click the Apply button. The tag “Set color [code]” is added to the selected element/s.
- Click the Next button.
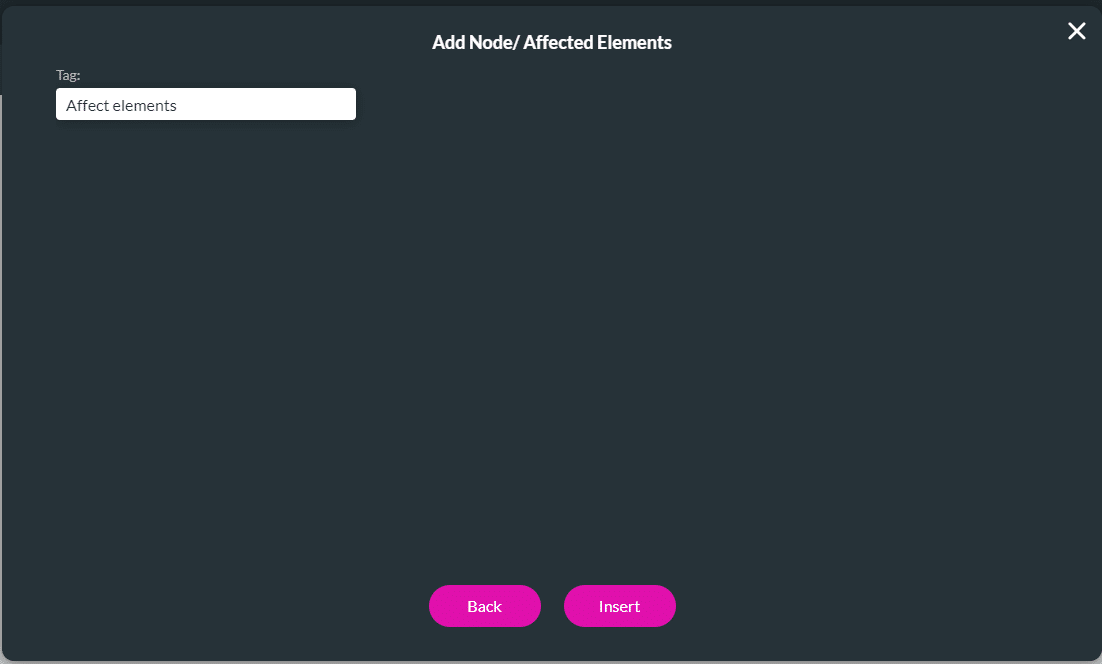
- If required, change the tag and click the Insert button. The node is added to the screen.
- Click the Apply button.
- Save and Preview the project.
When the button is clicked, the color of the affected element changes.
Set background color
This option will change the fill of the element.
- Use the drop-down list to select the Set background color option.
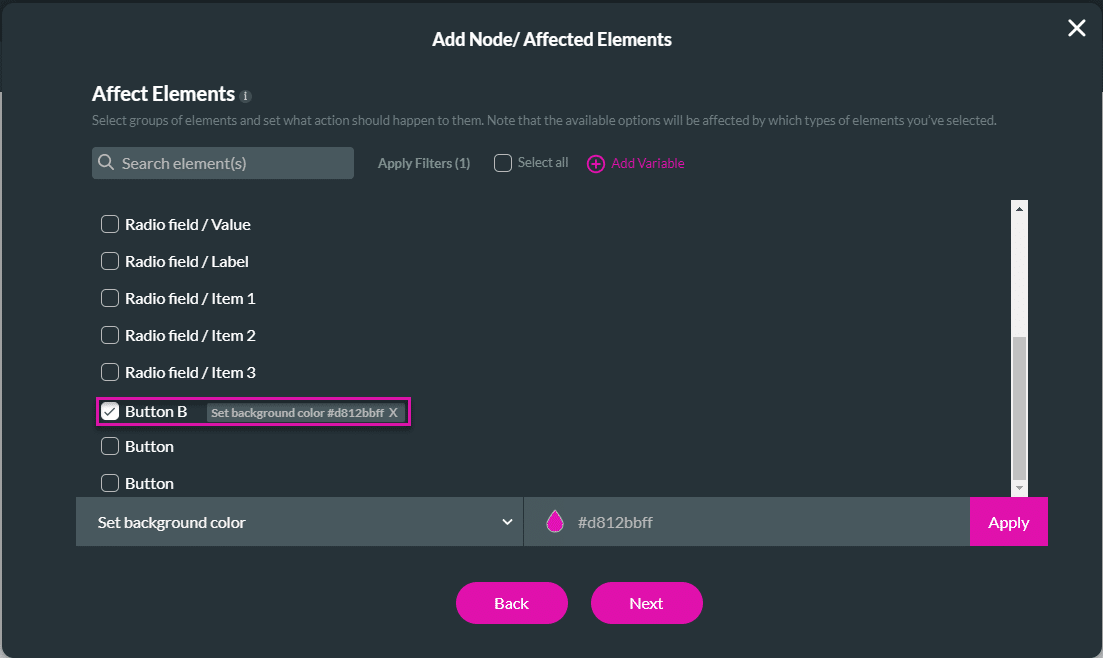
- Use the color selector to choose a color or enter the code in the field. In this example, Button B’s background color will change.
- Click the Apply button. The tag “Set background color [code]” is added to the selected element/s.
- Click the Next button.
- If required, change the tag and click the Insert button. The node is added to the screen.
- Click the Apply button.
- Save and Preview the project.
When the top button is clicked, the bottom button’s background color changes.

Note:
Protip:
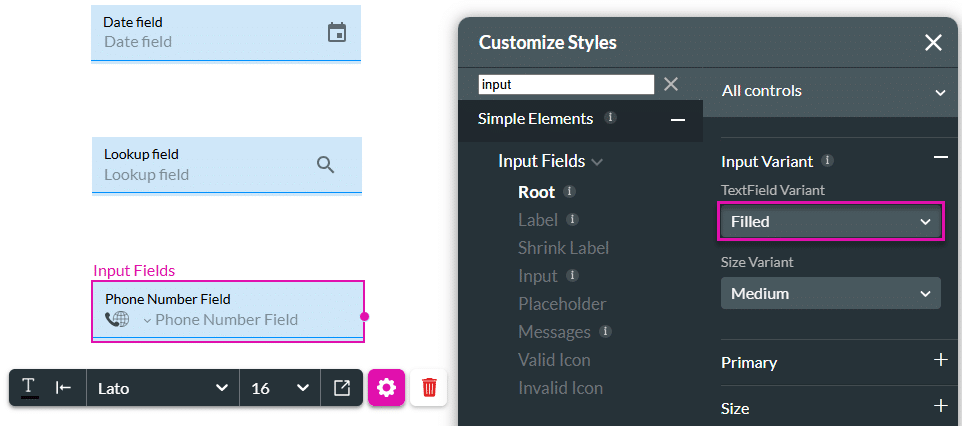
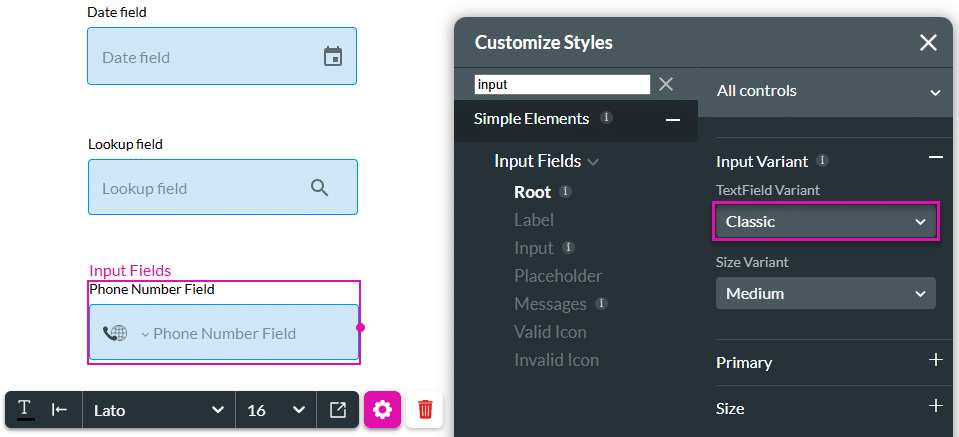
You can only change the background color for element variant types “Filled” and “Classic”.
Filled:
Classic:
Hidden Title
Was this information helpful?
Let us know so we can improve!
Need more help?
Book Demo