

Edit Mapping for Tracker
Business Background
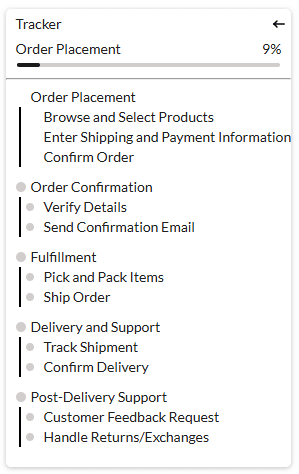
Change the mapping of the order tracker widget after you have added it to the Web project.
How to Guide
- Click the + icon to open the list of elements.
- Select the Widget option from the list.
- Drag-and-drop the Tracker element to the canvas.
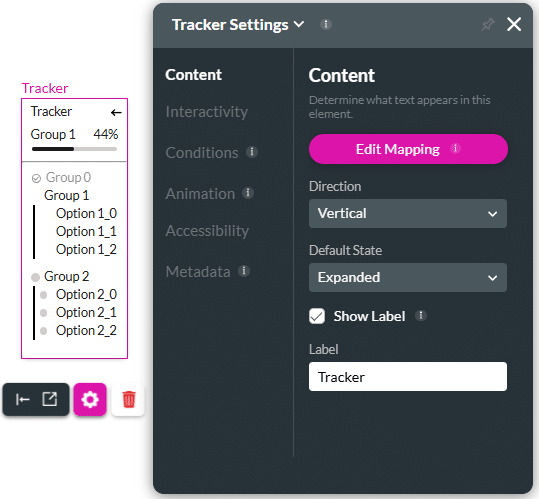
- Click the Tracker Gear icon to open the Tracker Settings screen.
- Click the Edit Mapping button to add mapping for the static values. The Configure Tracker Options screen opens.
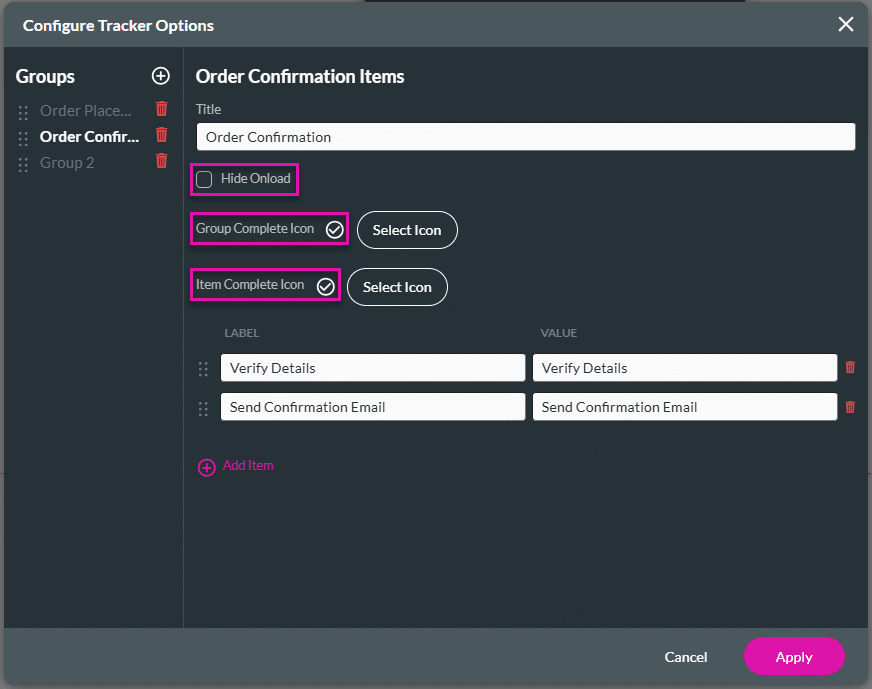
- Type a title. The group name will change accordingly.
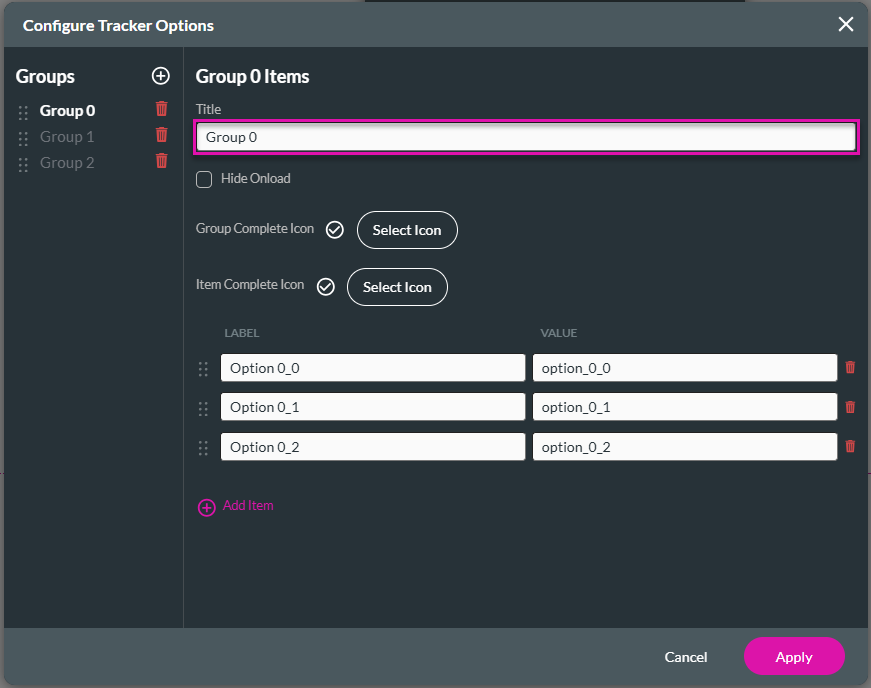
- Type the label and/or values in the corresponding fields.
- Click the Add Item option to add items, or click the Delete icon to remove items.

- Click the checkbox to hide the group when the webpage is loaded. It can be shown later using tracker interactivity.
- If necessary, change the Group Complete and/or Item Complete icons.
- The checkmark is the default icon.
- When you change the Group Complete and/or Item Complete icons, the change is applied to all the groups and items in the widget.
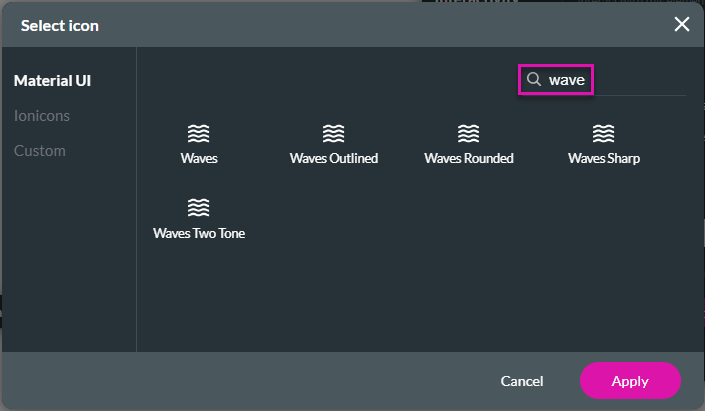
- Click the Select Icon button.
- Under the Material UI option, use the Search field, if necessary, and click an icon to select it.
- As an alternative, select the Ionicons option.
- Use the drop-down list to select an option:
- Filled
- Outline
- Sharp

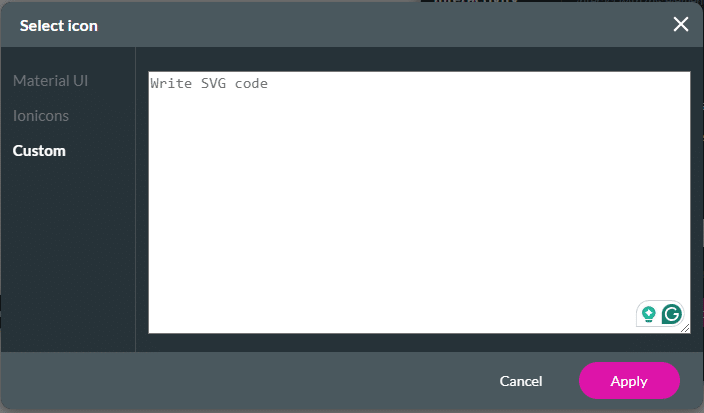
- As an alternative, select the Custom option.
- Add the SVG code to the field.
- Click the Apply button.
- Click the Group 1 option and add the title and items.
- Repeat the steps for Group 2.

- Alternatively, click the + icon next to Groups to add a new group.
- Repeat the steps for the new group until you have all the groups and items you need.
Note:
Click the Delete icon to remove groups or items in groups.
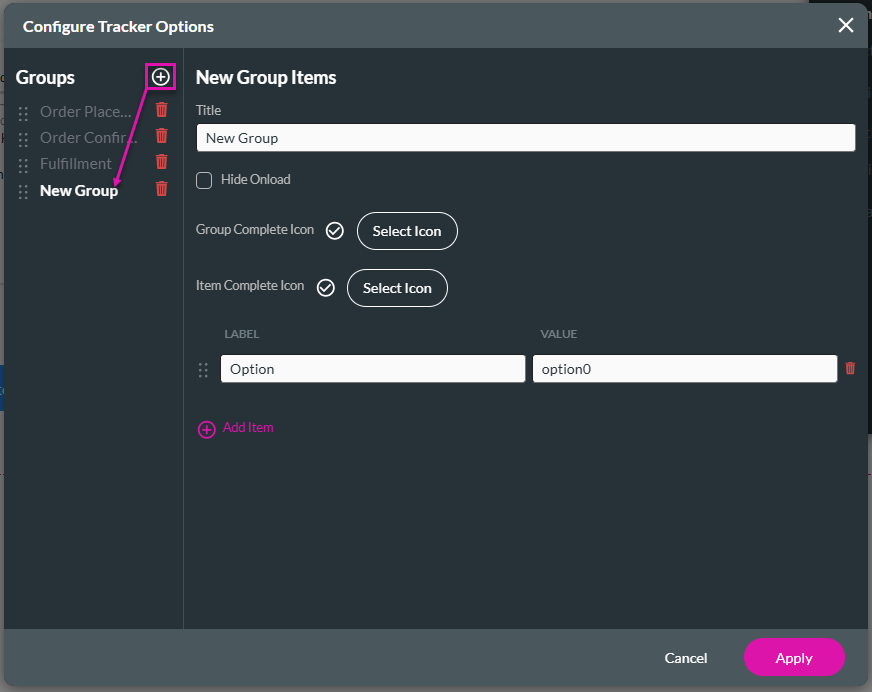
- Click the Apply button. The widget is updated with the added groups and items.
- Save and Preview the project.
Hidden Title
Was this information helpful?
Let us know so we can improve!
Need more help?
Book Demo