

Read Only
Business Background
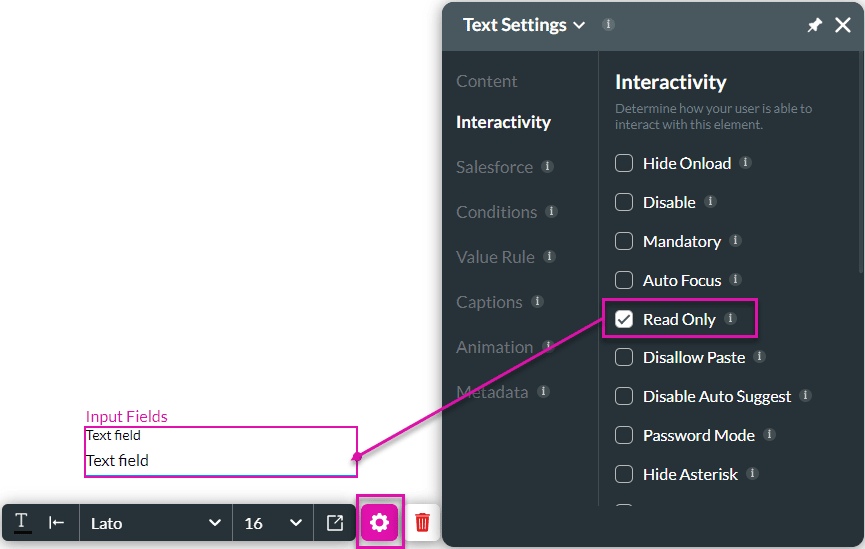
Use the Read Only function so users can view an input field but not make edits. This option is available for text, email, number, date, multi-select, and drop-down elements, to name a few. It allows the user to view the text; they cannot make any changes, such as deleting or editing the text.
How to Video
- 0:02 An introduction to Read Only.
- 0:19 Navigate to the Index Settings.
- 0:34 Preview how the input field works without Read Only enabled.
- 1:06 We show you how to enable Read Only.
- 1:19 Preview the updated project.
How to Guide
- Click the + icon to open the list of elements.
- Select the Input option from the list.
- Click-and-drag the Text element to the canvas.
- Click the Text settings Gear icon. The Text Settings screen opens.
- Select the Interactivity option from the list.
- Enable the Read Only checkbox. The field will not be editable.
Note:
The Read only option is similar to the disable option. There are elements with the disable option only, such as the button element and don’t have the read-only option. The user cannot type any text in the field. The main difference is the UI, and the disable option has greyed-out text. See the below example of disable and read-only:

Disable and read-only examples
Hidden Title
Was this information helpful?
Let us know so we can improve!
Need more help?
Book Demo