

Repeat Auto Fit Containers
Business Background
Use repeat auto-fit containers to repeat information in a container element, for instance, a stepper element, instead of using a repeat strip. This function enables you to bring a collection of data from Salesforce to map dynamically to your container. The option gives you more flexibility to display multiple records and repeated data.
You can add conditions to suit your business needs in a few clicks with no code.
Push or get data from Salesforce in your repeat auto-fit containers.
Titan Solution
With Titan Web, you can add a repeat auto-fit container to a container element to repeat information in the stepper to suit your business needs. Add the repeat auto-fit container and configure it so that the data can be repeated vertically or horizontally in your container.
How to Guide
- Click the + icon to open the list of elements.
- Select the Containers option from the list.
- Click-and-drag the container to the canvas.
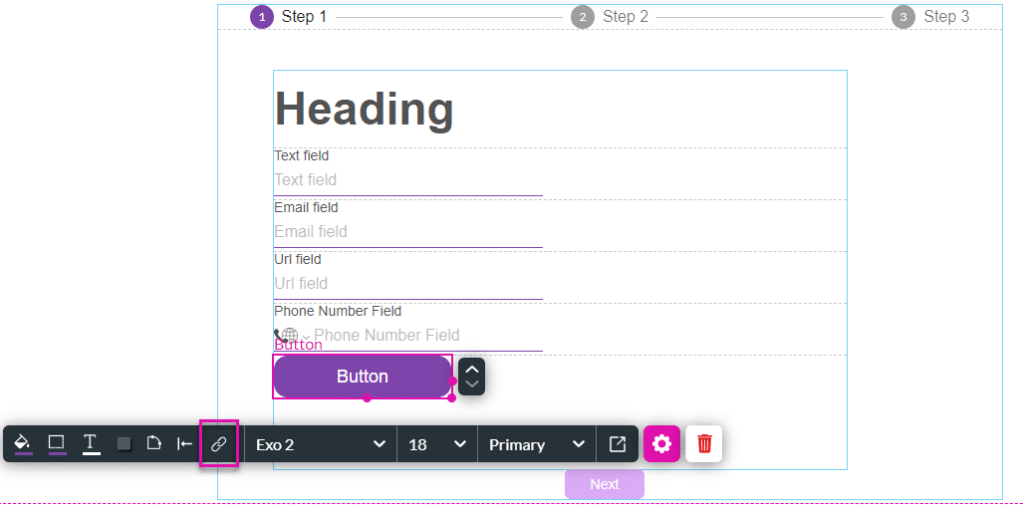
- In this example, a stepper container is used.

- Drag-and-drop the Repeat Auto Fit container to the step in the stepper container where you need the repeated information.

- Populate the repeat auto-fit container with other elements, for instance, input, text, or button elements.

Configure a Salesforce Get
- Select an element and click the element’s Gear icon.
- Select the Salesforce option and configure a Salesforce Get by clicking on the Configure Integrations button.
- Configure a Salesforce Get.
- Do this for all the relevant elements.

- Under Mapping, make sure that you map the elements in the repeat auto-fit container.

When the Salesforce Get runs, the repeat auto-fit container will be repeated for the number of records in the Get.
Configure a repeat auto-fit container interactivity
You can insert, delete or reset indices in the repeat auto-fit container using interactivity.
- Select the button element in the repeat auto-fit container.
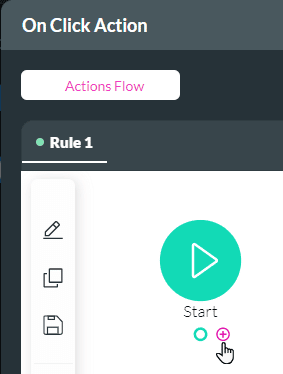
- Click the On Click Action icon to open the On Click Action screen.
- Click the + icon. The Add Node screen opens.
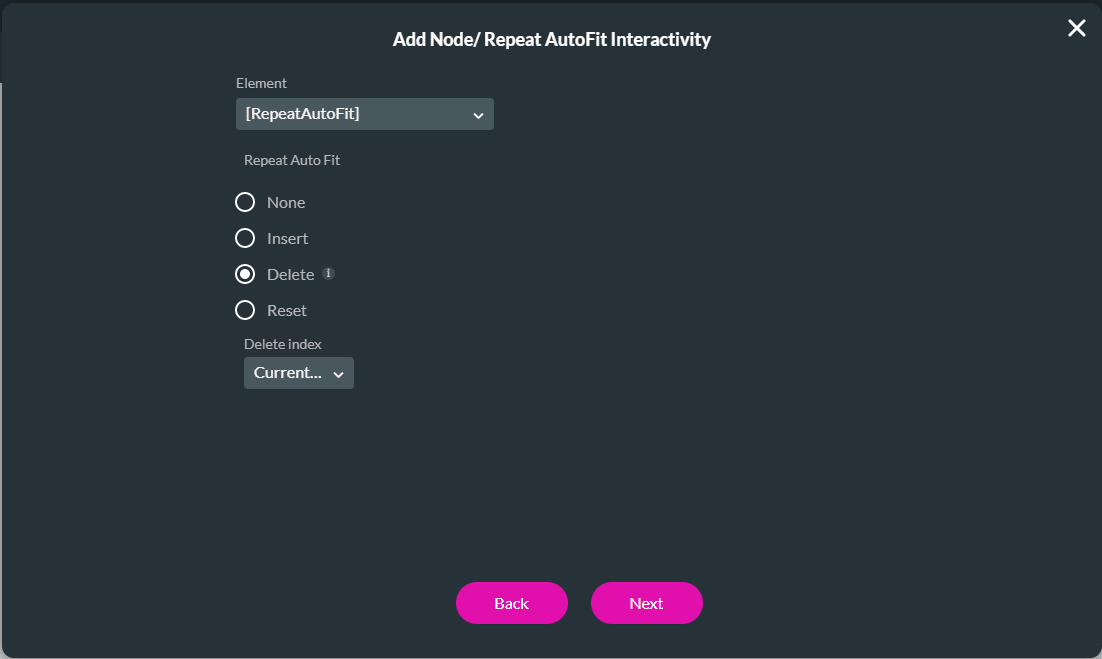
- Under Element Interactivity, click the Repeat AutoFit Interactivity option and click the Next button. The Add Node/Repeat AutoFit Interactivity screen opens.

- Use the drop-down list to select the repeat auto-fit container.
- Use the radio buttons to select an action:
- None
- Insert
- Delete
- Use the drop-down list to select one of the following options.
- Field
- Current Index
- Static
- Use the drop-down list to select one of the following options.
- Reset
- Click the Next button.
- Insert a tag if necessary and click the Insert button. The Repeat AutoFit Interactivity is added to the On Click Action screen.
