

Filter Date Range
Business Background
A power table is a beautiful and efficient way to show a lot of complex data. Filtering the data effectively adds to your business’s advantages.
How to Guide
- Configure a power table.
- Make sure that the power table has a column with date-related data.

- Click the Gear icon of the power table. The Power Table Settings screen opens.
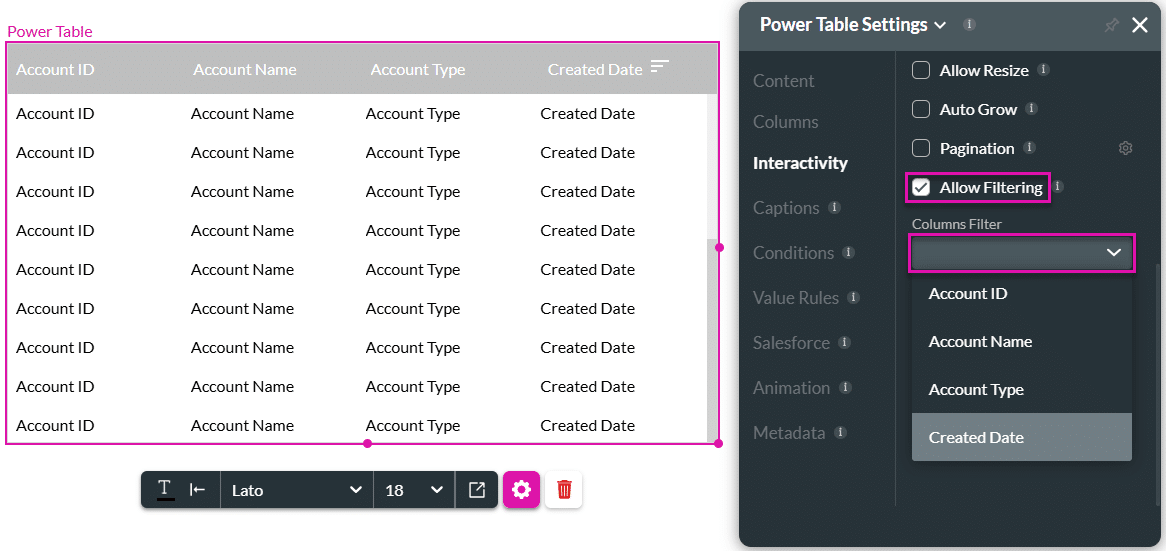
- Under Interactivity, scroll down and select the Allow Filtering checkbox. The Custom Filters drop-down list is added.
- Use the Columns Filter drop-down list to select the date-related option you added, for instance, Created Date. You can add multiple columns to be filtered. A check mark is added next to a selected column.
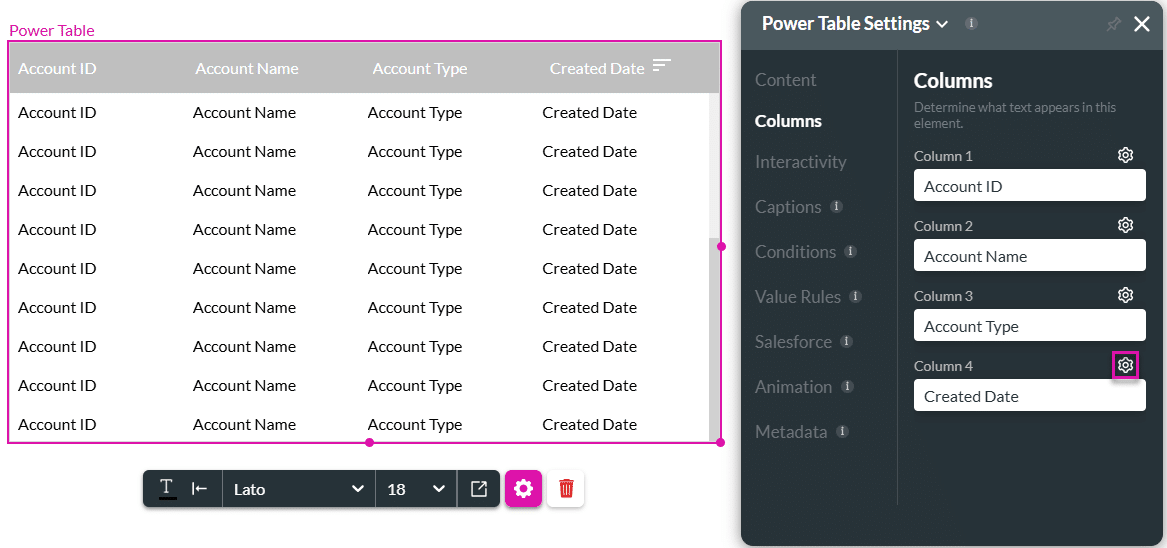
- Under Columns, select the Gear icon next to the date-related column. The Columns Settings screen opens.
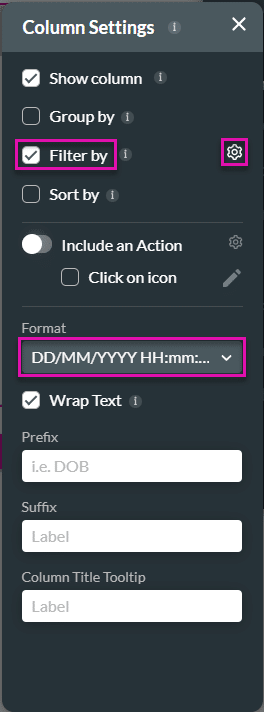
- Use the drop-down list to change the format of the date. The default is YYYY-MM-DDThh:mm:sss 000+0000.
- Select the Filter by checkbox and select the Gear icon. The Configure filter screen opens.
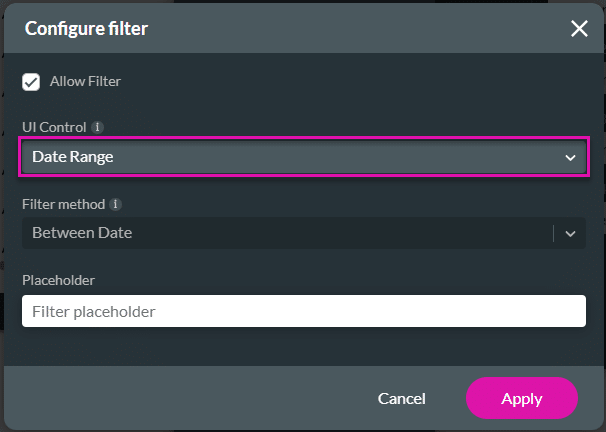
- Use the UI Control drop-down list to select the Date Range option and click the Apply button.
- Close the Columns Settings screen.
- Save and Preview the project.
- Click the Calendar icon. The Filter Date Range screen opens.
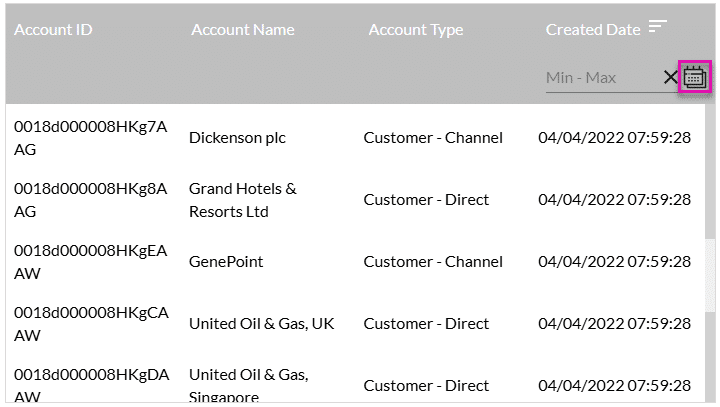
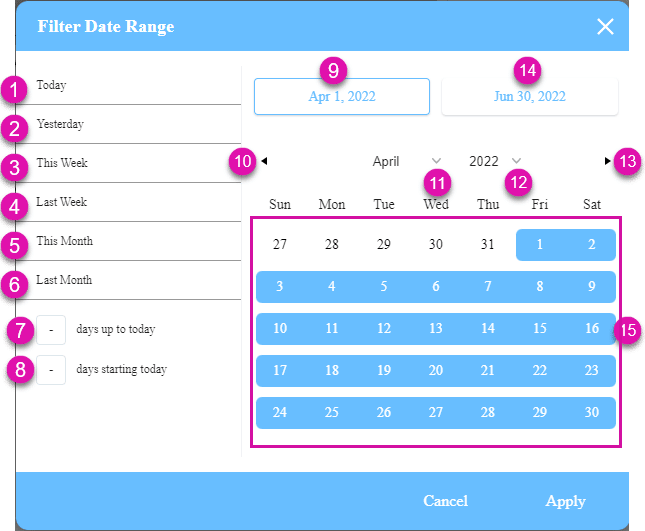
- Use the relevant tools described in the table to select a start and end date.
| Number | Label | Description |
|---|---|---|
| 1 | Today | Select this option to search today. |
| 2 | Yesterday | Use this option to search yesterday. |
| 3 | This Week | Select this option to search this week. |
| 4 | Last Week | Use this option to search last week. |
| 5 | This Month | Select this option to search this month. |
| 6 | Last Month | Use this option to search last month. |
| 7 | days up to today | Add a number in the field to search the number of days up to today. For instance, 40 days will search 40 days into the past, starting today. |
| 8 | day starting today | Add a number in the field to search the number of days from today. For instance, 40 days will search 40 days into the future, starting today. |
| 9 | From Month tab | Select this tab to choose the start date. |
| 10 | Month Back arrow | Select the back arrow to move one month into the past with each selection. |
| 11 | Month selector | Use the drop-down list to select a month. |
| 12 | Year selector | Use the drop-down list to select a year. |
| 13 | Month Forward arrow | Select the forward arrow to move one month into the future with each selection. |
| 14 | To Month tab | Select this tab to select the end date. |
| 15 | Day | Click a day in the calendar to select it. |
- Click the Apply button. The filter is applied to the table, and only the relevant results will be shown.
Hidden Title
Was this information helpful?
Let us know so we can improve!
Need more help?
Book Demo