

Export Data to Google Sheets
Business Background
Export data from your web project to Google Sheets.
Titan Solution
Titan lets you export data from multiple strips in your web project to Google Sheets.
How to Guide
Note:
Prerequisites:
- You must connect your Google account to Titan.
- Create a Titan Flow project.
Learn more about using Google Sheets in Titan Flow.
Create a Web project that contains the following:
- A strip with input fields, for instance, First Name and Last Name.
- Map Salesforce fields to the input fields, for instance, to get contact information.
- A button in a repeated strip.
- Add an On Click Action (strip interactivity) to insert the repeated strip.
- A button to trigger the Titan Flow to Google Sheets.
- Add an On Click Action with a Flow node.
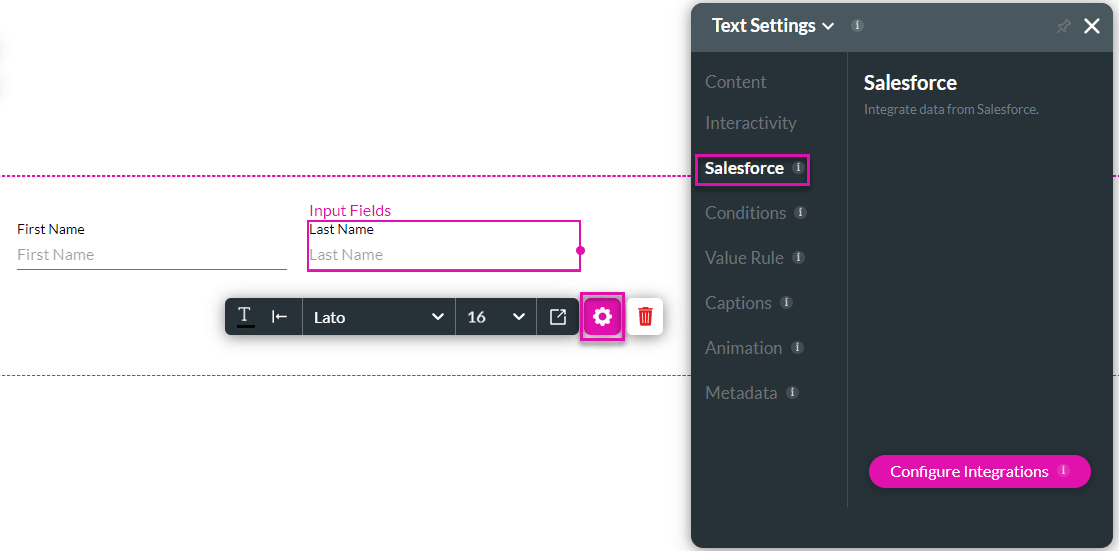
Add input fields
- Click the + icon to open the list of elements.
- Under Input, drag Text Field elements to the canvas.
- Use the Text Field element’s Gear icon to open the Settings screen.
- Under Salesforce, configure a Get integration for each element, for instance, get the contact information, such as first and last names.
Add a repeated strip
- Click the + icon to open the list of elements.
- Under Strip, drag a strip element to the canvas.
- Use the Strip element’s Gear icon to open the Settings screen.
- Under Content, select the Repeat checkbox.

- Click the + icon to open the list of elements.
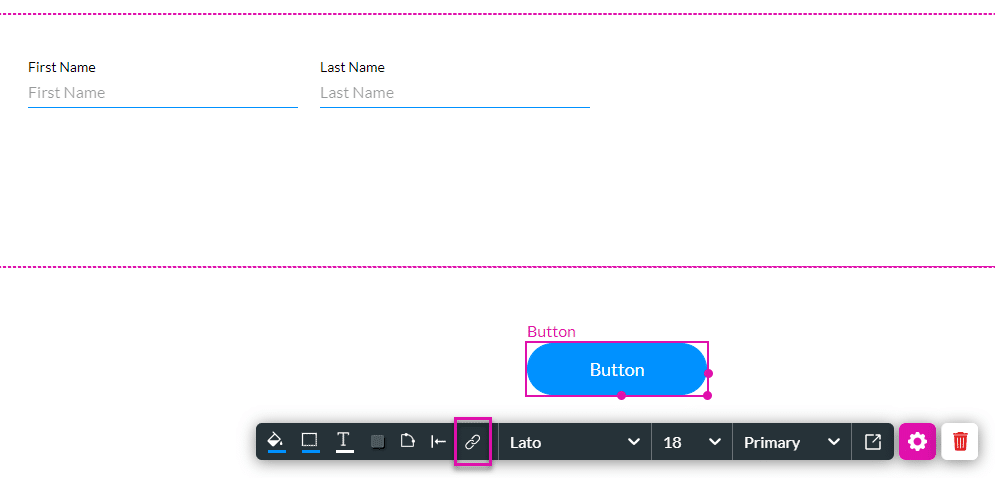
- Under Button, drag a button element to the repeated strip.
- Use the button element’s On Click Action icon to open the On Click Action screen.
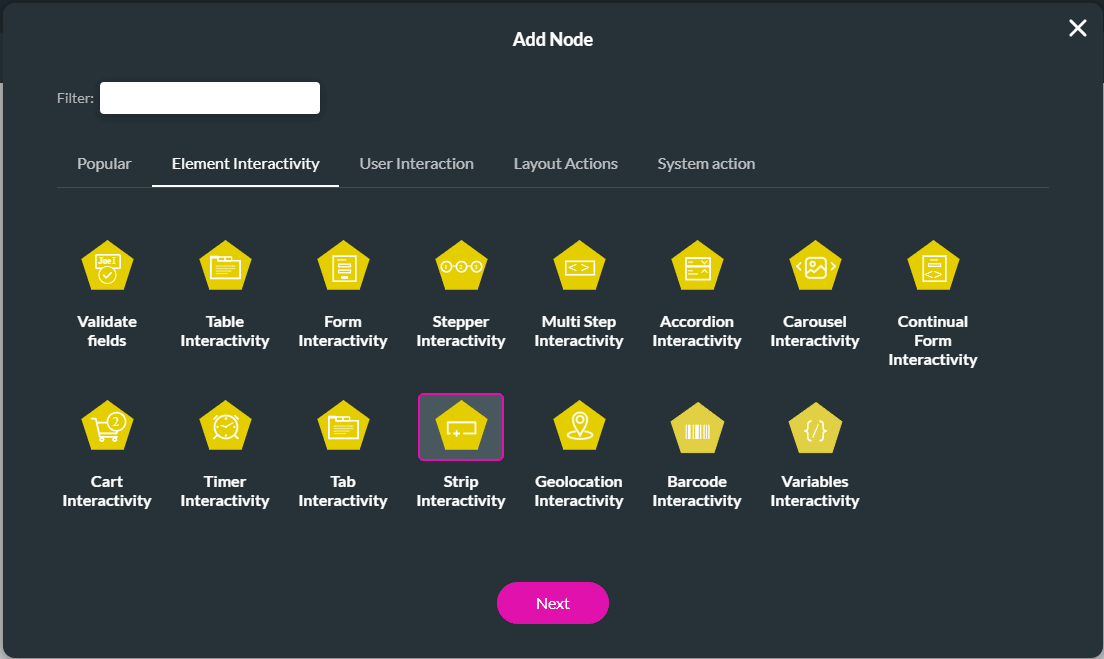
- Click the + icon next to the Start node to open the Add Node screen.

- Under Element Interactivity, select the Strip Interactivity option and click the Next button.
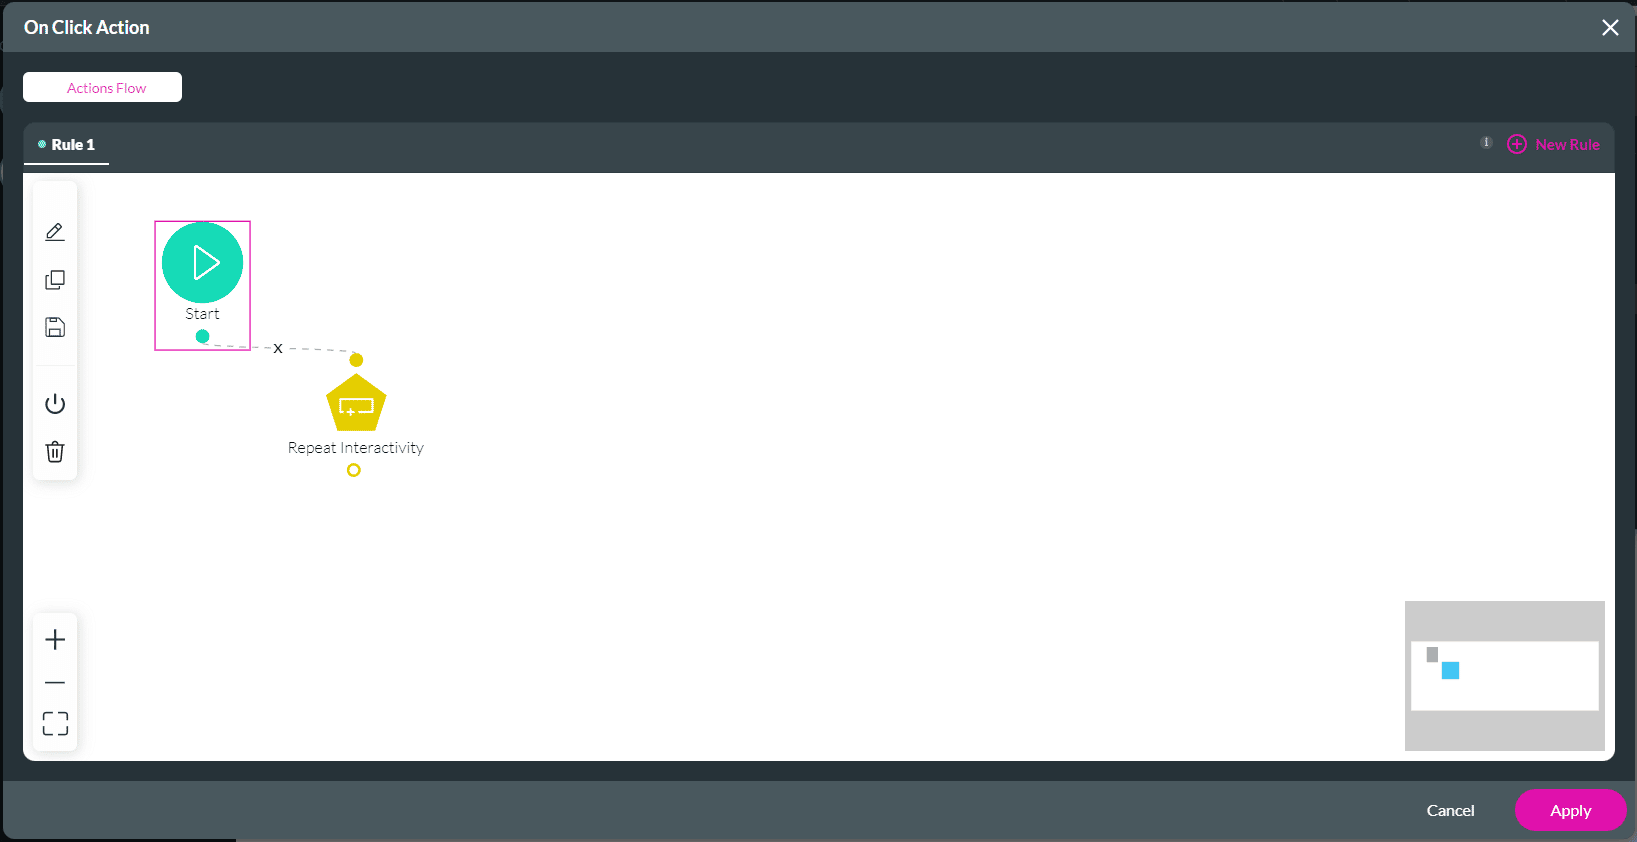
- Use the Strip Element drop-down list to select the Repeat Strip option.
- Select the Insert radio button and click the Next button.

- If necessary, add a tag and click the Insert button. The Repeat Interactivity node is added to the screen.
- Click the Apply button.
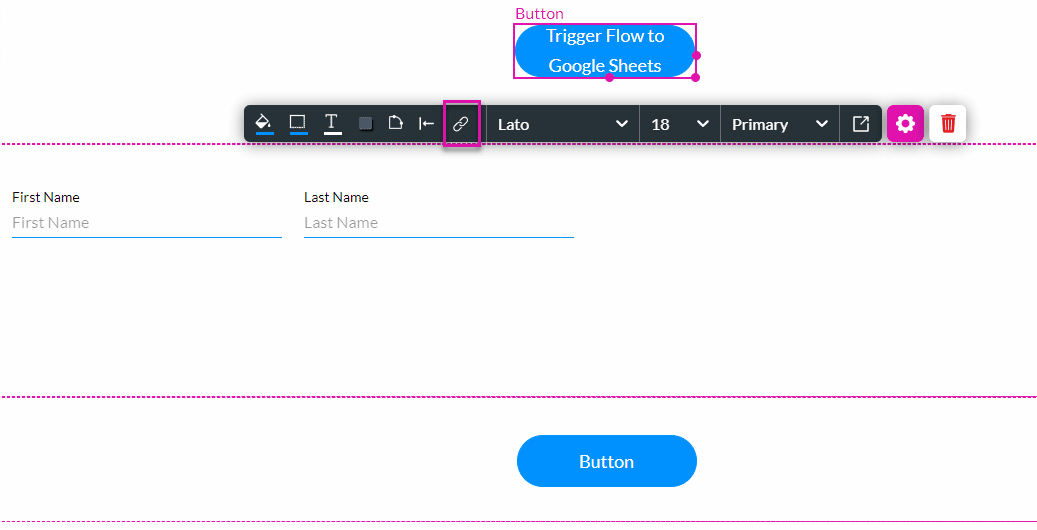
Add a trigger button
- Click the + icon to open the list of elements.
- Under Button, drag a button element to the strip.
- Use the button element’s On Click Action icon to open the On Click Action screen.
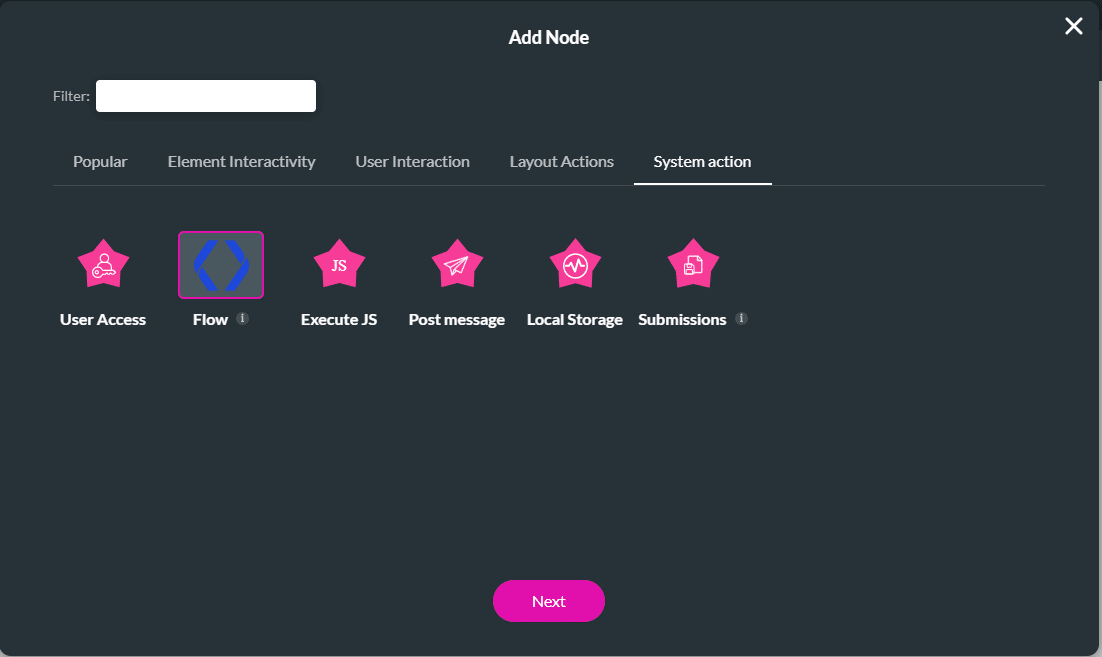
- Click the + icon next to Start to open the Add Node screen.
- Under System action, select the Flow option and click the Next button.
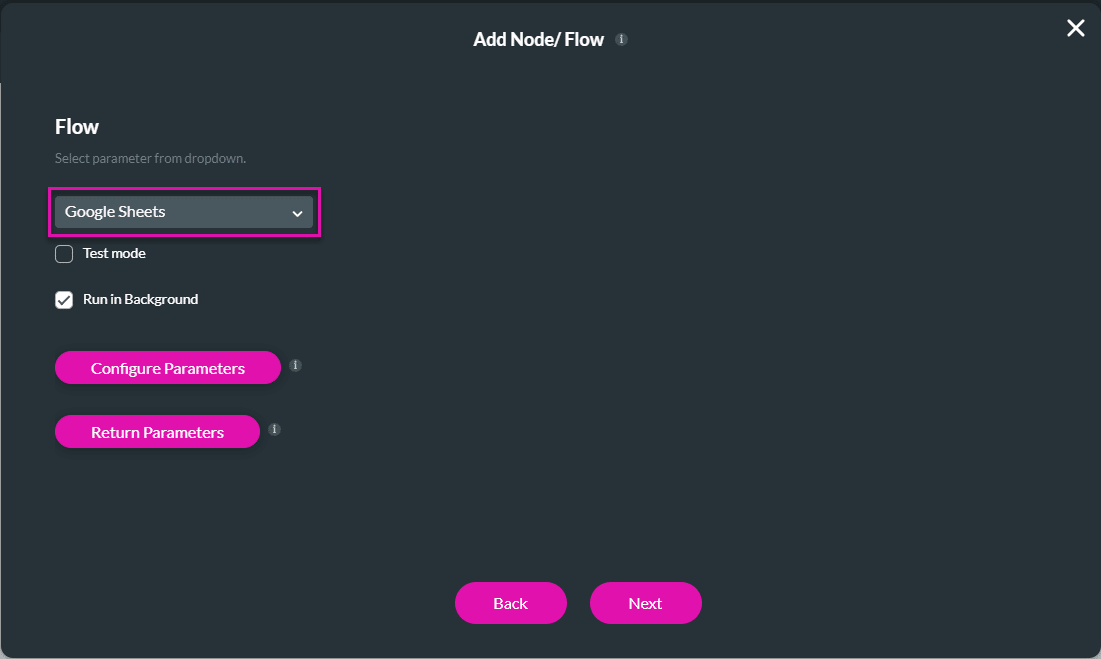
- Use the drop-down list to select the Titan Flow project that you created as part of the prerequisites.
- Click the Next button.
- Add a tag if necessary and click the Insert button. The Flow node is added to the screen.
- Click the Apply button.

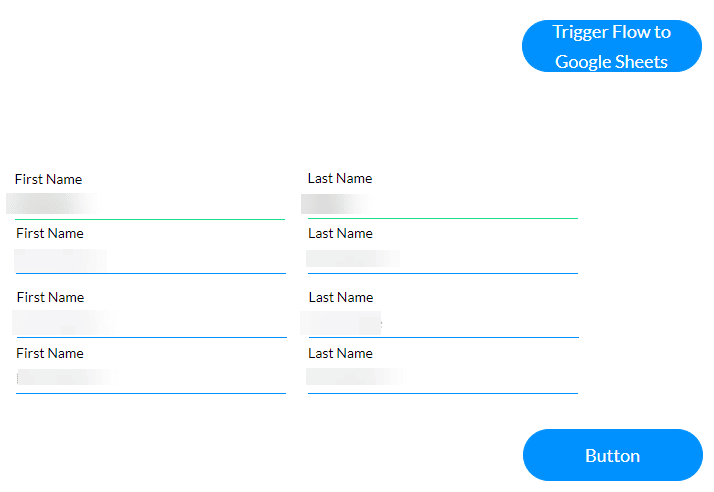
- Save and Preview the project. The data is shown.
- Click the button to trigger the Flow to Google Sheets.
Example in Google Sheets:
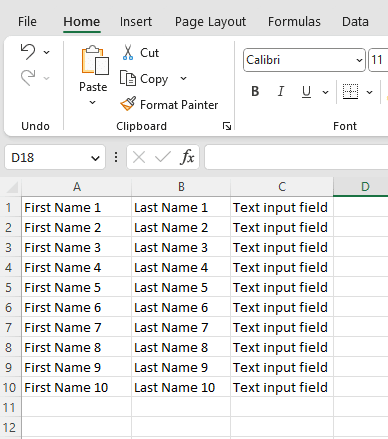
Any regular input field that is not part of the repeated strip will be added to each row.
Hidden Title
Was this information helpful?
Let us know so we can improve!
Need more help?
Book Demo