

Allow Add Record
Business Background
Use the Allow Add Record function to confirm the user’s selection of a specific record.
How to Video
How to Guide
The Allow Add Record option is available for the Lookup element.
- Click the + icon to open the list of elements.
- Select the Input option from the list.
- Drag-and-drop the Lookup element to the canvas.
- Click the Lookup settings Gear icon. The Lookup settings screen opens.
- Click the Interactivity option.
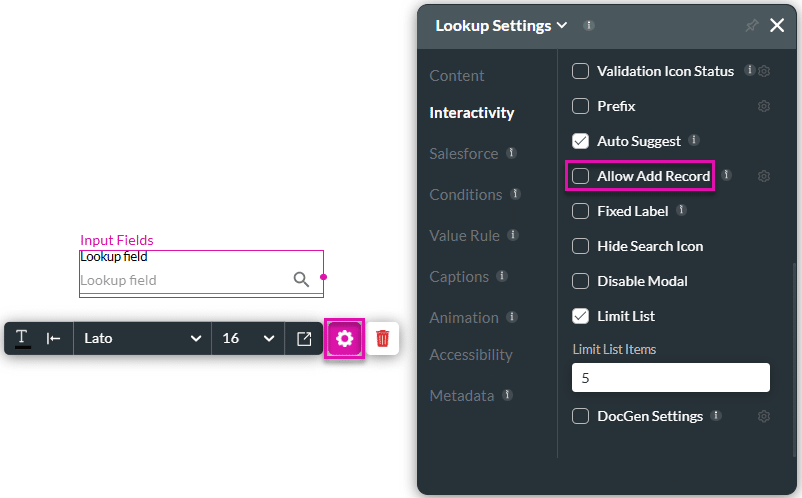
- Scroll down and click the Allow Add Record checkbox.
- Click the settings Gear icon. The Configure Input Add Record screen opens.

- Select the Always or No results option from the Show drop-down list to specify when you want a user to be able to add a record.
- Always: a user can add a record regardless of the available options.
- No results: If a user cannot find the record they are looking for, they can add a record.
- Use the Open page drop-down list and select the page in your project on which you want to add the new record.
- You need to add the fields and Salesforce logic on that page.
- Alternatively, you can select Custom Page from the Open page drop-down list and add a URL in the Custom Page URL field.
- Click the Set parameters button to configure redirect parameters.
- Filter the parameters, especially if the list is long.
- Select an option from the Show drop-down list:
- All
- Set
- Not set
- Type the parameter name in the field.
- Click the Apply button.
- Type the Width and Height in the field. This is the size of the modal that will open.
- Set the position of the modal on the screen according to the following options in the Position drop-down list:
- Top
- Center
- Bottom
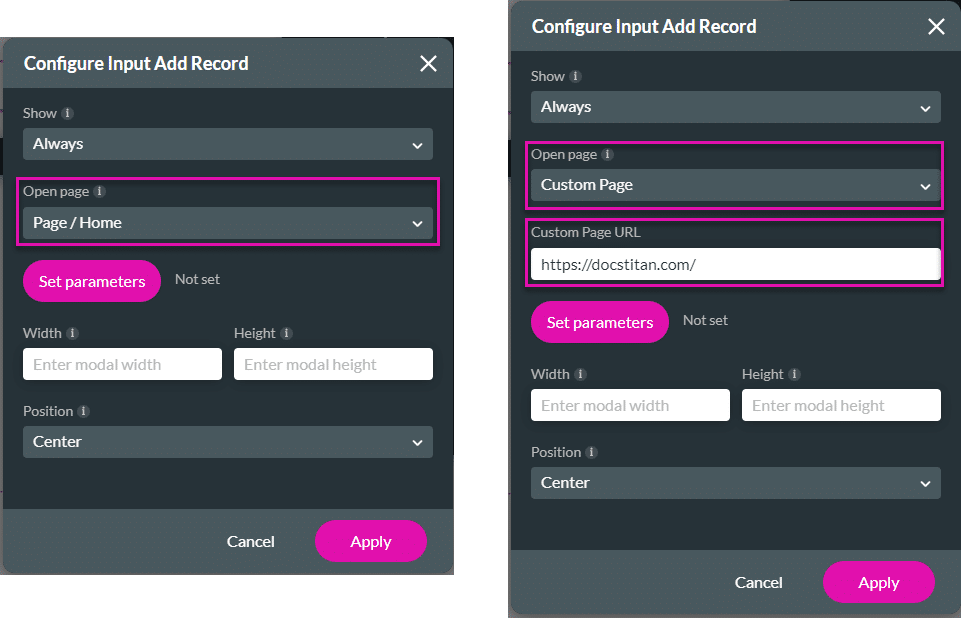
- Click the Apply button. See the example of the added record below.

Hidden Title
Was this information helpful?
Let us know so we can improve!
Need more help?
Book Demo