Do you like this
feature?
If you like this feature and want to transform your business with Titan's zero code applications for Salesforce, then schedule a demo today!
Advanced Legend
Business Background
The Advanced Legend option is available for the Chart element. You can show or hide the advanced legend. The advanced legend shows more information than the standard legend.
Titan Solution
Titan Web lets you add an advanced legend to chart elements.
How to Guide
Learn more about charts.
- Click the + icon to open the list of elements.
- Select the Chart option from the list.
- Click-and-drag a Chart element to the canvas. In this example, a pie chart is used.
- Configure the Pie Chart:
- Select a source in Salesforce.
- Configure conditions.
- Do the mapping and click the Apply button.
- Click the Pie Chart element settings Gear icon. The Pie Chart Settings screen opens.
- Select the Interactivity option.
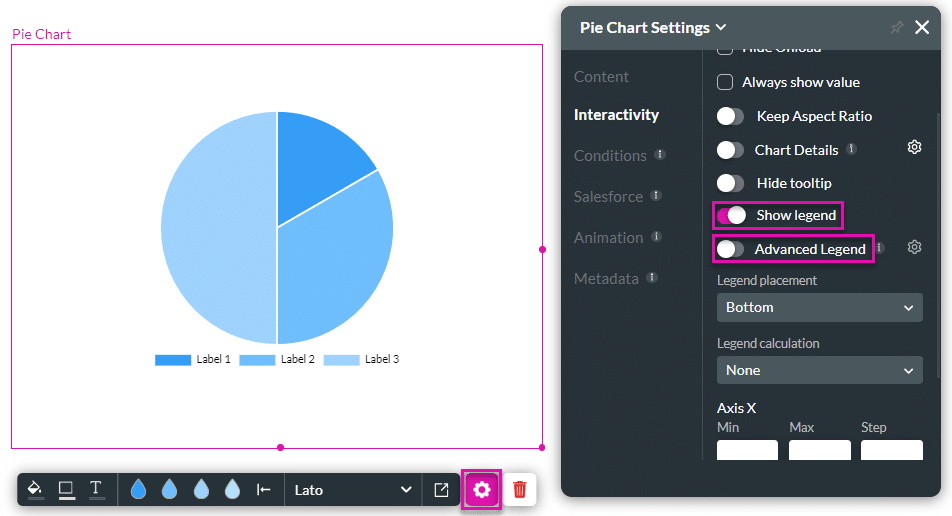
- Make sure that you enable the Show legend option.
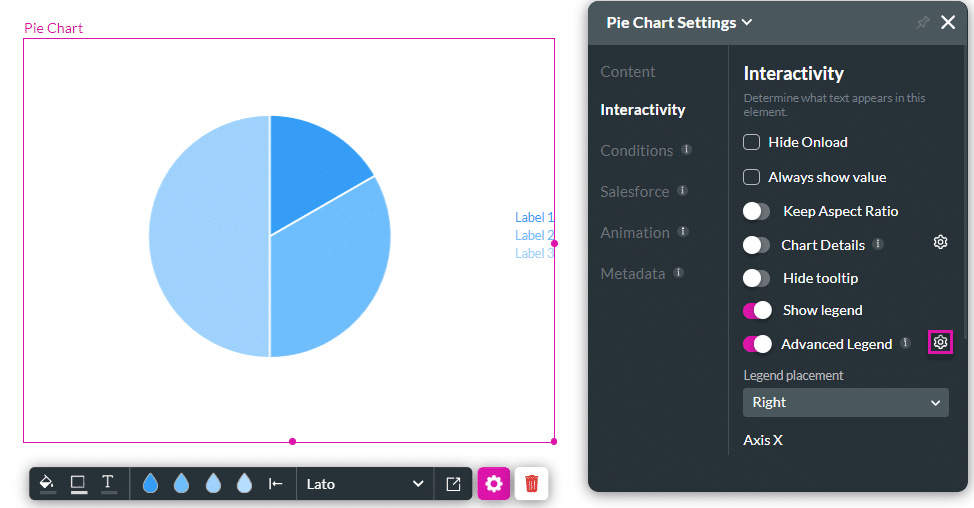
- Use the Advanced Legend toggle switch to enable the advanced legend. By default, the Advanced Legend option is off.
- Click the Gear icon. The Configure Advanced Legend screen opens.
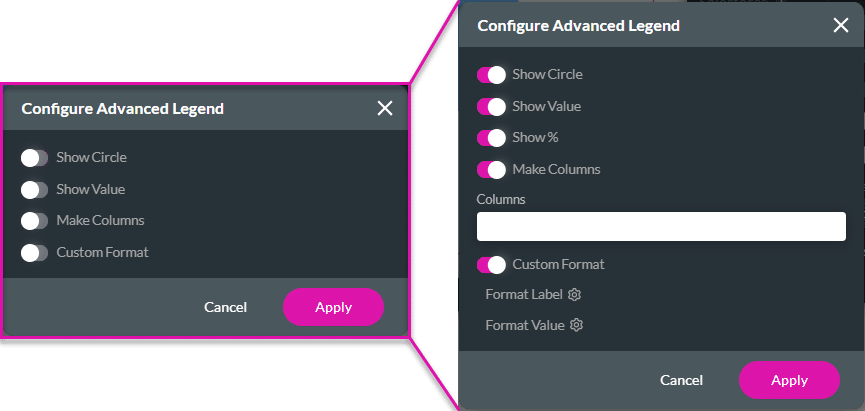
- Use the toggle switches to configure the advanced legend:
- Show Circle: This shows a circle next to the label with the color of the corresponding segment on the chart.
- Show Value: This is the total value of the X slice.
- Show %: This adds a % sign after the value.
- Make Columns: The advanced legend will be displayed in more than 1 column.
- Columns: Type the number of columns in the field.
- Custom Format: The label and value can be configured according to type and format. You can also add a pre- or postfix.
- Format Label
- Format Value
- For Custom Format, click the Format Label Gear icon. The Configure Format screen opens.
- Click the Enable checkbox to enable the custom format label.
- Use the drop-down list to select a type.
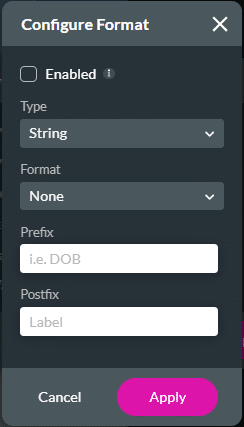
- String. Click the Format option to open the drop-down list. Some of the options are as follows:
- None
- Lower case
- Upper case
- Upper case first
- Capitalize
- Number. Click the Format option to open the drop-down list. The options are:
- ######
- ######.#
- ######.##
- Date/Time. Click the Format option to open the drop-down list. Some of the options are as follows:
- DD/MM/YYYY HH:mm:ss
- Date
- Time
- MM/DD/YYYY
- Thursday, September 4, 1986, 8:30 PM
- If necessary, add a prefix and or postfix in the field/s.
- Click the Apply button.
- For Custom Format, click the Format Value Gear icon. The Configure Format screen opens.

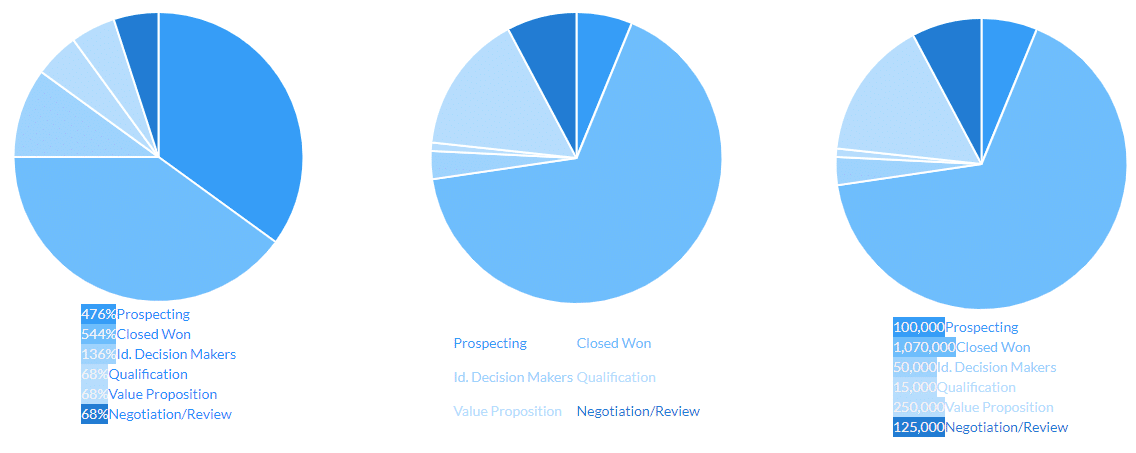
In the following example, the chart on the left doesn’t have an advanced legend (the Advanced legend toggle switch is disabled), whereas the chart in the middle has the option enabled, and the chart on the right has the advanced Show Circle option enabled. The circle has the same color of the corresponding segment on the chart.
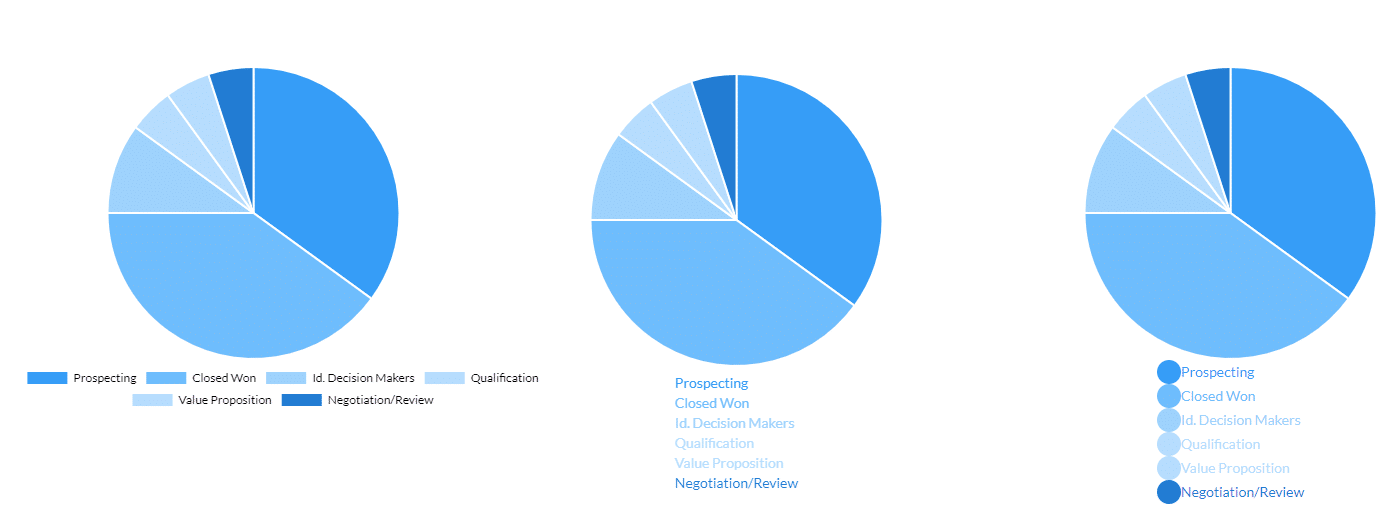
In the next example, the chart on the left has the Show Value and Show % options enabled, whereas the middle chart has Make Columns and 2 Columns enabled. On the chart on the right, a custom format for the value was configured. The Number type was selected with the ###,### format.
